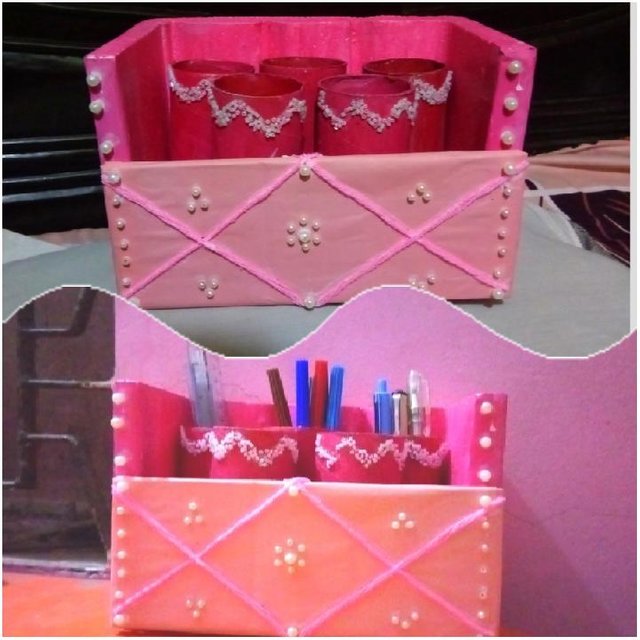
Contest: Recycle with Art # 7 / DIY - Pen holder made by Corksheet and others recyclable materials. || by @bristy1. 15% rewards to @crearte
Hello everyone
How are you all my friends. I am fine by the grace of almighty.
Today I am very happy to see this contest. I like to do art and craft work. Always, I try to do craft by using waste or recyclable materials. Today, I try to make a pen holder by using Cork sheet, roll cardboard of tissu paper and others materials. This is a recycled craft.
So lets start my work step.
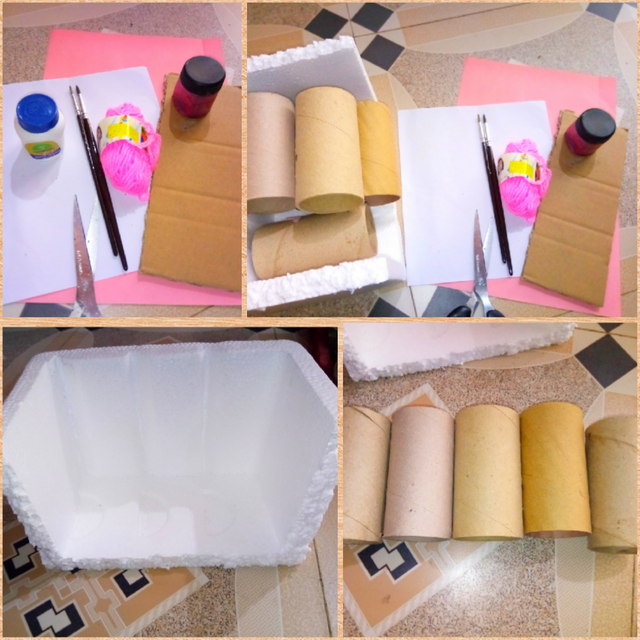
The ingredients of Pen holder :
- Roll cardboard of tissue paper - 5 pieces
- Plain cardboard
- Colored paper (pink)
- White paper
- Glue
- Watercolor (pink)
- Brush
- Cork sheet
- Wool yarn (pink color)
- Scissors
- Beads
How to make
Step-1
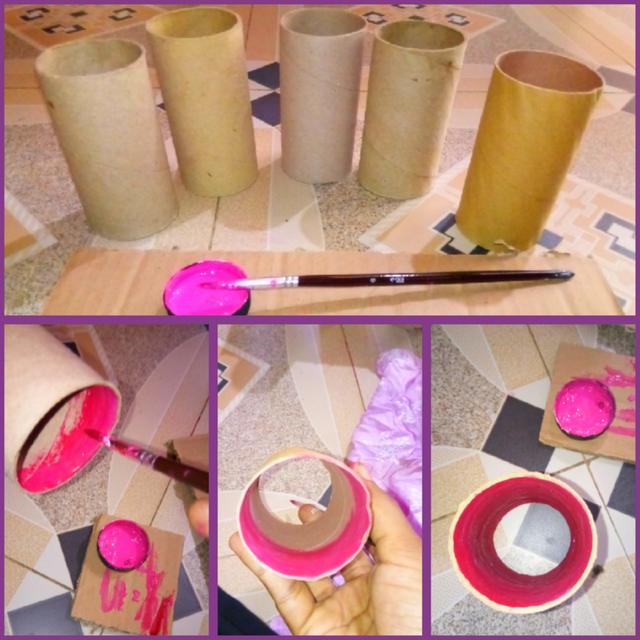
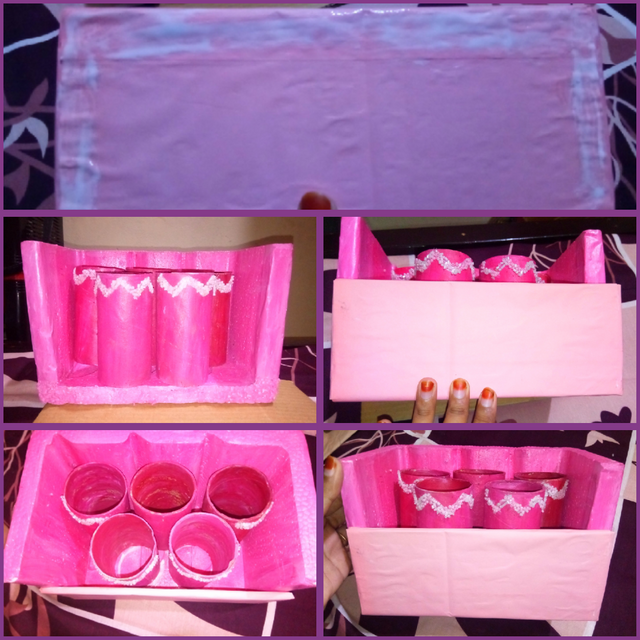
- Similarly I painted the remaining 4 rounds of cardboard. After painting, I kept them separately to allow the paint to dry.

Step-2
- Then I took plain cardboard. I took it the size of a cork sheet. Then I cut 2 pieces of paper out of pink paper, measuring the edges of the cardboard.
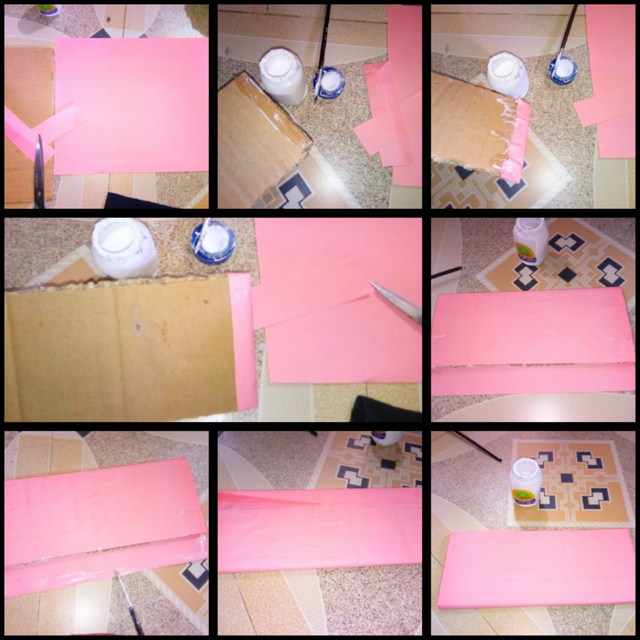
After cutting the paper, I glued the edges of the cardboard. Then I put equal amount of paper on both sides and put pink paper on the edge of the cardboard.
Then I took the pink paper with a large size equal to the cardboard. I will cover it on both sides, so I cut it according to the size.
This time I put glue on one side of the cardboard and put it on one side of the paper. I also put glue on the other side of the cardboard and wrapped the paper. So I covered the cardboard.
Step-3
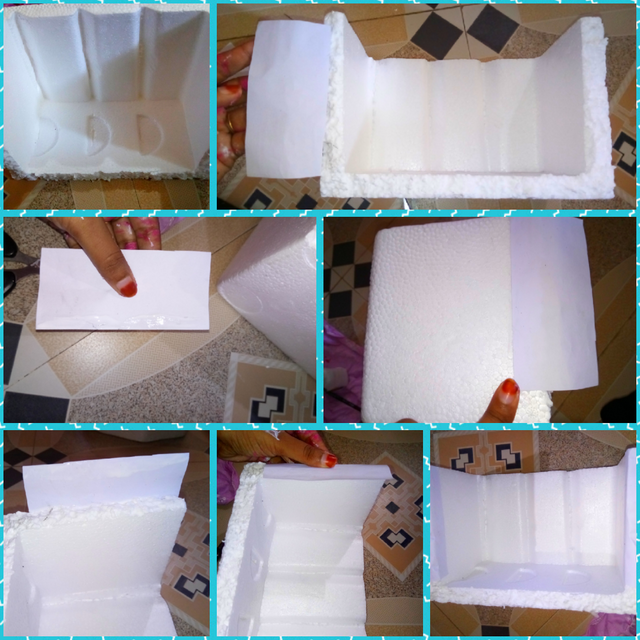
This time I will do the work of the cork sheet. So I took white paper, scissors, brush and glue in my hand. Of course with the cork sheet.
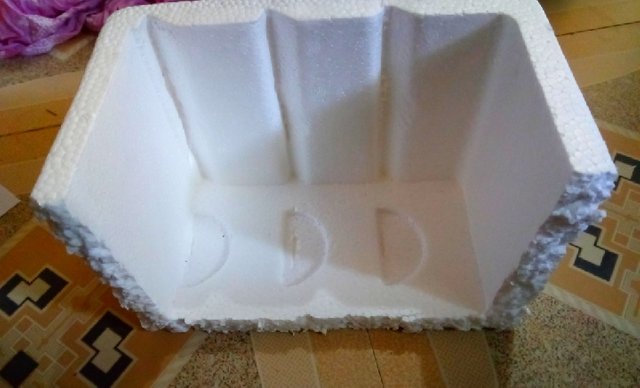
Now the edges of the cork sheet are a little broken so I will cover it with white paper. So I cut two white sheets of that size. Then I put glue on it and put it well on the edge of the cork sheet. I took a white paper cover on both sides.
Step-4
- After covering the cork sheet, I took the pink watercolor. With the color I started to paint on one side. When painting on cork sheet, I finished the color on one side and left it for a while to dry. Then when that part was dry, I dried the side part again.
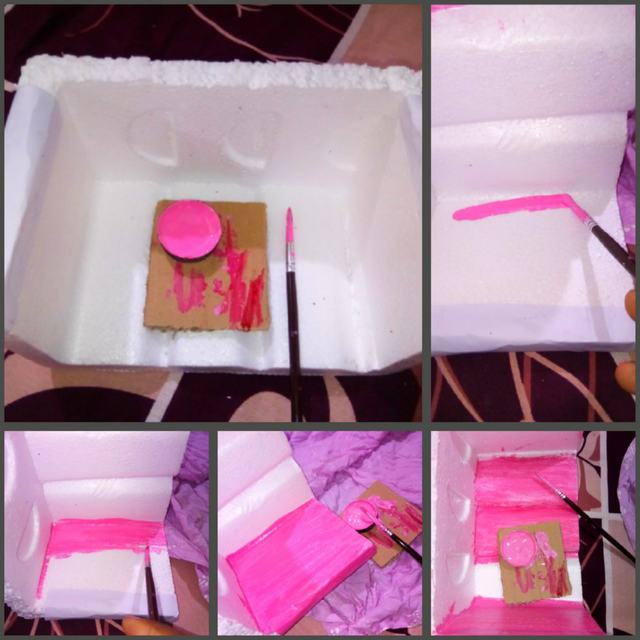
- Gradually painted the whole cork sheet. I painted the upper part as well as the lower part. I completed the paint work.
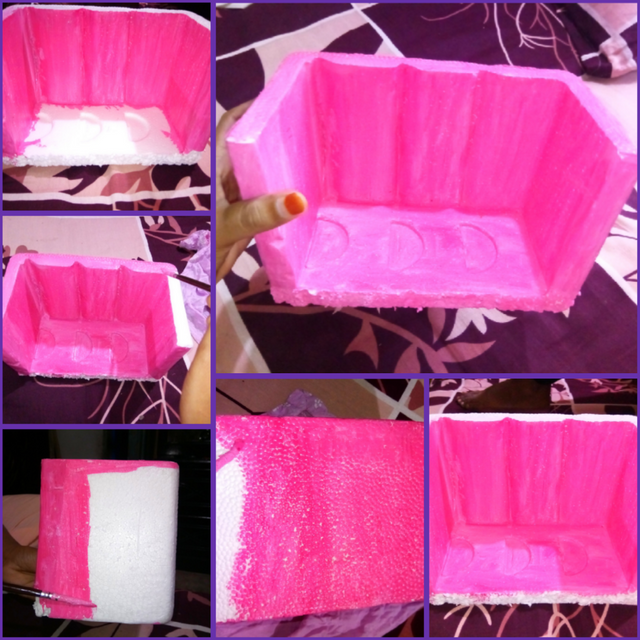
- After painting whole cork sheet I put that on one side to dry.
Step-5
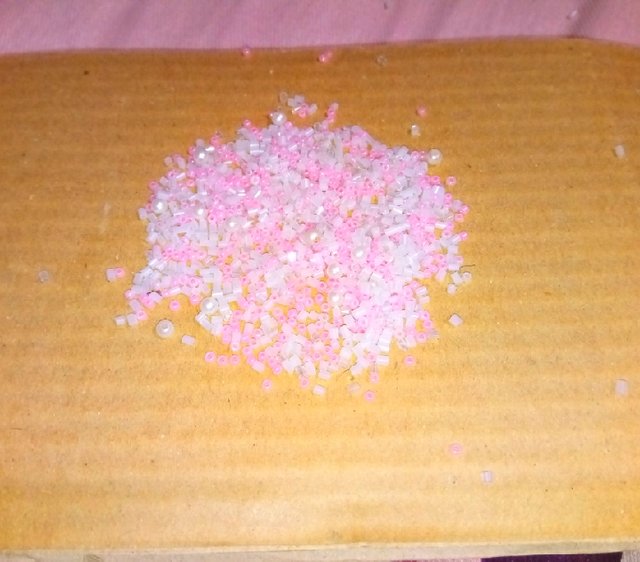
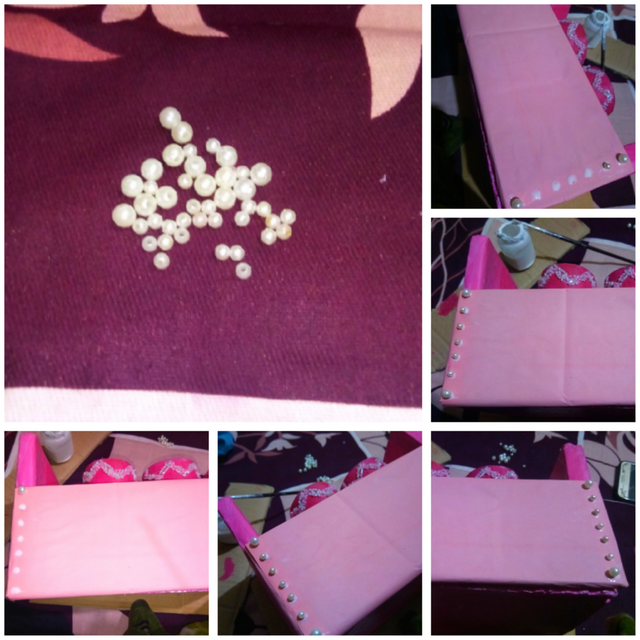
- I took a few types of beads. Some of these beads are very small. I took these for decoration.
- First I put the roll cardboards in the corksheet. Then I brought them to the front and saw that the visible part of the front as far as I can see, I will decorate the beads.
Step-6
- Then I took a roll cardboard and started decorating according to the size. In this case, I first took glue and brush. In the meantime, I designed and applied glue. After applying the glue, I spread the beads with my hands from above. These are sitting in gradually.
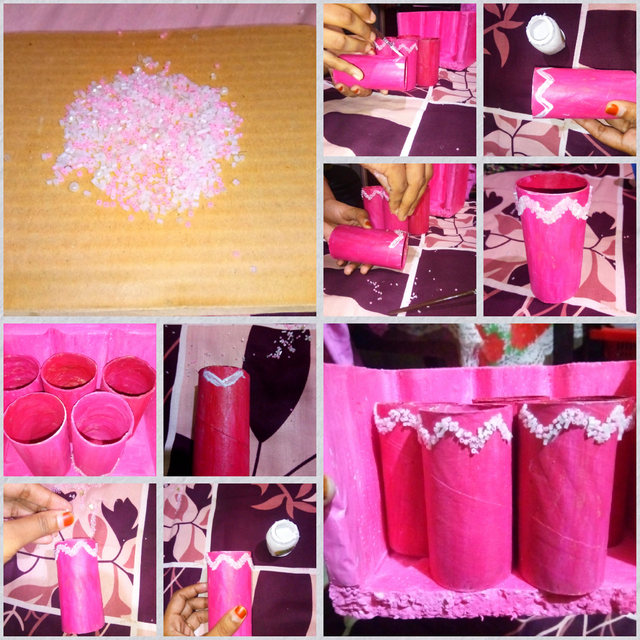
- In the same way I put beads on the remaining 3 roll cardboard according to the size. However, I did not put the bead on the middle roll cardboard.
- I put the bead and put the roll cardboards aside and dried them.
Step-7
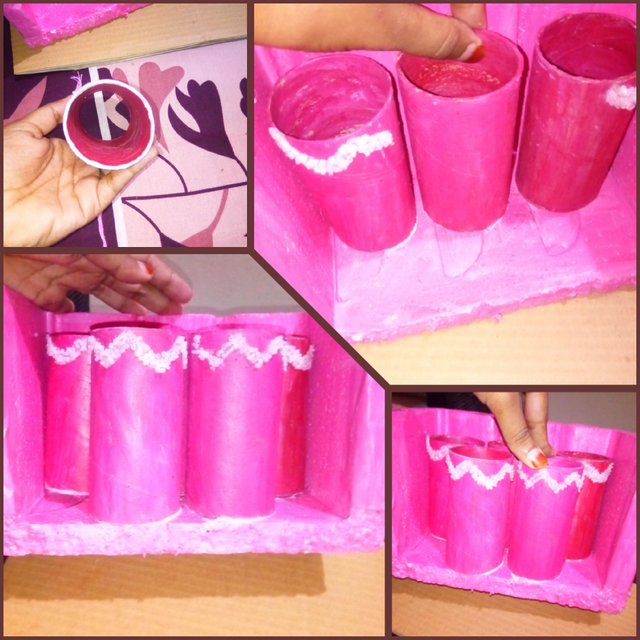
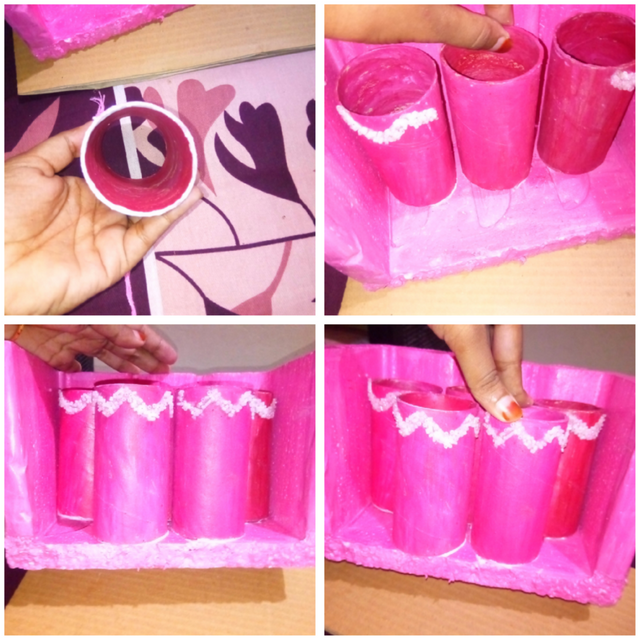
- This time I will put the roll cardboards in the corksheet. That's why I glued the bottom of them. Then I put one from one side. One by one I put all the rounds in the cardboard corksheet. It was set very nicely.
Step-8
- Then I took the plain cardboard covered with pink paper. I'll put it down in front of the corksheet. That's why I applied glue in the meantime. After applying the glue, I put it on.
- A lot of work was done. Then the work of overall decoration. That's why I took small and medium bead. The beads are white. In this case, I put them next to it with the help of glue .Then I did the decoration work again with the help of the glue.
Step-9
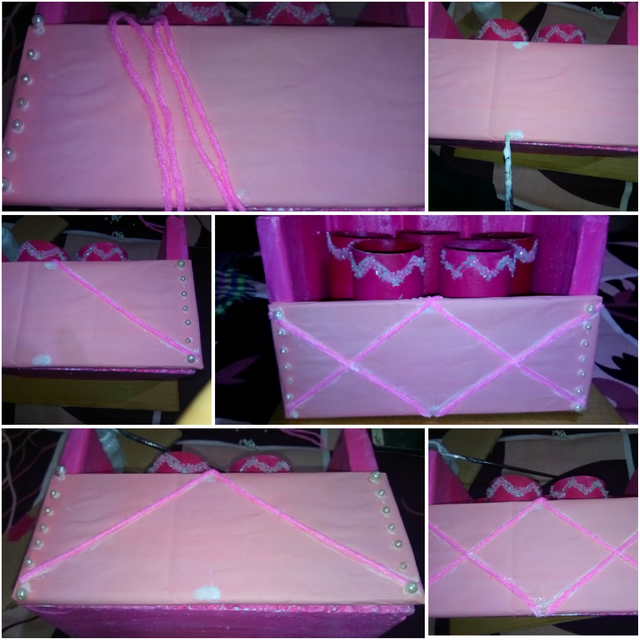
- Then I will do a little more decoration work on the front with pink wool yarn. So I cut the yarn accordingly. I put it horizontally in plain cardboard. In this case I applied glue and then applied yarn.
After sewing the yarn, I designed the bead in the meantime.
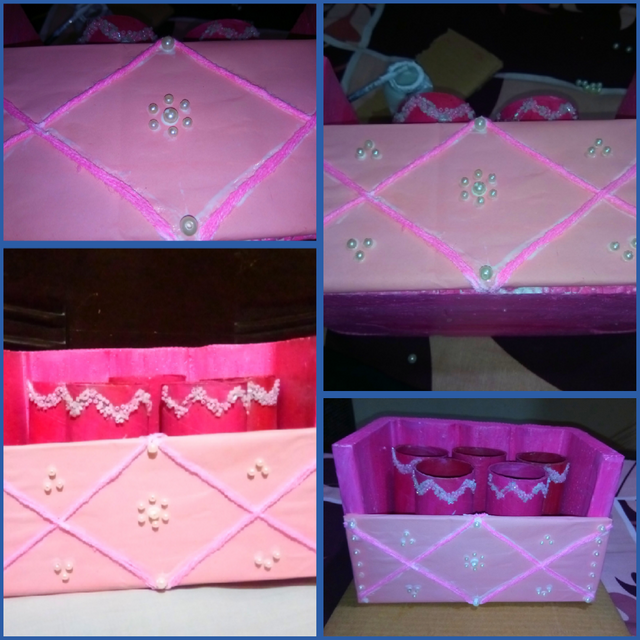
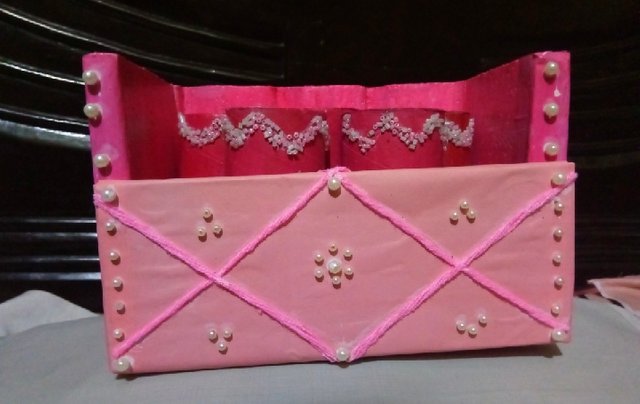

This is how a very beautiful pen holder was made.
Hope you all will like my craft work.
Thank you so much for seeing my post.
I want to invite my friends @lilip @eryll @isha46
Phone Details
| Camera | Smasung Galaxy |
|---|---|
| Catagory | (Photography) |
| C.MODEL | J5 Prime |
| Capture | @bristy1 |
| Editing | Only seturation |
| Location | https://maps.app.goo.gl/nThhkEoYBJYcwC376 |
.jpeg)
Special thanks those people's who read my post.
💦
💦 BRISTY 💦
💦
Hermoso portalápices amiga. Que bueno que comprarlas tu creatividad con nosotros.
Thank you dear
https://twitter.com/bristy110/status/1450809284862693377?s=20
Amiguita Bristy, que lindo ha quedado tu porta lápices, excelente manera de reciclar el anime y los rollitos de cartón, me encanta el color rosado y todos los lindos detalles que le colocaste a tu porta lápiz, tienen un lindo paso a paso.
Gracias por compartir con nosotros 💕
Eres nuestra participante #8 🌟
Many many thanks dear for your sweet comment.
Me encanta este tipo de arte, todo lo que tenga que ver con transformar reciclar le quedo genial..
Thank you dear
Hola @bristy1 !
Lindo trabajo amiga , el portalapiz
está realmente hermoso .
Felicidades
Thank you dear
Gracias amiga por la invitación, tu portalápices quedó hermoso, me gustó el toque que le diste con las perlitas.
Thank you dear
Es un lindo trabajo te felicito.
Thank you
Muy original, buen trabajo! Suerte
Thank you
Hiciste un gran trabajo, y un excelente paso a paso bien explicado.
Felicidades.
Thank you so much.
Hermoso trabajo amiga, la decoración esta muy linda!!
Thank you dear