How to list your own Token on a Public Exchange -Steemit Crypto Academy | S5W4 | Homework Post for @reddileep
Today in this post I will share with you my Homework Task (Season 5/Week-4) for Professor @reddileep. The course that the professor @reddileep has discussed with us "How to list your own Token on a Public Exchange". I have learned a lot about The How to list your own Token on a Public Exchange from this lecture of the professor.

Question-01
Define your idea of listing a Crypto token in a public Crypto Exchange and what its significance is.
After creating a crypto token, the token developer's job is to list the token on a cryptocurrency public exchange site and make it accessible to the public. Because if this token is listed on a public exchange site, it will be open to the public. Then the crypto traders will be able to buy or sell it. We know that tokens, unlike cryptocurrencies, do not work exclusively for a specific blockchain, but can be made public by token developers by listing them on various public exchange sites and reaching many people. Many merchants will be able to buy and sell these tokens. The means by which a public exchange token is listed is made available to the public.
Listing tokens on a centralized exchange site is not an easy task, since it controls a central entity. In order to list tokens here, the team at the centralized exchange site needs to get proper validation from the team first and get their approval. So this work has to be continued according to the rules of that central entity. So listing a token on a public exchange is much easier than on a central exchange site. And at a relatively low cost, a token developer on a decentralized exchange site can easily list his token at a low cost. A public decentralized exchange sites are naturally open source and are not regulated by any authority. We know that decentralized platforms can easily transact directly without any intermediaries and these transactions are completed through this smart deal.
It is very easy to list tokens on a decentralized exchange site. Because we already know that decentralized exchange sites belong to open source technology and a developer can easily list himself on that decentralized exchange site. To be listed, the token developer's wallet must be attached to that public exchange and the tokens must be imported there. This will require a little gas free. Decentralized exchange sites offer much greater security to the user, as direct users are able to complete transactions very easily without any third party intervention.
By listing a token on a decentralized exchange site, it can be made available to ordinary crypto traders and they can buy and sell it. It also helps a lot in increasing the value of tokens through token listing. When the token is listed on various decentralized exchange sites, the demand among users increases and merchants may become familiar with the token by being listed on public exchange sites. Crypto traders can be introduced so that later traders can buy and sell these tokens.
If we want to spread our tokens among crypto traders and introduce them to the general public, we must list the tokens on an exchange site. Only then will it become more widely known and ordinary people will be interested in buying or selling it.
Question-02
Demonstrate how to prepare everything needed to list your newly created Crypto Token in a public exchange such as selecting an exchange and adding a few BNB coins to your MetaMask wallet to accomplish the gas fee. (If you already have some amount of BNB in your wallet, you don’t need to deposit again.)
Since I have completed the previous task of this course, I have completed many of the things that I will need to complete the current task in my previous task such as:
If I want to list the token on the Decentralized Exchange Platform, I need to attach my Metamask Wallet to that Decentralized Exchange, so I need a Metamask Wallet. My previous task was to set up the Metamask Wallet completely.
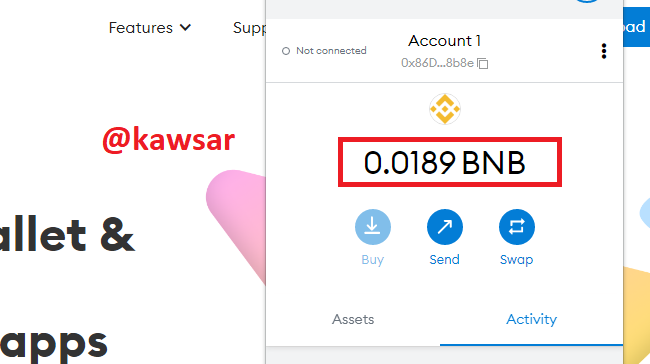
Also my metamask wallet will need enough BNB which I will need for gas fee. Since in the last task I deposited some amount of BNB in my metamask wallet. The amount of BNB I deposited for the last task has not been fully spent. Since I have BNB in my account, I will not deposit BNB in Metamask Wallet again. And the professor told us that Allready] if we have some BNB in our wallet then we don't need to re-deposit it.
Also to complete today's task I will need the token's contract address, the token's contract address I submitted in my last task and I have. Which I will use today to complete the task. I carefully saved it for myself. Because it says I will need it later. this is token's contract address "0x45aa272e63d8eed4a3f765aa652042f6589460a7"

Selecting an exchange:
I have selected a decentralized exchange platform to list my tokens on a decentralized site. The name of that decentralized exchange platform is PancakeSwap. We can easily list our generated tokens on decentralized exchange platforms. No paperwork is required to list our token here. It is a completely decentralized exchange platform. I need to attach my Metamask wallet here.

One more thing I will need to complete today's task is that I will need a new Metamask Wallet or Trust Wallet account. Because we have to show this token with some withdrawal in that wallet. I will create another new account to show the withdrawal. So I will create a new account in Trust Wallet for today's task. Below I will briefly describe each step of creating an account. Next we will show you how to withdraw some of our tokens in this wallet.
Create new Trust Wallet account
I will use my Android mobile to create a new account in Trust Wallet. So first I will go to the Play Store and search for Trust Wallet.

STEP-01: After searching by typing trust wallet, to install trust wallet from Google Play Store, first we have to click on install button.


STEP-02: After that, the Android apps of Trust Wallet will be installed on our mobile and now we will click on the open button.

STEP-03: After that we will read and accept the terms and privacy policy by clicking here and clicking continue button.

STEP-04: After that we will have a 12 character phrase here. We will copy and verify it then I will click on continue button again.

STEP-05: After verifying the 12-character phrase, our elevator will be successfully created. We will right click here.

STEP-06: We were able to create the wallet in a completely successful way, showing the interface of our wallet here.
Question-03
Demonstrate all the steps of listing your own Crypto Token in a Public Crypto Exchange.
I will show my token listed on a public exchange platform. I mentioned earlier that I decided to list my token on the pancakeswap platform. It is a completely decentralized exchange platform. I will show you step by step all the process of listing my token in pancakeswap. That's why I will go to the pancakeswap.finance platform first.

STEP-01: First I will connect our metamask wallet with pancakeswap.finance. For this, when the homepage of pancakeswap.finance comes up, I will click on the Connect Wallet button on the top right.

STEP-02: Here we have to select the wallet we want to connect with pancakeswap.finance. Since we will connect the metamask wallet, we will click on the metamask wallet here.

STEP-03: Then a new window will open here, in this window we will click on the Next button.

STEP-04: After clicking on the Next button, a button called Connect will appear in that window. To connect metamask with pancakeswap.finance we will click this connect button.

STEP-05: We can see that my metamask wallet is connected to pancakeswap.finance.

STEP-06: pancakeswap.finance To list our tokens on the decentralized exchange platform, visit the homepage of pancakeswap.finance. After coming to the homepage, there is a button called Trade on the top left side, I will click on that button.

STEP-07: After clicking on the trade button, we will select any token here.

STEP-08: Here then we will paste the token contract address in the search button above.

STEP-09: After pasting the token contract address here, the token that I created will show the name of the token below and show its symbol. Then we will click on the Import button.

STEP-10: Now give us a warning here. Then we will click on the I Understand button here and then click on the Import button. My token is listed on the pancakeswap.finance decentralized exchange platform.
Question-04
Demonstrate all the steps to bring half of your newly created Crypto Token into a Public Exchange (In addition to simply stating the steps, you should provide a clear explanation about each step)
Earlier I was able to list my tokens on the pancakeswap.finance platform. This time I will send some amount of my token here.

STEP-01: For this we will first go to our metamask wallet and then we will select our FGN token. After selecting, here we will click on the send button.

STEP-02: Then an interface will appear. Here we will click on the send button.

STEP-03: Here we will paste the address to which we want to send the token and select the amount of tokens we want to send and click on Next button. Here the professor asked us to send half the amount of my total token, but I forgot to give 2 (0) less. I'm sorry about that.

STEP-04: I will then click the Confirm button to successfully send the token.

STEP-05: We can see through the screenshot above that our transaction has been completed successfully.
Transaction Hash: https://bscscan.com/tx/0xc936c7ae50a100a609bbd39c37e41ce4f2690cbec0aeb973867c1dab5583d1c8
Question-05
Withdraw some of your own crypto Tokens into any other wallet such as Trust Wallet and MetaMask wallet. (Confirm the transaction through the relevant Block Explorer)
At this point I will withdraw some tokens from the tokens I created. I tried creating a new Trans Wallet account in the previous question. I will withdraw some tokens from that wallet and add a new custom token there.

STEP-01: First I will add a custom token to the trust wallet. For this I have to click on the button that I have selected in the screenshot above in the trust wallet

STEP-02: Then I will click on the Add Custom Token button

STEP-03: This time I will click on the receive button.

STEP-04: To receive the token here, we will copy the address by clicking on the copy button.

STEP-05: This time we will send some tokens from our trust wallet. I have selected 10000 Token here and then I will click on Next button.

STEP-06:Then we will click on the confirm button

STEP-07: After clicking the confirm button our transaction will be submitted and we will click on the selected button in the screenshot at the top right to view the details of the transaction.

STEP-08: As we can see here, above I have given a screenshot of bscscan, here showing my transaction status success and its timestamp.
Transaction Hash: https://bscscan.com/tx/0x4c2b386d43063ccc7d6b92d76836a37ade6c36f5f391d073614fad6277cf5f07
Conclusion:
Finally, I can say that we have easily added our own token to the pancakeswap.finance decentralized exchange platform. I am so grateful to my dear Professor @reddileep for giving us such an important and very interesting subject in detail and for giving us a lecture on Well Explained.