CRYPTO ACADEMY WEEK 5 HOMEWORK POST FOR @yohan2on - HOW TO INSTALL AND USE METAMASK ON MICROSOFT EDGE
Hi, steemians!!
I hope that all of us will always be protected by the almighty and always be given health.
This time I want to do homework given by professor @yohan2on which the homework this week explains the steps to install one of the DeFi web3 Wallets given by the professor: Meta Mask, MyEther wallet, Coinbase wallet, Argent wallet.
What I choose to discuss this time is MetaMask, and I will provide steps to install this add-on on Microsoft Edge which is a browser made by Microsoft. I chose to use Edge to install MetaMask because many of our friends have already provided ways to install MetaMask on Google Chrome and Mozilla Firefox, so I chose Microsoft Edge so that friends who use Microsoft Edge can understand how to install MetaMask and how we can use it.
.jpg)
1. (MetaMask) What Is It?
MetaMask is a wallet application that can store ETH assets and ERC-20 Tokens. This application is designed as an add-on that can be installed directly on the browser. This has completely changed the world of DeFi wallets where the average wallet is created by installing a special application on a computer, with this MetaMask it will be very easy for the owners of ETH and ERC-20 tokens to analyze and monitor the development of their assets.
2. How to install MetaMask on Our Browser?
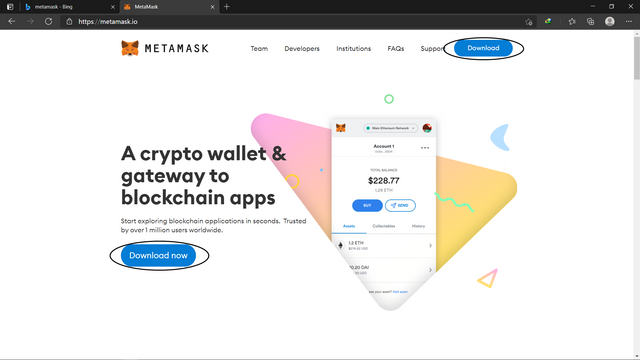
Visit the official website of MetaMask (you can open it here), don't install the MetaMask add-on from third parties, because it is feared that it will give hackers an opening to steal your assets later.
After that, click the "Download Now" or "Download" button to install the MetaMask add-on on your browser.
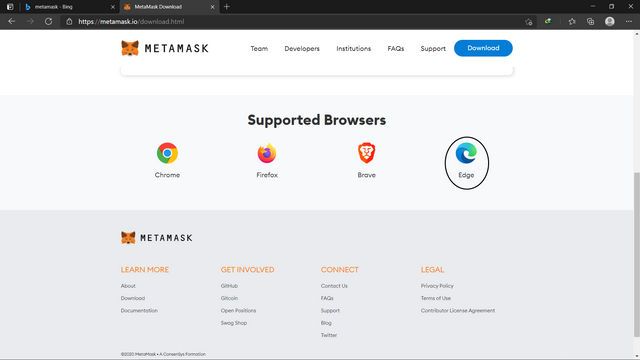
Choose the browser icon that you will install MetaMask on later. In this case, I am demonstrating Microsoft Edge, so I will select the Microsoft Edge icon.
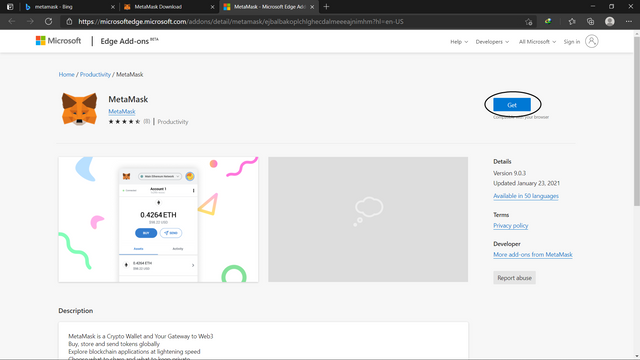
Then click on the "Get" button
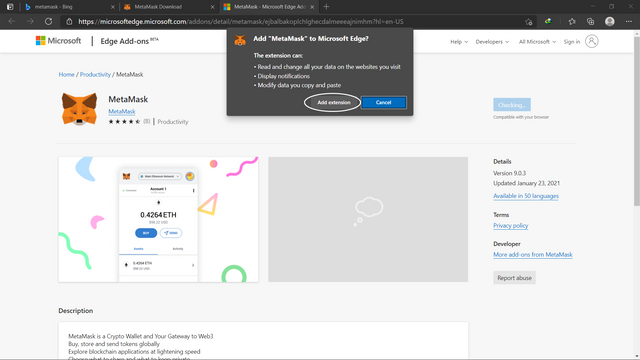
After that, a pop-up will appear asking you permission to download and install MetaMask on your browser.
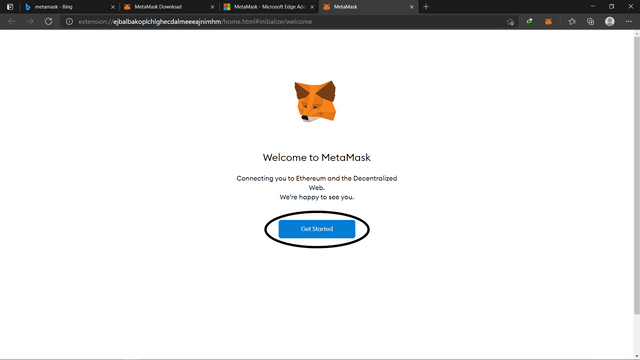
After the installation process is complete, we will proceed to the process of creating a wallet. All you have to do is click the "Get Started" button to get started.
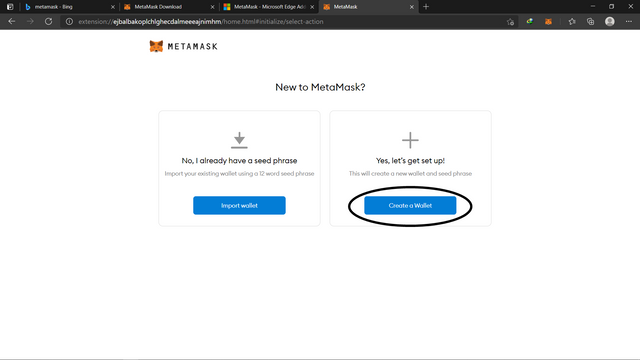
In the next step, you select the option "Create a Wallet" to create your wallet in MetaMask.
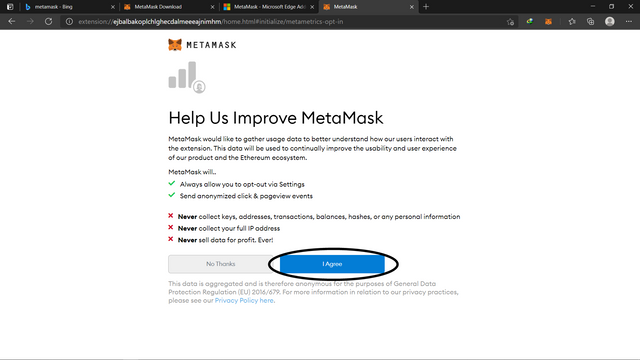
You select "I Agree" if you agree to the terms provided by MetaMask and you can go straight to the next step. But if you don't agree with it then you can't create a wallet on MetaMask.
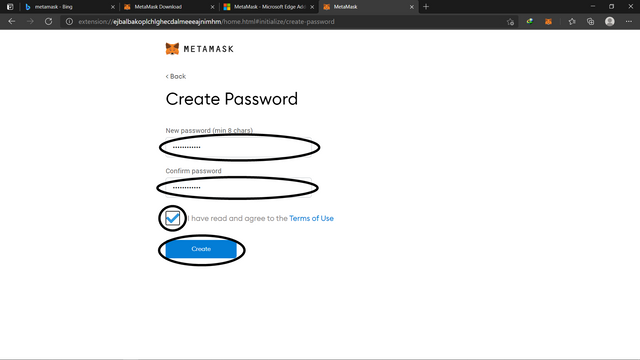
The next step is you will create a password so you can access your wallet later, make a good password that is difficult for irresponsible people to break into.
Then you will be given another password to back up your data. You just have to copy the words and save them in a safe place, after the process is complete you will be asked to confirm your data backup password by selecting the words that have been given one by one in the order.
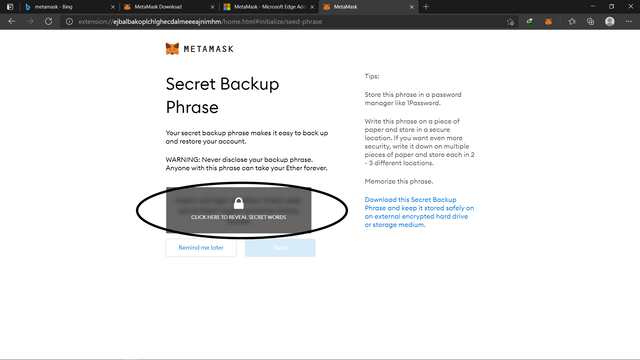
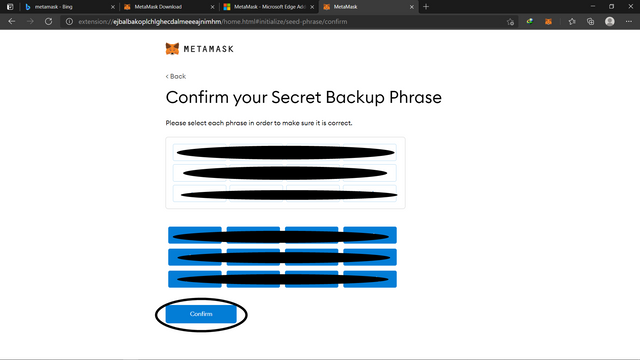
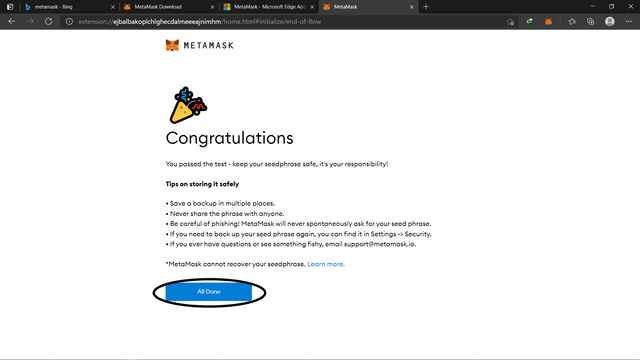
After all the processes are complete, your wallet is ready and can be used at any time. Click on the "All Done" button to end the process of creating your wallet.
3. How to Use MetaMask?
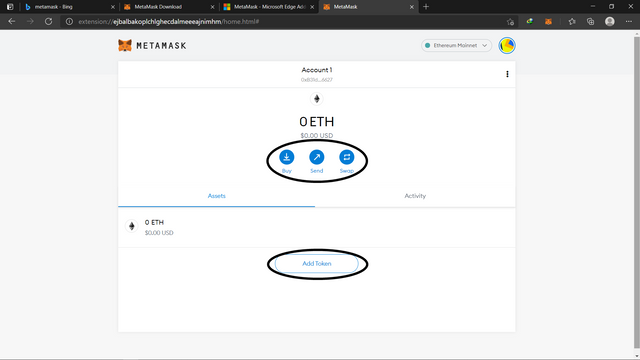
There are many things we can do with MetaMask, most importantly there are 4 things we can do: Buy, Send, Swap, and Add Tokens. I will explain them to you one by one.
Buy and Store ETH
To enter our ETH assets into our wallet into MetaMask, all we do is click the "Buy" button on the home page of your wallet.
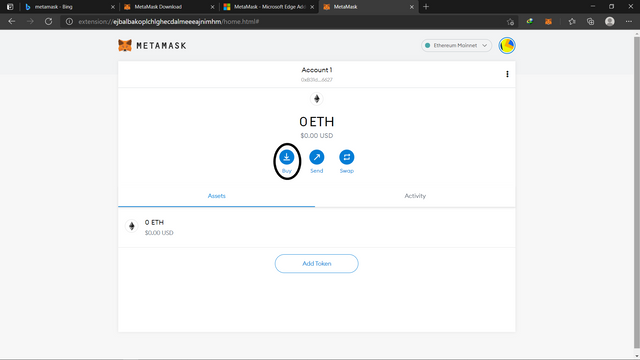
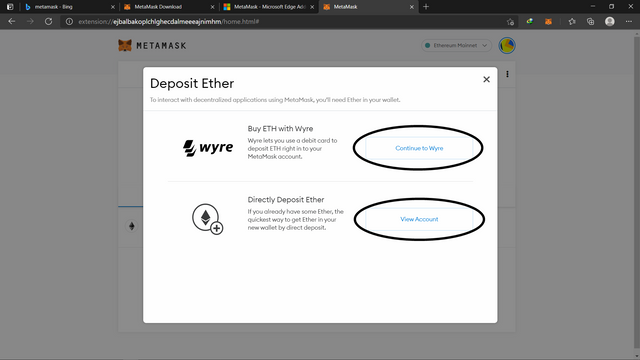
You will be given 2 options to enter ETH into your MetaMask wallet, namely by buying using Wyre or by depositing to your wallet.
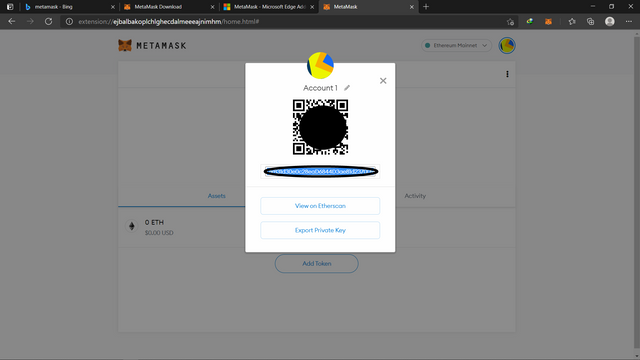
If you want to make a deposit, then all you have to do is copy your MetaMask wallet address and enter it to the place where your assets came from, or you can take the option to scan the QR code that has been provided.
Send ETH
In contrast to entering ETH, you can also send your ETH assets where you want. You just have to click the "Send" button on the home page of your wallet.
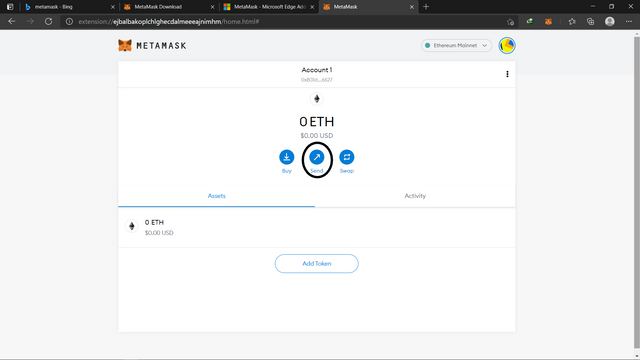
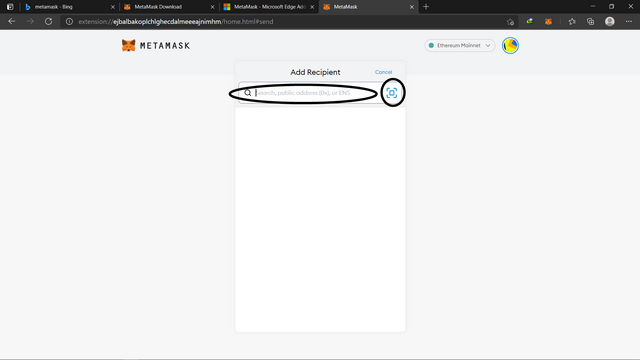
Then all you have to do is enter the address you want to send, or you can also send it by scanning the QR Code.
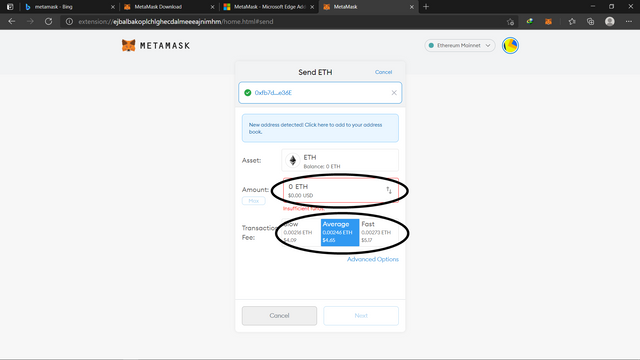
After that, all you have to do is enter the amount of ETH that you want to send and you will choose how fast the delivery process is, this will affect the transaction fee that will be borne by the user.
SwapETH With ERC-20 Tokens
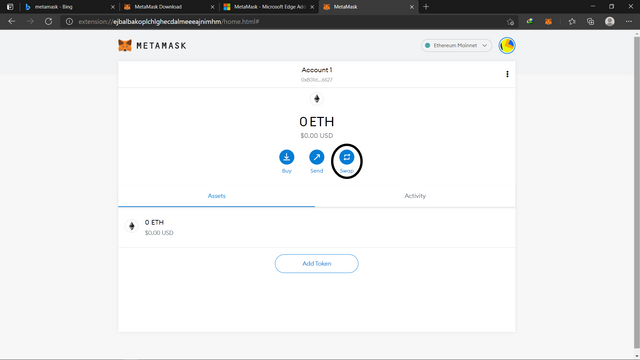
The third thing you can do is that you can exchange your ETH for all ERC-20 tokens. The first step is you click the "Swap" button on the home page of your wallet.
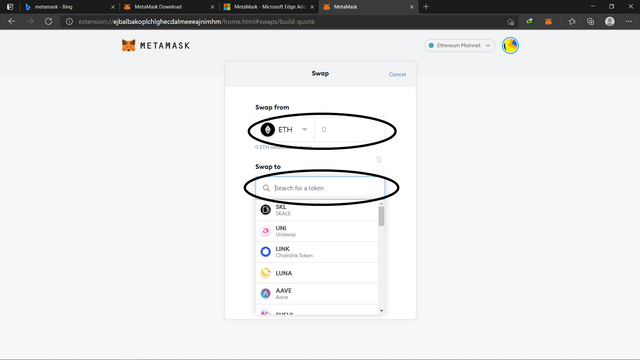
After that, all you have to do is choose how much ETH you want to exchange and you also choose what Tokens you want to choose to exchange for ETH.
Add Token (Send and Swap Tokens)
After getting the Tokens you want, you can also send your Tokens and you can also exchange them back to other tokens.
The first step is for you to click the "Add Tokens" button on the start page of your website.
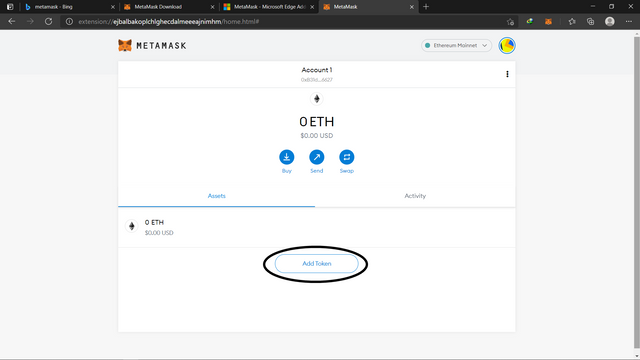
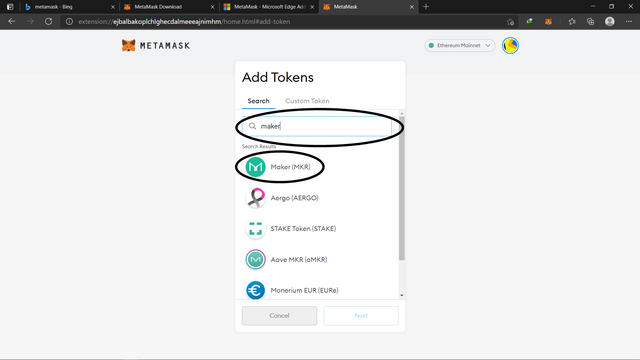
Then type the token that you want to add or want to send, and click on the token icon.
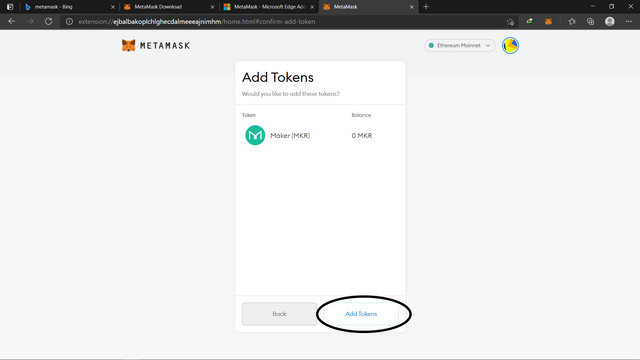
Then click the "Add Token" button
Then you can immediately send and swap the token. The method is the same as the process for sending and swapping ETH which I have described above.
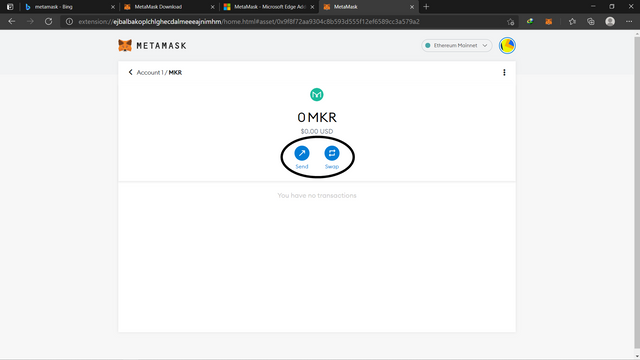
If you return to the start page of your wallet, then you will get the token that you added earlier, so you no longer need to look for the token first to make transactions.
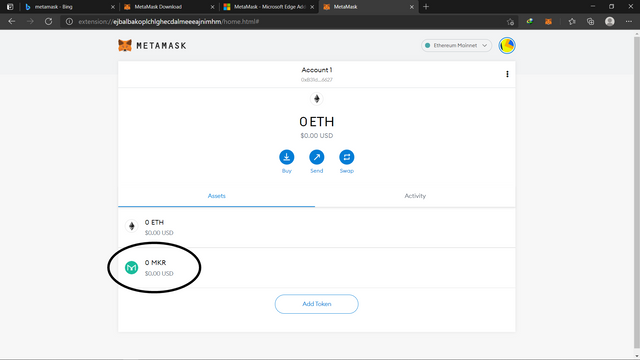
4. Can I Connect My Hard Wallet With MetaMask?
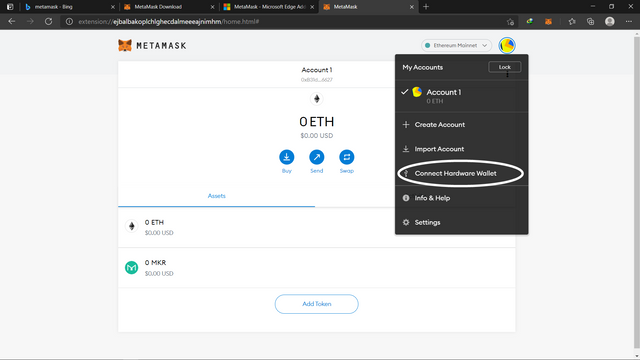
The answer is "OF COURSE YOU CAN". Your MetaMask wallet can be connected to your Hardware Wallet. The trick is to click on your account icon. After that, you choose the option "Connect Hardware Wallet".
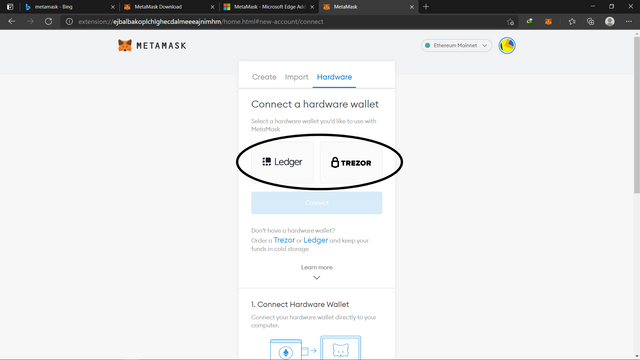
After that, you will be given two types of Hardware Wallet options that you can connect to Ledger and Trezor.
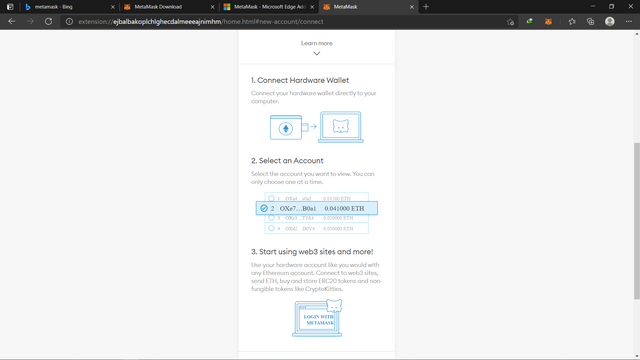
If you are still confused about how to connect your MetaMask wallet with a Hardware Wallet, then you can see the steps that have been given by MetaMask below.
That is my explanation of how to install MetaMask on Microsoft Edge and how we can use it properly. Hopefully, it will be useful for all of you guys and also for me. Sorry if there are errors in writing, and you can tell me by writing a comment in the comments column.
I'll see you in the next post!
CC:
Hi @banghim
Thanks for attending the 5th Crypto course and for your effort in doing the given homework task.
Feedback.
This is very good work. Well done! You indeed explored the various key features of Meta Mask, explained each one clearly and demonstrated visually how to proceed with everyone of them. Keep it up!
Homework task
9
Twitter Promotion