Crypto Academy / Season 3 - Week 6 | Homework Post For [@pelon53]- BLOCKCHAIN EOS
Introduction
Hello everyone.
This week is the 6th week of cryptoacademy and our topic is Blokchain eos. We all understood the EOS system, which the professor explained well in his lecture. Thank you professor for this nice explanation. Now we can start doing our tasks.

Question 1
Explain the Delegated Proof of Stake, DPoS algorithm.
As we all know, the consensus system is one of the most important elements of blockchain technology. These consensus mechanisms are a way to verify and secure transactions and shared data in decentralized networks.
Delegated Proof of Stake (DPoS) was created by considering the shortcomings of the Proof of Stake (PoS) consensus mechanism and as a solution to these. DPoS is a more efficient and democratic consensus algorithm than the PoS algorithm. The main purpose is a system that aims to speed up the verification of transactions and block generation.
DPoS was developed by Dan Larimer in 2014. Today, many projects use this system. EOS, Cardona, Bitshares, Steem, Tron, Ark, Lisk, etc.
So How Does DPoS Work?
In the proof-of-work system, network security is ensured by the energy and effort expended by the miners. In proof of stake, it is provided by the amount of coins locked by the users. In DPoS, users delegate the task of securing the network and verifying transactions to third parties.
Rather than voting directly with the amount of coins they stake, users elect delegates to reconcile on their behalf. These delegates are also called witnesses or block producers. That is, these delegates provide consensus during the creation and verification of new blocks. During the selection of these delegates, a user has the right to vote according to the amount of coins in his hand and they are connected to a certain delegate by depositing their coins into the staking pool they have chosen.
Delegates are re-elected each time a block is validated. Thus, it is not certain that a delegate will be selected as a delegate in the next block. For this reason, delegates must constantly be mindful of their reputation and thus have to be credible, knowing that their mandate may be terminated whenever the need arises.
The number of delegates selected for each block created is between 20-100. Selected delegates receive transaction fees for blocks they verify, and this reward is shared with users based on the amount of coins they stake.
At the same time, in DPoS systems, users can also choose delegates for the management of the network. These elected delegates oversee the performance of the administration and the protocol and do not take part in the verification of transactions. They can submit proposals on changing issues such as block sizes, the amount of transaction fees paid to witnesses, and these proposals are voted on by users.
DPoS System Features
- In these systems, they do not require devices that require high power and thus they do not consume high energy. This also means that we don't need devices that require high performance and bandwidth.
- Scalability becomes a prominent feature in these systems. Thanks to the delegates we have chosen, the creation of blocks and the verification of transactions occur faster.
- The system uses the Byzantine Fault Tolerance and thus any errors and malfunctions that may occur in the system are corrected. Thanks to this protocol, it provides higher security and higher protection to its users.
- The system is resistant to many attacks and thus our transactions are secure. The system is resistant to attacks such as Finney Attack, Double Spend, 51% attack.
The DPoS algorithm is one of the most secure systems in the blockchain, and its use will become more popular in the coming days.
Question 2
Explain What are Ricardian contracts on the EOS Blockchain?
Ricardian Contracts are called second generation contracts. The Ricardian contract was first initiated by Ian Grigg in 1995. The most general definition of the Ricardian convention:
“It is a kind of digital document agreed between two parties that contains the terms of interaction between the parties.”
The reason for the increased interest in the Ricardian contract was that although the existing contracts were strong, they were weak in practice. For this reason, Block.One first announced that it supported Ricardian contracts, and then EOS, and as a result, interest in Ricardian contracts increased rapidly.
There are two main elements that make Ricardian conventions unique. The first of these; was that it was an easy-to-read legal contract between two or more parties. The second is; This agreement, which the parties can easily read, is also easy to read on their computers. In this way, this contract has become easily available on blockchain platforms. In this way, these contracts can be easily collected, signed and recorded on the blockchain.
The application of Ricardian contracts to the blockchain system can be considered new. However, the history of Ricardian contracts goes back over 30 years.
It was first developed in 1995 as part of the Ricardo Payment system. As we said before, the person behind this contract, Ian Grigg, takes his place among the pioneers of financial cryptocurrencies. What makes Ian Grigg interesting is that he was a student when he developed the Ricardian Conventions. That's why people call this contract "Ian Grigg Ricardian Contract".
In 1998, he published a detailed study on Ricadian Contracts (Financial Encryption in 7 Layers). In this article, he defined the Ricardian Conventions with the following words:
“A digital contract between two or more spouses, mutually and cryptographically signed and verified, defining the terms of interaction. The important thing is that it is both human and machine readable and digitally signed.”
Question 3
Explore the official EOSREX interface (eosauthority.com). Show screenshots.
- We first go to https://eosauthority.com/ so that we can examine the EOSREX interface.
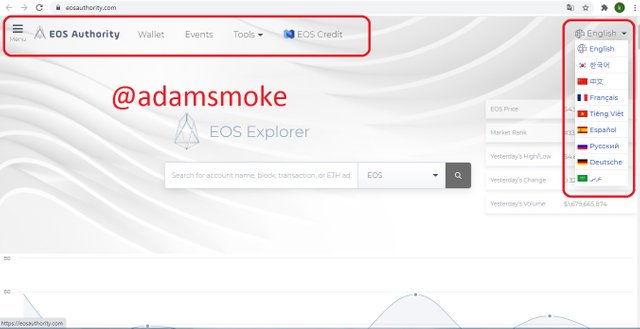
- The screen that confronts us for the first time in the interface is as in the screenshot above.
- As we can see in this screenshot, at the top left, we are greeted by sections such as “Menu, Wallets, Event, Tools, EOS Credits.
- On the top right, there is the language option section. There are many language options in this section. These; Many language options are available, such as English, Korean, Chinese, French, Spanish, Vietnamese, Arabic, German, Russian.
- When we examine the screen a little more, there is a section on the upper right where we can see the current price of EOS, market value, market ranking, yesterday's high and low, yesterday's percentage price change and yesterday's trading volume.
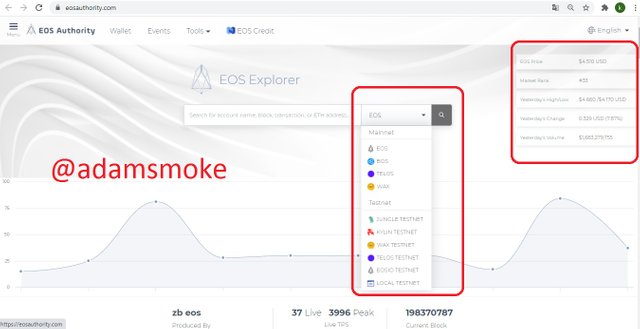
- When we come to the middle section, the “EOS Explorer” section welcomes us. This section also includes the Mainnets and Testnets it supports.
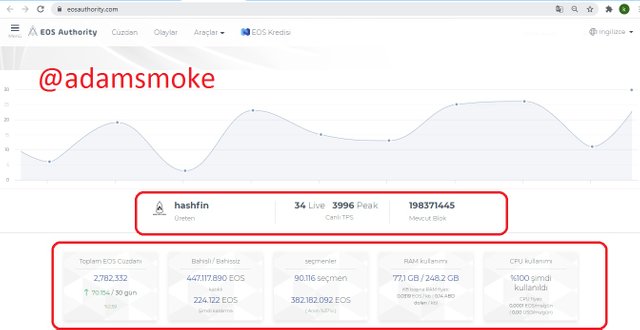
- When we go down a little bit to explore the page, there are witnesses, block numbers and TPS data that make up the last block. In addition, just below this information, there are data such as EOS Wallet Count, Staked/Unstaked, Voters, RAM usage, CPU usage.
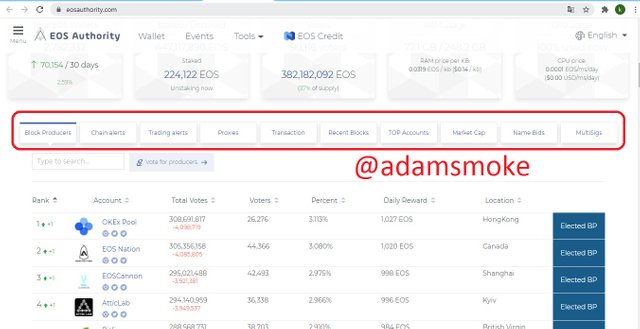
- When we scroll down a little bit on the page; Block Generators, Chain Alerts, Trading Alerts, Proxies, Transaction, Last Blocks, TOP accounts, Market Cap, Name Offers, Multi-Signature sections appear. In these sections, it is a nice section where we can see the best block producers, the alerts created in the blocks, the trade alerts that occur when large amounts of coins move, such as large transfers, the best users, the most coin holders, the ones with the most RAM.
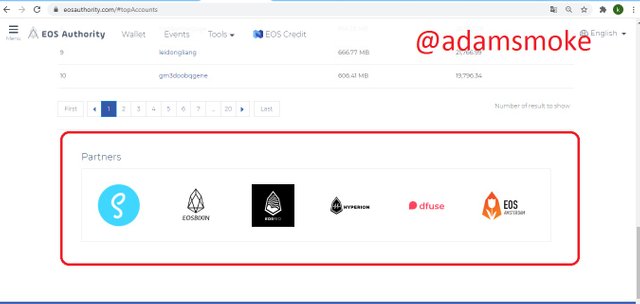
- When we come to the bottom of the page, we can see the partners of the platform.
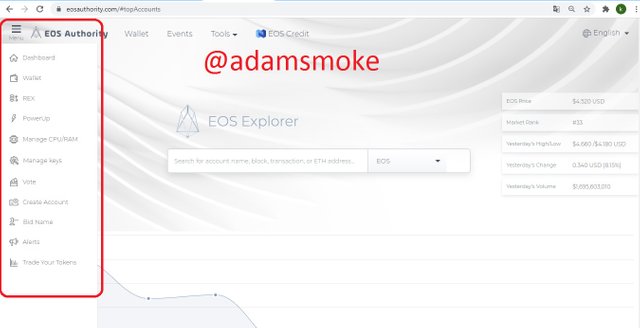
- When we click on the Menu section at the top left of the page, a pop-up window welcomes us. There are many account management options available here. There are sections such as Dashbord, Wallet, REX - Power Up, Manage CPU/RAM, Manage Keys, Vote, Create Account, Offer Name, Alerts, Swap Your Tokens.
- If we have a wallet, we can connect it. There is also an option to create a new wallet if you don't have one. However, you may need to deposit some EOS.
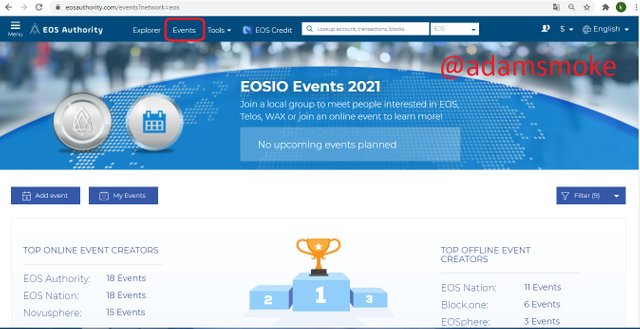
- In the Events section, we can easily see the events and events that will take place on the platform.
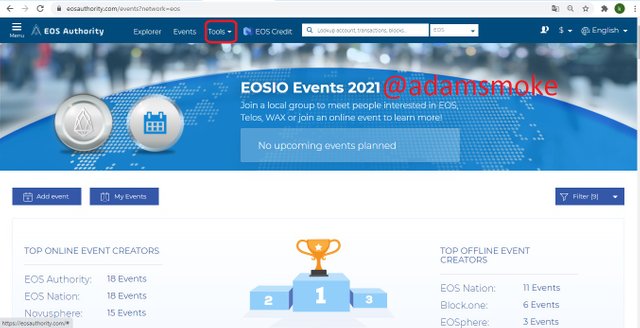

- When we click on the Tools section, a drop-down menu welcomes us. In this section we can see that there are a total of 29 tools to manage our account.
Question 4
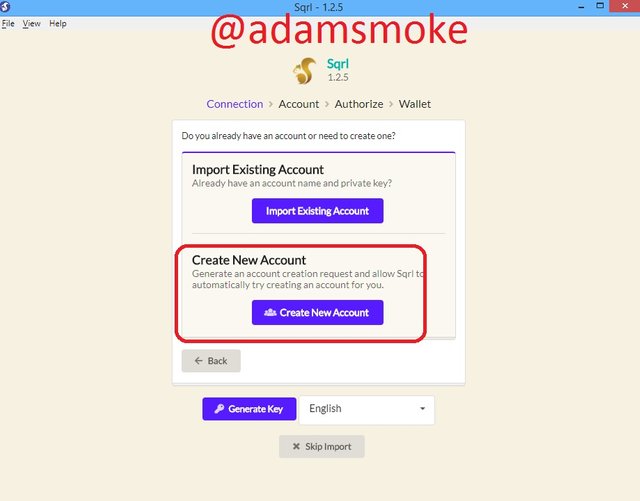
4.- Download sqrl wallet, explore and explain how to get CPU, RAM and Network. Show the screenshot.
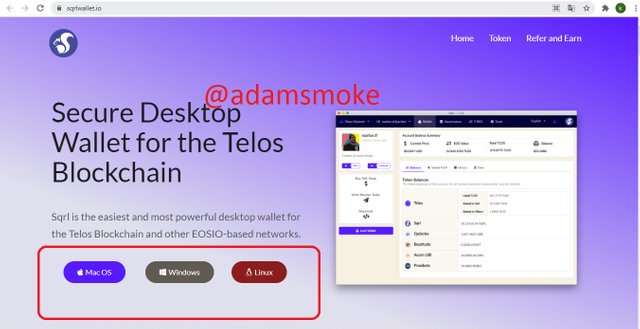
- First, we visit https://sqrlwallet.io/ and download it in accordance with our operating system.
- Then we open the downloaded file and start our installation process.
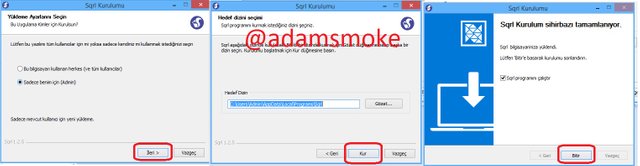
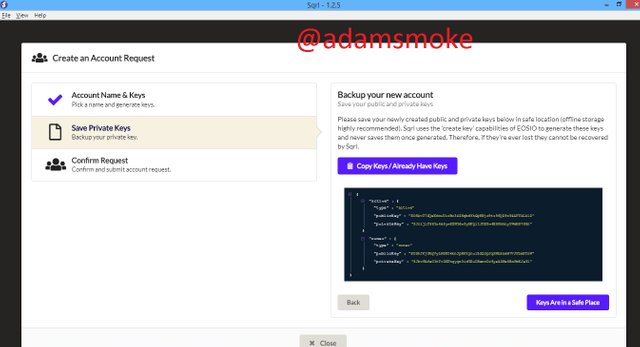
- Then we follow the steps I showed.
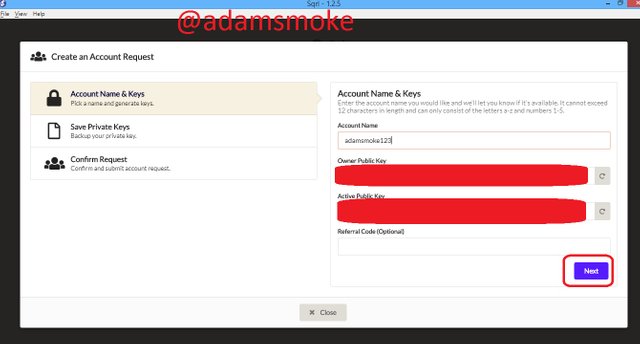
- Then we save the passwords given to us.
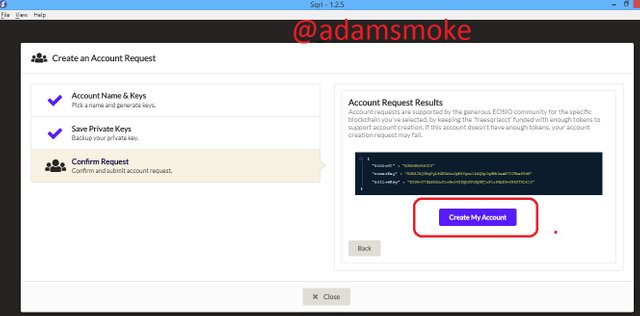
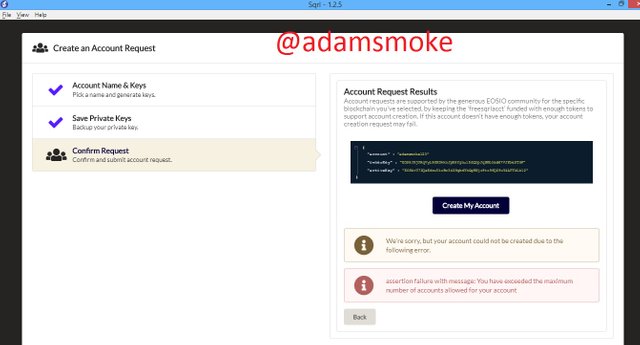
- When we want to create our account later, we encounter such an error. We cannot open our account because there is not enough balance in our Sqrlwallet account.
As an alternative to this error we can create a Telos wallet and link our wallet.
- Now we go to https://www.telos.net/ to open our Telos wallet.
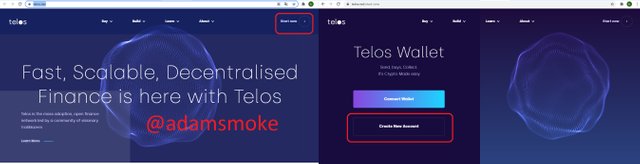
- Then we click on the option to create an account by following the steps above.
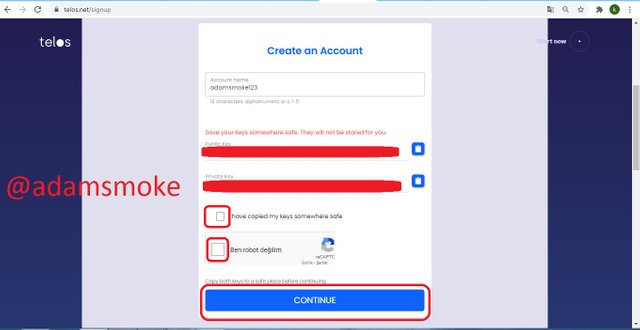
- Then I save my passwords and fill in the fields we show with the box and we open our account for free.
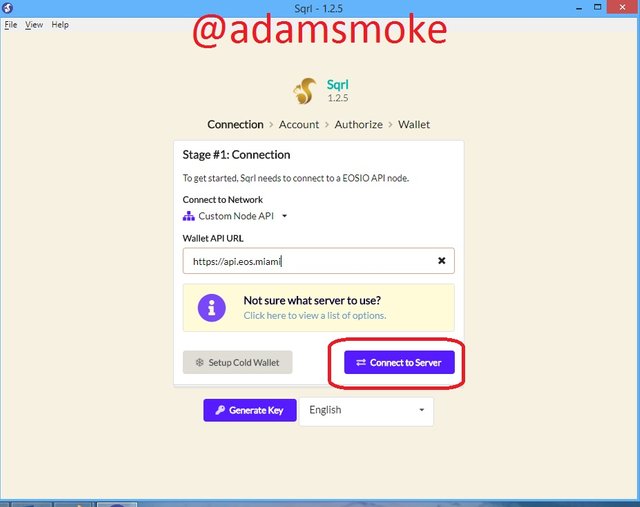
- Then we go back to the Sqrlwallet installation.
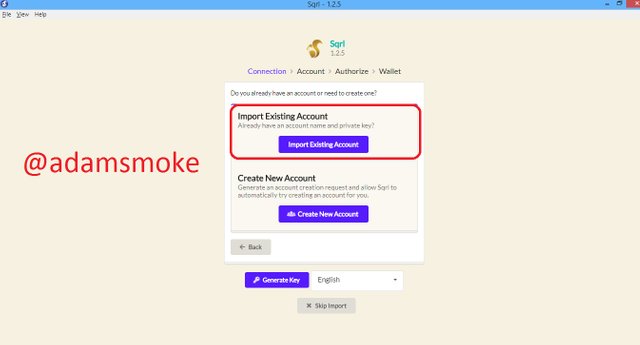
- We import our wallet by clicking on the area I showed with the box.
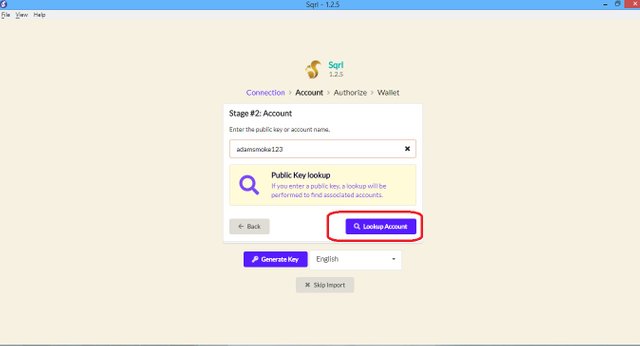
- After typing our username, we click on the search account option.
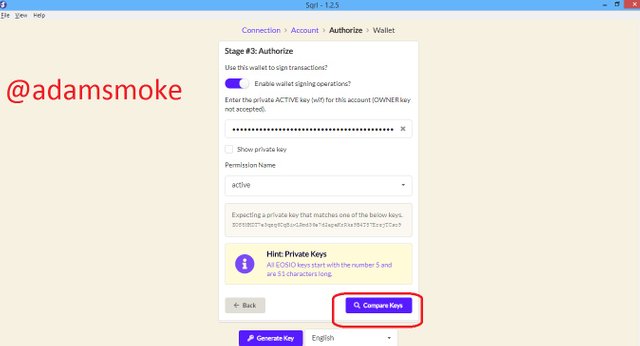
- On the next screen, we enter our Active key and click the "Compare Keys" button.
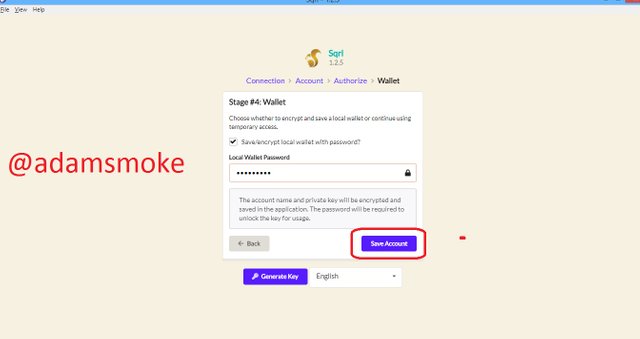
- After we set our password on the screen that appears, we click on the Save Account button and after accepting the rules on the screen that appears, we open our wallet successfully.
Now we can start exploring our wallet.
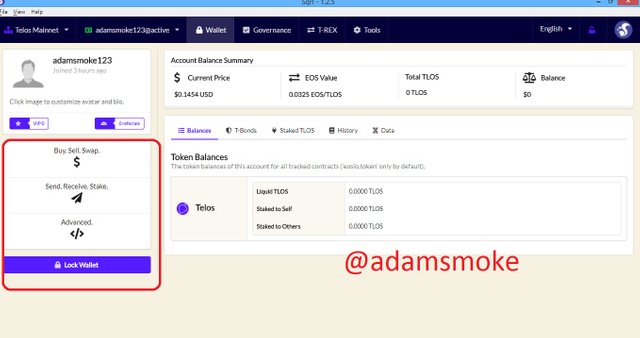
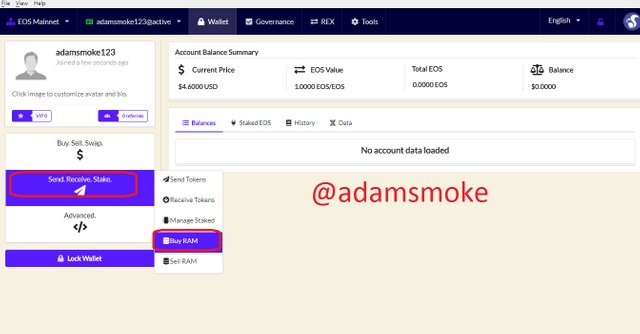
- When we start to examine our wallet, 3 options welcome us on the left.
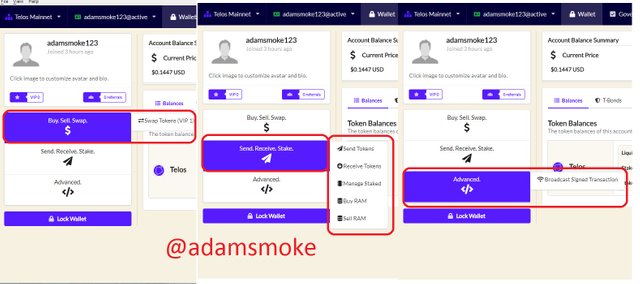
- We can shop for coins in the Buy/Sell Swap section.
- In the Send.Receive.Stake section, we can trade coins and stakes, buy and sell RAM.
- In the Advanced section, we can perform a "Publication Signed Transaction".
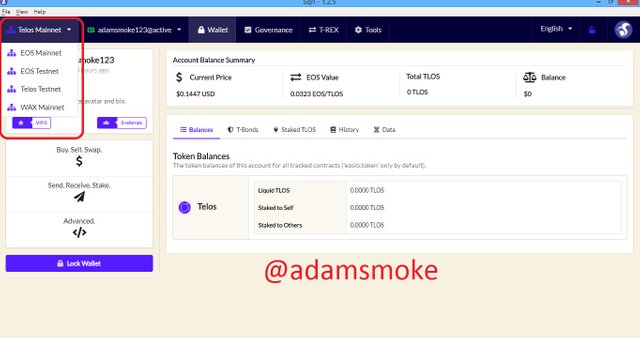
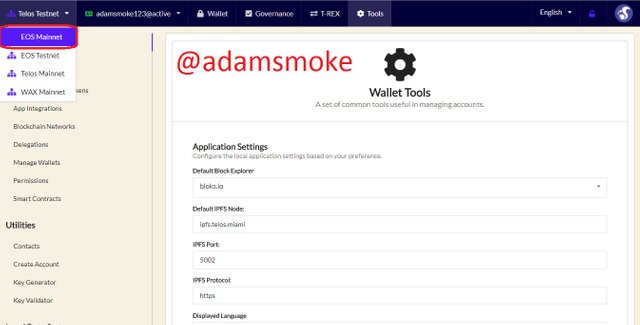
- When we come to the “Telos Mainnet” section in the upper left, we can see various other networks such as Eos Mainnet, Eos Testnet, Telos Testnet, Wax Mainnet. Whichever of these networks we choose, we can perform transactions on that network.
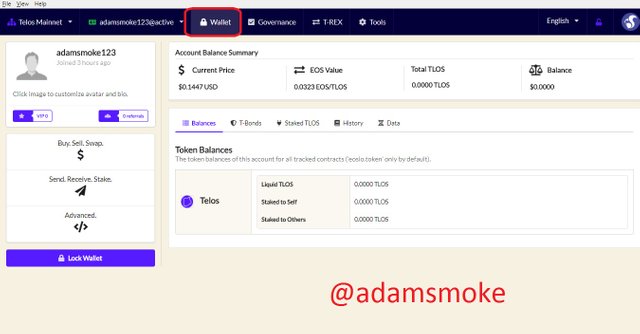
- When we click on the “Wallet” button, we can see the price of our coin and its value corresponding to the EOS price.
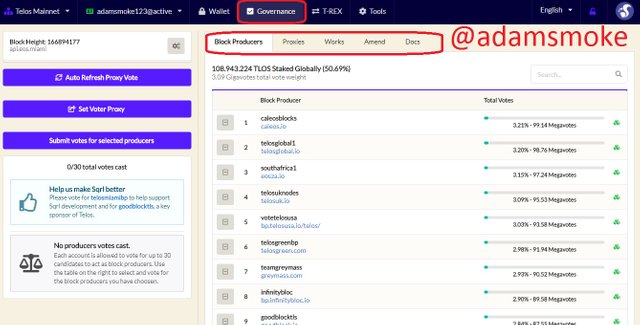
- When we click on the "Governance" section, we see the block producers and can vote for proxies. It also has the feature of voting as a proxy. At the same time, there are Works, Amend, Docs sections in this section.
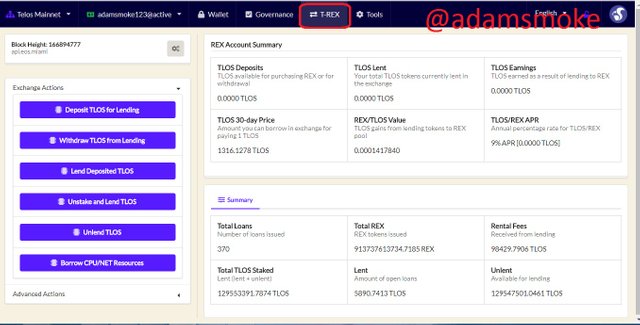
- When we come to the T-REX section later, there are details such as Deposit TLOS loan, TLOS withdrawal loan.
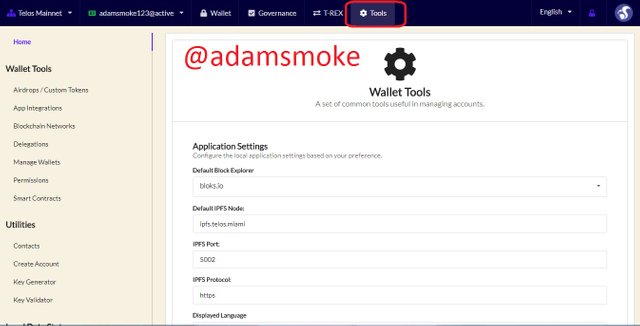
- In the “Tools” section, there are many tools related to wallet management.
How to Get CPU, RAM and Network?
- For this process, we first switch to the "EOS Mainnet" network.
- To purchase RAM later, we click on the "Buy RAM" option as seen in the screenshot.
- At this point, since EOS Mainnet is not opened, I repeat the above steps and continue over Telos Mainnet.
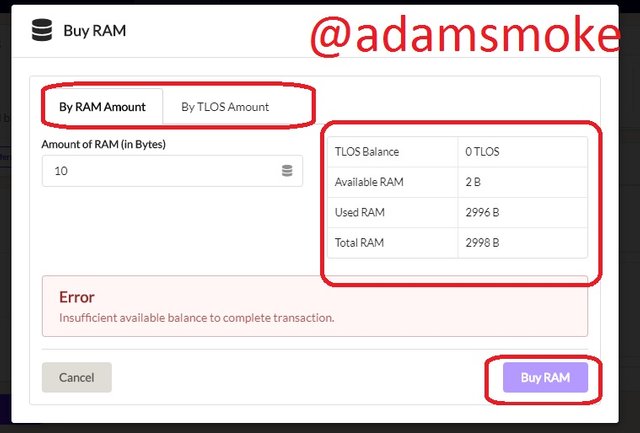
- There are 2 options on the screen that appears. We can buy RAM by typing the amount of RAM in one and the amount of Coins in the other. The same procedures are performed in both sections. Then, after clicking "Buy RAM", we can purchase RAM when we have the required balance. Minimum RAM usage is set at 3 bytes.
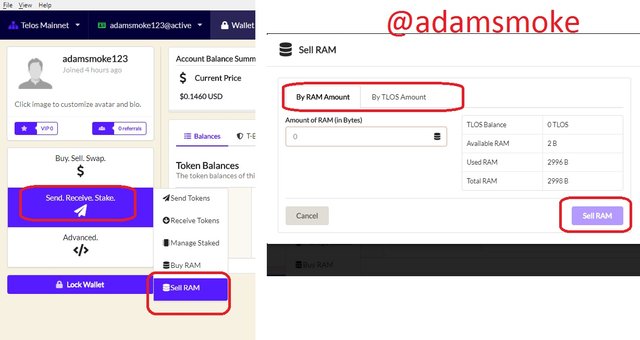
We can do it by following the same steps in the RAM sales process.
CPU Buy/Sell
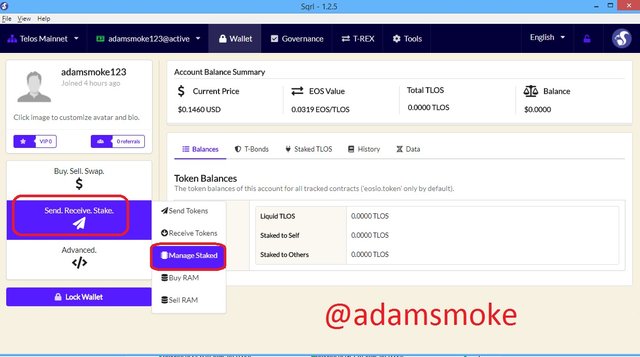
- Follow the steps in the screenshot above and click on the "Manager Stake" option.
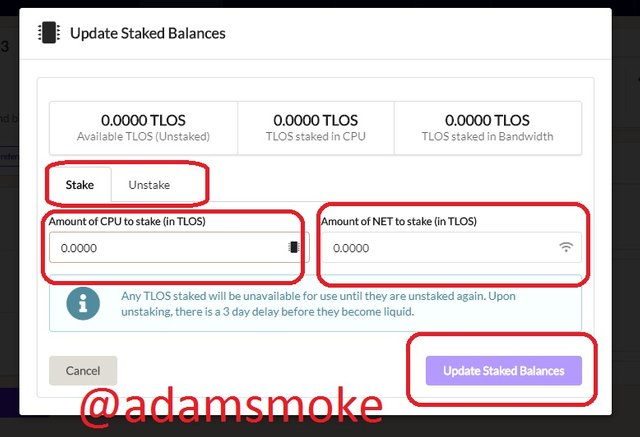
- First, we come to the "Stake" section, which I showed with the box. Here we enter quantities for CPU and Network. If there is sufficient balance in our account, we can perform our transaction by clicking the "Update Staked Balances" button.
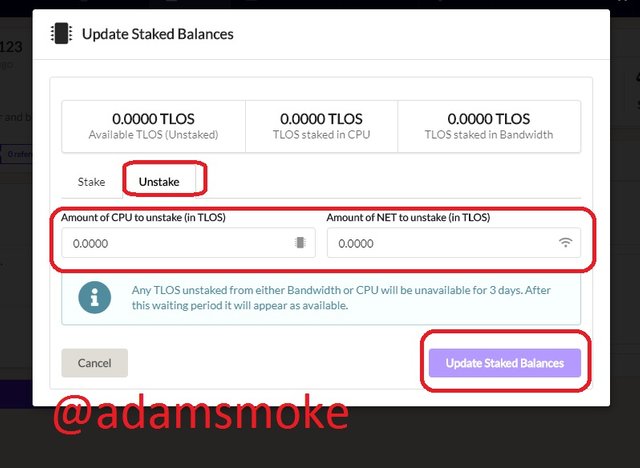
- In the same way, we can end the staking process by performing the same operations by clicking on the "Unstake" section.
After performing these transactions, we cannot use our Tokens for 3 days.
Question 5
Show the price of the REX token. And explain what it is used for.
The REX token was launched in 2018 thanks to Daniel Larimer, CTO of Block.One. Due to the lack of resources on the EOS blockchain, bottlenecks were formed, and REX emerged in order to eliminate this congestion and provide uninterrupted use to users. Thanks to REX, users have the opportunity to rent or buy resources for a certain fee even though they do not have sufficient resources. These resources can be generally thought of as RAM, CPU, Network. We can also define the REX token as a token used on the EOSREX platform. The REX price can be obtained by multiplying the REX token with the EOS price. There is also a 1:1 connection between the EOS token and the REX token. . Also, the REX token can only be used on the EOSREX platform. Also, when we want to use the REX token, we have to vote for any Proxy or a witness that has generated at least 21 blocks.
- First, we go to https://eosauthority.com/rex/statistics so we can see the REX token price.
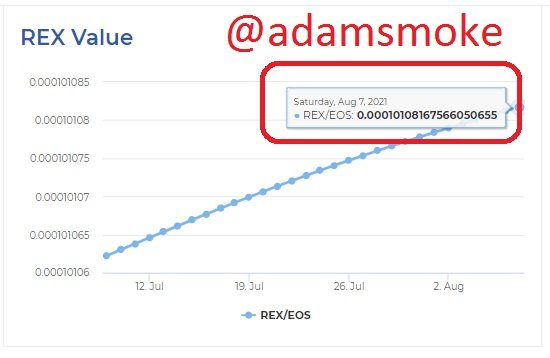
- Current, REX/EOS price: $0.00010108167566050655.
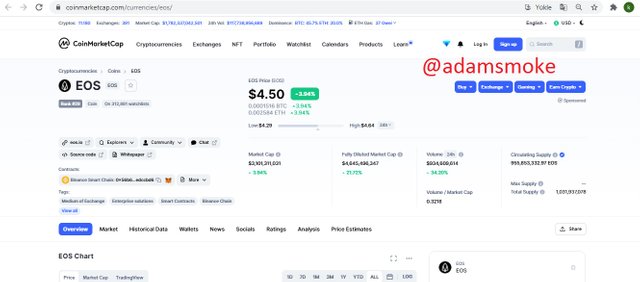
- Current, EOS price: $4.50.
Calculating the REX price is:
REX = REX value * EOS Price
REX = 0.00010108167566050655 * 4.5 = $0.0004548675375 USD.
Conclusion
In this sharing, we have seen once again how useful and beautiful the DPoS system is. At the same time, thanks to its many features, we have seen that the blockchain system has completed many of its shortcomings. As we said before, it is inevitable that it will become more popular in the coming years and it will be the most preferred consensus algorithm.
We also nicely explored and explored the once popular EOS blockchain. We have seen that the EOS blockchain solves the scalability and speed problem, which is the problem of old blockchains, thanks to the DPoS algorithm. It was even once known as the “Ethereum Killer”. However, its former popularity has not remained today.
Another issue we talked about in our post later was the REX token. We have covered in detail what the REX token does and where it is used. Transactions similar to those we perform with the REX token are available in many systems. E.g; We can freeze energy for Band and Network width in TRX blockchain.
Thank you professor @pelon53 for this nice and instructive lesson. Also, thank you to everyone who read my post up to this point. I wish you all a healthy and beautiful day.
Gracias por participar en Steemit Crypto Academy Season 3:
Espero seguir leyendo tus publicaciones.
Recomendaciones:
Calificación: 8.0