Halloween is just around the corner, here's a tipp on how to create a mask with simple and cheap materials
Halloween is always just around the corner if you have a costume that will take a lot of work. I usually invest plenty of time, but on the other hand, I also keep my costumes as cheap as possible while still have them looking original and of decent quality.
So I'll show you how I craft my costumes with cheap or free materials. This is a mask I created for Halloween two years ago:
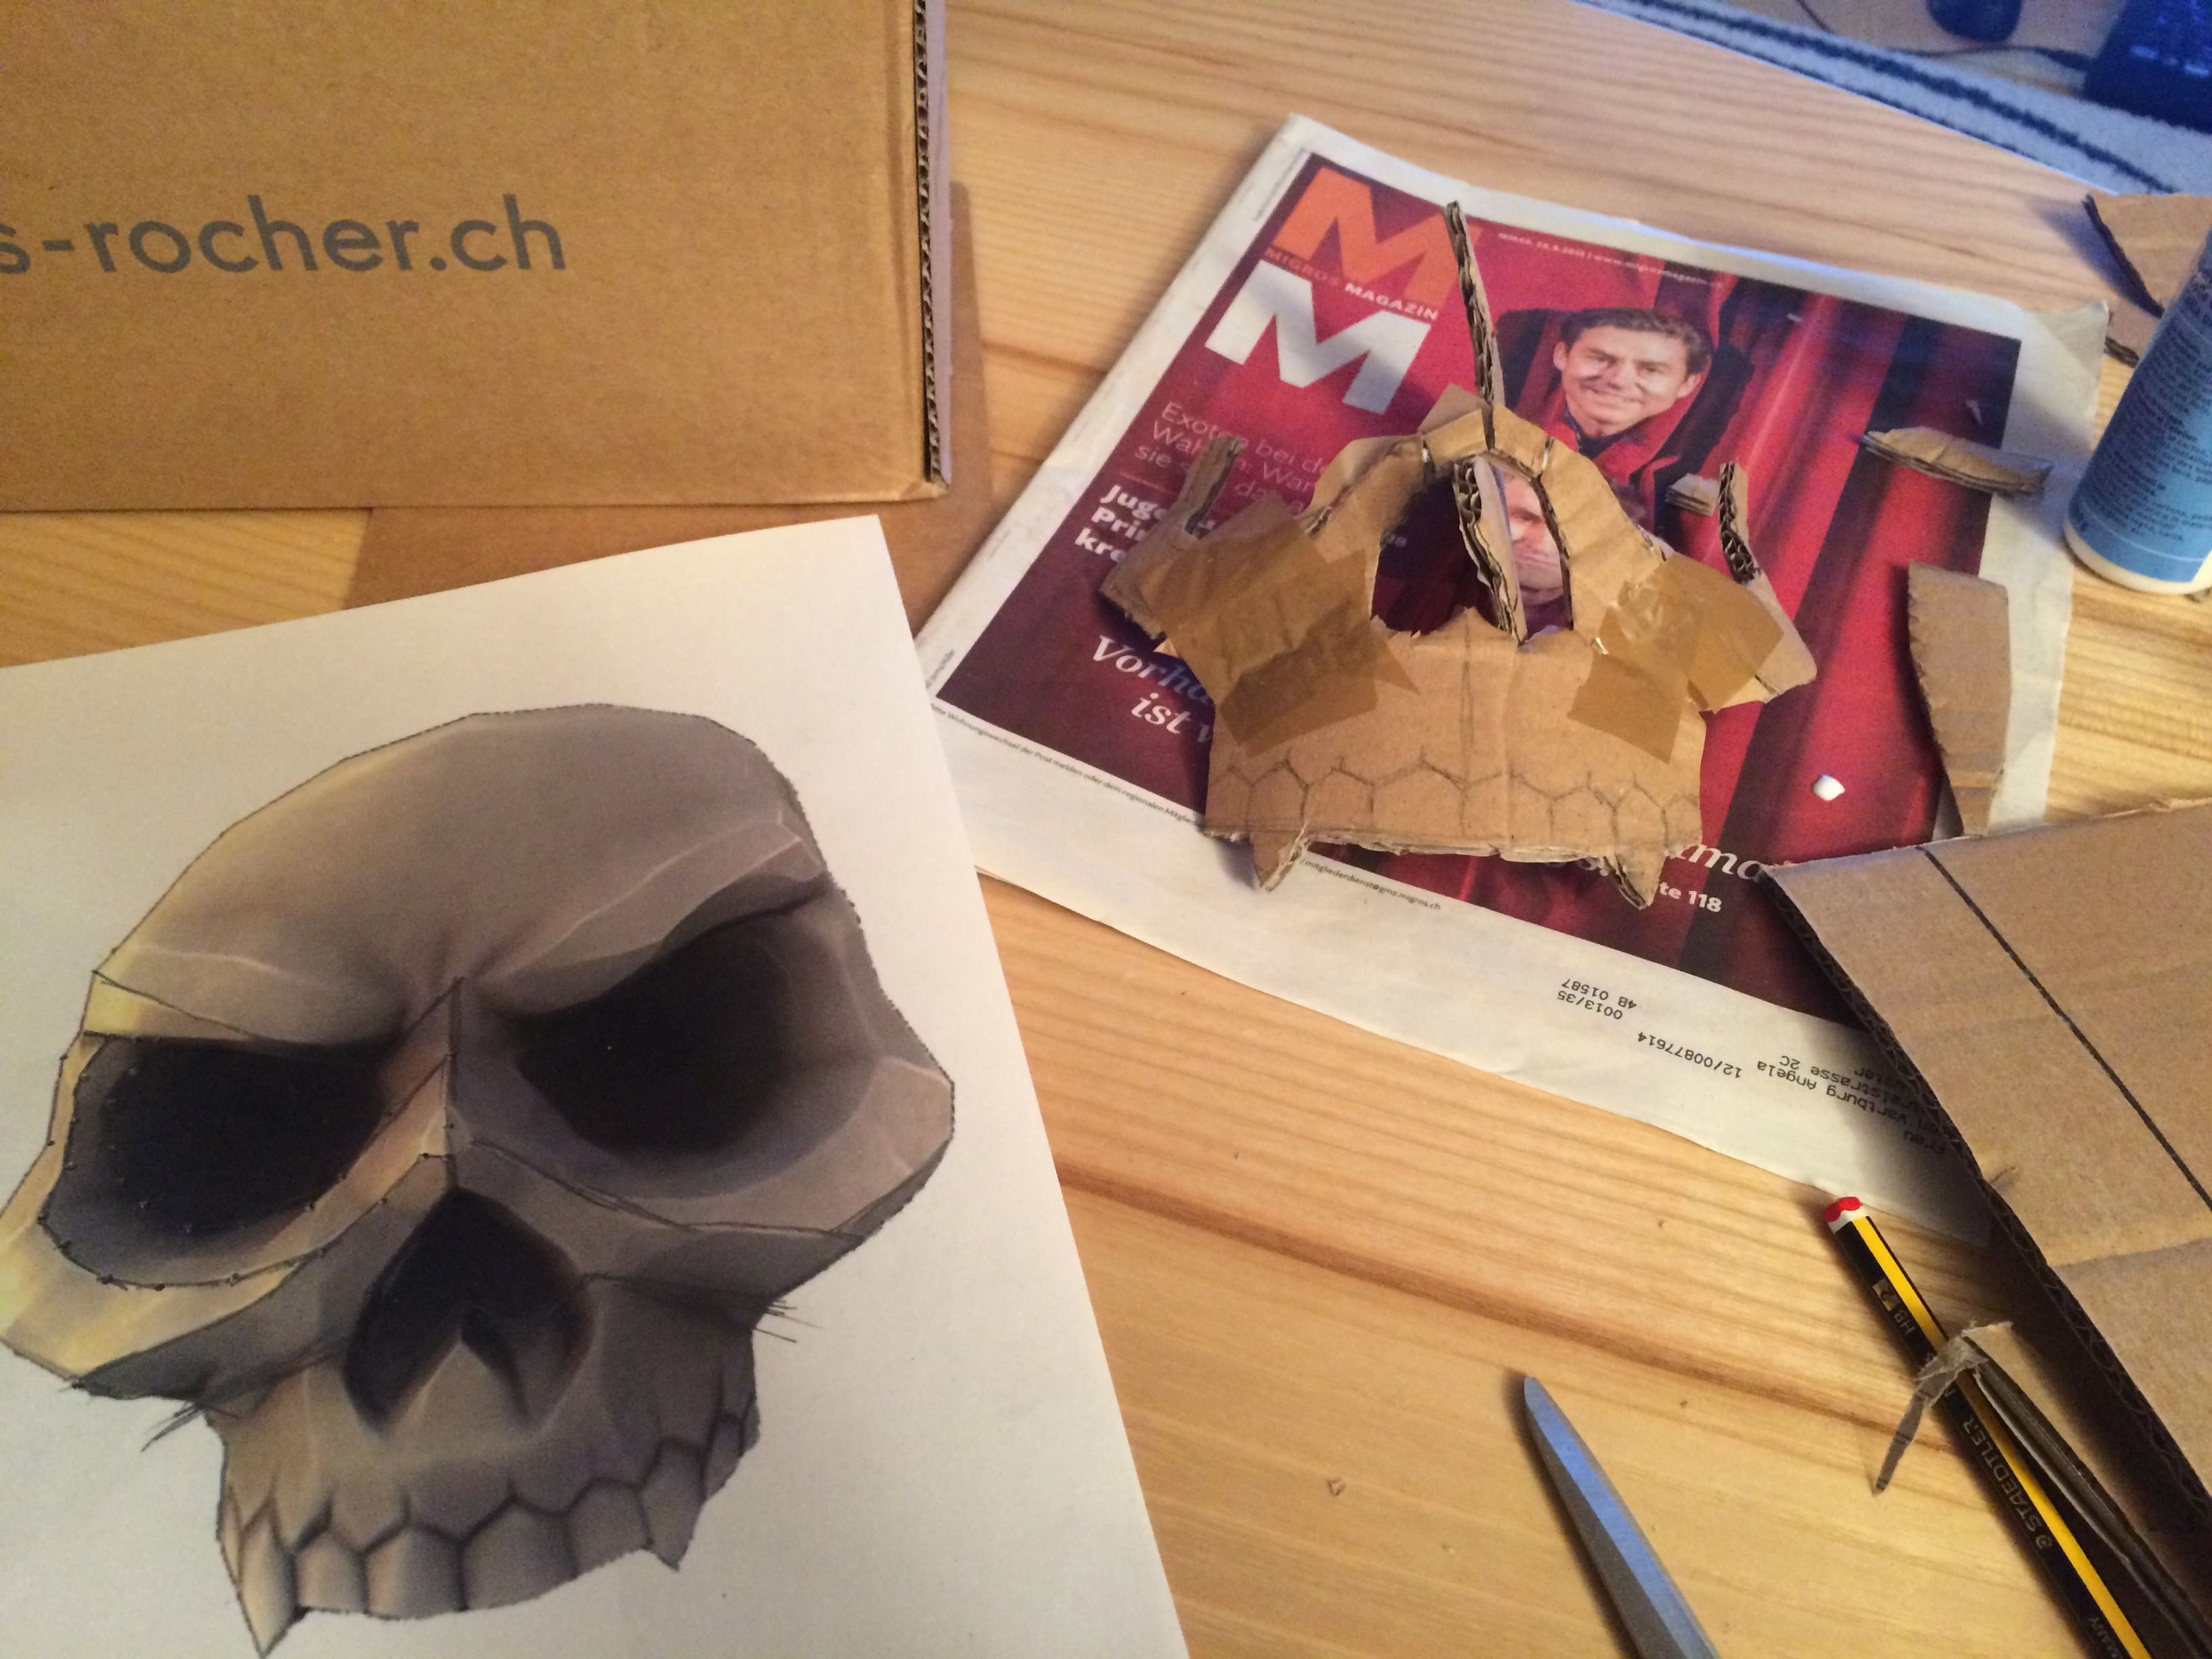
First, I created a frame for the mask out of cardboard. I used a picture of a 3D cartoony low poly skull from the internet as a reference and shaped various cardboard parts to a more or less correct base. To do that, I glued the parts together and taped them until the glue dried. Sometimes I also used clothespins to hold something together.

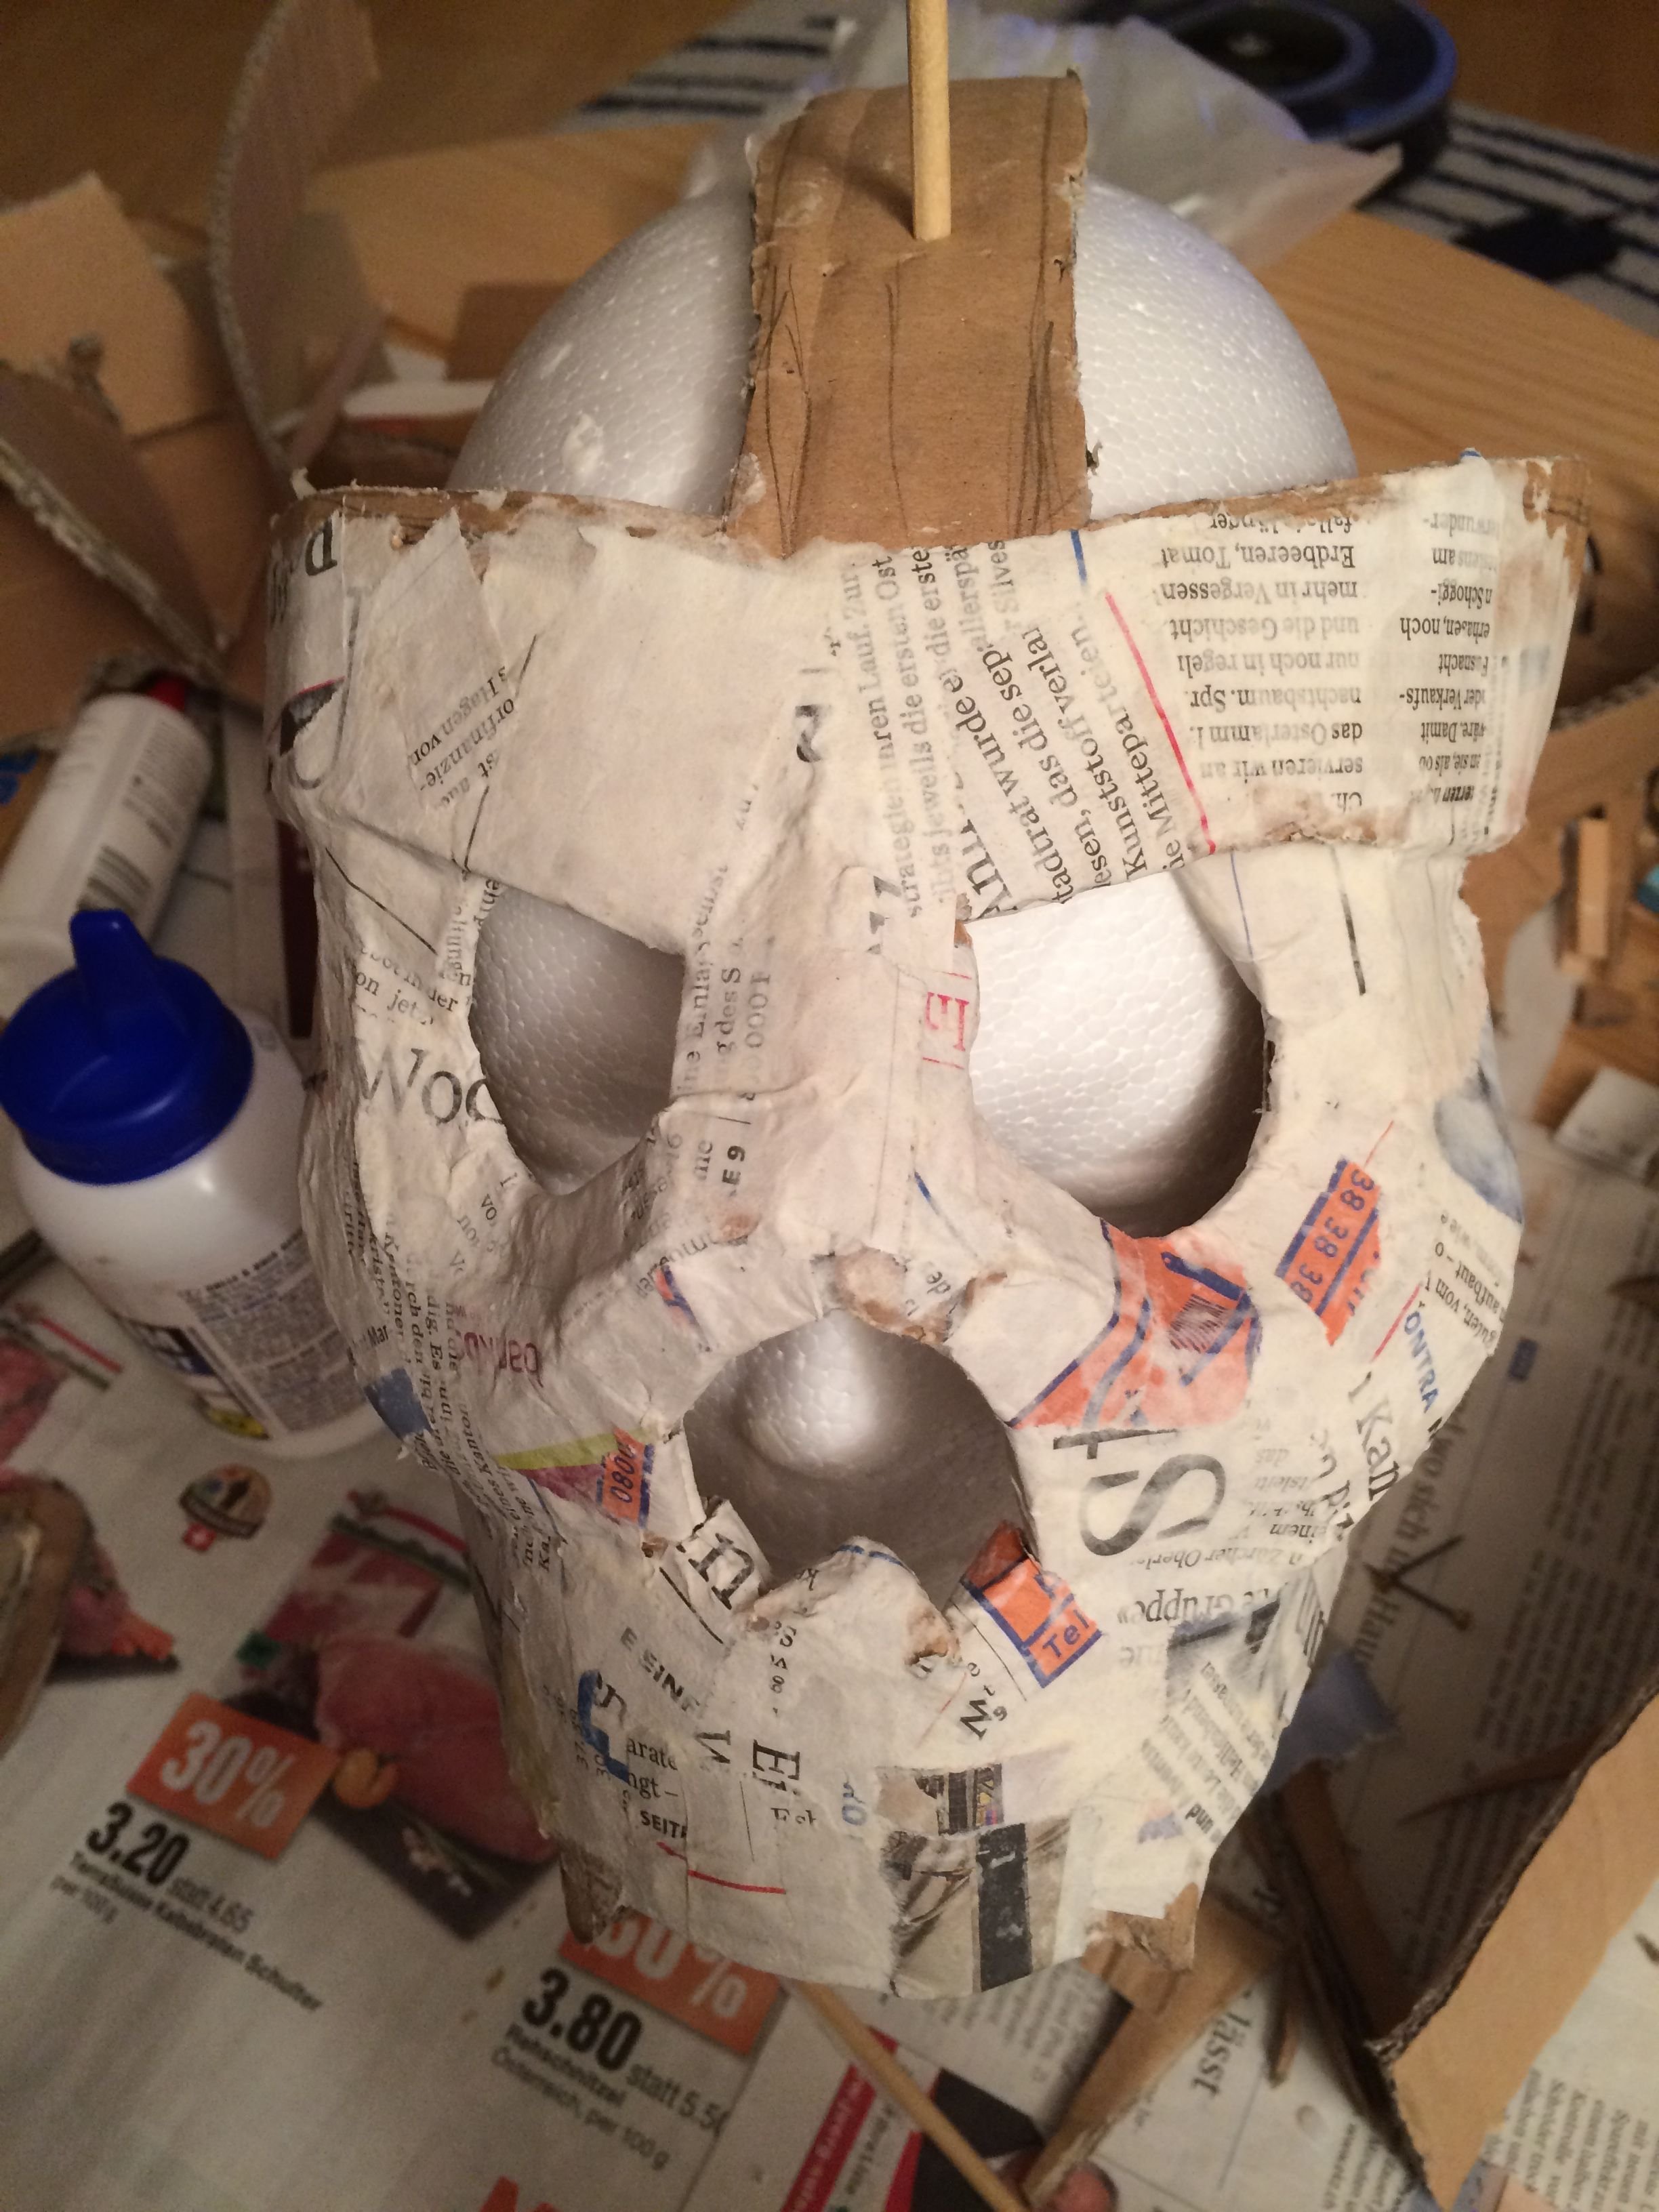
Next, I used a lot of glue (most of it home-made with flour and water) to plaster the whole thing with newspapers and then added some details with papier mâché (you can create papier mâché also by yourself, but that's just too much of a mess for me :))
The details added, I got to painting. As this was to be a "witch doctor" like mask consisting of a skull and a Mayan gold-feather headdress, the base colors were white for the skull and gold for the headdress.

You would have thought that the fact that this is a real-world 3D object would make it look very 3D and real. It does not. After base-coloring, the mask looks cheap and kind of "flat".
That's where the next very important step comes in: You have to pick a darker color and do some shading. Even better, you have to do shading in steps. First, only take a very slightly darker color (e.g. for gold I mixed in just a little bit of black) and add it here and there where it adds some more definition to the shape you want. Keep doing this, going a little bit darker each step until you apply the darkest color to the deepest impression (in my case, the eyeholes of the skull on the front). It's also important to have some color variation here to make it look real. It's supposed to look like old gold and not plastic :) I don't have the step by step pictures here, so here's the final result:

The ear jewelry consists of clay (Fimo) and cardboard.
I was able to attach the feathers by using corrugated cardboard carton on the inside of the headdress so in the end I could just stick the feathers in there.
That's it!
Needless to say that every step required a lot of waiting to let the glue and/or paint dry. So if you try to do something like this, also calculate the days you will need to wait to let it dry. Depending on how much glue and what kind of glue you used, you should let it dry for at least a day. In conclusion, you can basically create a mask, headdress, helmet or something similar with just glue, newspapers, cardboard and some paint. The most expensive items were the paint and the feathers. I also created a dagger out of clay (Fimo again), cardboard and obsidian. I paid about 25$ to a kid who is knapping and selling obsidian on ebay in his free time. Totally worth it.
[Dagger WIP, and also my mess :) ]
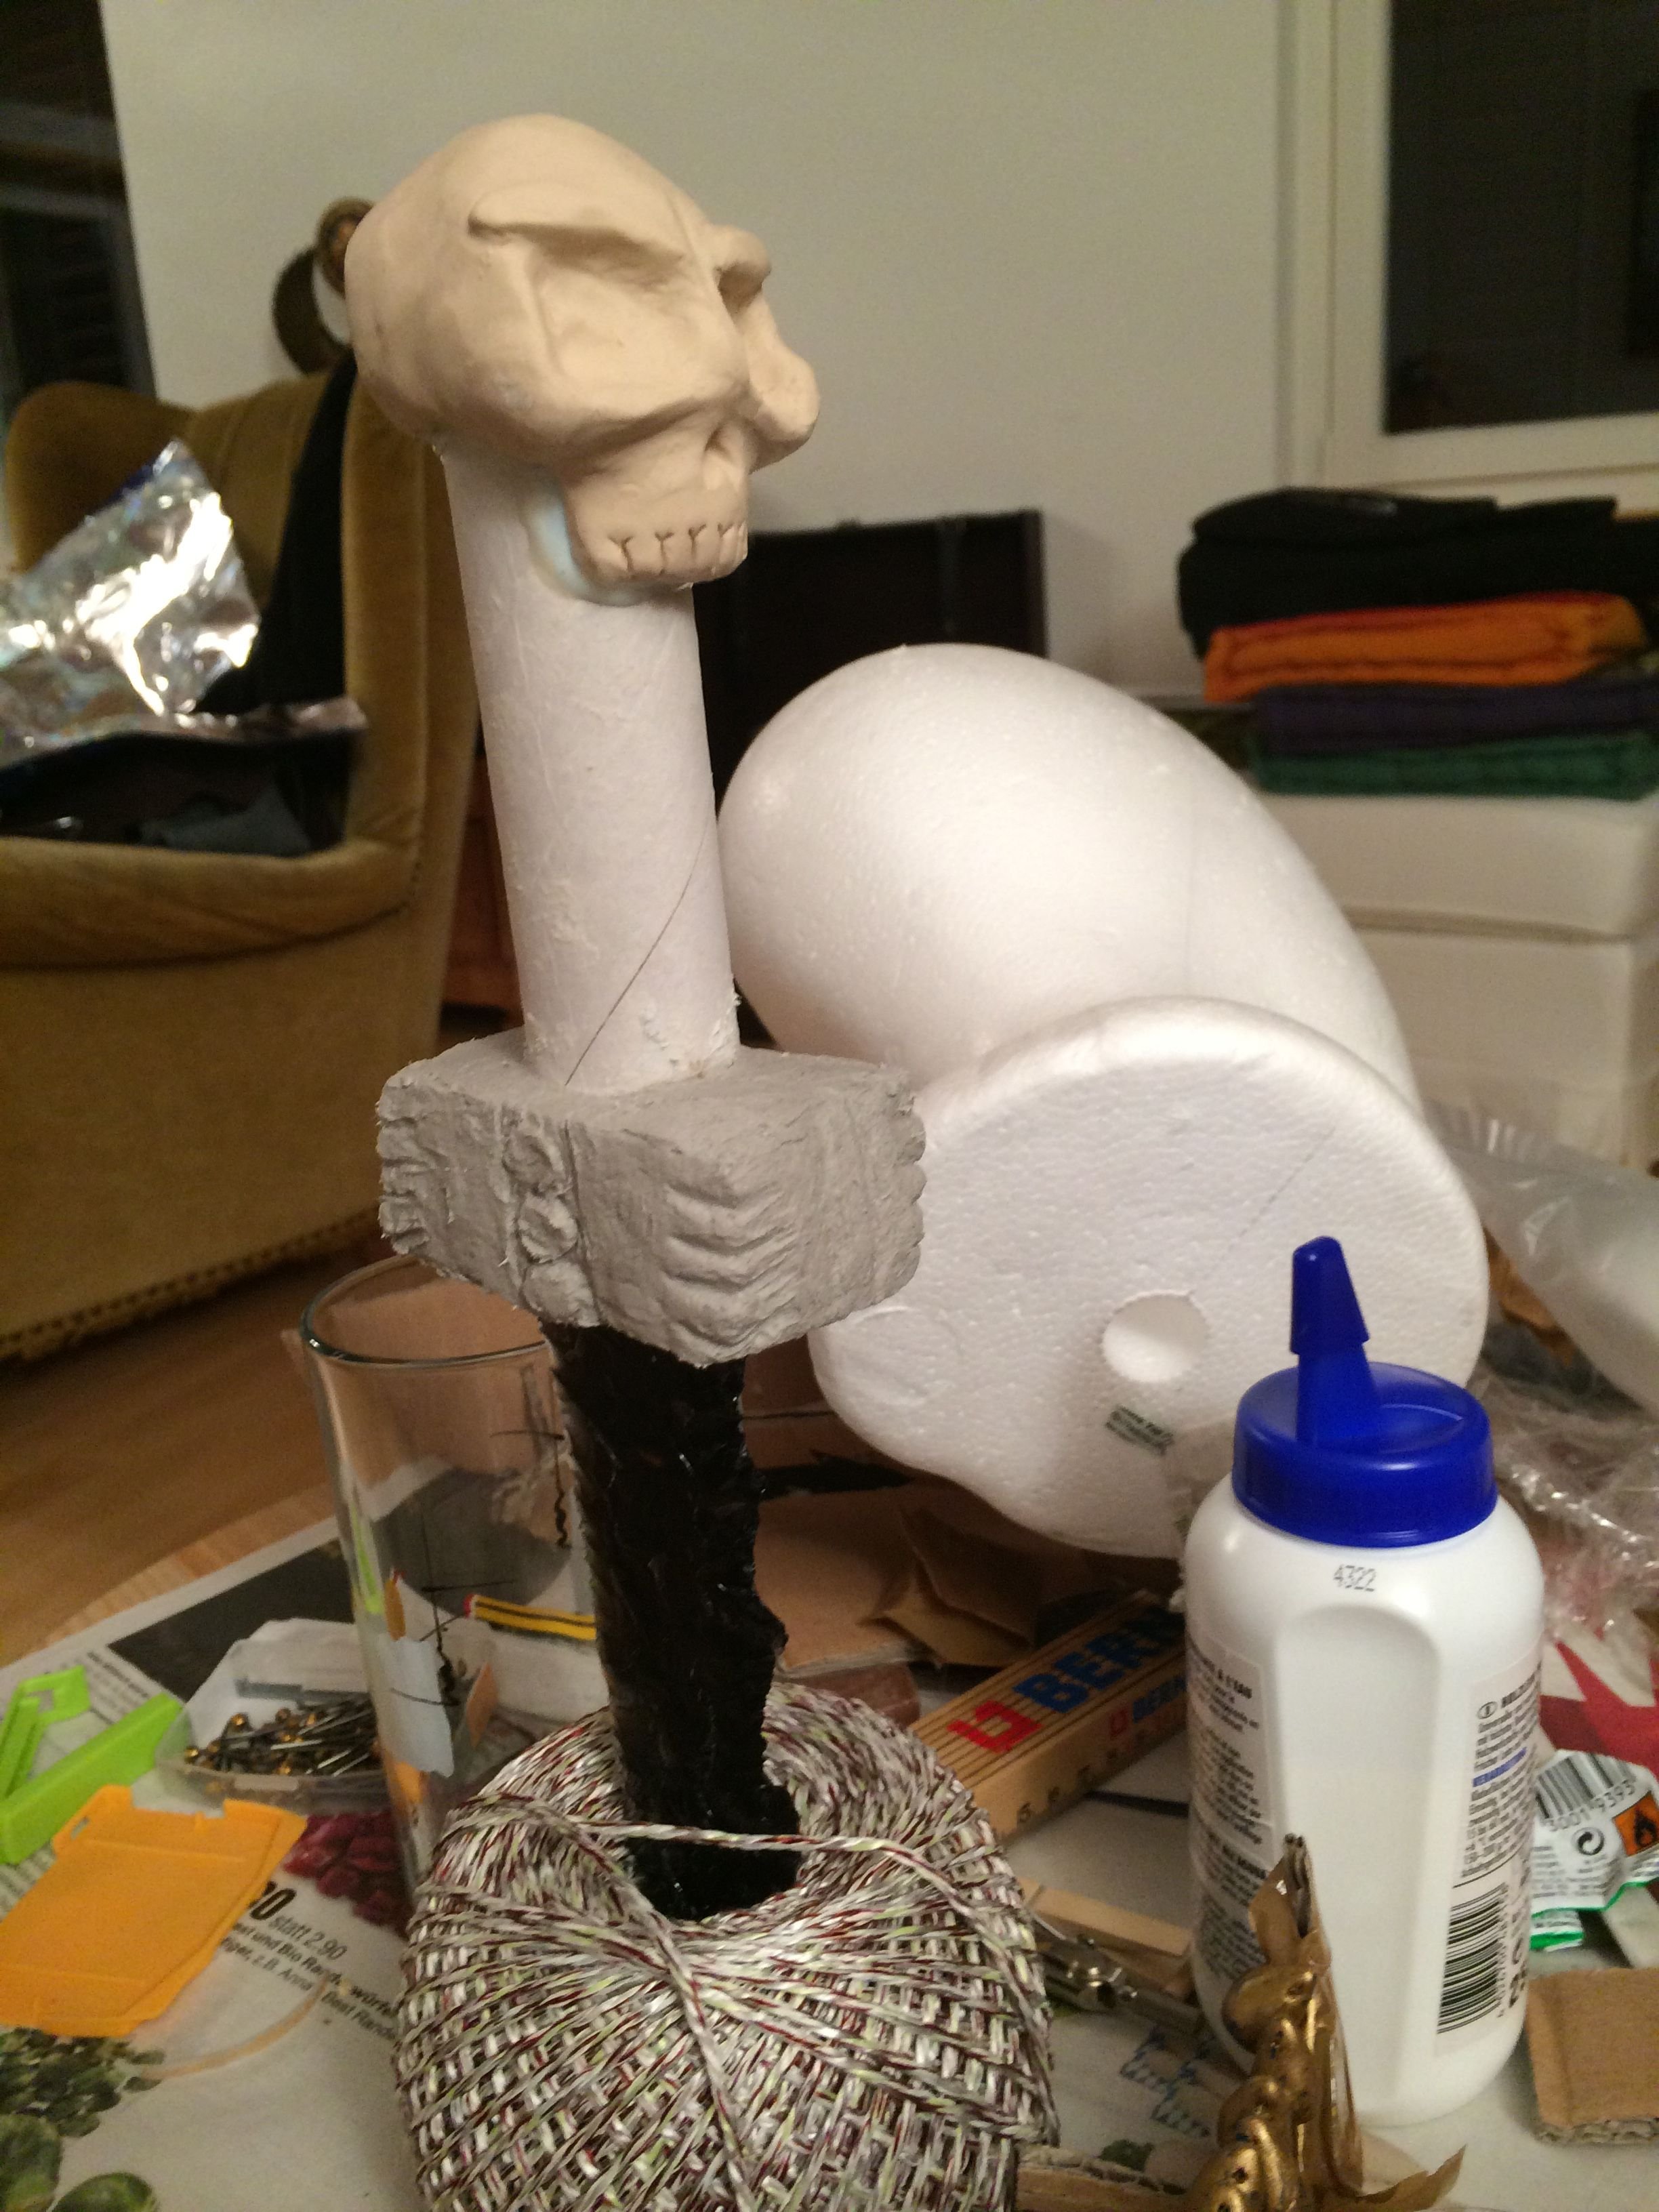
The finished dagger.

And finally me wearing the mask (bad picture because dark, but of course the mask works best in gloomy environment).

So happy Halloween, get to work!
Congratulations @asvari! You received a personal award!
You can view your badges on your Steem Board and compare to others on the Steem Ranking
Vote for @Steemitboard as a witness to get one more award and increased upvotes!