Gutter Installation on the Garden house.
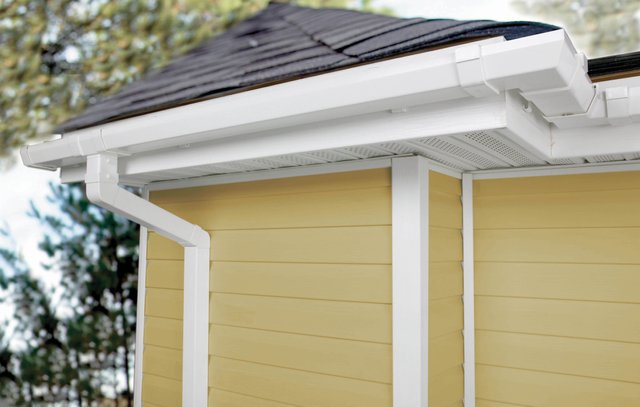
A rain gutter protects your garden house from water damage: The rainwater is drained off, without the wetness affecting walls and foundations. In Canada most people installing the gutter on the garden house. How to easily install a gutter on the roof of your garden house we explain in our assembly instructions step by step.
You need these tools
In eavestrough repair Toronto you will find gutter sets for square, desk, saddle, and 8-corner roofs. A distinction is made between gutters made of metal and plastic. Depending on the type of material you need different tools for the assembly.
Whether you choose a gutter made of metal or plastic depends on the one hand on your budget, on the other hand on your demand for longevity and aesthetics. Here are some of the differences between the two gutter materials:
Plastic gutters:
Hardly inflammable (thanks to unplasticized polyvinyl chloride)
Unbreakable, dimensionally stable and impact resistant
Good resistance to environmental influences (e.g. UV radiation, acid rain ...)
Acrylic protective layer: high color fastness
Available in black, white or gray
Cheaper than gutters made of metal
Metal gutters:
Durable thanks to galvanized steel (about 20-35 years)
Environmentally friendly
Dirt-repellent and resistant (thanks to topcoat surface coating)
Tolerant to temperature changes
Classic dark gray.
To assemble a plastic gutter on the garden shed
Provide tools and the gutter set, and hires a few helpers to help you with the tools and parts you need. Then you can start with the installation of your plastic gutter.
1. Installation of gutter holders and gutter irons
The first step is to attach the gutter bracket and gutter irons to the eaves board.
A man with a screwdriver. The gutter brackets are attached to the eaves board. To do this, proceed as follows:
Determine the angle of roof or eaves board. Keep track of the degrees and mount the distance wedge accordingly. At the lowest point, where later the spout is mounted, attach a gutter bracket. Then attach the second gutter bracket to the front gable side. You must ensure that a slope of approximately 1mm gutter arises.
Now stretch the guideline between the two gutters. Mount the remaining gutter brackets at a distance of about 50 cm according to the string orientation. If you use gutter iron, you must do the same. The gutter irons have to bend the roof pitch accordingly. Check that all gutter holders are tight before removing the guideline.
2. Assembly of the gutter
Now it can go to the assembly of the gutter.
Start at the highest point by hooking a gutter piece to the gutter hook or the gutter iron. Now measure which residual gutter you need and use the hacksaw to cut the gutter to length exactly at right angles. Debar the cut edge, connect the two gutter pieces and hang the gutter in the gutter connector. Apply the supplied special adhesive to the groove on the end piece and push the groove onto the groove.
Subsequently, the nozzle is mounted and the remaining gutter completely attached. Nail or staple the leaves strip onto the roof surface so that it hangs in the gutter. In this way, rainwater cannot run between the gutter and the roof.
3. Assembly of the downpipes
Finally, it goes to the attachment of the downpipes. Assembly of a downpipe holder at the garden house. Use the screwdriver to attach the pipe clamps to the garden house wall.
First, put a pipe bend on the gutter nozzle. Hold the second arch to the wall of the garden shed and measure the distance between the two pipe bends. The supplied 100 cm downpipe must then be sawn to the length of the distance between the two bends. Insert the 200 cm tube into the pipe bend on the garden house wall.
Fix the pipe with two downpipe clamps to the wall of the garden house and bend it at its lower end so that rainwater is led away from the garden house. To keep the nozzle, plates, and downpipe, you should glue everything with the supplied special adhesive.
Maintenance of the gutter
In order to enjoy your gutter for a long time, it is important to maintain it regularly. Check for leaves or other debris that clog the drain or downpipe.
Clean the gutter with a soft brush and water. Even a mild soap or car shampoo is suitable for care.
With the right instructions, attaching a gutter to the garden house is not that difficult. An illustrated assembly guide to your gutter set is of course included.