3 Things Beginners Should Know About Bends Part 2
Last time we talked about using your thumb as an anchor point and squeezing your fingers together to help distribute the work load when you bend. In the same way, the tip I'll be giving you today will also help you to better distribute the work load.
But this time, not from your thumb. We'll be using your other fingers to create a compound effect when used together with your thumb.
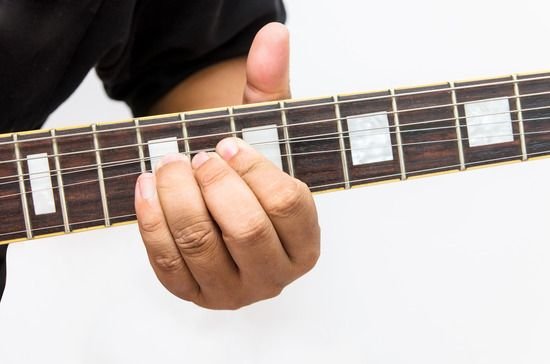
I'm not sure what finger you generally try to use for bends, but as much as possible, you should be trying to use your 3rd (ring) finger for bends. Why is that? Well, by using your 3rd finger, you can let your 2nd finger (middle) and your 1st finger (pointer) help out by reinforcing the bend. Let's try it out.
One Is The Loneliest Number
Let's start out our little experiment by placing your 1st finger on the 9th fret of your 2nd string, the B string. Now play that note, and try to bend the string up while it's ringing out.
Maybe you got it, maybe you didn't. Either way, using one finger to do a bend is like work overload! Not very efficient most of the time. You would think that such a strong finger like your pointer finger could handle a little old bend, right?
Three Fingers Are Better Than One
Now, go ahead and place your 3rd finger on that same 9th fret of the 2nd string. Then, on that same string, put your 2nd and 1st fingers directly behind your 3rd finger. They should end up somewhere on the 8th and 9th frets. Now try a bend and use all your fingers together. See how using three fingers instead of just one takes a lot of the effort away?Side Note: It won't always work out like this when you're playing songs. Naturally, you won't always be able to do bends with your 3rd finger. This is exactly why I said, "Not very efficient MOST OF THE TIME." Sometimes you gotta do what you gotta do.
But, now that you have experienced a 3rd finger bend with some added backup, you can see why it's worth trying to do it in this way whenever you can.
Just like anything else, the more you practice it, the easier it will become and you won't even have to think about what finger to use. Or that you should be trying to wrap your thumb around the top of the neck for extra support. It will just happen.
Stay Tuned For More
In the next post, I'll give you one last tip that will help you with the sound and accuracy of your bends.
This is probably the most important tip of the 3. I say that because with enough experience, you really can use any finger to do a bend, not just your third finger. With enough strength, you can bend without ever having to wrap your thumb around the top of the neck. These tips are kind of like added bonuses for more efficient bends.
But, if your bends aren't hitting the right pitches, they will just sound amateurish. Definitely not the sound you're going for!
To see Part 1 of the series on guitar bends, click here.
To see Part 3, click here.

Hi! You're writing wonderful tutorials, but if you want to get upvoted by major curators, you have to use some pictures that beautify your post and put the source from where you're taking the pictures or if they're yours.
Thanks for the info, I’ll try to include some more pictures in the future!