The Complete Guide to Making Pizza at Home
The Complete Guide to Making Pizza at Home
Sling your own from-scratch pies with some pro tips from Slice founder and renowned pizza authority Adam Kuban.
For pizza lovers, a slice is more than a food—it’s an obsession. And while some can feed that obsession by buying New York-style wedges, sitting down to a wood-fired Neapolitan pie, or defrosting a good ol’ pizza bagel, others feel compelled to take the process into their own hands—starting with yeast and ending with a perfect sprinkling of Parm.And so the would-be pizza chef’s first problem is not what kind of oven to cook in, or where to buy the freshest mozz. No, it’s what kind of pie-maker to be.“There are two kinds of home pizza cooks,” said Adam Kuban, founder of Slice and proprietor of pop-up pizza joint Margot’s Pizza. “There’s the serious amateur who’s maxing out his or her oven, hacking it so it runs hotter, who’s always in pursuit of the next one- or two-percent improvement; and then there’s the ‘all pizza is good pizza’ person.“I’ve been both,” says Kuban.Given that the pizza has a long history in the United States and a longer one, of course, in Italy, it would be disingenuous to claim that pie-making is simple. Yet, at its core, pizza has just two elements—crust and topping—and so while its methods and proportions may be tough to master, getting started isn’t hard at all—especially not with Kuban by our side.
1. The Dough

A good pizza crust does more than deliver toppings to your mouth—it’s got flavor. Amazingly, all you need to create an ideal crust—one with both structure and flavor—is flour, yeast, water, and time. The single best thing you can do for your dough is allow many hours for rising.Still, if the crust doesn’t come out perfect the first time or the second, that’s okay. “For some people, that’s half the fun of making pizza — chasing the incremental gains with each iteration of your recipe or technique,” said Kuban.He recommends the beginning a pizza journey with the personal pan pizza that Kenji Lopez-Alt developed for Serious Eats, because “it’s like the best Pizza Hut pan pizza you’ve ever had.”The personal pan approach saves you the work of stretching and transferring your dough, and it allows for tons of toppings (more on that later). But if you’re anxious to ditch the pan and keep your crust thin, I recommend this optimized version of Jim Lahey’s no-knead dough on the Smitten Kitchen blog. The dough is soft and produces a tasty, golden, sturdy crust. Best of all, the recipe is straightforward enough for pizza-making newbies, though—like the personal pan crust—it does require hours of rising.
2. Alternatives to Perfect Dough

If you want pizza and you want it now, no 22-hour rise is going to work for you. That’s why English muffins, bagels, and French bread exist. Store-bought naan, tortillas, and wraps are also workable stand-ins for dough. With any of these replacements you also have the advantage of a sturdy crust, since you’re starting with cooked bread, rather than raw dough.Since a pre-made crust won’t be the star of your meal, you’ll want to focus on your sauce and toppings (keep reading) to ensure a final product even a snob wouldn’t look down his nose at. Or shouldn’t, at least.“Purists may scoff at French bread or English muffin pizza,” said Kuban. “But I was making that stuff as a kid and I can guarantee it stoked my interest in pizza and led me down the path I’m on today. Why deny future generations of pizza-makers this gateway drug?” Exactly.
3. The Sauce
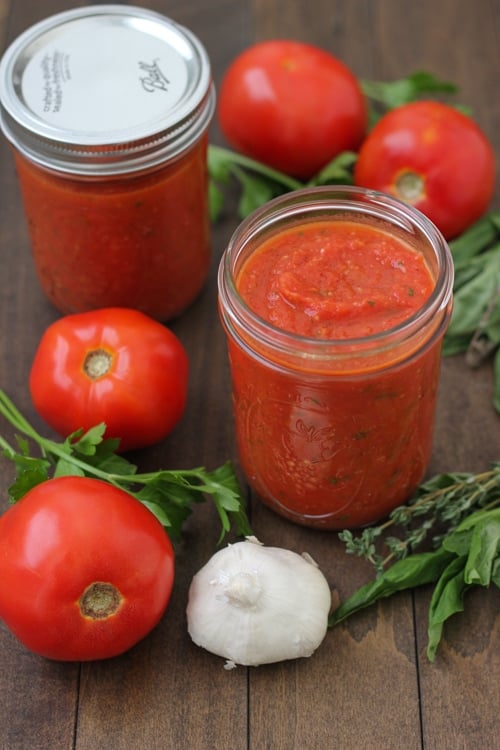
Slow-cooked Italian “gravy” really has no place on pizza, nor does a commercial jar of too-sweet marinara. Pizza sauce is far simpler than either of those.“You can’t go wrong with a simple sauce made from San Marzano or San Marzano–style tomatoes passed through a food mill,” said Kuban. Buy whole tomatoes, then strain out the extra juice from the can. Blend the tomatoes, or pass them through that food mill. Definitely add a pinch of salt; you can also throw in minced garlic and a couple teaspoons of olive oil.
4. The Cheese

Where would pizza be without cheese? Pies would lack the golden bubbles, the sliding goo of hot mozz, and that coveted pull of stretchy cheese as it starts to cool. At home, a mix of “aged” (pre-packaged or supermarket) and fresh mozzarella will prevent you from ending up with a water-logged pie while still delivering both gooeyness and milky freshness. You can pick one or the other if you want to shorten the ingredient list. Using the supermarket mozzarella will lead to a pie that resembles a New York slice, while going the fresh route produces a white-as-snow melt that seems more Italian and gourmet. You can grate, cube, or pull apart your cheese by hand. Use less than you’d think—when the cheese melts, it spreads.But pizza cheese doesn’t stop at mozz. Parmesan is an essential topper, delivering saltiness, body, and umami. For optimal Parm enjoyment, make like the guys at Staten Island-style Artichoke Basille’s Pizza and pile on generous amounts of grated cheese immediately after pulling the pie from the oven. Fresh ricotta finds a home on white pies, and any good-tasting melting cheese—fontina, for instance—could make a cameo on a quattro formaggi pizza.
5. Stretching and Assembly

There’s a lot of room to grow when it comes to pizza assembly, and a few hacks to create a good final product even while you finesse your technique.One thing you’ll have to do is stretch your dough from a lump into a sheet. If you made Lahey or Lopez-Alt’s recipe, you won’t have use for a rolling pin. Instead, use your (lightly floured) hands and gravity to reshape a ball of dough into a pizza, touching and pulling as little as possible to prevent holes. Have your oil-brushed pan or skillet on hand so that you can transfer the dough right onto it. Don’t sweat the weird shapes. If the dough becomes stubborn and won’t stretch any more, give it a break. Cover with a damp towel and occupy yourself with other tasks for 10 minutes. When you return, the dough should have relaxed.If you’re using a pizza stone, you can assemble the pie on a paddle and slide it onto a pre-heated stone (or steel) that’s already in the oven.When your dough is stretched, move onto the toppings.
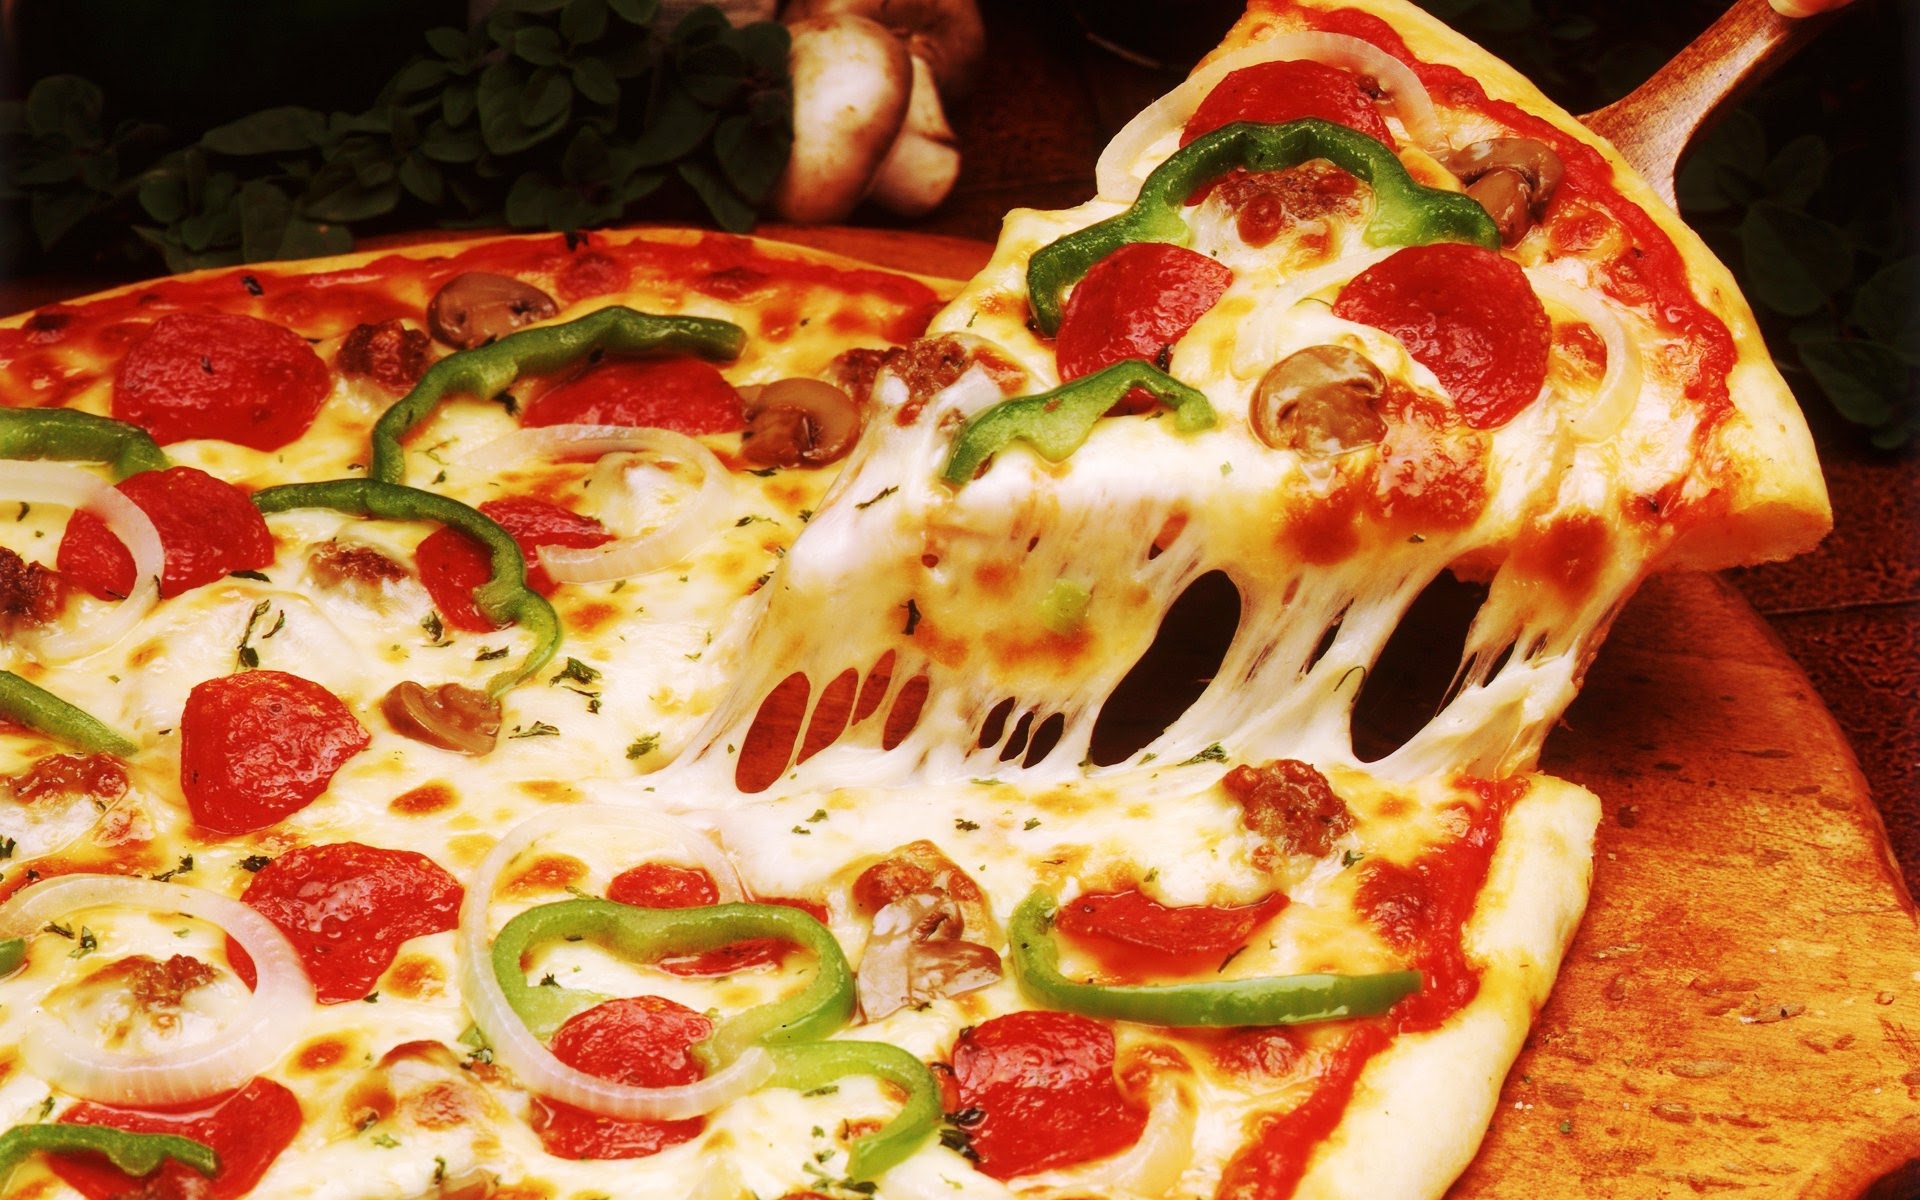
6. Toppings

One of the true joys of making pizza at home is choosing the exact toppings you crave, like pepperoni and olives (pictured), sausage and meatballs, or broccoli rabe and red peppers. Go wild—just not with the amounts: “My cardinal rule for saucing, cheesing, and topping is, ‘What looks like too little is usually just about right in the end, and what looks like the right amount is probably going to be too much,’” said Kuban.Kuban’s only other rule of thumb when it comes to toppings is that while you should definitely take inspiration from your favorite flavors—even non-Italian ones, like tacos or cheeseburgers—you should never be dogmatic. “The more literal you are about it, the worse it tends to be.”
7. White Pizza

Where would pizza be without sauce? Just fine, actually. When the red sauce takes a break, a whole slew of ingredients that might not pair perfectly with tomatoes can suddenly take center stage. White pizza, or pizza bianca, is common in Italy, where sometimes it’s so white it doesn’t even have cheese.To make a white pizza, simply arrange the cheese right on the dough and build out your toppings from there. The combination of potato, rosemary, and taleggio is common in Rome. Together, mozzarella, anchovy, and arugula make a winning trio.
8. Oven Cooking

Get your oven hot to cook pizza. Searing heat will turn your base from dough to crust in the same amount of time that your tomatoes morph into a jam-like sauce, and your cheese bubbles and blisters. Don’t be afraid to crank up the oven as high as it will go—usually between 500°F and 550°F. Even this broiling temperature won’t match the heat of a commercial pizza oven, though. If you’re at the point where you want to take your game to the next level, you’ll want to invest in baking steel or a pizza stone—surfaces that absorb extra heat and direct it back onto your crust.While these may seem like extra baggage, don’t discount them if you’re serious. The steel, said Kuban, “was the number one thing that really helped me with my New York–style crusts.”
9. Grilling

If you dine at Al Forno, the Italian restaurant in Rhode Island that invented grilled pizza, you’ll see why many consider the grilled pizza to be king. With charred edges, big bubbles, and handsome grill marks, the pie looks and tastes great. But there’s another perk here for the home cook: Charcoal grills can reach temperatures of 700°F, higher than most conventional ovens (to get a grill that hot, use a lot of coals and lower the grate to be closer to the heat).When you grill pizza, you have to work fast. Have your toppings (not too many) on hand. Place your stretched dough on a hot part of the grill, and cook just until it solidifies—usually 2-3 minutes. Then, flip the dough and speedily build out your pizza. To make the sure the cheese melts, move the pizza to a cooler part of the grill and cover for another 1-2 minutes, checking to be sure the bottom doesn’t burn. Then, remove, rest, finish, and repeat with the rest of your dough.
10. Finishing Your Pie

Your pie isn’t quite done just because it came out of the oven looking perfect. To finish off your pizza, take a few last steps. First, sprinkle with Parmesan as soon as you can—the more the better. Then, add any fresh herbs, like basil, or dry seasonings, like oregano and red pepper flakes. Finally, give your pie something extra by drizzling it with the best-quality olive oil you have. Let the pie rest for 3-5 minutes for easy slicing. Then, at last—potentially a full 24 hours after you began your pizza-pie odyssey—cut a slice and eat it. It’ll be worth it.RELATED: The Complete Guide to Making Falafel at HomeRELATED: Our 5 Favorite Pizzerias in NYC
WATCH NOW