SEC20/WK4: Graphic Design Hands - On practical 1

Hello steemians,
Today I am participating in the SEC20 WK4 - Graphic Design Hands-on Practical 1 competition, organized by @lhorgic. As a graphic design enthusiast, I found this challenge particularly interesting because it allows me to practice my skills using Canva, a platform that I appreciate for its simplicity and power.
Step 1: Setting Up My Workspace
- I started by launching my Canva app and choosing a 16:9 aspect ratio for my design, which is great for presentations or social media visuals. Once the dimensions were set, I set up my workspace by selecting a background color by clicking on the color icon. I used a specific hex code to get the exact shade I wanted.
| Picture1 | Picture2 | Picture3 |
|---|---|---|
 |  |  |
Step 2: Adding a Background Image
- After setting the background color, I wanted to add more depth to my design. I clicked on the gallery icon and chose an image related to money or finance to reinforce the theme of my project. This image added an interesting visual effect to the background of my design.
| Picture1 | Picture2 | Picture3 |
|---|---|---|
 |  |  |
Step 3: Adjusting Image Transparency
Once the image was added, I enlarged it to cover a significant portion of the workspace. Then, I adjusted the transparency to 30% using the transparency slider, which allowed it to blend in subtly without stealing the spotlight from the text. I entered the value manually for precise control.
With the background in place, I focused on adding text. I clicked on the "Text" icon and added a key phrase that summarized the main idea of my design. The placement of the text was carefully considered so that the message was clear and impactful.
| Picture1 | Picture2 | Picture3 |
|---|---|---|
 |  |  |
Step 4: Choosing the Typography and Formatting the Text and Adding Shapes to Structure the Design
I selected the font "Permanent Marker" to give a strong and bold look to my text. Then, I played with the size of the characters to create a visual hierarchy, highlighting the most important words. I adjusted the layout until the text harmoniously occupied the space while respecting the principles of readability and aesthetics.
I then added a square shape under my main text using the "Elements" icon. This shape served as a frame to draw attention to certain parts of the text. I also changed its color to create a contrast with the background, using a specific hexadecimal code for a precise rendering.
| Picture1 | Picture2 | Picture3 |
|---|---|---|
 |  |  |
Step 5: Highlighting certain words
- I applied the principle of emphasis on a keyword, such as "Earn", by changing its color to make it stand out. This helps guide the viewer's eye to the important elements of the message.
| Picture1 | Picture2 | Picture3 |
|---|---|---|
 |  |  |
Step 6: Highlighting certain words
I also added a second text, "STEEMIT.COM", which I strategically placed in the composition to complete the whole.
To complete the whole, I inserted an image without a background, obtained from the site remove.bg, and I placed it in my design so that it would integrate harmoniously with the other elements.
I applied the principle of emphasizing a keyword, such as "Earn", by changing its color to make it stand out. This helps guide the viewer's eye to the important elements of the message. I also added a second text, "STEEMIT.COM", which I strategically placed in the composition to complete the whole.
To complete the whole thing, I inserted an image without a background, obtained from the site remove.bg, and I placed it in my design so that it would integrate harmoniously with the other elements.
| Picture1 | Picture2 | Picture3 |
|---|---|---|
 |  |  |
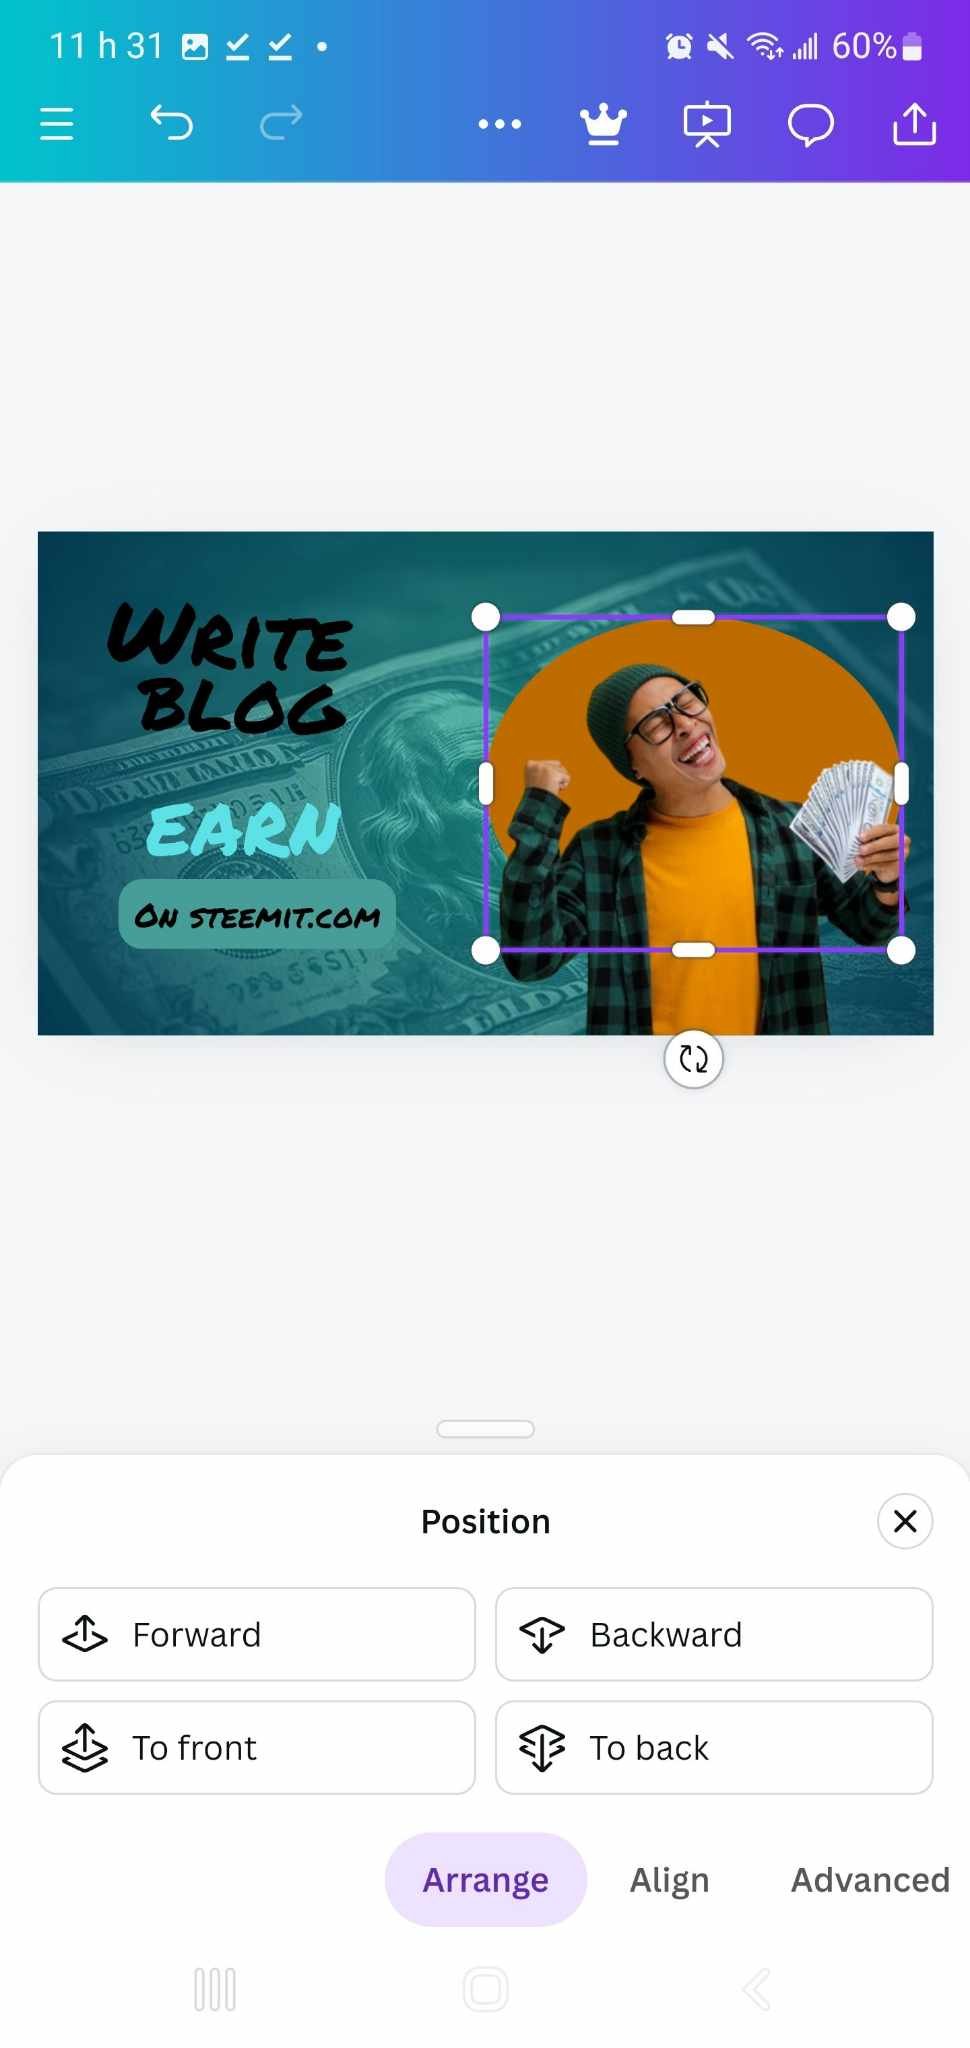
Step 7: Final Adjustment of Images and Shapes
- Once the image was inserted, I resized it to my liking and then added a circular shape that I superimposed on the image. Using the positioning tool, I sent the shape to the background while ensuring that the image remained visible in the foreground.
| Picture1 | Picture2 | Picture3 |
|---|---|---|
 |  |  |
Step 8: Finalizing the layout of the elements
For the final touch, I adjusted all the elements so that they were well aligned and coherent. I used the repositioning option to ensure a perfect balance between the shapes, texts, and images. I made sure not to send the circular shape too far back so that it would not disappear behind the background.
After completing all the steps, my final design was ready. It featured a subtly textured background, hierarchical text, highlighted shapes, and well-integrated images. All of this created a clean, professional, and eye-catching visual.
| Picture1 | Picture2 | Picture3 |
|---|---|---|
 |  |  |
Thank you very much for reading, it's time to invite my friends @cruzamilcar63, @mvchacin, @adeljose to participate in this contest.
Best Regards,
@kouba01

Upvoted. Thank You for sending some of your rewards to @null. It will make Steem stronger.
This post has been upvoted/supported by Team 5 via @httr4life. Our team supports content that adds to the community.