The Maker Challenge: Wicking Beds (Water Saving Garden Beds, Perfect for Water Wise Vegetable Growing)
The Maker Challenge is a series of challenges presented by the Meadows & Makers podcast - such a fabulous idea! This week's challenge asks Steemians to show their making of a hydroponic or aquaponic set up, and you can find the challenge here. I love a practical project challenge, as we're project people, and this one couldn't have come at a better time as we do the finishing touches on our wicking beds. I asked @jackdub whether they count, as they use water creatively and innovatively to grow stuff (in our cases, herbs and vegetables) and he agreed they ABSOLUTELY count, so, yay! I know some of you have been eagerly awaiting this post regardless of it being a contest entry, so I do hope you enjoy it.
A little while ago I posted here about our concerns about a dry summer and possible drought, and for the last few months, I've been researching wicking beds as a way to manage water better. They're designed to prevent evaporation and the water in the reservoir below 'wicks', or draws up via capillary action', to the soil above. They've been used in desert environments with much success, and are perfect for a section of our garden where the grape vine and a gum tree suck the nutrients from the soil.
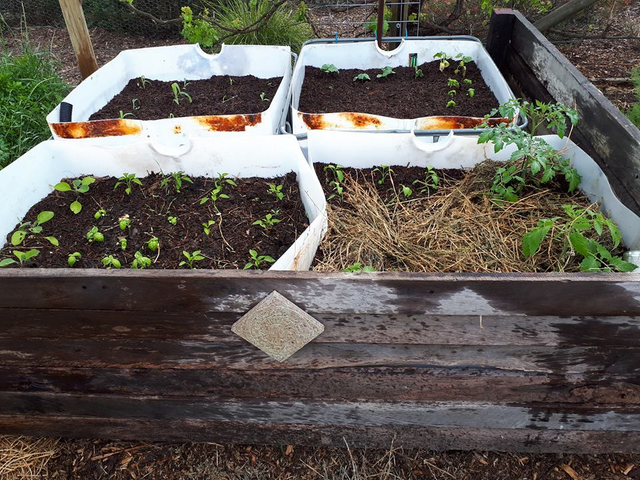
Here you can see the finished product - 2 food grade IBC containers, cut in half, surrounded by some old red gum to hide the ugly plastic from the house. I'll run through a step by step of how we made them below, and include a video 'run through' of what everything's looking like one week on. My husband is hoping we now have 'enough' wicking beds, but with 5 acres to fill, he has another thing coming!
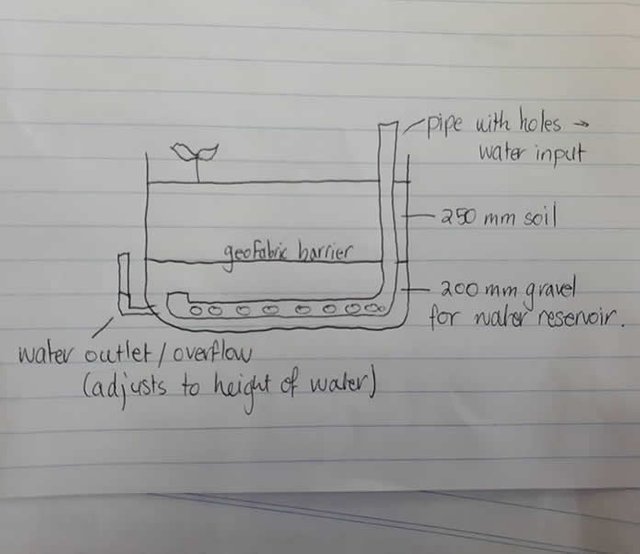
Here is a rough sketch of the set up:
Step 1: Cut the Bulk Containers in half
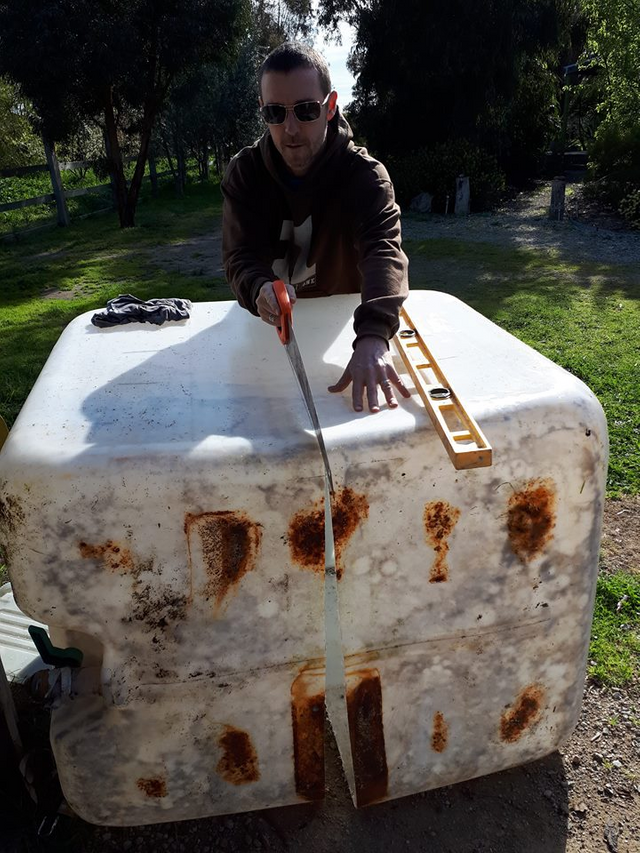
Alternatively, find a suitable vessel. It'll need to be about 400 - 500 mm deep - 200 for the reservoir, and 200 - 300 mm for soil. No more soil than that as it just won't 'wick' that high. With the IBC's, we sandpapered the edges as the saw cut them quite rough.
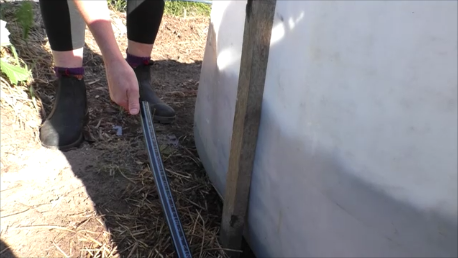
Step 2: Tank Fitting
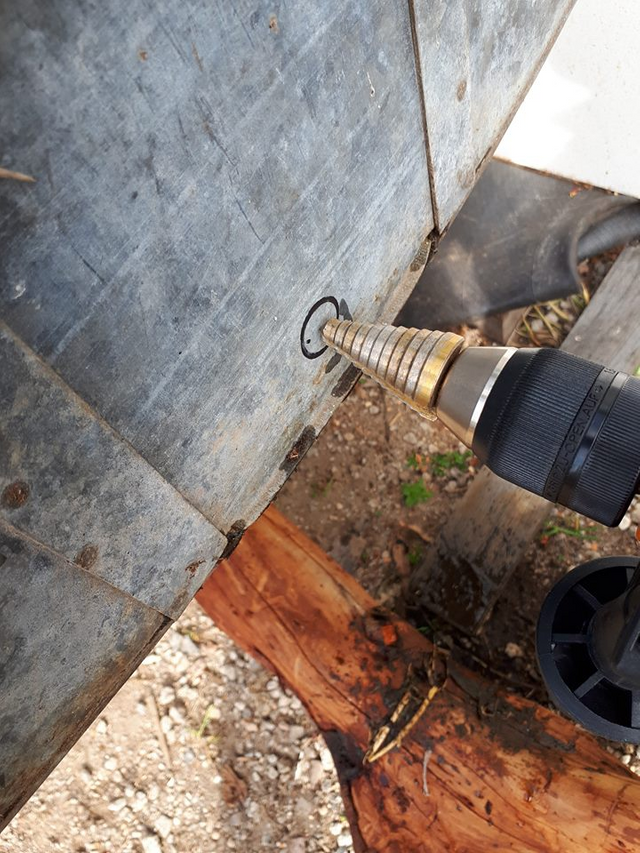
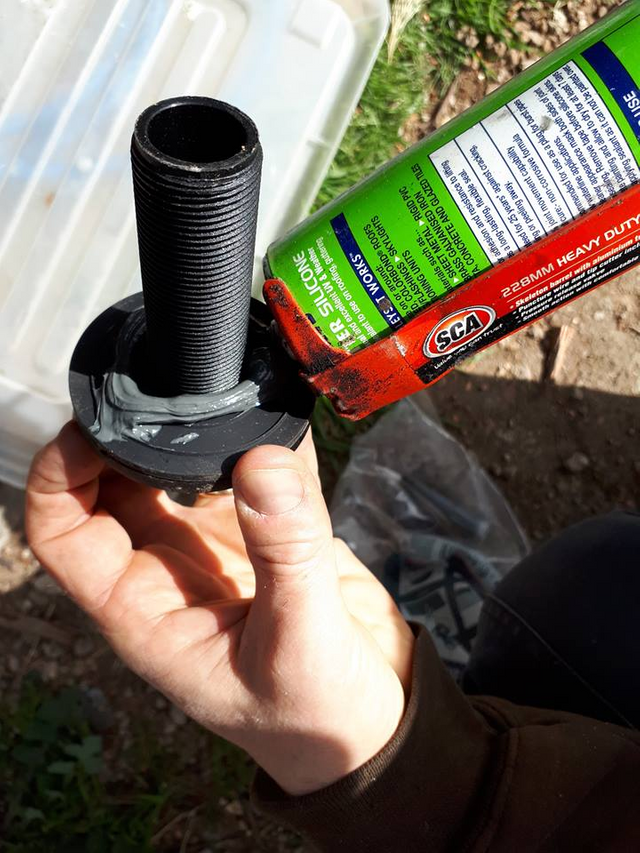
Our tank fittings are quite fancy, and to be honest, quite pricey. I do imagine you can make a water outlet at the 200 mm mark simply using a pipe at that level. However, the benefit of using the tank fitting is that I can place it quite low, and use a longer pipe to adjust the water height, thereby having the ability to drain the tank completely. Here, we use 25mm tank fittings which are siliconed in place and then left to dry.
The photo on the left shows us drilling into an old trough for my strawberry wicking bed, as I didn't take a photo of us drilling through the IBC! The photo on the right is the tank fitting being prepped with silicon.
Step 3: Water Pipe
Anything will do here - white agricultural pipe with an elbow and holes drilled in will work just fine. We had this pipe lying around, so simply drilled holes in it. Hold this in place with bricks so the gravel doesn't displace it. One end of the pipe comes out and up above the level of the soil - this is where you will pour the water from a hose, so you'll also need a tin or covering of some description to stop the mosquitos entering and breeding in the reservoir.
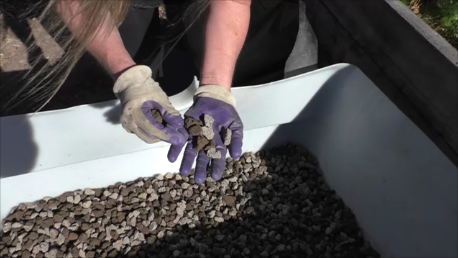
Step 4: Gravel
We had some plumbing screenings left over from another job, so we used those. The water will settle in the gaps between them. I've read that others use sand, or wood bark, although I imagine wood bark would eventually decay. Each half IBC used about 2 - 3 wheelbarrows worth - hard and heavy work on a hot day, but I'd got new boots so I was a little stronger than usual.
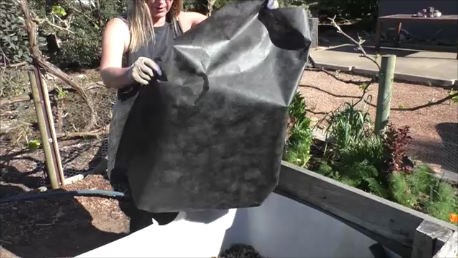
Step 5: Geo-fabric
There needs to be a barrier between the gravel/water reservoir and the soil, to stop the soil falling into the reservoir. We had a roll of permeable weed matting, but you can use shadecloth or other fabric too.
Step 6: Soil
I had enough compost to fill two IBC's, but had to order in some more mushroom compost for the other two. Packed down, it's about 4 wheelbarrows per IBC. Each have about 250 mm of soil in them - any more and the water won't 'wick'.
Step 7: Extra pipe, and watering
I cut extra pipe so we can adjust the height of the water in the reservoir, as pictured, and filled them up til the water overflowed from said pipe. If planting straight away, note that it takes a couple of days for the water to wick, so you'll need to water the plants in to begin with. After that, you won't water for days in the hotter weather, weeks in the cooler weather!
I have done a control planting where we planted aubergines (eggplants) in compost outside of the wicking system, and the ones in the system are doing much better. I have selected smaller or dwarf varieties to go in the beds (yet still chosen for their high yield) so I can fit more in, and I'm presuming because they have a constant water supply, I can plant them a little closer together, especially since they are in such nutrient dense soil. I planted lebanese cucumbers at the back so they can climb up, saving more space, and pumpkins in the corner so they'll trail up and out of the beds and onto the garden.
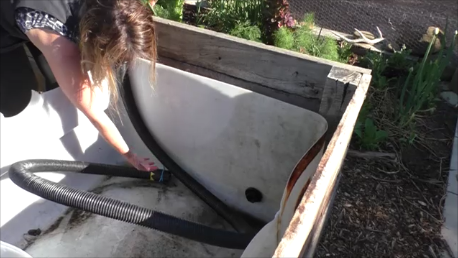
Video Update on the Wicking Beds: One Week On
Whilst I didn't video the construction of last week's IBC wicking beds (we didn't know about @jackdub's challenge!) I did a video walkthrough of the set up and what's happening one week on. The strawberry bed wicking trough has been in for about 3 weeks now - you can see strawberries, whereas the strawberries in the ordinary bed aren't yet fruiting.
This was great, you really described it well and having the video to see how well everything has progressed was really nice. I also loved getting to hear your voice. It gets so dry here in the summer, I'd love to try these next year, I image I will have more energy then too to take on this project. Great job you two xxx
Ah they would be PERFECT for Spain! You can do them in tubs or buckets and can make them pretty simply too..
Posted using Partiko Android
Awesome post, thanks for the entry :) I havent seen this type of setup put together before, excellent instructional. Great news too, the top 4 posts now receive 10 steem each - to be announced saturday :)
Wow that is an amazing reward. Fingers crossed. I am glad you enjoyed it bubba I am really excited about it stuff I finished my bath one yesterday too so I will post on that later in the week as well. It is going to help my Vietnamese mint survive the summer as it never seems to get enough water. If I can I will go and fill my friends Aquaponics setup as they took all our stuff when we gave it away and actually created a better set up anyway. Not sure when I will get a chance maybe after the weekend
Posted using Partiko Android
Great concept and sustainable creativity
Thanks
Posted using Partiko Android
I LOVE the way you take water usage so seriously. I think it's gonna be a dry summer down-under and I love the way you have illustrated this, step by step, so others can follow your lead. AWESOME job!!!
Thanks!
Posted using Partiko Android
@artemislives is right... I'm going to be able to make something like it. We had a very wet summer and usually around here it's kind of drought like the year after!
Thanks again
wow! So impressive! I think this is such a smart idea - and I loved your video! I think we'll try it as well, you've convinced me. Drought was a big problem for me last year.
Awesome!! You'll get to see how mine do over summer so you can make up your mind.
Posted using Partiko Android
I love aquaponics. Studied it for years but sadly living off-grid and virtually no power in the winter, well, aquaponics will not happen for me. Even with cold water fish, it has not worked to provide thermal heat enough to keep things warm. I have ways to heat the water but just too much work.Also in the winter virtually no sun so plants do not thrive well. then, of course, there is the issue of power for pumps. With that said I am looking forward to seeing what people share.
These aren't quite aquaponics, and there's no power needed, so they are perfect for off grid.
Posted using Partiko Android
Nice idea can't have enough herbs :)
Too right!!!
Posted using Partiko Android
Just classic =)
oh hi, glad you enjoyed it - I think?
@riverflows I love this idea! My husband will be on board but I'm not so sure about the aging parents. We finally convinced them to consider a mini hydroponic system. Do you find the veggies grow faster, like aquaponics do? Maybe we can build a very experimental one. I like that it is suitable for drought conditions. Great post!
Well, we are doing this as an experiment so I'll let you know. I think the strawberries have grown faster!
Posted using Partiko Android
Awesome! Pls holler when you need a hand in harvesting😍😍 How do you cook those eggplants?
Baked with kasoundi is sublime!!!
Posted using Partiko Android
Sure sure but will google kasoundi first😂🤣
Eggplants are versatile..so many dishes that can be cooked from it.