HOW TO MAKE: Raised garden bed WITHOUT NAILS / Japanese style
Hello,
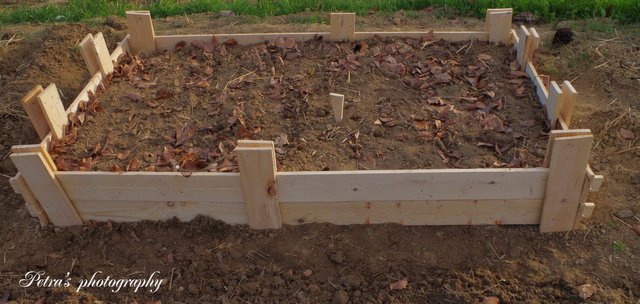
today I want to show You how we made raised bed in our garden: Japanese style (without using pins or nails).
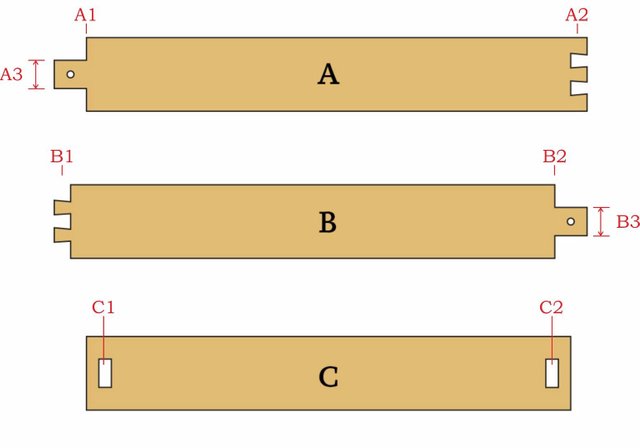
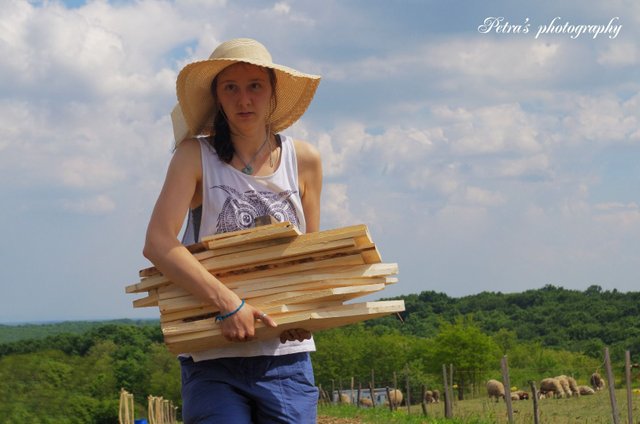
First we need to saw the planks for the construction. I made a sketch for you to make the understanding of this whole process easier.
Ok, so this raised garden bed is made out of two ''floors''.
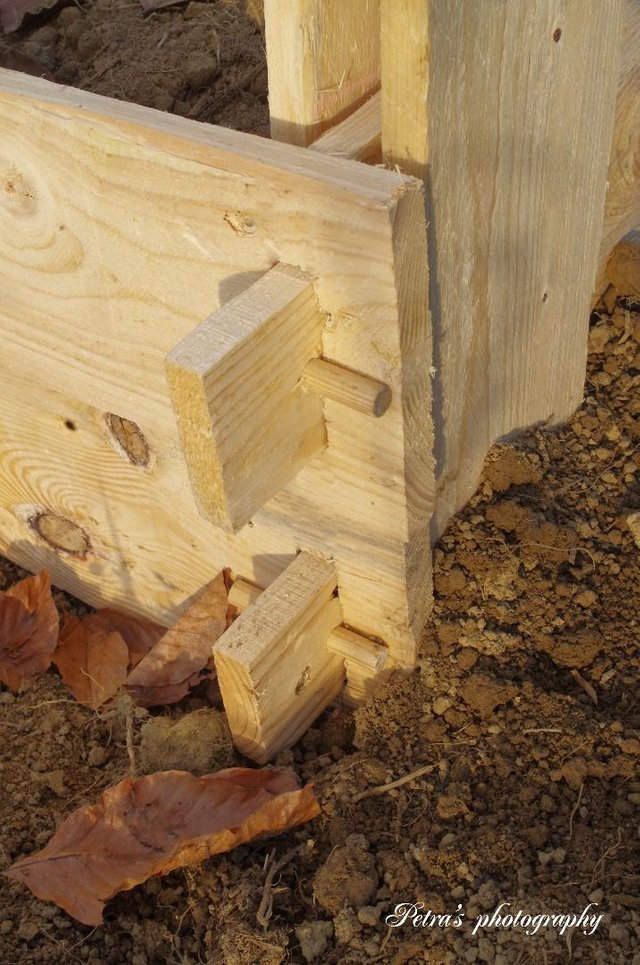
For one ''floor'' we need two of an ''A'' planks, two of ''B'' and two of ''C'' planks. The height of planks is optional but all of them should be the same height.
On the ''A'' and ''B'' planks we need to drill small holes at the ends (as shown above in the sketch) because these are the places where we will put rounded wooden wedge to hold the construction together. The diameter of the holes should be the same as the rounded wooden wedges that you have. Note that the distance from the hole to the ''A1'' or from the ''B2'' to the hole is the same as the thickness of the planks.
The rectangular holes (C1&C2) are high as A3 and B3 which are also the same height. Rectangular holes are wide as much as the planks are thick.
''A'' and ''B'' planks are meant to be combined (A2+B1) and they are in this case front and back side of the bed. ''C'' planks are lateral sides of the beds.
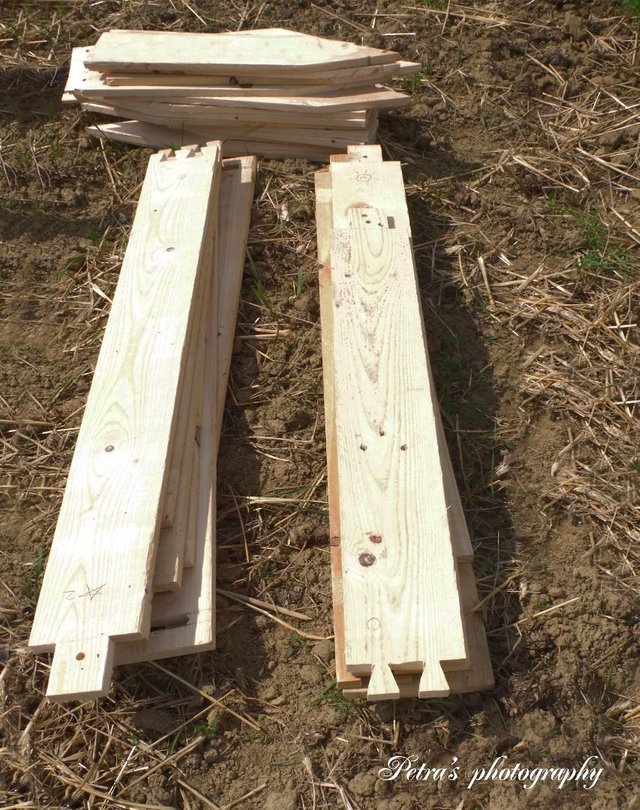
For this garden bed we made two ''floors'' so the total of planks for this construction was 4xA, 4xB and 4xC. We made the 20 pieces of the big wedges to make sure the floors will be stable.
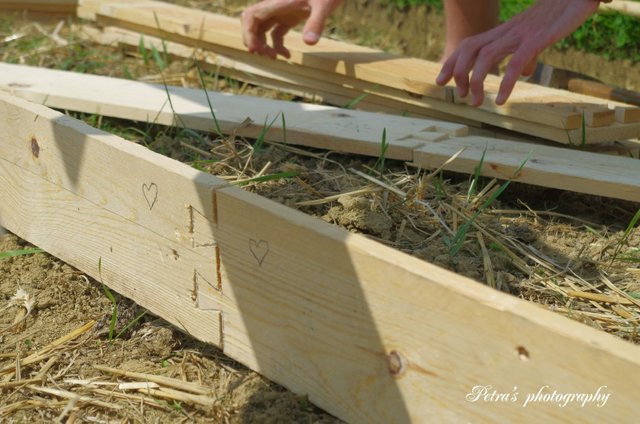
Next step is to put the pieces of the puzzle together! We made little symbols on the inside of the planks which made this job easier and fun :)

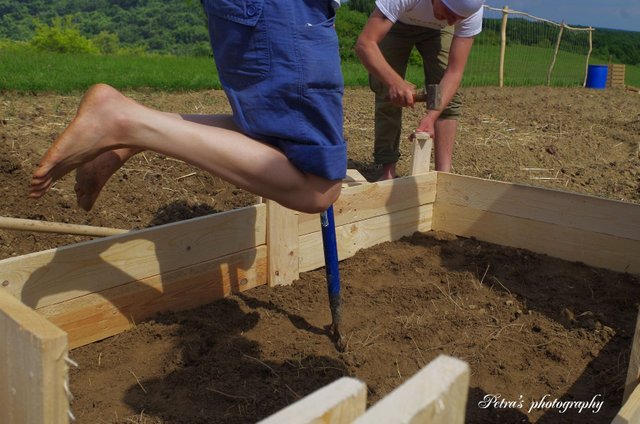
Our raised bed is taking it's shape, we have put it on the desired position in a garden. It was a beautiful spring day, it was really really warm and the soil started to warm up so we were able to walk barefoot. I love that feeling when my feet are connected directly with Mother Earth!
Next step was to drive in the wedges: big ones (see the photo above) and small rounded ones (see the photo bellow).
While my friends did that, I was ventilated the soil with special garden forks :)
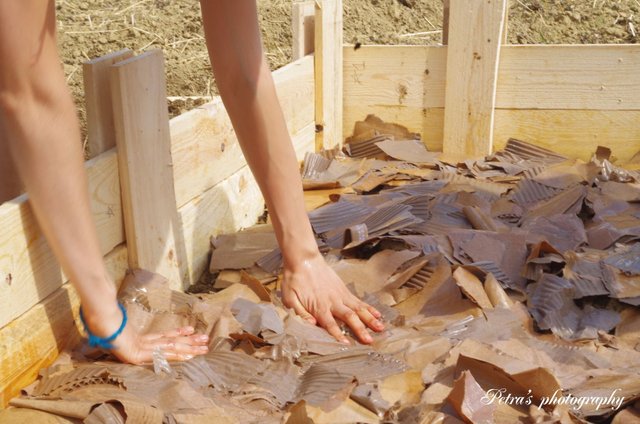
Now we are ready to prepare this garden bed for the season.
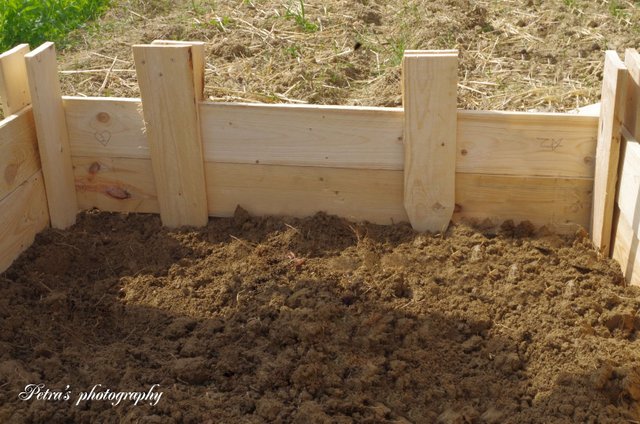
First, we put the pre-soaked cardboard thorn into pieces on the bottom of the bed.
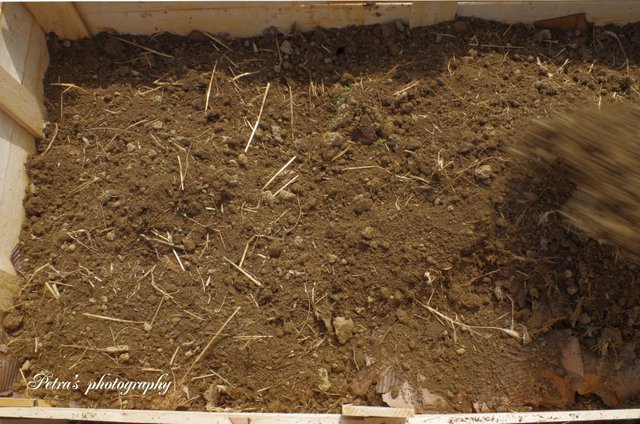
Next we put in the soil (regular soil that you have in your garden) and composted soil (or if you have, humus is great too).
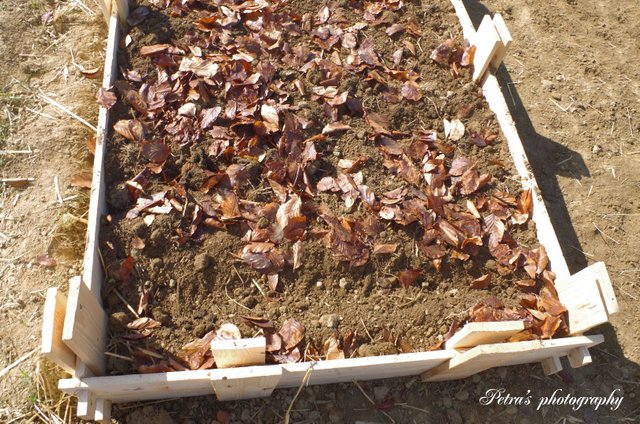
We put the leaves on the top (it's called mulching) and you can also do that with the straw or hay too. It's desirable in gardening because it maintains soil moisture.
Now we are ready for sowing. Last season we saw carrots and onions because they protect each other from parasites. We made small rows, planted the seeds, covered it with soil (carrot seeds go about 1-2 cm deep and onions 3-4 cm) and watered them.
Now our raised bed is done! We are waiting for the seeds to start the germination.
Last season not only carrots and onions grew big in this bed. It seems like the compost that put in the bad had some cucumber seeds. We left them grow :)
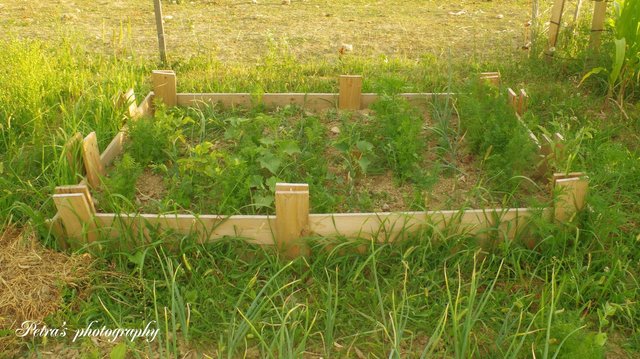
On these images You can see how the plants grew beautifully!

I hope You enjoyed the post!
If You have any questions, feel free to ask!
Follow me up for more gardening stories...
Much love,
@oceansoul13
Hello @oceansoul13,
Congratulations! Your post has been chosen by the communities of SteemTrail as one of our top picks today.
Also, as a selection for being a top pick today, you have been awarded a TRAIL token for your participation on our innovative platform...STEEM.
Please visit SteemTrail to get instructions on how to claim your TRAIL token today.
If you wish to not receive comments from SteemTrail, please reply with "Stop" to opt out.
Happy TRAIL!

Thank You!
Thank you for following and upvoting @gardening-trail
Read our guidelines here. Join us In the Gardening-Trail and let's discuss Gardening Related Topics
Thank You!
Nice work :)
Thanks! :)
Nice, upvoted and followed! thank you
Thank You!
That is like a 3-dimensional puzzle, alright. I like it because the entire thing can be returned to the soil, eventually. This would be especially great for locally milled wood, too. Or re-used wood. Happy gardening in your raised beds this coming season!
Yes exactly! A 3D puzzle made by yourself! How fun is that :) That's exactly why I didn't want to use nails...this is totally organic and degradable :) Thank You, the preparations for this season are starting soon....I'm so excited :)
I really like seeing things degrade back into soil. Wood is such a good soil builder, even though it takes awhile. Happy gardening!
great! follow you))
Thank You dear @aksinya !