Let us tinker #1 Raspberry Pi as Mega – Retro - Console / RecalBox / RetroPie [English]
You may have heard of it ...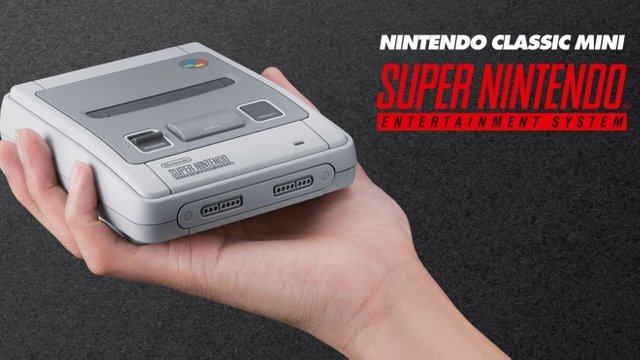
... just forget about the little one from Nintendo if you do not want it for your collection and have a look at this really little WONDERMACHINE here, a way better choice :D
Raspberry Pi (3)
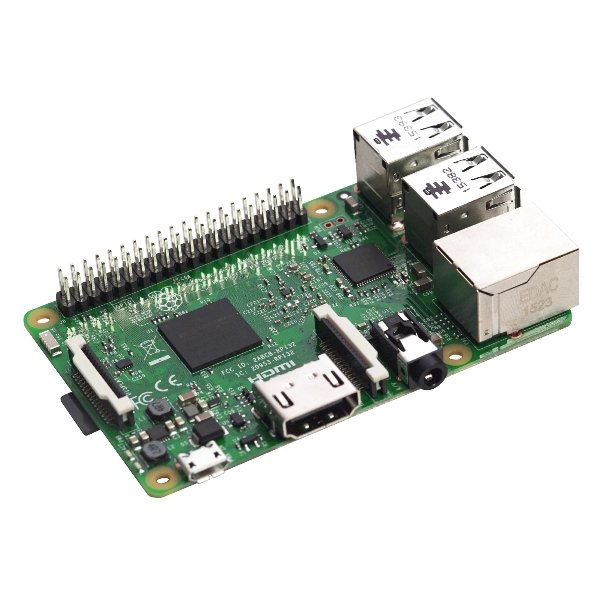
(Size = about a pack of Zigarettes)
The Raspberry Pi offers countless possibilities, one of them is to turn it into a
MEGA-RETRO-CONSOLE
I'll tell you more about how this is done in this post.
What do we need?
Essential Stuff:
Raspberry Pi
20-35€ (1-3 or the Zero version, best choice would be the RasPi3 because it has onboard (onboard = directly on the board integrated) WLAN+Bluetooth , the RasPi 1 or the Zero do have enough power to handle all the systems, but they are slower and they need a extra Wlan-Stick/Cable Connection, also Bluetooth is not onboard in the older versions – so if you should want to buy a RasPi for this purpose, take the RasPi3 ;) )
Power Supply
7-12€ (3A-3,5A, instead the "normally recommended 2,5A" for enough energy supply for the device (only @ RasPi 2+3!))
SD or MicroSD – Card (depending on your RaspberryPi Version!)
5-20€, depending on the size or more like the plans you have in your mind ;)
HDMI Cabele
1-x€, should be no questions here^^
Useful accessories:
Controllers are of course very welcome here and you have the free choice, from cheap USB controllers to the current console controllers, even original PS2 / SNES / etc. controllers can be used via USB adapter, out of the box (without driver installation or similar, plug in - running!);)). My personal favorite is the XboX360 Controller (wireless) in combination with the Wireless Reciever, use this combi also on my computer and have therefore also selected the following items for my setup:
XboX 360 Wireless Reciever
10-15€ try to get the original one for better quality ;)
XboX 360 Wireless Controller
10-30€ (bad condition / preowned - new)
AA-Akku-Batteries and a Charger
About 20€ for 4pcs (good, long living ones) and the charger, cheaper for you on time, better for nature ;)
Case
5-25€, depending on quality, equipment / special model/version (we will get back on this later ;) )
Heatsink
0,70-1,50€ or make them yourselfe ;)
Fan (NOISE!)(not necceserry, but possible, cooling is always good^^)
1-2€
So far tot he equipment / hardware.
Now of course the
Operating System
is missing.
Here we have two choices
Retro-Pie (www.retropie.org.uk) KODI MEDIA CENTER IS ALREADY INCLUDED!
and
Recalbox (www.recalbox.com) KODI MEDIA CENTER IS ALREADY INCLUDED!
I finally decided to use recalbox after some tests / comparisons, because the system brings a higher basic compatibility (accessories / hardware / better update function, etc., at least at the time of my tests) and i simply liked it better.
However, you can choose on your own, the following steps remain nearly the same!
If you have decided on a system, download the required image file for your hardware:
#1 RecalBox https://www.recalbox.com/
Download: https://www.recalbox.com/diyrecalbox
(INCLUDING DETAILED INSTALLATION TUTORIAL, DEAD EASY
!)
https://github.com/recalbox/recalbox-os/wiki/Home-%28EN%29 (Should actually leave no questions open, if so, just ask for answeres in the comments below or watch the video down there ;) )
#2 RetroPie https://retropie.org.uk/
Download: https://retropie.org.uk/download/#Pre-made_images_for_the_Raspberry_Pi
(Also a detailed tutorial for installing RetroPi: https://retropie.org.uk/docs/First-Installation/ )
Which systems are supported?
Currently, emulators are supported for the following systems:
Arcade
Arcade Classic
NES (Nintendo Entertainment System)
FDS (Famicom Disk System)
SNES (Super Nintendo Entertainment System)
Nintendo 64
Game Boy
Game Boy Color
Game Boy Advance
Nintendo Game and Watch
Nintendo Virtual Boy
Play Station 1
Atari 2600
Atari 7800
Atari ST
Atari Lynx
NEC PC Engine (TurboGrafx 16)
NEC Supergrafx
Sega Master System
Sega Megadrive (Genesis)
Sega SG1000
Sega 32x
Sega CD
Sega Game Gear
MSX 1
MSX 2
MSX 2+
ScummVM
PRBOOM
Vectrex
Wonderswan Color
NeoGeo Pocket Color
NeoGeo/NeoGeo CD
Philips Odyssey 2 Videopac
Amstrad CPC
Sinclair ZX81
Sinclair ZX Spectrum
Moonlight
Everything is running smoothly, only games such as Conker's Bad Fur Day (N64) are unfortunately a problem (does not run smoothly, but notorious for it). Also old computer systems such as e.g. Atari-ST or DOS via ScummVM are supported, so it is also possible to play the old Point and Click Adventures like e.g. Monkey Island 1-3 with your RecalBox :)
Installation
With RecalBox the installation really works simple and fast, download, unpack, copy the files to the root of your SD card (Root = directly, without subfolder on the SD card as it was unpacked;) ). SD card in the RasPi and power it up, then the whole process takes a while and the system is established.
NEARLY DONE ;D!
Afterwards, you only have to pay attention to a few, but VERY important little things, you need the "Bios-Files" for some systems like the Playstation 1 for example and at ScummVM there is also something important to note!
You can get the required BIOS-files
here: https://www.file-upload.net/download-12633240/BiosFilesRacalbox.rar.html Complete, correctly named and virus free.
Or for example here: https://www.emuparadise.me/biosfiles/bios.html (or just google for it)
(In case you took the second option the files have to be renamed and tested (see wiki), but also no giant act, the files in the upload can be inserted directly, remains left to you on how you want to handle it.)
As said, there is also something to note with
ScummVM
Your game files, e.g. for Monkey Island 1 MUST be stored in a certain main folder that carries a certain name!
Here ist he List: https://www.scummvm.org/compatibility/?lang=en (the „Game Short Name“!), So the main folder you put your files for Monkey Island 1 into must be called "monkey", that’s it about ScummVM;)
Adding Games
What is still to be considered with the RecalBox is the following: You do not copy the games via USB or your SD card, you HAVE TO do this via network transmission, but is DEAD EASY and very comfortable, also a fast way to access your savegames or similar if needed so;)!
Out of the original Wiki:
If you configured the wifi or plugged an Ethernet cable on the recalbox, it shares files on your local network. On your computer, got to Network on Windows explorer, and select the recalbox :
If you don't see the recalbox in your network, try to type \RECALBOX in the explorer address bar. If it doesn't work, go in the recalbox menu, NETWORK SETTINGS and note the ip. Then type your ip in the explorer address bar, for example \192.168.1.30
You can access all recalbox shared folders :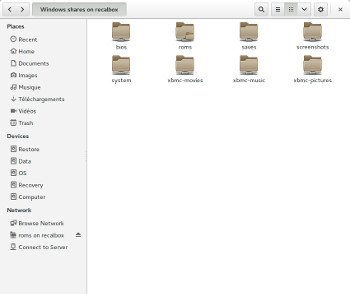
ALTERNATIVE:
You can open recalbox in your webbrowser at http://recalbox/ or http://recalbox.local/ or using the actual ip, for example http://192.168.1.30. There you can see the system status, configure recalbox and also upload ROMs and BIOS.
Depending on your recalbox installation you can also use the new user-friendly web-based manager 2.0 - https://www.recalbox.com/blog/en/post/blog-2017-03-06-manager2/
Just copy the files in the corresponding folder. You can use either .zip files or uncompressed roms. To refresh the game library, go to the Menu, then Games Settings then Update Games Lists
(https://github.com/recalbox/recalbox-os/wiki/Manual-%28EN%29#network (@ point VI))
(Don´t miss the Bios files and create the folders if you want to use ScummVM ;) )
This was all there is to be aware of when installing such a system :)!
HAPPY RETRO GAMING :)
Here some examples how your system could be looking after downloading the artworks and information files for your games (see wiki for detailes). If you have a huge collection this can take hours btw. ;). Not necessary, but looks beautiful :)
THIS IS INTERESTING FOR EVERYONE, not just gamers:
Why a Raspberry Pi and not any other device?
Simple:
Cheap, small / portabel, silent (if no fan was installed).
Maximum approx. 5 watts consumption with the mentioned setup with nearly 100% utilization (I bet nearly every of your light bulbs verbracht more current? ^ ^).
In addition, you do not just have your RecalBox at the end, one or two more SD cards in seconds change your RasPi into something completely different! SD card with other System (e.g. LibreElec installed (Kodi MediaCenter (EPIC!)) And bam, there is a full MediaCenter directly in front of your nose, which you can even control with the original remote control of your TV!
On the other card you install Raspbian for example and you will have a Linux Desktop PC in front of you (Easy to use for everyone!)
I had the Pi with a rechargeable battery already in the park, another friend his mobile beamer and again another a thick sheet and nails, so we had a spontaneous outdoor cinema in the park that also attracted strangers, clearly no ultraperfect Picture, but that was not the point here :D
And this is only a very small fraction of what can be done with this small computer ;)
If you need ROMs or Image-Files (Games):
or dozent other sites, just google: "ROM DOWNLOAD"
There are always very nice projects, here are a few examples of what some people are doing with their Pi and this system:

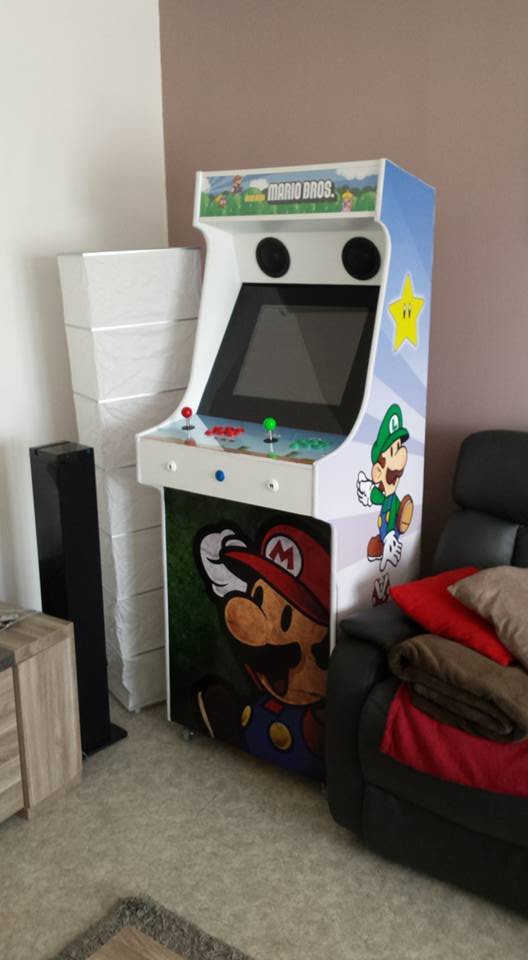
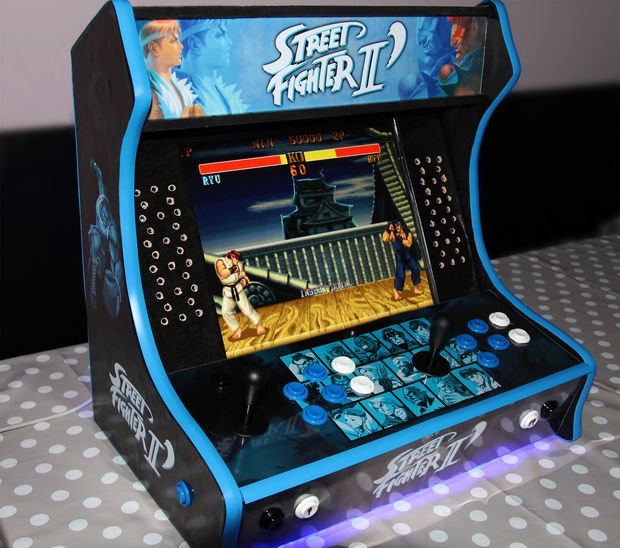
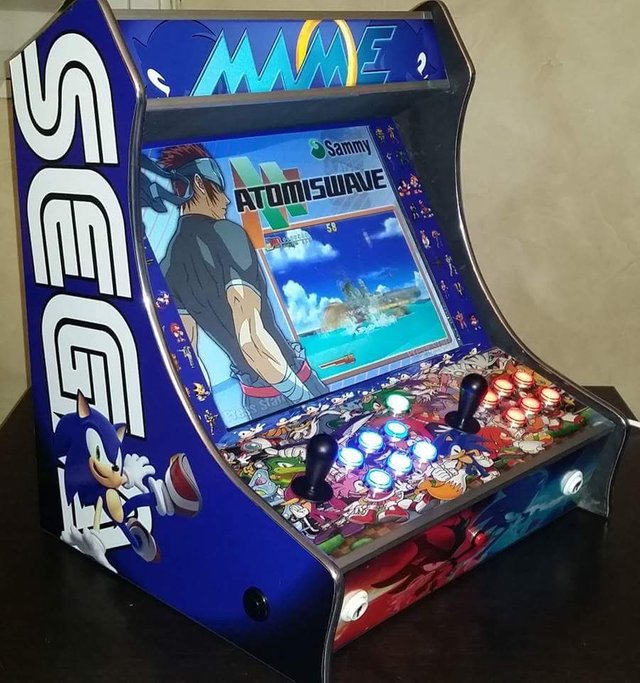
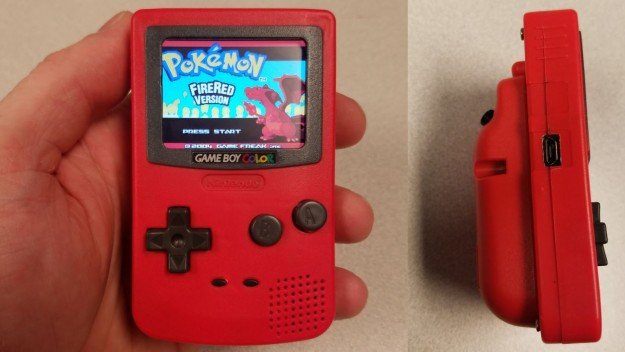

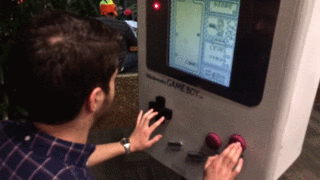
Just to give you some examples of the possibilitys :D
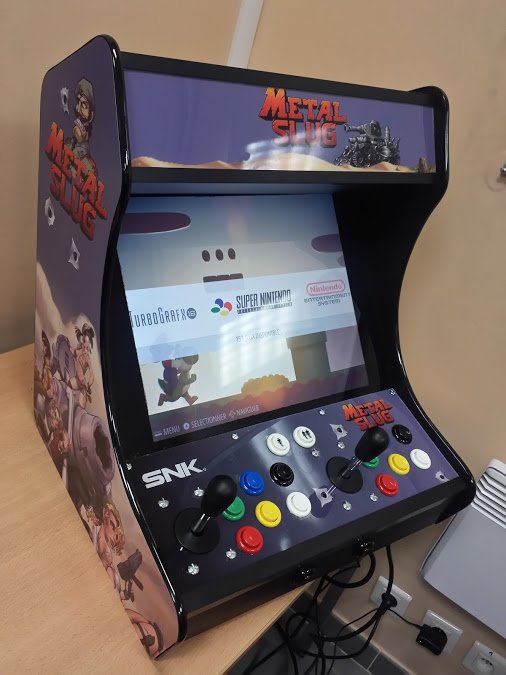
I also prommised something special about the cases:
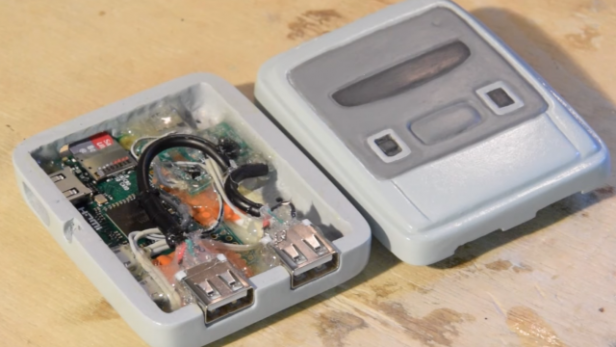
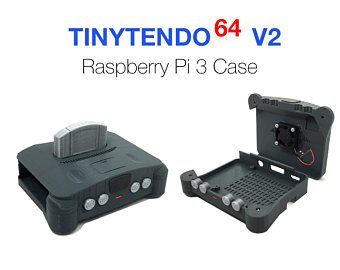
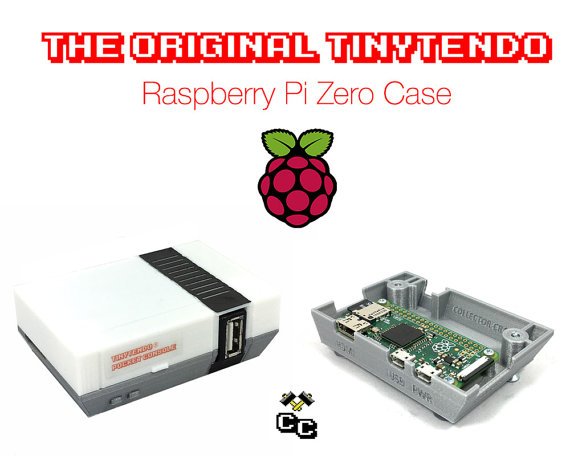
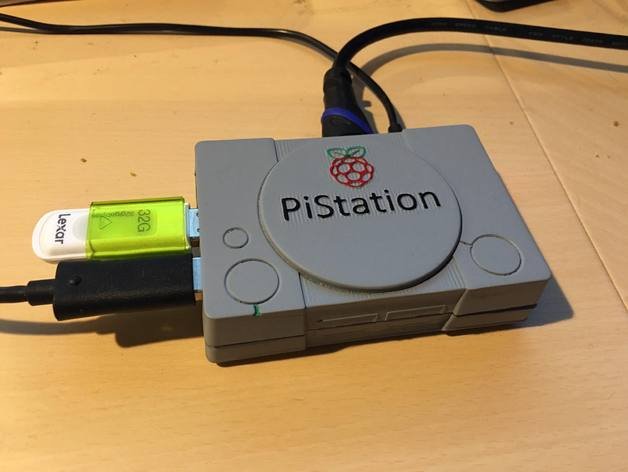
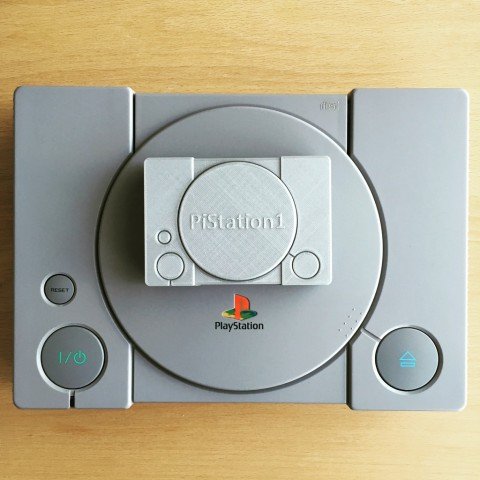
![]()
Picture source = Google.
VIDEO-TUTORIAL A-Z, EVERYONE CAN SET THIS UP!
This is a Video about a complete setup if you have any problems:
If there are any questions, feel free to leave them in the comments below or contact me @ https://steemit.chat (same name) ;)
I LOVE IT, using mine for years now :) Quickly packed if you go visit someone ;)
I know what to do with my Raspberry Pi now yess!
You will have lots of fun with it ;)
And it comes with a fully integrated media center if you get tired (also controllable with your gamepad) :D
Those cases are awesome! It would also be cool to empty out the insides of a system and mount the Pi inside of it. Maybe a cool project when I get a little more space =)
Ahhhw, you are awsome and you´re also killing me xD A 100% Upvote, Resteem and a Upgoat on top :)
THANKS! I have something in my mind for you ;D
And yes, the cases are also awsome xD
But i just picked a few pictures, the possibilities are nearly endless where to put the Pi into, have seen so many great things :)
Are you using https://steemit.chat ?
I have not gotten into steemit chat just yet. I just learned of it a few days ago but I will check it out tomorrow since I don't work.
And this is btw what i was talking about yesterday ;)^^
Good post. :)
Thank you :)
The language might not be perfect, but i think its understandable xD
@oregonpop got you a $2.01 @minnowbooster upgoat, nice! (Image: pixabay.com)
Want a boost? Click here to read more!