Giant Jenga
Intro: Two By Four Tower Yard Game

I do not claim to own any rights whatsoever to the "Jenga", "Ta-Ka-Radi", "Tumbling Tower", "Tail Gate", or "Game" for that matter. The author does not claim to own any rights to the above descriptors products are purely coincidental, And as the author, I do not own anything I hope this tribute game is taken as just a fun way to enjoy during a family outing. AKA please don't sue me.
We like to play outside and this is an inexpensive project to help facilitate more outdoor family time. That and I really could not see spending $70+ for a premade set on Craigslist.
Bill of materials
6 - 2"x4"x8' Premium Stud dimensional lumber. About $18
Can of Paste wax $6
0000 Steel Wool $2
Tools Required
Saw (Miter saw preferred but I have a circular saw)
Sander (bench sander preferred but I have a 1/4 sheet palm sander)
Tape measure
Square/Protractor
Something to mark the wood to be cut
Optional Router & bit to put a 1/4 round curve along the sawn edges
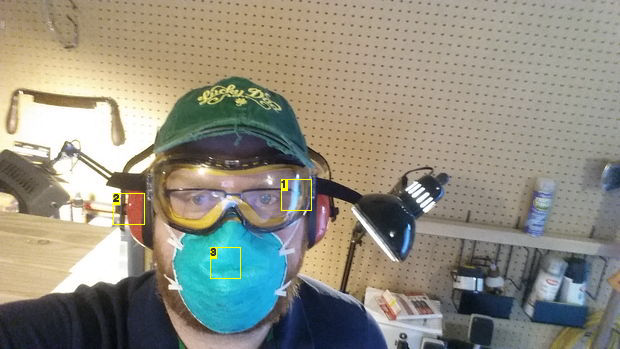
Safety Glasses
Hearing Protection
Dust Mask
The Miter Jig to make the blocks optional but speeds things up using a circular saw if making more than one set Use a miter or table saw.
1 - 2x4x18" piece for the base
2 - 2x4x6" for the saw guides
1 - 2x4x2" for the end stop
6 - 2.5" deck screws (and something to drive the screws)
To avoid infringing on the previously marketed games my version is made using standard 2"x4"s (1 1/2" x 3 1/5" x10 1/2" inch) studs. I cut them evenly to provide a tower consisting of 3 blocks layered in alternating directions. The rules for both games indicate 48-54 Blocks, Jenga is played with the blocks on the wide flats with no
gaps. Ta-Ka-Radi is played with the tower built on the narrow flats with gaps between blocks.
When buying your lumber find the length of the board in inches and divide by 10 1/2" The whole number will be the number of pieces obtained from that board. AKA a 8' length will result in 9 pieces or about 6 - 2"x4"x96" boards to make the 54 blocks
Game Play
Play is similar to Jenga "Jenga is played with 54 wooden blocks. Each block is three times as long as its width, and one fifth as thick as its length 1.5 × 2.5 × 7.5 cm (0.59 × 0.98 × 2.95 in). To set up the game, the initial tower which has eighteen levels of three blocks placed adjacent to each other along their long side and perpendicular to
the previous level (so, for example, if the blocks in the first level lie lengthwise north-south, the second level blocks will lie east-west). Once the tower is built, the person who built the tower gets the first move.
Moving in Jenga consists of taking one and only one block from any level (except the one below the incomplete top level) of the tower, and placing it on the topmost level to complete it. Only one hand should be used at a time when taking blocks from the tower. Blocks may be bumped to find a loose block that will not disturb the rest of the tower. Any block that is moved out of place must be returned to its original location before removing another block. The turn
ends when the next person to move touches the tower or after ten seconds, whichever occurs first. The game ends when the tower falls, or if any piece falls from the tower other than the piece being knocked out to move to the top. The winner is the last person to successfully remove and place a block."!
Step 1: Wood you like to see an epic fail?
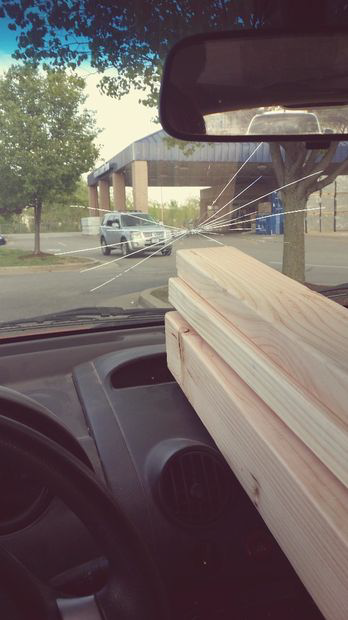
Go buy some wood, but make sure you take a small subcompact car to buy it. You don't need the truck for 5-6 2x4's. But don't do something foolish like breaking your windshield when you close the hatch of your car. Remember how I said this was to be an inexpensive family game? Yeah, mistakes happen when you are not paying close enough attention and 2x4's in a hatchback will work like a Newton's cradle. Close hatch, hatch
transmits force to 2x4, 2x4 transmits force to the windshield, windshield breaks.
There was a mobile glass guy that pulled in as I realized my error and gave me a quote so I got that going for me....
6 pieces of premium Kiln Dried 2"x4"x8' Studs $18 at Lowe's.....
Stupid mistake breaking the windshield of the car. $200 most mobile glass installers.
Embracing the Suck and submitting your foolish mistakes to the internet for all of eternity-- Priceless
Anywho make sure the 2"x4" studs you choose are straight along all 4 axes and that there are minimal flaws. I chose Kiln Dried Premium 2"x4" studs as they will have less of a tendency to warp and weigh a heck of a lot less than green wood.
I'll save you from any more puns on this step, on to the jig.
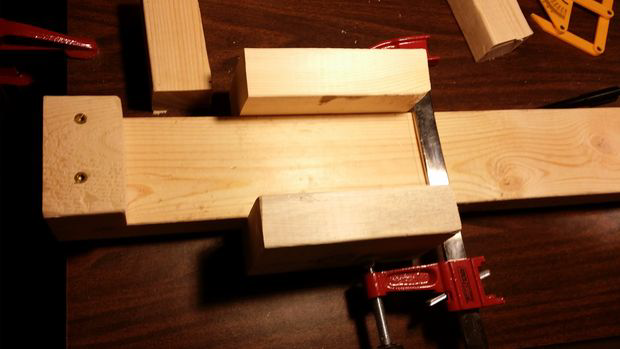
Step 2: Block Jig
If you have a compound miter saw you have it made. Just measure 10 1/2" from your saw blade clamp a block and get to chopping. I don't have a miter saw yet so the cordless circular saw will have to do. I figured that by making a Jig I could make short work out of the block making process while ensuring that they are all of a uniform
size and length.
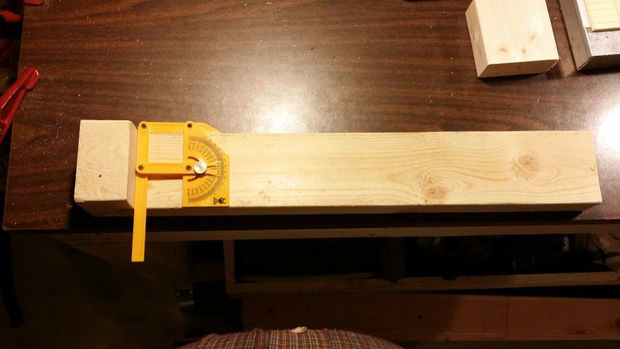
- From the scrap pile get a 2"x4" that is longer then 10 1/2" long I had a 16" length so that is what I used
- dig out a couple of square blocks and use your carpenter's protractor to ensure that everything is squared up.
- Screw an end block at right angles to the base of your jig.
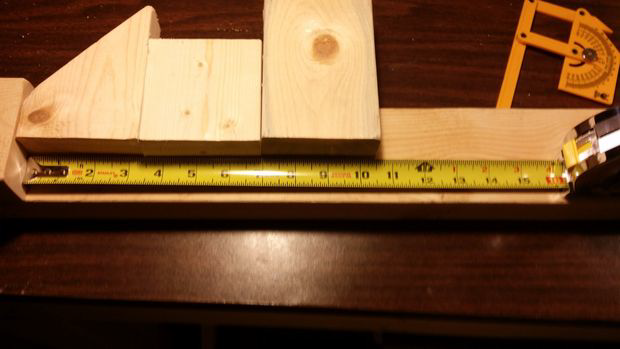
- Dig out 3 2"x4" scraps to ensure that the guestimate of 10 1/2" inches is the correct width of 3 2"x4"s
- Mark the line with your protractor
- Set the depth of your saw to 0 and make a parallel square line to take into account for the shoe of your saw.
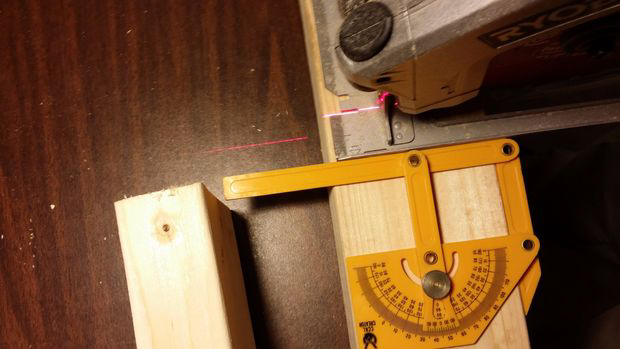
- Square up 2 blocks of wood to the sides butted against this second marking
- Clamp them in place then affix them with 2 1/4"screws.
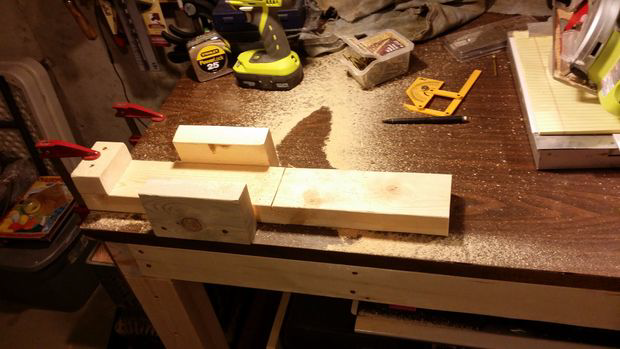
Step 3: Making the Blocks
I made the blocks by sliding in a full-length stud into the jig made in the previous step.
- Set the depth of your saw to 1 3/4" ( max on mine)
- Clamp the jig to the workbench
- Ensure the blade is square to the shoe (90*)
- Ensure that your adjustment knobs are Tight.
- Put in earplugs
- Put on safety goggles
- Load a 2x4" stud into the jig

- Plug in or insert your battery
- Line up your saw shoe to the guide blocks
- Cut your first block

- Measure it to ensure that it is 10 1/2" long and that all sides are square
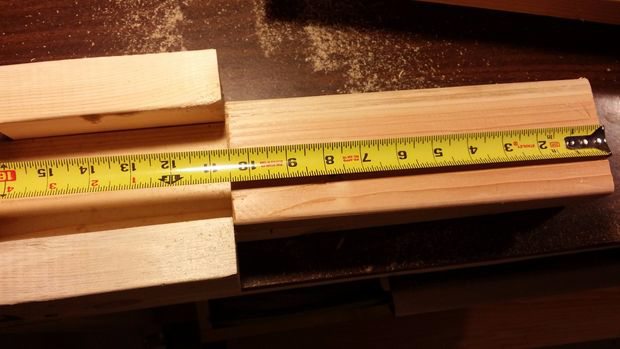
- If that block is within the desired specifications proceed to cut the other 53 blocks
With a jig this step went fairly quickly I think I had all 54 blocks cut in less than 15 minutes. I had a milk crate to the left of my jig and I placed the finished pieces in the crate until it was full then I stacked them on top.
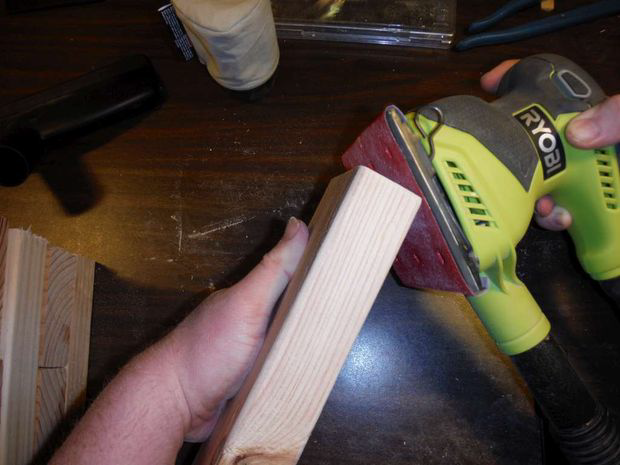
Step 4: Sanding Blocks.... sooo much sanding
Ok By this step you now have 54 rough sawn blocks. Time to get them smooth and ready to wax. If you have a table router you may want to quarter round all the edges for a nicer edge. I don't have a router table but I do have a 1/4 sheet palm sander. This part takes forever with a palm sander I want to say that I was sanding blocks for 5 hours the better the 2x4's the less sanding will be required.
- Sand all sides of each block until smooth
- While using the sander round the corners of the blocks to present a beveled edge.
- Stack blocks for the finish of your choice.
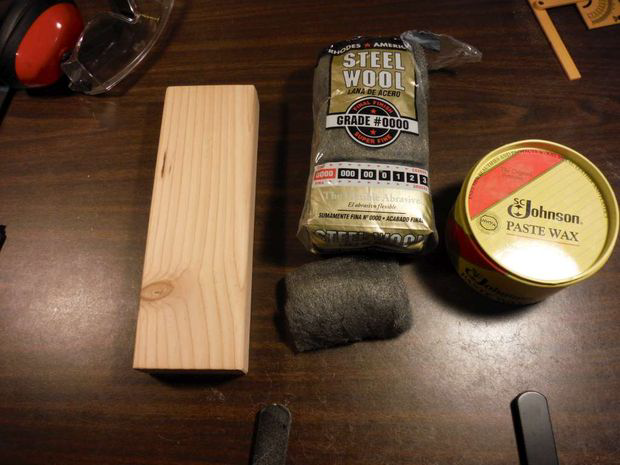
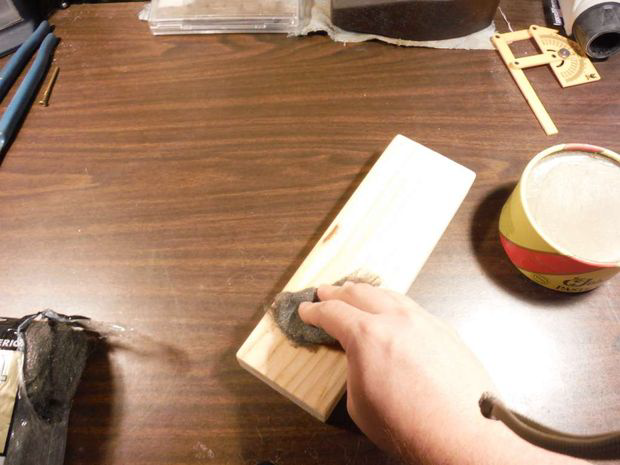
Step 5: Hand Rubbed Wax Finish
The Wax Finish will protect the blocks from moisture and also lubricate them so that they will be easier to slide out from the tower by reducing the friction between blocks. If you want to apply a stain or polyurethane instead this is the step to do so.
For wax, you are going to need
0000 steel wool
Paste Furniture Wax
Towel or buffing pad (not your moms or wifes good towels this will not be useable for company afterward.
- Load wax onto a pad of 0000 steel wool
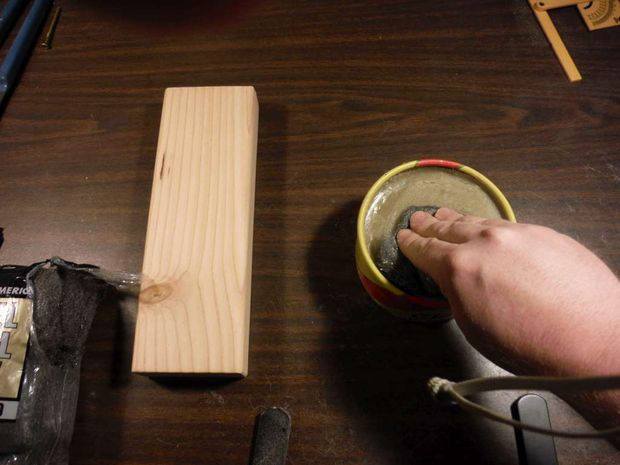
- Starting at the ends rub the steel wool with the grain about 5-6 times
- Without allowing the wax to dry
- buff the wax from the block with the towel
- Admire your handsome finish on block 1 and get back to it you have 53 more to do.
Step 6: Lessons Learned
- I really need a bench sander, Like WOAH if I plan on making more games and toys I need a less labor-intensive way to smooth wood. Good thing father's day is coming up Hint Hint.
- Never put anything on the dashboard of the car. Use the rope in the hatch and drive with it open and the windows down.
- Windshields break really easy when struck by a 2x4
- A compound miter saw would be nice to have but is not necessary if one can make a jig, Lower priority tool.
- If you wax wood, without gloves on your hands will repel water like a freshly waxed car.
- Buy the best materials possible it results in less work later.
- Sanding is cathartic if not time-consuming.
- Waxing blocks is cathartic if not time-consuming.
- I forgot how expensive windshields are.
- Dewalt Goggles fit around glasses and keep out dust. Unfortunately, my glasses will fog up in short order.
- I like the results of paste wax as much as I do boiled linseed and will use it more.
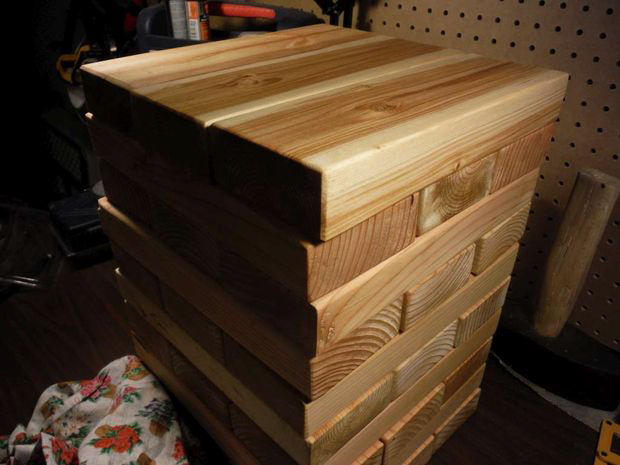
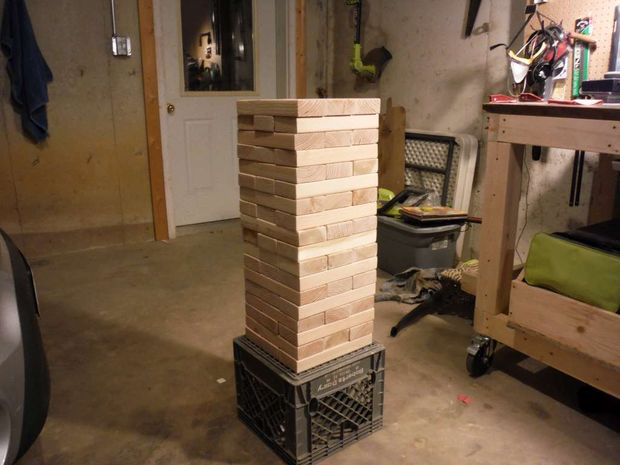
The end result looks good!
Thank you. I do reccommend not using the whole tower when playing with small children. 54 makes a pretty big avalanche of wooden blocks
Lol. That's a fair point.