Mini Stun Gun: My cheap DIY high voltage box
I used to have a cheap 15 kV stun gun that I used for high voltage experiments and low energy XRays. Unfortunately I broke it trying to take it apart, so I've been without a small supply for awhile (the big 20,000 and 35,000 Volt ones are little large and dangerous for some of the experiments I do). Today I decided to put together a new one using an Ebay high voltage module I had lying around, and share it here.
The end result is a little handheld high voltage supply that runs on 2 AA batteries (3 Volts total on supply). While, yes, it could be used as a stun gun for self defense, I don't intend to carry it around and only want it for some high voltage RF experiments I've been wanting to try.
In case you don't want to read the entire post, here's the end product:
Without further introduction, here's the second sketchiest looking thing I've ever built!
High Voltage: Ebay and the CW Multiplier
Okay, I'll admit I cheated a little bit: I used a pre-made high voltage module (around $2 on Ebay) that I had lying around as the voltage boosting portion of this circuit, having never gotten a chance to build it into a device this yet. These cheap, somewhat crappy modules claim to output 400 kV (400,000 Volts). This, like most stun-gun voltage claims, is a blatant lie. When using a 5 Volt supply, you can expect at most 10,000 volts (measured by me) from one of these. Since I am using only 3 volts for this device, I would expect a corresponding drop to 5-6 thousand volts on the output arc.
Unfortunately the modules are full of epoxy, and as such we can't look inside. That being said, having analyzed what they do I think I have a pretty good idea of what's inside.
The infamous Ebay high voltage module. Don't believe their voltage rating. Although I haven't had the misfortune of being shocked by one of these yet, I assume it would hurt but not be harmful.
Credit
The following is how I think the module works based on its operation.
At the input, 3 volts DC is provided by the battery pack. This is fed into an oscillator which converts it to a low voltage AC signal. This current is transferred to a transformer. By making the number of turns on the secondary (output) coil much greater than the number of turns on the input coil, the voltage on the output coil will rise dramatically (and the current will subsequently drop). Now, we have much, much higher voltage AC leaving the transformer.
But we want the voltage to arc across the gap, and for that we need at least a few thousand volts. For that, I have very strong reason to believe something called a Cockcroft-Walton multiplier is being used. The CW multiplier is a ladder of diodes and capacitors that can transform input alternating current into much higher voltage direct current.

This two-stage CW multiplier will quadruple the input voltage.
Credit
Used to drive the world's first proton accelerator, CW multipliers are extremely common in HV supplies (recognizing one is how I realized that an unlabeled device from the trash I was about to scrap was actually a decent 35,000 volt power supply that still worked). They are pretty cool since you can boost voltages without any coils: Just diodes and capacitors.
I'd like to stress that in this case, direct current just means no negative voltage. It does not mean that the output voltage is steady: Not at all, for in the CW multiplier the output will drop and rapidly recharge due to it being controlled by a capacitor. But, the output will not be AC: There will be no negative voltage component. Because of this, you can use a CW multiplier output for anything that needs DC, you just can't expect to continuously produce the maximum voltage all of the time.
Anyway, after the CW multiplier, the voltage is fed out of the module via the high voltage output wires, and an arc is produced across the air gap between the wires once the electric field grows strong enough. The reason that I am almost certain that there is a CW multiplier inside the module is because, like any good stun gun, the output arcs come in pulses: Every second, several dozen arcs go off, producing the characteristic "taser" crackling sound. For steady direct current high voltage supplies (like the 20kV flyback supply I made here), a more stable, quieter arc will form.
So in effect, the module is charging up a capacitor to a high voltage, on discharging it when the circuit shorts itself out via a plasma arc (which occurs when the electric field in the air exceeds a threshold value). This means that if you put the wires further apart, you will get a higher voltage. But you can't do this forever: Pull the wires too far apart, and no arc appears, because the arc is appearing inside the module. This can damage the module, so it's best to keep the wires close together and allow an arc to form.
How the device works
Now that we've covered how the module works, let's go over the rest of the device. I used the battery pack from my geiger counter because it's not currently working (I tried to add a standalone speaker, failed, and haven't gotten around to fixing it yet). You could use any 3 volt battery pack. For power, I used two dollar store AA batteries, which add in series to produce the needed 3 volts.
Two switches in series control the high voltage output: A flip switch and a push button, both salvaged from random junk last year. The flip switch is used as a safety precaution: When it is in the off position, you can't turn on the high voltage, preventing accidentally discharges. The push button simply powers on the high voltage, and if connected properly produces an arc on the output wires.
I also added an LED as another safety precaution. When the safety switch is turned ON (and the stun gun is ready to go), the LED glows bright red to indicate that the circuit is currently unsafe to handle. I added a 220 Ohm resistor in series with the LED to limit the current passing through it and extend battery/LED life.
And that's about it, it's a pretty simple device. Really it's just a platform for easily using the high voltage module. After soldering everything together and using way too much hot glue to secure all of the joints, it was finished.
Notice that the red light is on - this means that pressing the button, hidden under the tape, will fire the high voltage arc.
I think it will be quite useful for future experiments.
Of course, it wouldn't be a high voltage post without some arc pictures. The arcs are much fatter/higher power than the piezoelectric HV arcs I previously photographed, so the pictures aren't as clear. Like I said above, I expect the voltage to be somewhere around 5,000 volts (I can't find my gigaohm resistors to actually measure the voltage unfortunately).
Anyhow, here's some pictures of the arcs:
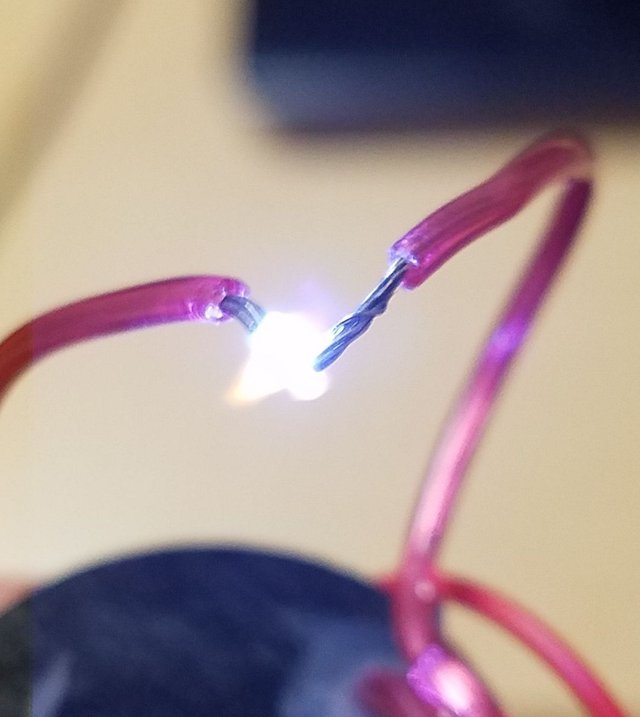
Since the arcs are being reproduced many times a second, this devices gets pretty noisy.
Possible Uses for this thing
Off the top of my head, here's some things you could use this for ... other than self-defense (I really don't recommend relying on this to protect yourself ...)
- Low-energy XRay production in a vacuum tube (this probably won't work due to the somewhat low voltage)
- Mini EMP that can kill dollar store calculators and reboot more advanced electronics
- Possible RF source
- Reproduce Hertz' experiment that discovered electromagnetic waves
- HV capacitor charging (DO NOT DO THIS YOURSELF, EXTREMELY DANGEROUS!)
- Ozone production (slightly useless but it does indeed do this by ionizing the air)
- Cutting paper (due to the frequency of the bursts, it won't burn anything, but it will cut tiny holes in paper or other thin materials when you fire the arc through it)
And more - if you can do it with high voltage, you can use this.
Slightly disclaimer: This probably isn't legal in some countries due to BS laws banning stun guns, even if you only ever use it as a HV supply. Know your local laws before reproducing this.
And that's it! I hope you were able to learn something new today. Let me know if you have any comments, questions or corrections. As mentioned, I plan to try to produce some detectable EM radiation with this and will report back if I have any success.

And yes, before anyone asks, I know that I made it hard to replace the batteries. Sadly this will require removing the tape, and was caused by a lack of foresight on my part. But, everything is fine for the time being.
If you plan to reproduce this, just be safe. This high voltage supply shouldn't cause permanent damage, but I really am not in a hurry to touch it and find out. Remember to add safety features (such as the secondary switch and indicator light) if you attempt to build this yourself.
Thanks for reading!
Images not credited are my own. You are welcome to use them with credit.
Additional Source:
Cockcroft-Walton/Greinacher Multiplier Wikipedia Entry
I've always loved electronics, although I don't understand a lot, even though I took an industrial electronics class back in the 1980's. Of course that was many, many years ago. I've forgotten much.
Thanks for your post.
excellent post about stun gun....thanks for sharing....
Great post @proteus-h ! Just to clarify from your description the ebay High Voltage module appears to perform the following functions (DC to AC) --> (Step Up Transformer) --> (CW Multiplier). Have I got that right?
Yup, that's it - with the implicit step of AC to DC at the end (this is a result of the CW multiplier). Unfortunately, since it's harder to measure high voltage Ebay sellers take this as cause to ridiculously inflate the voltage numbers (if you look up stun guns you'll see numbers like 15 megavolts, which is pretty much impossible).
Glad you enjoyed the post!
Hello @proteus-h
This post is really packed with information. I have learnt a lot. You did an awesome job.
Well done,
I'll be looking out for future posts to see if you were able to achieve your goals.