Ambient Conditions Monitor using a Raspberry Pi Zero W and Sense HAT
I’ve been looking for an excuse to use most of the capabilities of the Sense HAT on a project. I’ve used it before as an interactive/visual interface to run scripts on a Raspberry Pi 3, but that project was really underutilizing the board. The Sense HAT is part of the AstroPi project (the project that allowed UK schools to run experiments in space). It bundles an 8x8 color LED matrix, a mini joystick and a ton of sensors (barometric pressure, humidity, temperature, accelerometer, 3D Gyroscope and magnetometer).
Overview
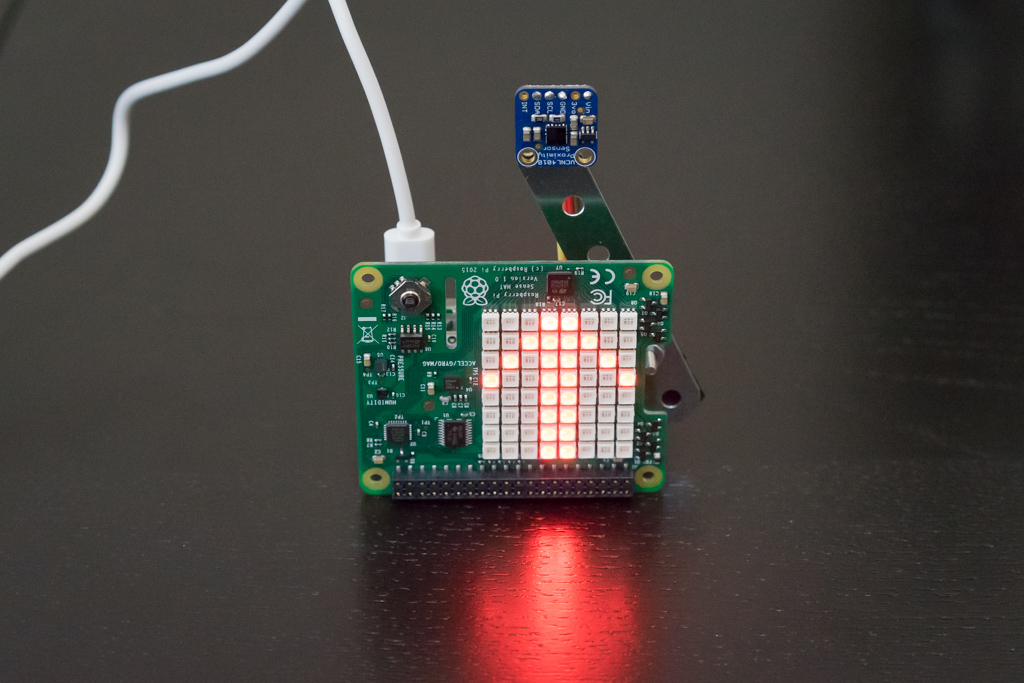
The intent of this project is to monitor temperature, humidity and barometric pressure using the Sense HAT and a Raspberry Pi Zero W. I wanted to provide a visual indication of the temperature trend and a general idea of how warm or cold it is. Also, I wanted to get details of the current conditions only if requested. This is what I came up with:
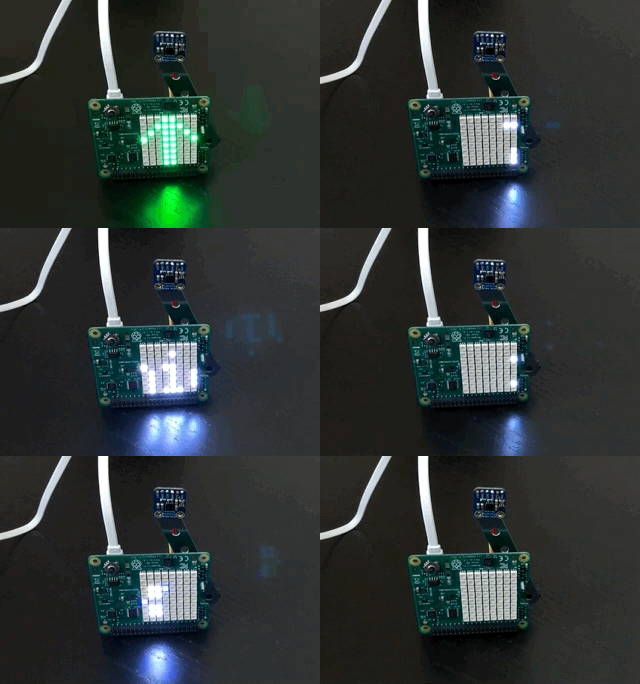
The LED Matrix shows an arrow representing how the temperature changed since the last update (2 minutes by default, but configurable in the code). If it went up, the arrow points upwards, if it decreased, it points downwards, and if it remained the same, it shows a “=“ symbol. Additionally, the arrow color changes depending on how warm or cold it is, showing blueish colors if temperature is below 60 F and reddish colors if it’s above 75 F (all these parameters are configurable in a Python script).
Hardware
Here is a complete list of the hardware used on this project. Most of the components can be found on either Amazon or Adafruit.
- Raspberry Pi Zero W.
- Sense HAT.
- Adafruit Pi Protector for Raspberry Pi Model Zero.
- Adafruit Perma Proto Bonnet Mini Kit.
- VCNL4010 Proximity/Light sensor.
- GPIO Stacking Header for Pi A+/B+/Pi 2/Pi 3 - Extra-long 2x20 Pins.
- Stainless steel strip for holding the proximity sensor. Any other strip or support will do as long at it keeps the proximity sensor accessible. If using metal screws/nuts, make sure they won’t short any connections on the board.
- Screws and nuts.
Assembly
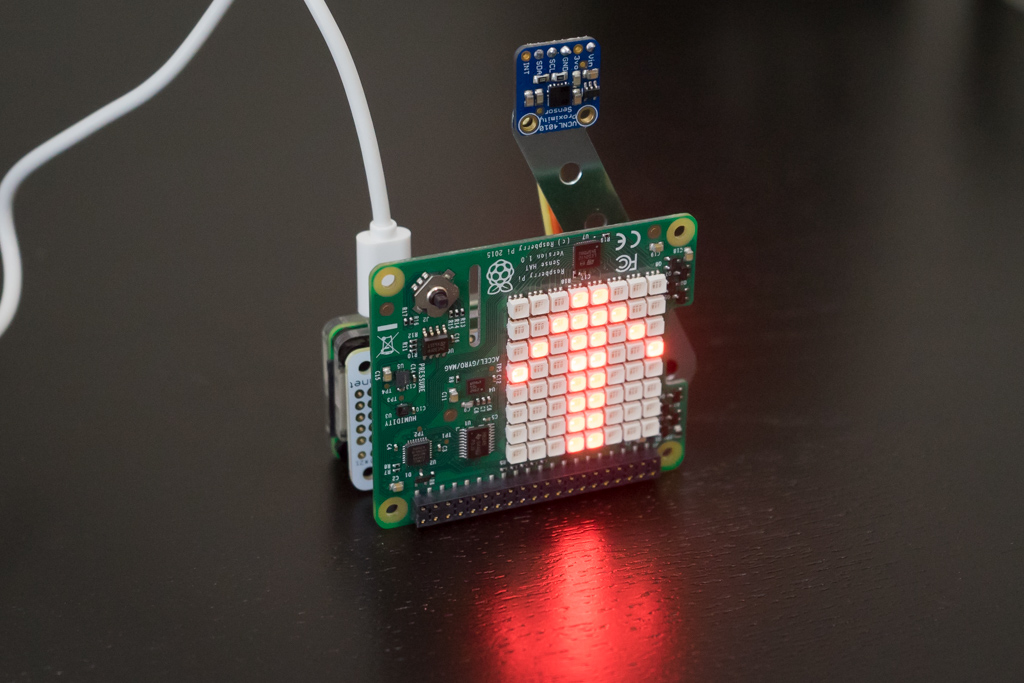
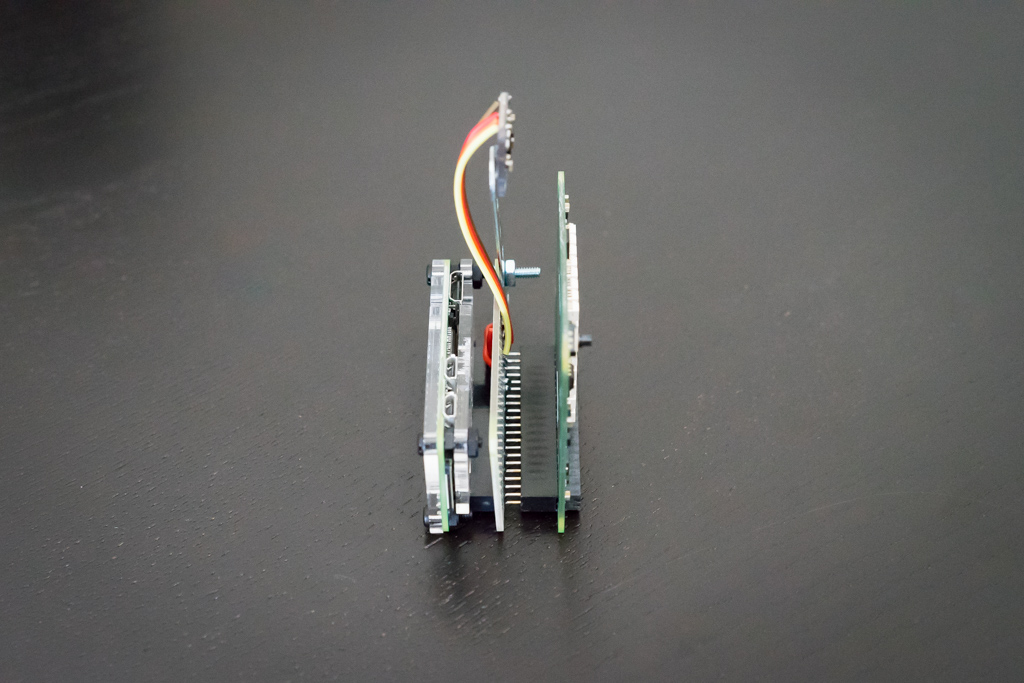
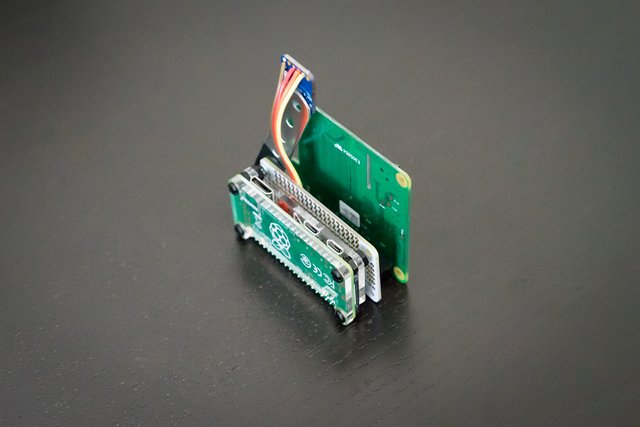
The setup is comprised of three main blocks: Raspberry Pi Zero W, the Perma Proto Bonnet holding the proximity sensor (and needed connections) and the Sense HAT.
The proximity sensor works over I2C, so it only needs 4 connections: power (5V), ground, SDA and SCL. Connect the sensor’s pins to the corresponding pins on the Raspberry Pi GPIO and you are all set. I used the Perma Proto to do so.
Software
Python Script
All the heavy-lifting is done by a single Python script which can be downloaded from here. Since both Python 2 and Python 3 come pre-installed on the latest Raspbian version, you should be ready to go as soon as you download the image and install it into an SD card.
As indicated above, the script checks conditions every two minutes and updates the LED matrix accordingly. The Sense HAT temperature reading is affected by the the heat given off by Raspberry Pi processor/board (that’s the main reason the whole setup was not put inside a case). Although this issue is more prominent when the Sense HAT is connected to the Raspberry Pi 3, I experienced temperature accuracy issues with the Raspberry Pi Zero W as well. The Python script includes code to compensate for this and one of the constants in the script header can be further adjusted if needed.
In order to the LED matrix to show explicit ambient conditions (temperature, humidity and pressure), just bring your hand within 4 inches of the proximity sensor. Once the scrolling message finishes, the LED matrix goes back to showing the temperature indicating arrow.
Since Raspberry Pis are susceptible to SD card corruption if they are suddenly left without power, I’ve included code to safely turn the device off: push the joystick stick down two times. The LED Matrix will show a message asking to confirm shutdown. Push the joystick stick down again and the Raspberry Pi will safely be shut down (see video).
The python script is ready to go out of the box. Note that Adafruit library for the VCNL4010 should also be installed (download and instructions here). If you wanted to change some of the parameters, do so on the script’s main section:
    STICK_TRIGGER = 'down'
    SCROLL_SPEED = 0.015
    TEMP_FACTOR = 1.65 #Temp. adjustment factor in Celsius.
    READINGS_INTERVAL = 2 # in minutes.
Some of these parameters are self explanatory. However, there are some that need further explanation:
STICK_TRIGGER: It refers to the Sense HAT joystick direction that will trigger the turn off command. Default is down (other options: up, right, left).
TEMP_FACTOR: It refers to factor adjustment to be applied to the temperature reading. The default number should work for most cases.
General Setup
The Python script is intended to be run when the Raspberry Pi Zero boots up. I covered this on a previous post. In a nutshell, the rc.local file should be edited by typing sudo nano /etc/rc.local. Then, the following should be appended right before the line that reads exit 0:
sudo python3 /home/pi/scripts/system/ambient.py &
Obviously, modify the path above according to the place where you saved the script (ambient.py).
Finally, here is a short demo video showing the device's main features as well as how to turn it off:
I had a lot of fun putting this little project together. Feel free to leave a comment below if you have any questions. Also, please Upvote this post if you find it useful.
Congratulations @moving-electrons! You have completed some achievement on Steemit and have been rewarded with new badge(s) :
Click on any badge to view your own Board of Honor on SteemitBoard.
For more information about SteemitBoard, click here
If you no longer want to receive notifications, reply to this comment with the word
STOP