🍕 "MAMMA MIA! NOW THEY'LL DO IT AT HOME!" 🍕
This is how the owner of the Italian pizzeria would react if he knew that today I would betray his patents on the perfect pizza! 👌
I love pizza. Round, square, on thin, on thick, small, large, EVERY KIND!
If I had been born a second time, I would like to be a Ninja Turtle and eaten it every day. 😎
When I think about the pizza, I feel joy, the day becomes better, worries disappear and a smile appears on my face! 😄
Because you have to share the joy, I have a few tips for you that will allow to prepare pizza at home, like from an Italian Ristorante! Buon appetite! 👌

🍕 FLOUR HAS A MEANING
A good pizza is one that is crispy from the outside and soft from the inside. To achieve such an effect, we will need the right flour. Traditional recipes are always with type 00 (zero-zero) flour, which is very finely ground and this form gives the baked dough the correct consistency and crunchiness.
Only a few years ago it took some overlap to get it, but now there is no problem with its availability and you will find it in every bigger supermarket. It's a little more expensive than "ordinary" flour, but in my opinion, the delicious bottom is worth it!
🍕 MAXIMUM POWER, MAXIMUM HEAT!
The dough needs a feeling! 😉
It must be kneaded tenderly for at least 10 minutes and, what is very important, it must be supplied with as much air as possible during this time!
A good way is to literally rip it apart from time to time and knead it again into a shaped ball.
If the dough does not want to cooperate immediately after kneading, give it a moment and sprinkle it with flour from time to time until it becomes elastic.
When it's easy to form, has a smooth surface and leaves the hand freely, it means it's ready.
🍕 THIS IS GROOOOOWING!
Growing up is the most important stage in the preparation of the dough. If we have given him enough attention during the production process, it will now beautifully gain "body"! :D
To achieve this, there are two methods: for the hungry and for the patient. :)
▪ FOR THE HUNGRY
Put the dough into a bowl, cover with a cloth and leave for an hour. When it grows nicely again, knead it together, let it rest for 5 minutes and make bottoms out of it right away. Leave the bottoms for another 5 minutes, put on a sauce, spread out your favorite additions, a little bit of oregano and to the oven!
Using this method, the dough grows quite strongly during baking and there is more of it! Hungry people should be very satisfied with it!
▪ FOR THE PATIENT
This method of preparation is called “cold rising” and allows the dough to have a much deeper taste and more interesting texture. Thanks to its application, we obtain a dough on which we can prepare a truly thin pizza because it does not grow as strongly as fresh.
Just as in the version for the hungry, leave the dough to rise for an hour, knead it again, but then put it in a bowl (greased with oil), lubricate it with oil from the top, cover it tightly with food foil and keep it overnight in the fridge.
Usually we want to have pizza right away, so I suggest to use half of the dough immediately and hide another half overnight in the fridge.
🍕 THEY SEE ME ROLLIN...
No matter what method you choose to use, it's time to shape the dough into nice pizza bottom! 👌
Warning! Always use your hands to prepare the bottom, never the dough roller. A separate place in hell awaits for those from the roller. Don't risk, use your hands! 😉
Sprinkle the tabletop with flour, put the dough over it and form a ball, slightly flat it with your hand and to the work!
The principle is simple - the dough is shaped from the inside to the outside.
Try to gently "push" them towards the edges so that it becomes thin but does not start to crack. To do this evenly, turn the dough from time to time.
If it didn't come out the first time just roll up the dough and try again.
After some time, when you "feel" the dough, you can begin to lift it and slowly turn it so that the gravity can do part of the work for you.
🍕 NOT EVERYTHING AT ONCE!
When we have the bottoms ready we can start to make pizza. It is important to keep the order in which all the ingredients are “sunken” in the cheese during baking.
The order shall be as follows:
- tomato sauce
- mozzarella cheese
- favorite additives
- a pinch of oregano
If we put the additives directly on the sauce and then cover them with cheese, it will create a shell that will not allow the ingredients underneath to be baked.
Of course, there are exceptions to this rule, but this is the order in which we most often meet.
🍕 MUST BE HOT
It is not necessary to specify in the recipe the baking temperature for pizza in the home oven. We simply set our oven to maximum! 🔥
Additionally, we allow it to warm up very well (older models need even 15 minutes to do so).
In wood-fired ovens, where the original pizza is baked, the temperature can reach several hundred degrees, which makes the thin pizza ready in a matter of minutes. Of course, this temperature can be forgotten at home, but let's still make sure that our oven does its best! 💪
Traditionally, the pizza is prepared by placing it on the hot surface of the oven immediately with a baker's spatula.
How to at least partially reproduce such a surface in the house?
The pizza stone will work best (quite solid can be bought for about 15$).
Place the stone in the oven and heat with it. It strongly accumulates heat and "pulls" moisture out of the dough, which makes it more crunchy.
If you don't want to invest in such a gadget, you can replace it by heating an baking tray. The properties of the stone are not present, of course, but it is a budget option.
The last issue is to put the pizza with the additives on the hot surface.
The baker's shovel is rather not on standard kitchen equipment, so how can we do it?
The baking paper comes in rescue! Place the molded bottom of the pizza on it, apply the sauce and additives, then smoothly move the corners to the stone or baking tray and close in the oven.
After 3-4 minutes, open the oven, pull the paper out with a decisive move and close it quickly so as not to lower the temperature. It's not perfect, but it's a great solution for home environments.
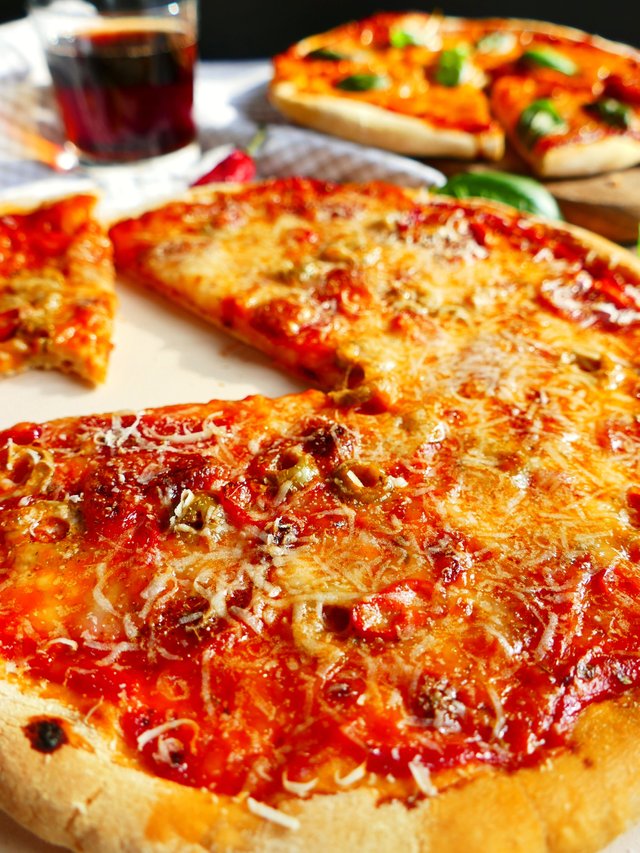
The pizza should be baked in a "regular" oven for 10 to 12 minutes. When the cheese starts to bubble on it cheerfully and the edges become blushy, it is ready!
Pick up the pizza onto a wooden board or tabletop covered with baking paper and let it cool for a few minutes. Thanks to this, the cheese “tie” all the ingredients and can be eaten normally (about taking it out of the oven is hellishly hot, which I checked many times 😄 ).
Now we only need to cut the pizza into pieces and serve it!
Following these few simple steps, we can prepare at home a pizza as in the Italian place! 👌
Beautiful photos and lots of great information, especially about kneading your dough tenderly. I will remember that when I make my first pizza. 😂
Thank you! 😉
I hope you will show me your first home-made pizza! 👌
Here you will find the proven recipe:
https://steemit.com/whatscookingchallenge/@the.foodini/whatscookingchallenge-a-real-italian-pizza-now-you-can-do-it-at-home
Will do. Hope I get the @the.foodini seal of approval!
For sure! For me almost every pizza is beautiful! 😄