How I photographed a piece of cheese
Today I will tell you how I photographed a piece of cheese using only one artificial strobe light.
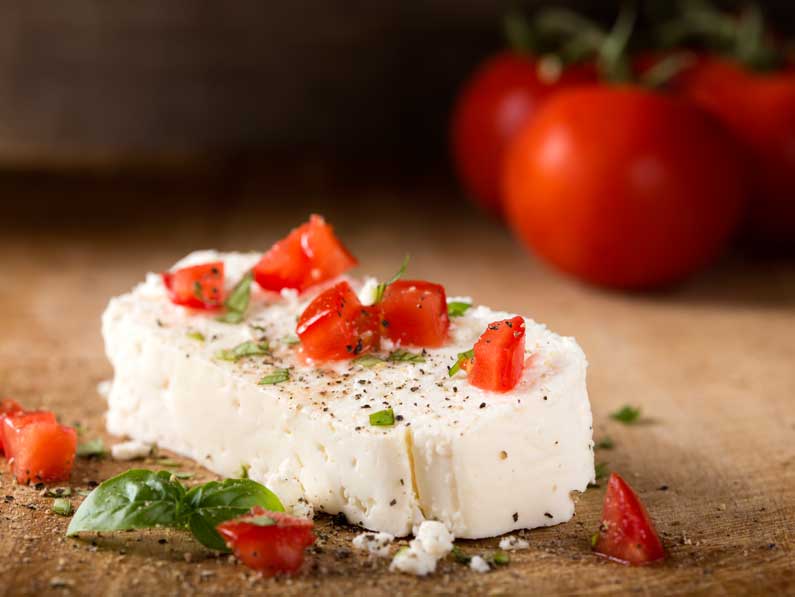
The main subject (the “hero”) was a local cheese that is called “telemea” – is very much like feta cheese just as much saltier. It can be eaten either alone or in salad, with polenta, or in sandwiches. This cheese is made from sheep, goat or cow milk. It goes well with tomatoes, which is why I used in this setup. To create an even more beautiful, more appetizing images, I used ground pepper and wood for background. As I said before, I used a single light source, a strobe with one softbox. For light reflection, I used white, black, and silver cards.
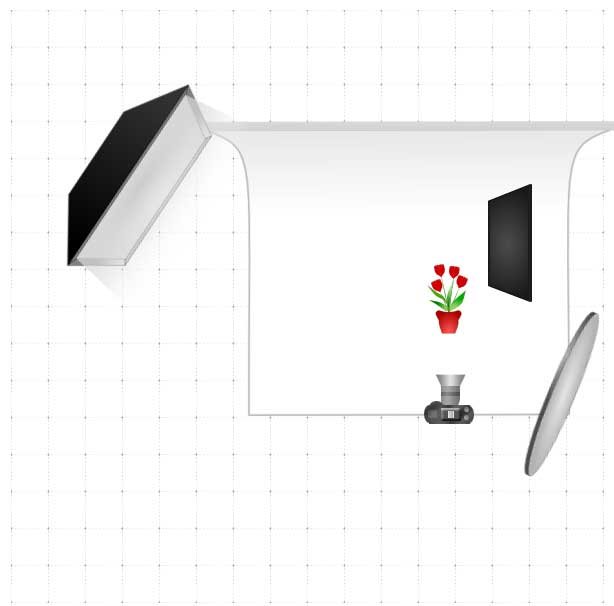
As you can see in the light diagram picture, I put the light in back left lateral, behind the subject, to create those beautiful highlights. This phenomenon occurs especially when photographing food that is either with oil or wet to reflect light from the back. This light gives our subject a feeling of freshness. However, using only the light from the side / back to our subject would create shadows too dark in the front, which is why I use these filling cards wrapped in aluminum foil which can be seen in the picture.
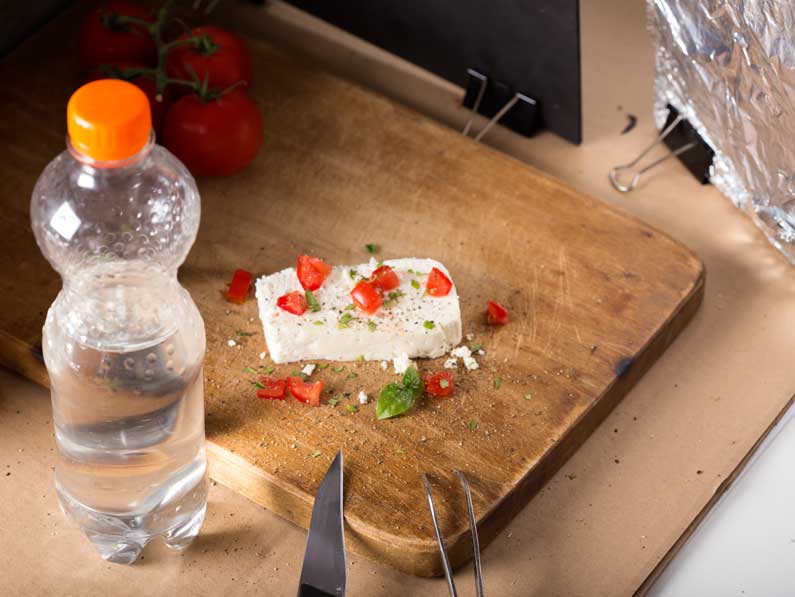
In background I put some small-sized tomatoes (cherry tomatoes) but I did not want to put too much light on them to not distract attention from the hero. For this, I used a black card on the right side (to stop the light reflection from the silver cards), and, to stop the light coming from the softbox, I used a wooden board. First I sat cheese in front left and tomatoes in the right background, I did some tests and after I was satisfied with the result, I added cubes of cherry tomatoes, chopped basil leaves and ground pepper over the cheese. In the final shoot, I put between the main light and cheeses, a transparent bottle filled with water to create a more nice light effect. The focus was made on the first third of cheese. Finally, I open the raw file and post processing was very easy to do. No major adjustments were needed. I increased a little contrast and color vibrations, applied a 50% noise reduction just to be sure that everything is out of noise, and after, I made a very minor change to the levels diagram. I will speak in another post with much more details about the post processing of images.
Some recommendations:
- use only fresh ingredients
- do not use very much colors
- try not to use more than three main colors to not distract attention from the main subject
- when you adding spices or other ingredients (as I added ground black pepper, basil, tomato pieces) do it without appearing to be too orderly, simply throw them away. If you not like what happens with some small pieces, remove them or change them position. I use brushes and tweezers to be easier to do that.
Remember: details make the difference!
You can see a more recent picture using the same techniques here.
Nice tutorial. I really wanna try this technique too.
Thank you very much :)