How to make the Auberge du Lis sourdough starter
There are plenty of blogs and websites and books that tell you how to make a sourdough starter. If you're looking for some new trick or technique, or a foolproof method, you won't find it here. Fact is, it's kind of easy -- the pared-down instructions are at the end of this post. However, like the art of bread making itself, there's a lot going on in a sourdough starter--after all, it's a specimen of wild yeast, and there are a lot of factors that affect it. Those technical quirks and the interplay of variables are of endless fascination to me, and if you're serious about making bread at home they've probably tickled your interest, too.
So, if you want to jump to the instructions, go to the end. If you want to read me waffling and over-analysing a simple process, read on!
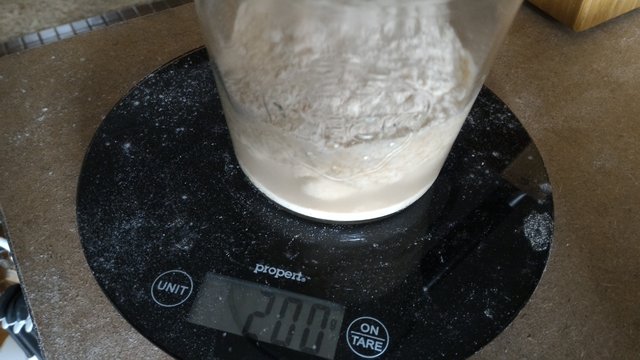
Step 1: Mix 100g flour and 100g water.
I said it was simple. The fact is we don't do much of the work. We just guide the natural process. The sourdough starter is simply a collection of wild yeasts and bacteria. These yeasts are all around us, in the air, on our hands, in the flour. The process here is to cultivate the local yeasts, and to 'feed' them in accordance with their life-cycle. Given that they're everywhere, the first few days it helps to keep the mix exposed to air a little. I also mix the first few times by hand (just swirl it around with your fingers).
Use the freshest flour you can find. We're lucky enough to have access to good fresh organic flours, but my first starter was just supermarket wholemeal flour. Wholemeal as the starter is ideal, any whole grain flour, because there is more of the wheat berry than in regular old white flour, which means more sugars that the yeasts like to eat.
Step 2: Wait 24 hours.
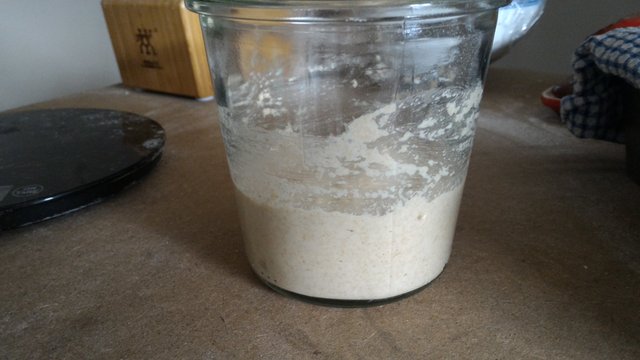
This is probably the most difficult part of the process. While we're waiting, let's talk about containers. Glass is good because you can see its activity. Glass with measures on the side is better, to see how much it has risen. Just keep it out of direct sunlight. Ambient light doesn't matter too much, and fluoro lights are no big deal either. I used to use a jar, but find a bowl easier to work out of. It is a white porcelain bowl, and I cover it in cling film. For now, with this new starter, I'm just laying a sheet of paper towel over the jar.
OK, so why 24 hours? Mainly to keep it simple. Easier scheduling is good. Same reason we're using nice round measures of 100g (feel free to scale up or down as necessary). You want to give the yeast enough time to develop, but not wait too long so that it runs out of food and some other bacteria moves in. Your climactic conditions, and how often you bake, will affect your feeding schedule. I bake anywhere from 4-48 hours after feeding, knowing how that will affect the breadmaking process and the final flavour profile of the loaf.
But how does temperature affect the starter? Here, things can get complicated pretty quickly. The short answer is: warmer is faster. During this process the temperature in our kitchen fluctuated between 16-18 degrees C. Somewhere around 25-27C is optimal fermentation temperature. Anywhere from 15-30C will be fine for creating the starter, but when you get around to proofing a loaf of bread, the temperature has a pretty significant impact. Also, different bacterial populations predominate at different temperature ranges (and different conditions generally), and these have varied effects on the flavour of both the starter and the final bread.
Step 3: Feed the starter: Same time the next day, discard half (leaving 100g) and mix in 100g water and 100g flour.
Don't worry if it's not precise. About half. These things are pretty hardy. If you're new to baking at home, measuring by weight is a good habit to learn. The main thing for now is to get pretty close to the same consistency, consistently. I find this consistency of equal parts easy to work with.
Also, don't worry about the dried bits around the sides of the jar. They're just hangouts for the yeasts we're cultivating. My starter bowl gets cleaned very rarely, and then usually only because I've left it too long between feedings.
Step 4: Wait 24 hours...
So we've seen that time and temperature and the type of flour affect the speed of fermentation. Let's talk about some more variables that are involved. Above I mentioned the consistency. Hydration is one factor a home baker has pretty good control over (barring sloppy measurement technique).
Equal parts flour and water is a 100% hydration starter. The more watery your starter, the faster it will ferment. And that means the drier it is (higher ratio of flour to water) the longer it takes. Though note, too, that proportionally less flour means less food for the yeasties -- it may get there faster, but will need more frequent feeding. It's all about tradeoffs.
But again, different hydration levels create environments ideal for different cultures. A drier starter, for example, creates a more sour flavoured starter and resulting dough.
What we're aiming for as home bakers, and what keeps me endlessly interested, is how these variables can be tweaked and balanced and traded off to create new flavours, or to manipulate what we can when we have to work with less than ideal conditions. Even just finding a nice balance for your own palate is an adventure.
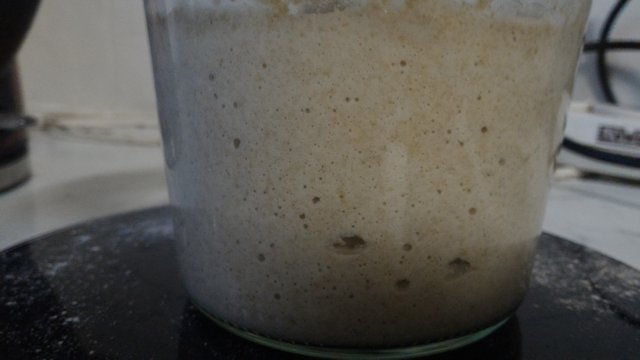
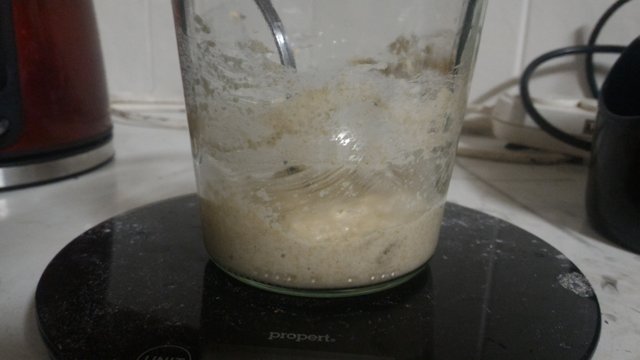
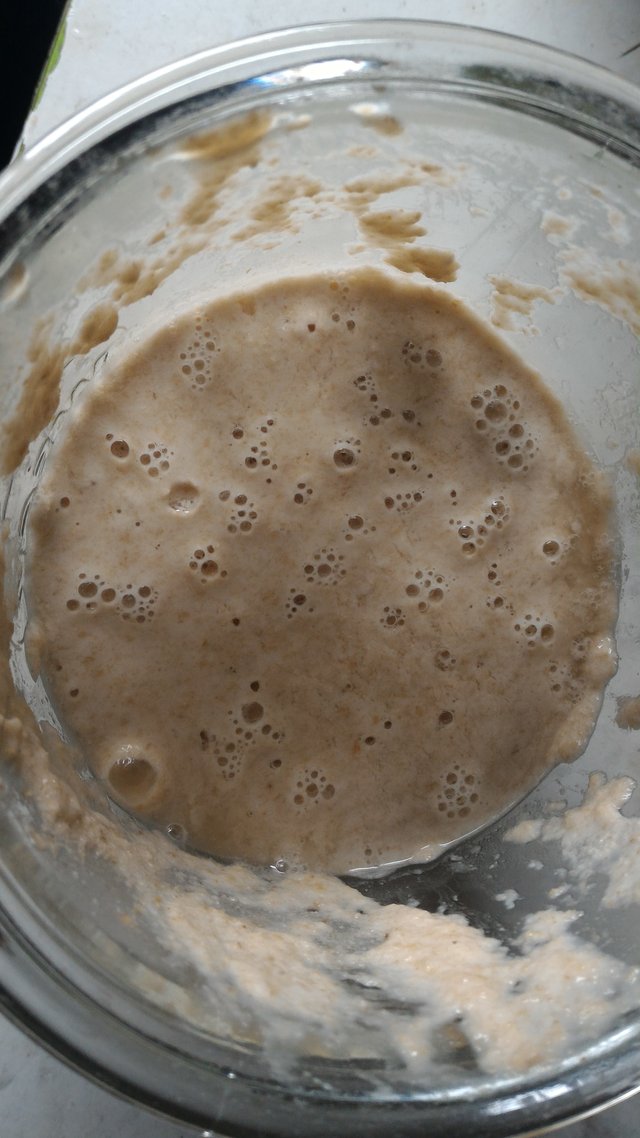
So, 24 hours later again, and we are ready for the next feeding. Above, after 48 hours and two mixes, you are starting to get some bubble activity. Glorious glutinous goodness. This is sooner than I expected, which I'm putting down to the freshness of the flour, but it should look like this after the third or fourth feeding even with regular supermarket wholemeal.
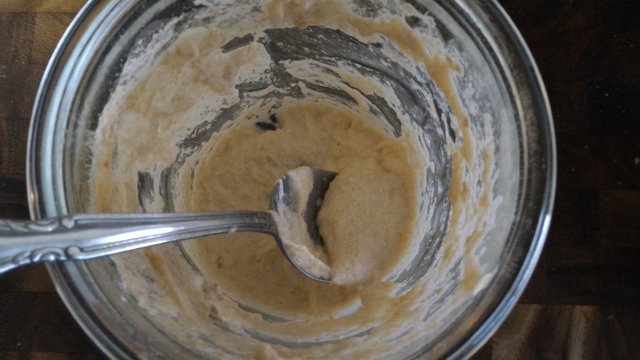
Not only should you be getting your fingers in and feeling the evolution, you should be smelling and tasting it, too. Understand the pungent, yeasty, alcoholic smell as it develops and as the starter ages. Likewise, when you have a well developed starter, taste it every few hours as it ferments so you can learn how the sourness in the starter becomes part of the final bread flavour.
Step 5: Feed the starter: Same time the next day, discard half (leaving 100g) and mix in 100g water and 100g flour.
Step 6: Wait 24 hours...
So feed it again, leaving 100g, and adding 100g each of flour and water. Again, at this point the measurements of what's left behind is a little sloppy, but just so long as you have equal parts flour and water added, you get the right consistency.
In time you can start experimenting with different flours. I mix and match, but always at least 50% whole wheat. In a pinch I'll use all white flour (baker's flour), but it always comes back to whole wheat. Again, there are tradeoffs -- in my experience whole wheat is quicker to ferment, but that means more frequent feeding. If I use white flour (or some proportion white) it may be slower, but is also more sour. If I know I'm not baking for a few days I will use more white flour, deliberately slowing the starter.
These organisms are flexible, and short-lived -- you can change the schedule and the ingredients up as often as you want, contrary to some accepted wisdom. Just take note of the effects. If you are doing a really drastic change, or are not confident, have a couple of containers going side by side for a few days just in case.
On the third day (i.e., after 72 hours), discard most of it (let's say leave 50g for the counters, but anywhere from 20-50g should do it). So at this point we are leaving less of the mature starter, because it has started to multiply quite nicely in there. So it either needs more food or you need to set some of those yeasts free (i.e., throw them out). Otherwise you have sourdough taking over your house.
Step 7: Feed the starter: Same time the next day, discard half (leaving ~50g) and mix in 100g water and 100g flour.
Step 8: Wait 24 hours...
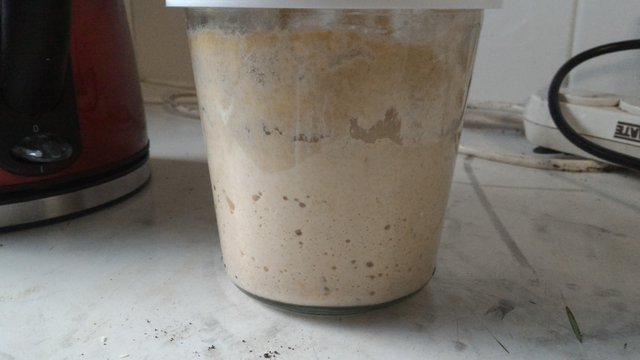
Here is after that third feeding, and then at the 4 day mark. You can see the difference made in 24 hours. It's alive!

Also at this point, I'm putting a proper lid on. All the wild yeasts from the air, my hands, etc, are in there. They've won. Keep them safe.
Everyone has the existential crisis when they first have to 'discard' some starter. Let it go. In time you'll find a nice balance so you're not making too much, or there are plenty of recipes for using the extra -- pancakes and crumpets are good starting points.
So, same again, repeat steps 7 and 8: leave 50g and feed with 100g each of water and flour.
By now you've found the rhythm of the feeding schedule. Hopefully it's also clear that the starter is flexible--you have to work to it's timing to some extent, and know that there are factors you can change that will affect it in turn.
There are plenty of sources that are very prescriptive about how and when and with what to feed the starter. Hardline attitudes like that make me immediately skeptical. I'm not sure whether it's an attempt to maintain a mystique about some processes, or just an unscientific attitude, but it is certainly unhelpful.
The fact is, this is just flour and water, mixed in a range of conditions, concentrations, and schedules. There might be an optimum set of values for each variable, in one particular environment or climate or season, but they all fall on a continuum. Prescriptive approaches don't teach the flexibility you need, and may stop you from understanding how these factors impact the bread. Find your preferred, optimum set of conditions. If an approach doesn't work, you should have the knowledge of how and what variables to tweak to make it work.
Advice along the lines, 'it must be fed every 12 hours, at hydration level x%' is usually misleading. We're not looking to run an industrial operation here. If you are, you will have controlled conditions, and are probably already aware and accounting for those variables. (Though, perhaps there is some merit even in the seasonality of bread?)
One last bugbear before we move on. People pay money to get a starter. Ok, fine, people have to make a crust (get it?), but if you want to make bread, you'll need flour, water, and to learn how to wait--and those three things are the ingredients of a starter anyway. The notion that some famous baker's starter will transform your bread is likely bunkum. I'm no microbiologist, but it seems logical to me that local yeasts will take over in short time. So unless you have super controlled conditions, and access to identical ingredients, you're probably wasting your money. The reality is that you will have substantially more variation by changing up the type or even the source of your flour.
By all means, if you can't wait the few days it takes to get one going, a dose of a friend's starter will set you on the road sooner. But within a short time it will become your starter. It's destiny is in your hands.
24 hours have passed again. By now, as you can see above, it's cracking along nicely. The smell at this point should be a nice pungent sour smell. If it smells a little yeasty, that's good -- it's yeast. If it smells very sour and alcoholic with a layer of liquid on top, it's probably been too long.
Repeat the same steps again.
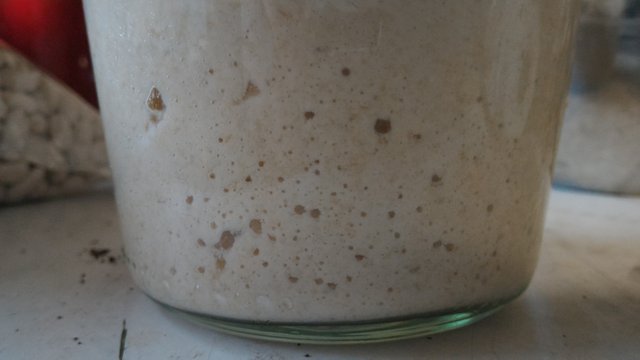
Another feeding to be sure., and 24 hours later, it's looking like this:
Plenty of bubbly activity from the yeasts and bacteria converting sugars to CO2. Almost frothy as you spoon it out. It should smell quite nice at his point, too, and if not, you'll get used to it.
Keep repeating steps 7 and 8 indefinitely, changing the particulars as you find what works best, or what is appropriate to the season.
At this point, I feed my starter every 1-3 days, keeping about 10% of the starter. This is usually just the scrapings after taking what I need to make some dough. How much you keep at feeding time will depend on how often you bake, and all the other factors mentioned throughout. If you keep more, the starter is more ready more often, so for baking daily you might want to keep refreshing daily keeping half (e.g., 100g starter, 50g flour, 50g water), for example.
First things first, get baking, then get experimenting!
Instructions:
(At around the same time each day:)
Day 1: Mix 100g flour and 100g water.
Day 2: Discard half, leaving 100g. Add and mix 100g flour and 100g water.
Day 3: Discard half, leaving 100g. Add and mix 100g flour and 100g water.
Day 4: Discard most, leaving ~50g. Add and mix 100g flour and 100g water.
Keep repeating Day 4 instructions. When it is good and bubbly, after about a week, make bread!
We'd love to hear how people go! If there are any questions, ask away.
We'll put a nice basic bread recipe up in the next few days so you have somewhere to start :)
Lovely @aubergedulis. Thank you for posting this hard to find information. Your instructions make it seem so easy. Cheers.