SLC21/WK4: Stabilizing Fractures- Comprehensive First Aid for Different Types of Breaks
I am pleased to participate in the 4th week of SLC Season 21. This week, we will be learning Stabilizing Fractures- Comprehensive First Aid for Different Types of Breaks.. So Let's start,
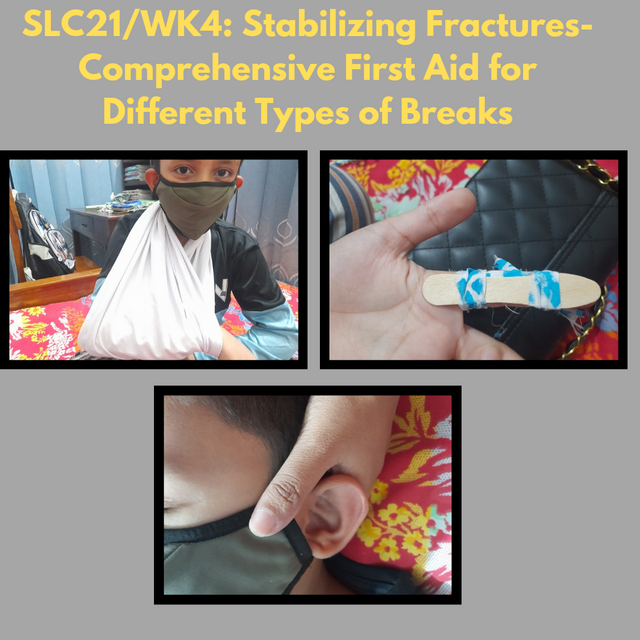
Apply a sling on the arm and a splint on the finger of a sibling, child, or peer. Attach a picture of the application and explain the procedure in detail, highlighting key points for immobilization and stabilization.
An arm sling is a very important first aid treatment to immobilize and stabilize the arm and shoulder after any injuries. At the beginning of this lesson, we learned that fractures can be of two types, simple or compound. In the case of simple fractures, we can manage the fracture with a first aid kit, but in the case of compound fractures, it is not 100% effective, so the injured person must be taken to the hospital immediately. When a person is injured in an accident, there are fractures in the bones, so we have to follow the basic first aid protocol (DRABC) before helping him. I have shared this protocol with you earlier.
D= Danger (Ensure our safety). Ask someone for emergency help.
R= Check injured person's Response ( look, listen and feel)
A= Go for Air way. (place in recovery position, open mouth and remove foreign particle)
B= Breathing (Check breathing) If breathing is normal then It's a good sign, if breathing is not normal we have to go for CPR.
C= Circulation (Check bleeding) If bleeding is severe, then press the wound with a clean cloth.
I am not explaining the DRABC protocol properly here because I have explained it in my previous participation. So, let's start with how to apply a sling on the arm.
1. Applying a Sling on the Arm
Materials needed
A clean cloth. (It would be great if you have a triangular bandage)
Process
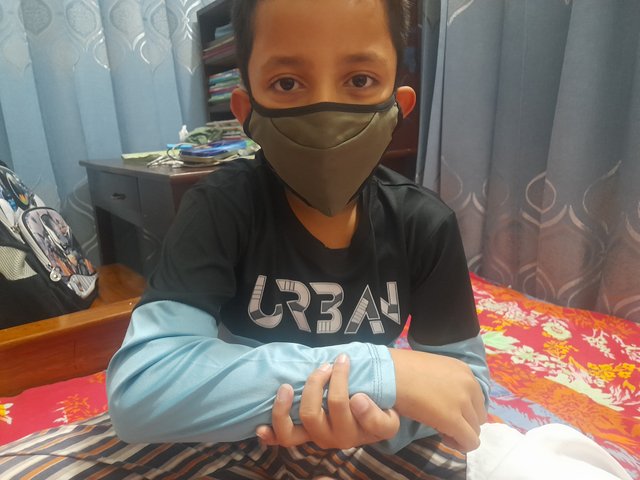
- Position the Arm: - This i very basic thing that we have to position the injured arm properly. Without trying to straighten it, keep it as the same position in it is found. It would be great if the injured person support his injured arm by other hand.
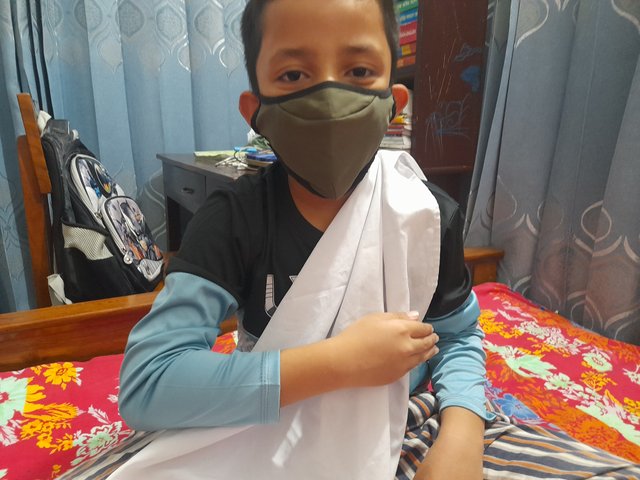
Praper The metarial: I roll up the cloth tightly to form a cylindrical shape.
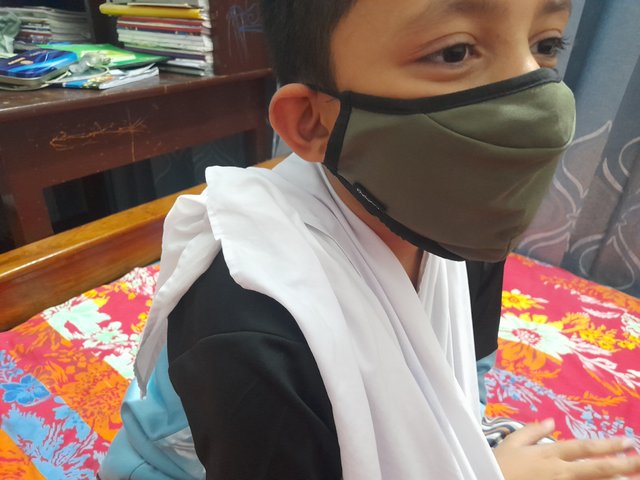
Apply Padding: As I dont have a triangular bandage so here I used a clean triangular cloth which is gave cylindrical shape by rolling up tightly. Then I place one corner of the cloth under the injured arm and ofcourse notice it to cover the injury properly. First gently place the long side of triangle top under the injured arm to the opposite shoulder of the injured arm. Then bring the top end around the shoulder.
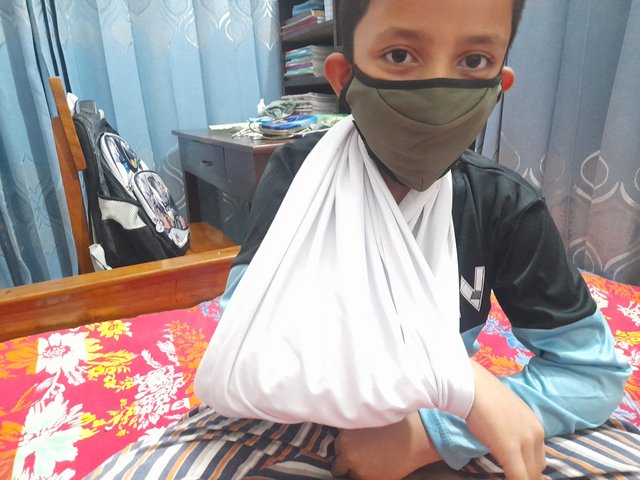
Tie and Secure the Sling: Bring the second end of the cloth up around the neck and tie them securely. The knot should be on the shoulder behind the neck. It shouldn’t be very tight and also be tight enough to support the arm.
- Check the Circulation: Ensure the sling is enough secure and there is no excessive pressure. Then check for the circulation by cheacking the warmth and feeling in fingers and toes or checking the hand pulse.
 |  |
|---|---|
 |  |
2. Applying a Splint on the Finger
Materials needed
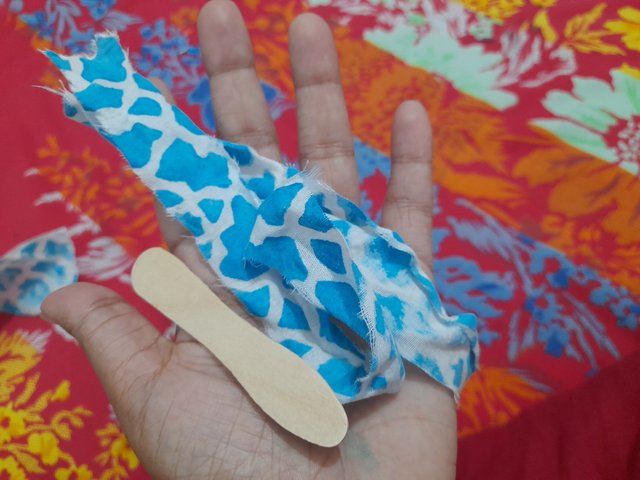
A hard object Ice-cream stick
Clean cloth
Prepare the materials: clean the hard object, the stick properly with flowing water.
Prepare the finger: Without trying to straighten the finger, keep it as the same position in it is found. Then check any cuts or wounds. If there is any cut then clean it gentely.
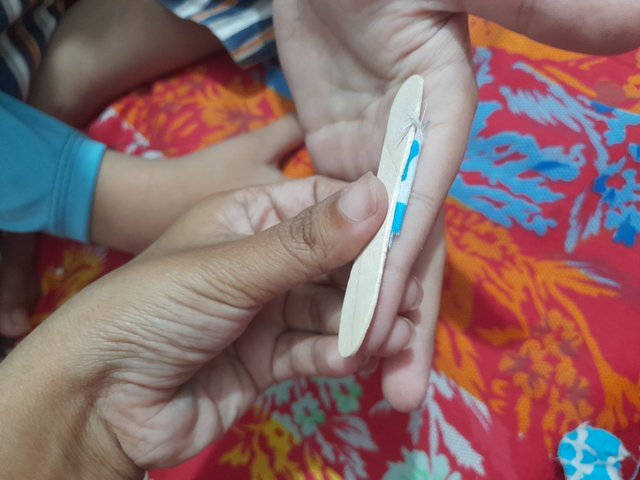
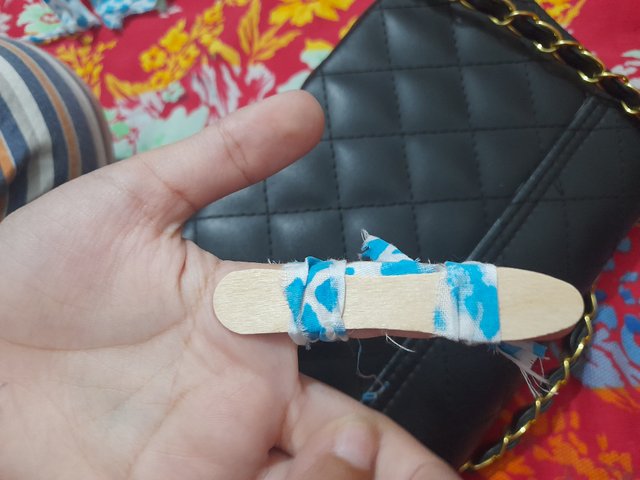
Position the Splint: - Place the splint along the injured finger as you can see in my picture. It is better to use a soft padding between the splint and finger. Here I used a cotton cloth. It is for the victim's comfort.
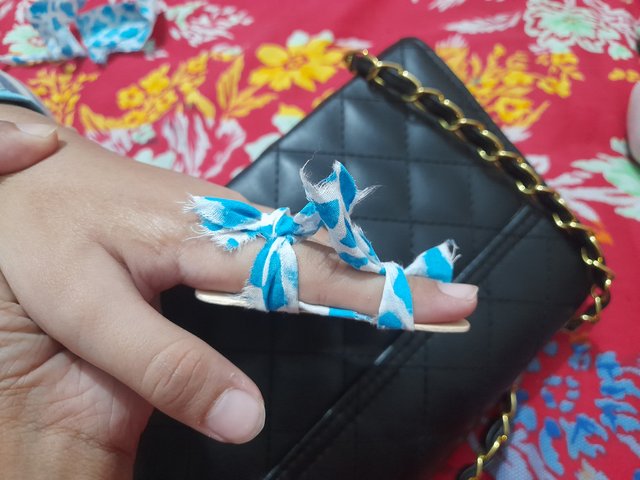
Secure the Splint: Then tie the splint and finger with a clean cloth. I didn’t cover full finger becuse I have to check circulation on fingerstrips.
Check circulation: Ensure the finger is not tie hardly and check the skin colour, pulse and moving capacity of finger.
 |  |
|---|---|
 |  |
Key Points For Immobilization And Stabilization.
- Check for circulation by pressing the fingertip and observing if color.
- Reapply if the sling or splintfeels too tight or loose.
- Ask the victim if the pain is increasing or discreasing.
- Monitor the signs of shock, airway should be constantly.
- If the victim isn’t comfortable then take him emergency to the professionals.
Research the process of helmet extraction in the context of head and neck injuries, and explain why it is important to avoid removing the helmet immediately in the case of suspected spinal injuries. Include the steps for safe helmet removal if necessary.
Like I mentioned before if in a such situation where I am the first responder of an accident. I will follow the DRABC protocol. As I write it in my my answer so I am write after DRABC protocol. Helmet extraction is a sensitive matter. Since the helmet is related to the neck and spine, we have to do these tasks with great care and skill. In the event of a suspected spinal injury, the helmet, if removed incorrectly while attempting to remove the helmet, can aggravate the injury, which can later lead to serious consequences such as paralysis or even death of the victim. The helmet provides some stabilization of the head and neck, acting as a protective barrier against further movement.
Importance of Avoiding Immediate Helmet Removal
Disrupts spinal stability: Helmets often provide stability to our neck and head, which can be important in preventing additional damage to the cervical spine.
Risk of Spinal Cord Damage: Compromise airway support: Removing the helmet incorrectly can cause our head to shift which can compromise our airway or cause additional injury.
Steps for Safe Helmet Removal if necessary.
Before I start writing about the steps, I also include the situation when helmet removal is necessary. Remember the DRABC protocol? There if we see Airway obstruction which means If the victim is not breathing , we should go for this. If the helmet is loosely fitted. If chest compressions or CPR is needed. If the helmet obstructs controlling significant head or neck bleeding.
Steps
Assess the Situation - ensure own safty and Call for the emergency medical assistance immediately.
Prepare the team- For safe helmet removal process we need atleast two person. In any accident spot there always a crowed so we can ask anyone for this help.
Stabilize the Head and Neck- First, position yourself near the patient's head and in front of the victim. Securely hold the helmet and stabilize the neck to prevent movement of the victim.
Helmet Preparation: To remove the helmet, first carefully remove the chin strap and gently spread the sides of the helmet to reduce pressure on the victim's head and neck.
Remove the helmet- One person will hold the victim's neck and head steady while the second person gently slides the helmet off. Care should be taken to ensure that the head remains in line with the neck when removing the helmet. And avoid pulling the helmet.
Post- preparation - When the helmet is removed, the first person uses their hands to manually stabilize the head and neck.
How is C-spine stabilization done? Explain the procedure in detail, ensuring you include when and how to use head blocks or manual stabilization. Attach a photo or video of yourself demonstrating proper C-spine stabilization techniques.
First, let's understand what C-Spine Stabilization is. Cervical spine or C-Spine stabilization is a technique used to stabilize the neck and upper spine after an accident. It is used to prevent further injury in the event of an accident such as a car accident, fall, suspected spinal injury or head injury. Proper stabilization reduces movement and as a result, protects the spine, which maintains the balance of our entire body.
When to Apply C-Spine Stabilization
Suspected Spinal Injury: This lesson is about C- spine stabilization when it is badly needed. So we must know when to start and the very first reason to apply C-Spine stabilization process when it it suspected spinal injury. It could be because of fall or accident as I mention before.
Signs and Symptoms: We already know the sings and symotoms of this. So when we found such signs likr Neck pain, neck moving problems, numbness,, we should go for this.
Unconscious victim: Finally the unconcious victims, When the injury suggests a possible neck injury because unconscious victim can't express there pain location.
Manual Stabilization of C-Spine
It is a temporary stabilization process which prevents further injuries . But it is effective. Steps of C-spine stabilization are:
Ensure Safety: - This is the first thing to do. Assess the scene and ensure own safety. And ask someone to call for the emergency help.
Position Yourself: Kneel beside the victim's head. It is because of maintain control over unnecessary movement of him.
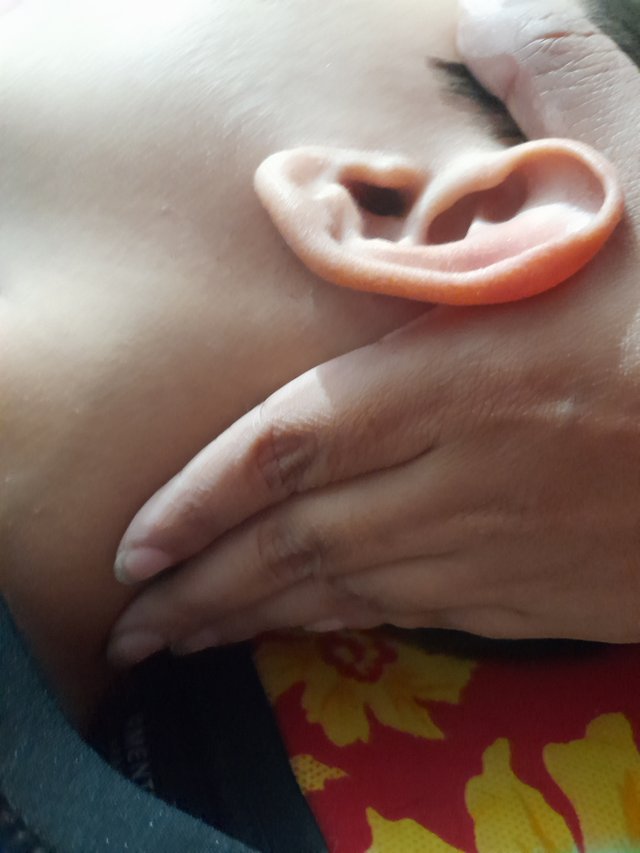
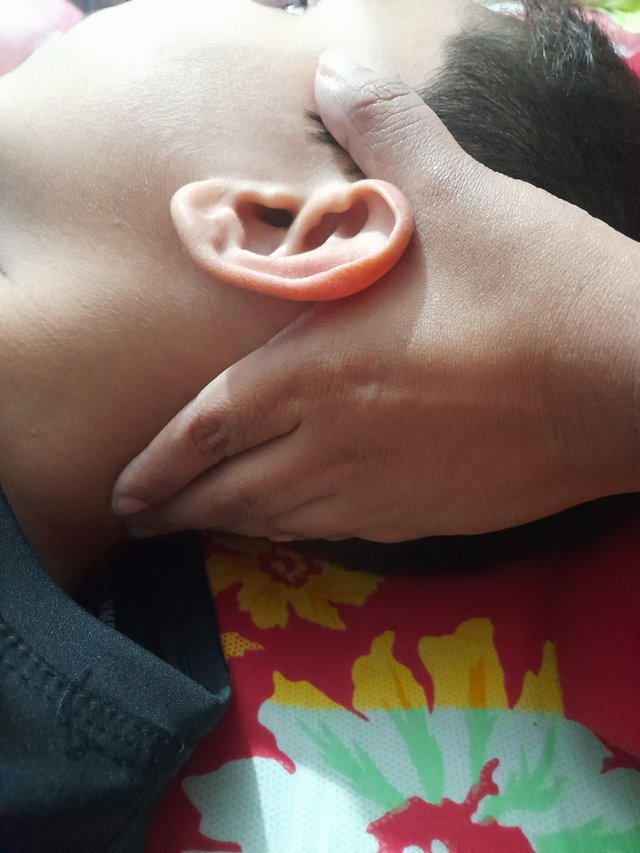
Hold the Head:- Then, we have to place our hands gently on either side of the victim. Our palms will cover their ears and fingers will support the lower part of the head skull.
Keep the Neck Neutral: Don't force the head for poisoning. Remember to stabilize in that position victim was found. And hold the head so that it reduce the ration of neck.
Monitor the Patient: look for breathing and signs of distress. If need go for airway process. We have learn the Process of airway in our privious class.
Using Head Blocks for stabilization of C-Spine
We use foam or plastic devices known as head blocks to prevent lateral movement. We effectively and gently position the victim and ensure that the spine is not bent during the procedure, as this is very important. A little carelessness can lead to paralysis or even death later.
 |  |
|---|
Here I demonstrate a victim who is fall and suspected spinal injury so I start manual stabilization of C-Spine.
Consider you encounter an unconscious person with a compound fracture on the arm, massive bleeding, no pulse at the distal radius, and restricted breathing. How will you prioritize and manage the situation? Describe each step in detail, including how you would control bleeding, stabilize the fracture, and address the breathing issue
There are two types of fractures. Simple fractures and compound fractures. In this situation I will deal a compound arm fracture of an unconscious victim with messive bleeding,no pulse and restrict breathing. It would be a very critical situation for me before joining this learning challenge but I believe now I can manage such situation. Thanks to @abdu.navi03 for this great and life saving course. So in such situation my steps will be.
Follow DRABC protocol
Assess the place and ensure my safety. Try for response by Look, listen and feel (LLF). Gently ask him "are you okay?". No response means unconscious. And ask someone to call for the emergency help.
Airway and Breathing - I will perform the victim's head-tilt, chin-lift maneuver until a spinal injury is suspected. Then I will go for Look, listen, and feel for breathing for 5-10 seconds and if I find restricted breathing then first support his breathing by loosing his cloths, Position the head for optimal airway patency. If victim isn’t breathing then go for CPR.
Control Massive Bleeding
As in this situation, there are external bleeding so the things I should do is
- Apply direct lressure on that area with a clean cloth or gauze directly on the wound. Apply firm pressure and If the cloth ot gauze soak through then add more layer instead of removing it and keep continuous pressure.
- If bleeding is uncontrollable then use Tourniquet.
Assess Circulation
Our victim has no no pulse at the distal radius means compromised blood flow which can be minimize by controlling bleeding and also our victim has arm fracture so after stabilizing the fracture will help restore of curculation.
Stabilizing the Fracture
- The best method for this procedure since we are not prepared for standard equipment we need to use so it is best to use a make-shift splint (rolled material).
Place the rolled-up cloth on both sides of the arm and tied around the neck (for details read my first question answer ). This prevents movement of the broken arm from further injury.
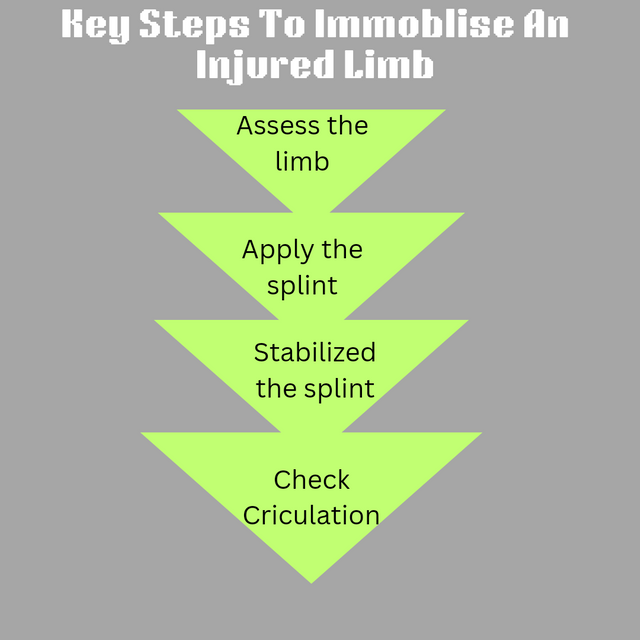
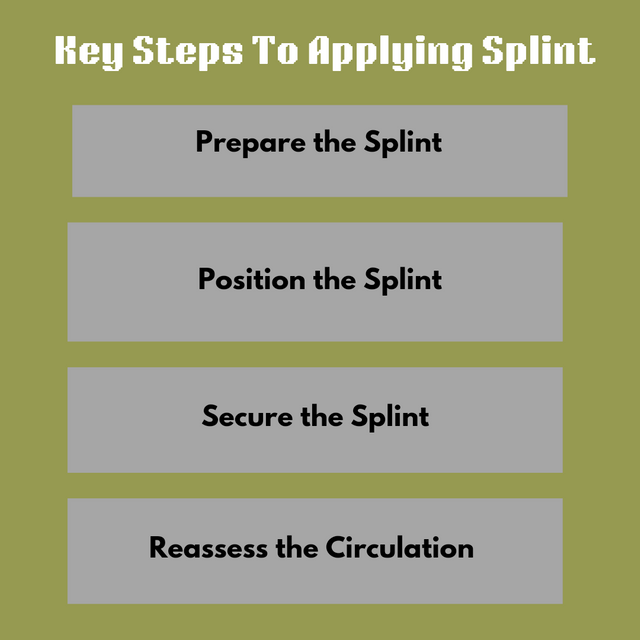
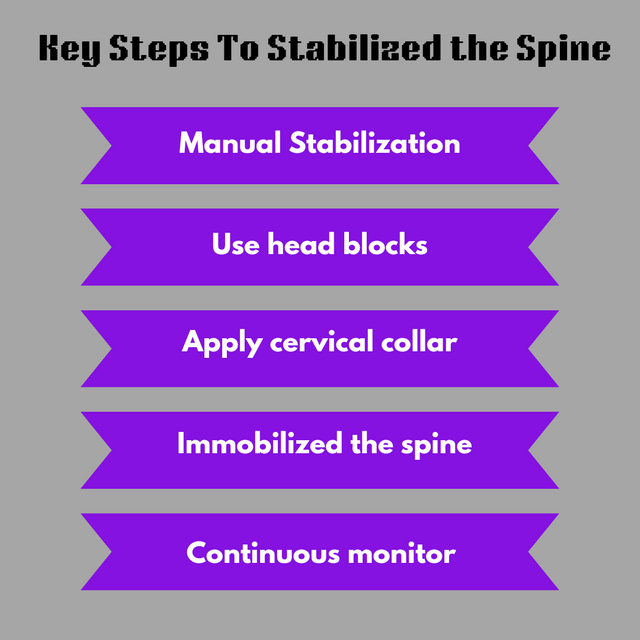
Create an infographic (visual illustration) on managing fractures. Your design should highlight key steps such as how to immobilize the injured limb, apply a splint, and stabilize the spine. Ensure the infographic is easy to understand and visually guides users through the process.
I am inviting my friends @solymann
@meheruntinni @sihanurrahman to participate in this SLC.
Student Name: @pea07
Overall grade: 8.9
Plagiarism Check: Pass
AI Use: No
General Feedback: The student has shown excellent understanding of the course and has come up with a good explanation on how to manage fractures. I geniuenely enjoyed reading your article.
Thank you.
Regards,
@huzaifanaveed1
Thank you very much for your review. I'm sorry for the spelling mistakes; I will be more careful not to repeat such spelling mistakes. If I had been careful, my performance could have been better. I have noted this and will definitely not repeat it in the future, InshaAllah.