Tutorial on how to cut a short pleated dress (using Ankara fabric)
Good day to you all, it's a great privilege to be on this great community once again and I'm here as always to give you the latest and best in the fashion world.
Ankara fabric is a fabric that are greatly cherish in this part of the world because of it tremendously beauty and flexibility to suit all the styles you choose to use it for, and that's one of the reason why I'm using Ankara fabric for this tutorial.
I adore pleats, I think they are just so classic and flattering. Pleated dress flatters whether you’re a curvy girl or not, and it’s pretty and easy to sew. It’s a big rectangle that gets its shape from pleats and a little mathematics. I have them and I have sewed them for people, it is just so cool.
I'm about to sew one for a customer and I decided to use it for tutorial for my own people to learn by taking some pictures and video.
Many steps are involved from the cutting of the fitted top, to the sleeve, shaping of the neck, then down to the pleats. Okay! Let’s get started.
Things/materials needed
2yards or more of fabric
Zipper
Linen (if desired)
And all other sewing equipment needed such as a sewing machine, matching thread, scissors, chalk, measuring tape.
Step 1
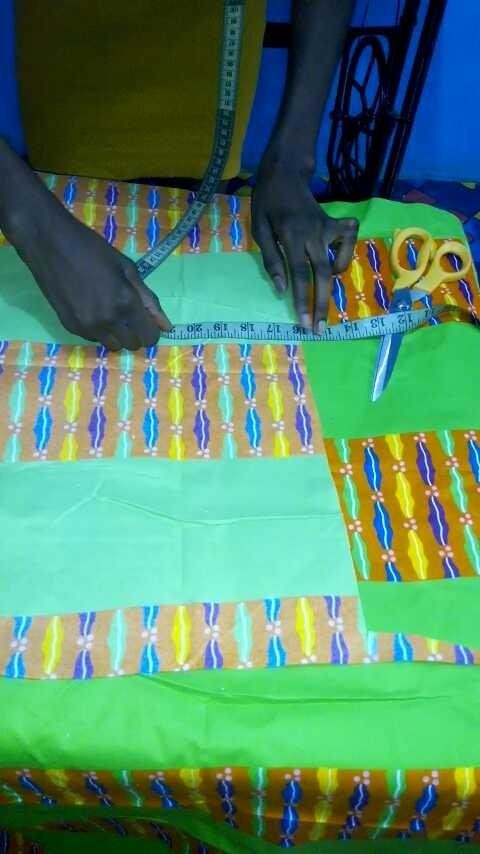
Taking of the measurement
°Measure the burst: the tape will be placed across the fullest part of the burst for a adequate measurement.
°Measuring of the waist.
°Measure the full length of the dress.
°Measure the half length which is usually 2-3inches after under burst.
Step 2
Drafting
Firstly, you fold a small portion of the fabric into two then make use of the measurement earlier taken by drafting it on the fabric. All the measurement taken will be divided into two equally representing the back and front respectively.
Measurement used
Shoulder- 16
Burst- 36
Waist- 30
Half length -16
Arm hole – 8
Sleeve- 7
Round sleeve- 12
Short length- 41
°We are starting the drafting from the shoulder, mark eight on the fabric with a colorful chalk but not the same color as the fabric.
°Mark the arm hole down from where the shoulder ends in one above by marking 8 inches down from the shoulder.
°Marking of the burst which is 9inches but 1 inch will be added for the seam allowance.
°Marking of the waist which is 7.5, because of the dart which aids the fitness of the dress 2 inches will be added which makes it 9.5. 1 inch for the dart the other for sewing allowance.
°Marking of the under burst which is 16, do the marking at least three times on the fabric to get a straight line and you can make use of a ruler to join the lines.
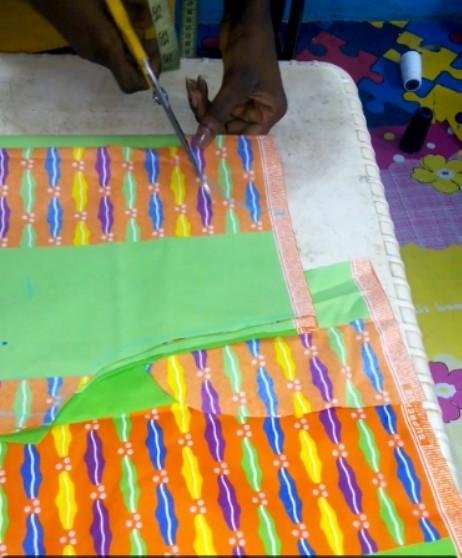
Finally join the points already marked neatly for easy cutting. Thereafter, take up your scissors and cut the drafted part out.
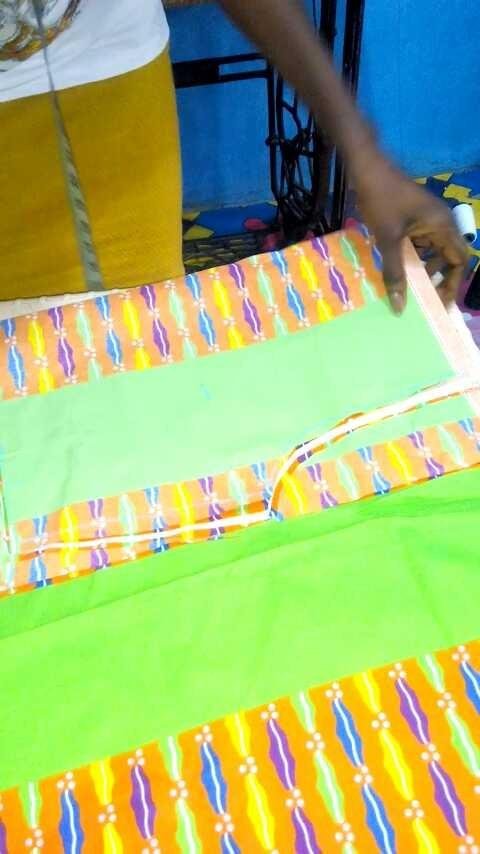
This is for the front part but there is no need for repeating the same for the back, just fold another portion of the fabric and place the front on it but leave 1 inch at the middle for the zipper if the zipper is going to be fixed at the back, then use your scissors to cut it out from the fabric.
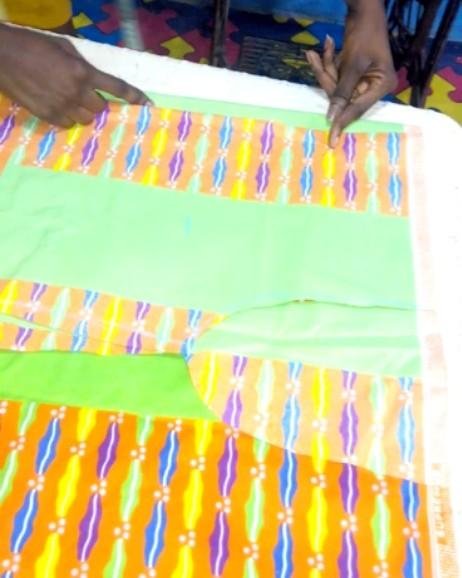
You can decide on the type of neck to use for it but am using a round neck with a little slit.
Step 3
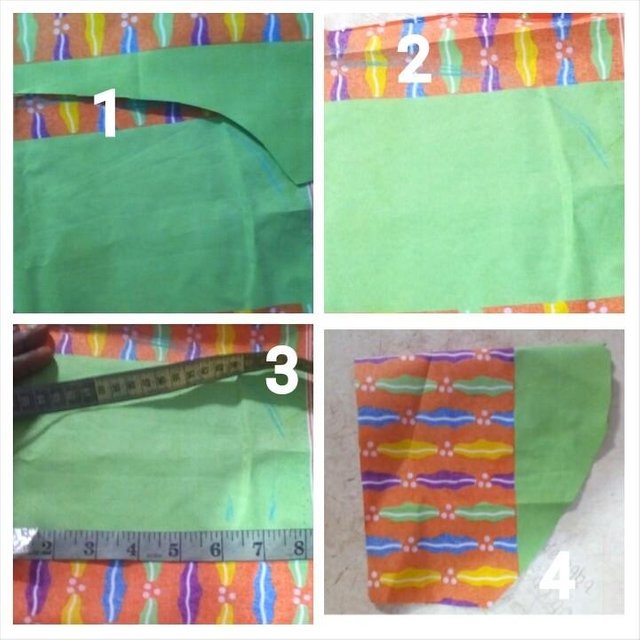
Cutting of the sleeve
Place the arm hole on the fabric and shape it out, then measure 7 inches on the fabric by placing your tape rule at the middle. Thereafter measure the round sleeve which is 12 divide it by 2 so we will be using 6 inches for the round sleeve but don’t forget to add 1 inch extra for the sewing allowance.
Step 4
Cutting of the pleats
The pleat is surprisingly the easiest part to cut, you don’t need any pattern all you need is the measurement. The half length will be subtracted from the full length the remaining length will be use for the length of the pleats.
The fabric will be cut in a rectangular shape excessively more than the measurement of the person, also depending on how full you want it to be.
I made A Video To Make It Easier For You To Learn
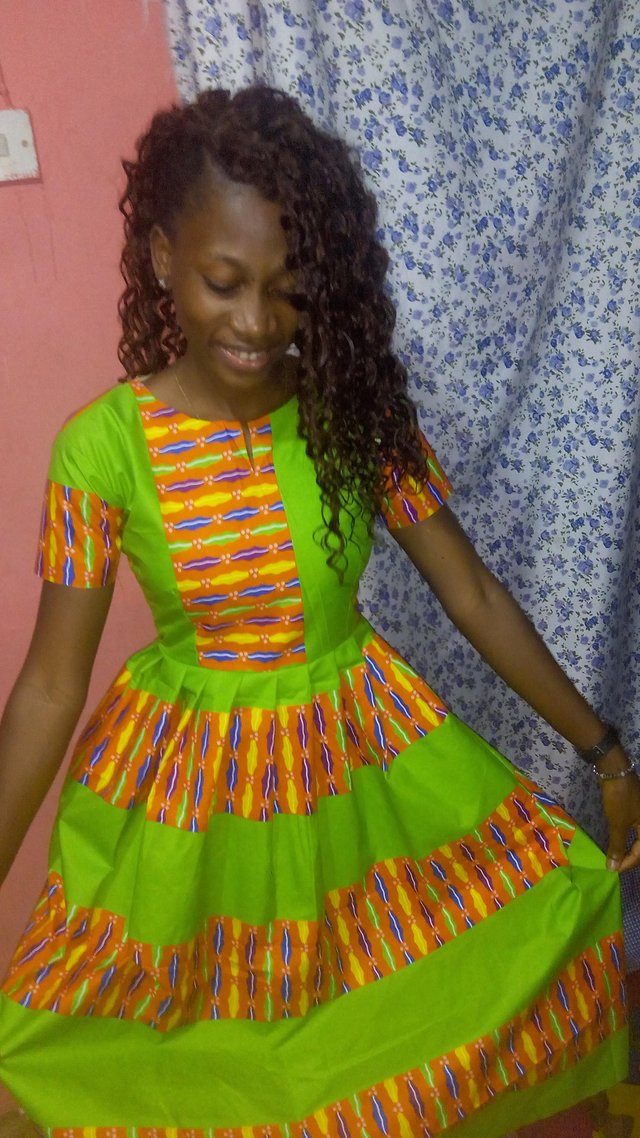

This was the end product after I finished sewing the cloth, and my next post will be on the steps involved in the sewing of the pleated dress.

If any of the terms used in this tutorial is not clear to you, you can check there meanings in my last post on the terminologies used in tailoring here
Do feel free to drop your suggestion and questions and if you want a tutorial on any style drop it also in the comment section for more understanding and clarity. Thank you so much for taking your time to read this tutorial.
Think fashion always.
All the images and video were taken on my Infinix Note 3 phone
Upvote
resteem
comment
follow
Welldone ma! Keep showing forth!
Thank you