How to use iSpoofer to fake location on iPhone?
In this article, we introduce how to fake location on iPhone by iSpoofer. Although you can use XCode to do the same thing, iSpoofer is much easier to achieve that object, meanwhile, you don’t need to have experience in software development.
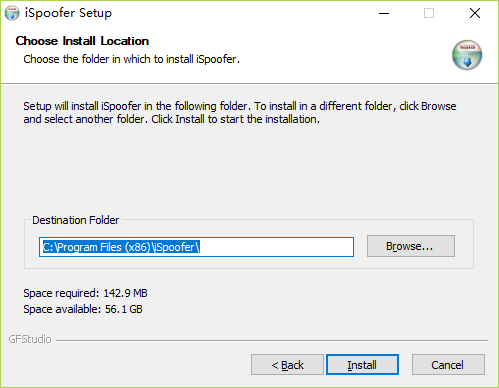
Step 1: Download & Install iSpoofer from Website
Visit https://www.ispoofer.com/ and then download iSpoofer to your computer, double-click the setup file and follow the step-by-step guide to install iSpoofer.
Install iSpoofer for Windows
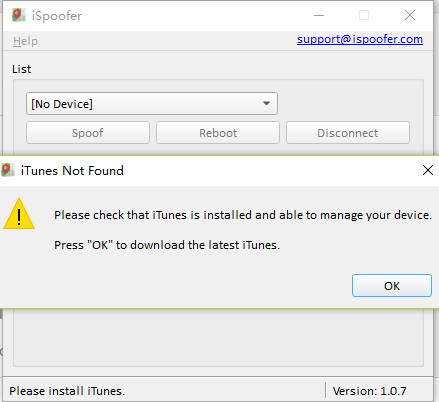
Step 2: Open iSpoofer and Do the Necessary Preparations
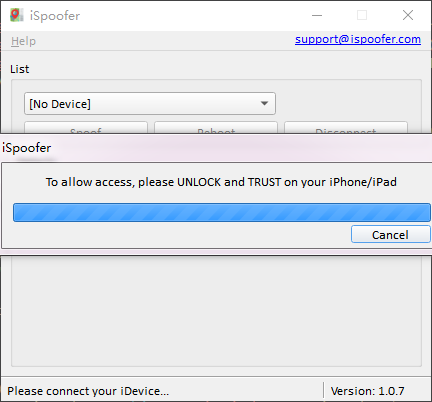
Once you installed iSpoofer, launch it, and the software will check the system environment to ensure that iTunes is installed. If you haven’t installed iTunes, iSpoofer will guide you to download it automatically. After iTunes installed successfully, you can connect the iPhone, iPad or iPod to your computer via USB interface. iSpoofer will detect your phone and prompts you to unlock the iPhone and trust the computer on iPhone.
iTunes Not Installed
Trust PC on Your Device
Step 3: Get Ready to Travel
When you see the details of your iPhone on iSpoofer, that means iSpoofer has successfully connected to your iPhone. Now you can click the "Spoof" button to start your journey.
Mount iOS Developer Image
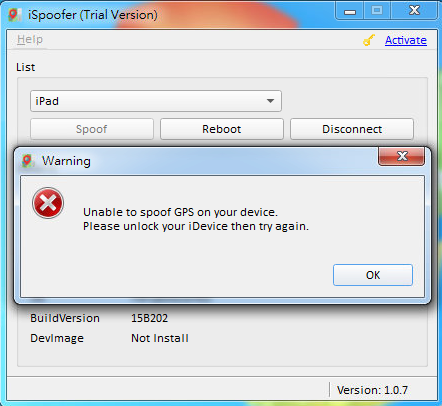
Note: In order to fake the location on Windows PC, iSpoofer needs to mount a Developer Image file into iOS like XCode. This process requires your iOS device keeping unlocked.
Step 4: Let’s GO!
Make sure your internet connection is working and then you’ll see a map of the world. There are 3 modes you can fake location on the iPhone.
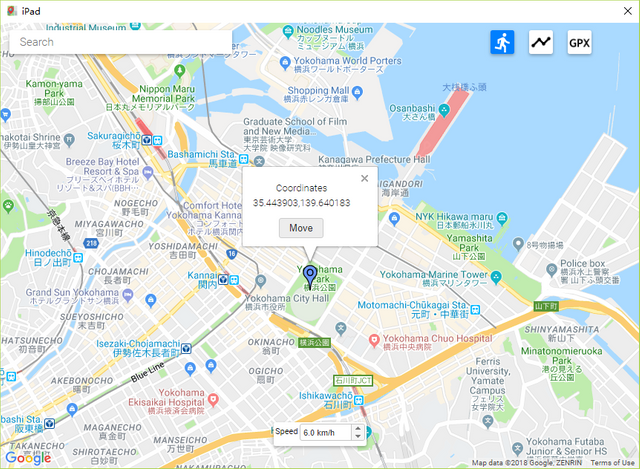
Mode 1: Single Point Simulation
This is the default mode when you start to use iSpoofer. Search a particular location on the map and then click it on the map, you’ll see a “Move” button. Your iPhone will immediately move to this location when you click “Move”. In this mode, you can also press “WASD” key to move the location manually! Even you can adjust the moving speed with a small widget at the bottom of the map.
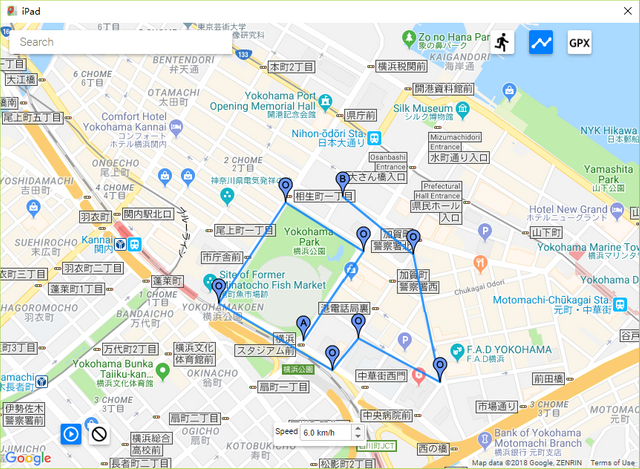
Mode 2: Customizing Route
In this mode, you can click several pins on the map. When you finish setting up these pins and then click the “Play” button on the left bottom corner of the map. Your device will start to “move” according to this route and the speed you set. The movement will never stop until you click the "Stop" button. It’ll go there and back repeatedly.
Mode 3: GPX File
There are many GPX files on the Internet, which you can use for many purposes. So iSpoofer enables you can load GPX file and apply it to the map. Like customizing route mode, you can set your movement speed and click “Play” to start. And the movement will not stop until you click the “Stop” button.
When you finish the special journey, you can reboot your mobile device to immediately restore the GPS location. If you have any additional questions, please contact via [email protected]. We’ll respond as soon as possible.
Congratulations @ispoofer! You received a personal award!
You can view your badges on your Steem Board and compare to others on the Steem Ranking
Vote for @Steemitboard as a witness to get one more award and increased upvotes!