EOS tutorial : wallets, accounts, tools and resources

EOS is a latest-generation blockchain platform with unique features. In addition to its consensus mechanism - delegated proof of stake (dPoS) - EOS differs from many other infrastructures by its system of user accounts, and by the free nature of transactions. How does EOS accounts system works ? How does EOS staking works ? What are the best interfaces available ? How to define the resources, in CPU, bandwith and RAM, necessary for your account to work properly ?
User accounts on EOS
In order to promote adoption of decentralised value exchange systems, it is necessary to eliminate as many technical barriers as possible between end users and the blockchain. Public addresses on most existing blockchain networks are difficult for ordinary people to read. In addition to discouraging newcomers, it can also lead to reading or writing errors, that can be costly. This is why the idea of having user accounts, readable in a "human-friendly" format is essential.
On EOS, it is possible to create as many user accounts as you wish, if you have devoted corresponding amount of tokens to the resources necessary for the existence of the account : bandwidth, CPU, and RAM. These three resources are available in finite quantity in EOS ecosystem, and are provided by block producers. By staking a certain amount of EOS, user accesses his share of corresponding network resources.
- Bandwidth, in kB/s, represents the data rate to which a user can claim.
- Processing units (CPU) represent the amount of information that EOS network can process in a given time.
- Random access memory is used to store account information, such as name, balance, access permissions, state of smart contracts, and so on. Unlike the two previous resources, RAM is bought on the market (we are in favour of a change to a RAM rental system).
There are two types of user accounts on EOS :
- Standard accounts, represented as 12 alphanumeric characters (all lower case letters from a to z and all digits from 0 to 9).
- Premium accounts, which can be represented by shorter character strings. These personalized "labels" (for example, if you wish to create an account in the name of your company) are accessible via an auction system.
Technically, user accounts have two keys :
- An active key, to interact with the blockchain : make transactions, vote, buy RAM, and so on.
- An owner key, which allows you to modify ownership and access permissions of an account.
It is of course possible to create multisig accounts, and to configure the threshold of signatures necessary for its activation, just like on Bitcoin.
An EOS account can be seen as your "human-compatible" identifier on the blockchain. It is necessary in order to execute transactions, and different levels of access authorization to this account can be set. It also means that in order to create a new account, you must go through an existing account.
From the point of view of EOS software architecture, wallets are managed by keosd and accounts by nodeos. cleos command line interface provides access to both programs, which are independent.
How to know your EOS account name ?
When EOS was deployed, all users who registered their ERC 20 tokens were assigned an account corresponding to the registered EOS public key. You can very easily find the (randomly generated) name of the account corresponding to your EOS public key or your Ethereum public address by going, for example, to :
Requirements to create an EOS account :
If you do not have an EOS account resulting from the genesis block (for example if you left your ERC-20 on an exchange platform), in order to create a new account, you must go through an existing account. There are different ways to create a new account :
- Thanks to a friend who already has one ;
- Thanks to a third party service ;
- Thanks to EOSIO's bootstrap account.
Ownership of staked tokens must also be taken into consideration : they may belong to the account creator, or to a defined account holder.
It is also possible to delegate voting rights from one account to another account, for example if you do not want to interact with the blockchain for fear of doing silly things.
Premium names :
Standard EOS accounts do not allow you to create names with less than 12 alphanumeric characters. So it was to allow users to create custom account names that premium name auction system was set up.
Premium names are suffixes that can be composed of as many characters as desired, without exceeding a limit of 12 characters, in the same way as top-level domains on the Internet (.com,.fr, etc.). Like their analogues on the web, it is through an auction mechanism that members can assign them. Anyone can bid on a premium name, but only one name per day will be given: it is the name with the highest bid of all.
It should be noted that EOS tokens dedicated to acquiring premium names will be locked into a fund, eosio.names, which will be used to finance projects of general interest or burned. This creates a form of deflationary pressure on EOS, while promoting the common good.
To bid on premium names, you can use one of the tools presented below.
Creating an user account : different tools
There are different ways to create an EOS account. Creating an account requires staking the amount of EOS tokens needed to use the network's CPU and bandwidth resources. You also need enough EOS to buy the RAM needed to create the account (currently 4k, but this will be reduced).
Most of the tools needed to interact with EOS require installation of Scatter. This extension allows, like Metamask on Ethereum, to manage your cryptographic key pairs locally, to allow you to identify yourself on different applications based on asymmetric encryption. Clearly, it is a very effective tool to protect your private keys without sacrificing comfort of use.
Warning : you must download Scatter extension from a secure source (Chrome Store) and check extension's identifier once it is installed!
Go to: https://chrome.google.com/webstore/detail/ammjpmhgckkpcamddpolhchgomcojkle
- Once Scatter is installed, copy and paste the following address in Chrome to access extensions and activate developer mode (top right): chrome://extensions/
- Find Scatter in the list of extensions and display its full ID. It must be exactly this one : ammjpmhgckkpcamddpolhchgomcojkle
First configuration :
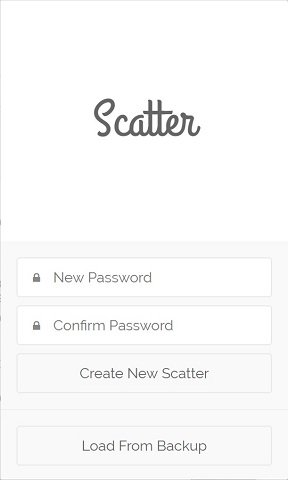
Password will be used to access your locally stored and encrypted data. Corresponding mnemonic seed will be communicated :
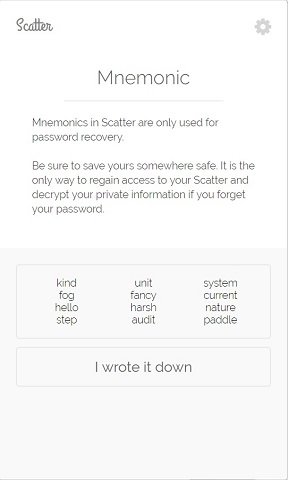
Of course, usual precautions are necessary : make sure that your working environment is not corrupted, keep this information in a safe place, etc, etc....
Key pair generation with Scatter :
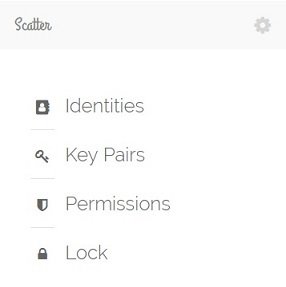
It couldn't be simpler ! Launch Scatter extension then, go to the "Key pairs" tab. Select EOS blockchain, give this key pair a name, and click on the "Generate key pair" button: a public/private key pair will appear. Private key will be hidden (replaced by asterisks) but by clicking "Copy" you can copy/paste the key pair into a file (preferably stored using a secure solution, such as Keybase, or on an external physical medium). Then, click on "Save".
Repeat this operation to have two pairs of keys, so that owner key for your future account is different from active key.
Once these pairs of cryptographic keys have been generated, you can proceed to the creation of an EOS account. Easiest way to do this is through one of the many tools available online.
EOS Account Creator by EOSVibes
EOSVibes, a block producer candidate, has created an online EOS account creation service : The service is easy to use. Click the blue "GET STARTED" button. The following screen will appear:
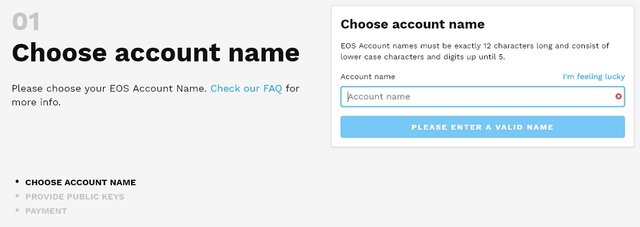
First you need to choose an account name. Its availability will be checked automatically. Please note that a standard EOS account name consists of exactly 12 alphanumeric characters. Once you have found a valid name, proceed to next step.
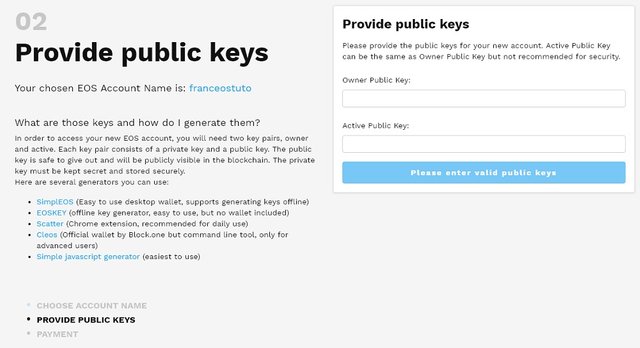
Here you need to provide the public keys (owner and active) that will match your account. You can generate them using Scatter (see explanations above), or you can use any tool at your convenience.
Step 3: Payment !
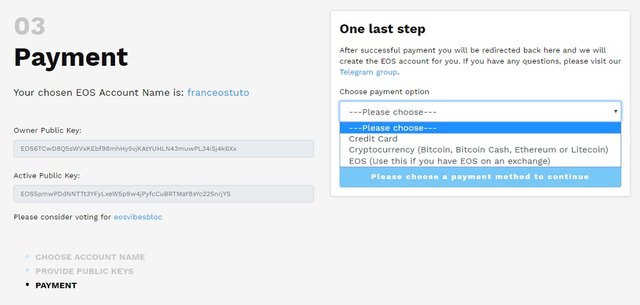
EOS Account Creator allows you to pay by credit card, via BTC/BCH/ETH/LTC, or directly with your EOS, if they are currently stored on an exchange platform. Select desired method, make the payment: that's it, you have an EOS account !
ZEOS - a free service for the community (only the RAM purchase fee is required)
ZEOS is a free, secure and open-source online service that makes it very easy to create an EOS account : Youtuber Crypto MaAk made an explanatory video :
Easily create a new EOS account from one of your existing accounts : EOSToolkit by GenerEOS
GenerEOS (a stand-by block producer) has created an extremely ergonomic tool to interact with EOS blockchain : This very comprehensive tool allows you to create and manage your EOS accounts, but also to vote, search for accounts on the blockchain, etc.. Before using EOSToolkit, make sure you have Scatter properly installed and configured. It is necessary to already have an account on EOS in order to create a new one via EOS Toolkit : the tool does not allow for the moment to create an account from scratch, on the other hand, creation and management process is pleasant thanks to its graphical interface. You just need to have generated your owner and active keys, and have the necessary funds to purchase RAM and allocate CPU and bandwidth.
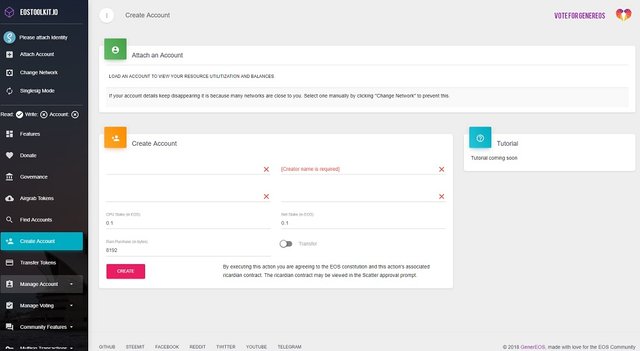
An explanatory video is available on GenerEOS YouTube channel :
Create wallets and accounts with cleos
If you are not afraid of code lines and want to create your EOS accounts in the most raw and secure way possible, you need to go through EOS command line interface, cleos : this CLI allows you to interact with the REST API of nodeos. In order to know the procedures to install EOSIO software on your computer, according to your operating system (it is recommended to use Docker), refer to dedicated tutorial on franceos or on EOSIO development portal.
Check also "Lesson: Accounts & Wallets" in the nodeos section of the development portal.
Create an EOS wallet in keosd :
Before creating an account, you must create and configure the default wallet for your local EOS node. To do this, use the wallet create command with cleos :
$ cleos wallet create
Creating wallet: default
Save password to use in the future to unlock this wallet.
Without password imported keys will not be retrievable.
"A MASTER PASSWORD"
This default wallet will be encrypted with this password : keep it safe, blah blah blah...
Corresponding file will be named default.wallet and stored in ~/eosio-wallet folder. This path can be specified using --wallet-dir argument.
Creating multiple wallets :
Use -n argument to create multiple wallets, which will be protected by different passwords :
cleos wallet create -n wallet2
Creating wallet: wallet2
Save password to use in the future to unlock this wallet.
Without password imported keys will not be retrievable.
"A MASTER PASSWORD"
Confirm that the wallet has been created and matches chosen name:
cleos wallet list
Wallets:
[
  "default *",
  "wallet2 *"
]
This asterisk means that each listed wallet is unlocked (this is the case, by default, after each creation). To lock a wallet, use wallet lock command :
cleos wallet lock -n wallet2
Locked: wallet2
By executing wallet list command again, the asterisk will have disappeared, notifying wallet lockup.
cleos wallet list
Wallets:
[
  "default *",
  "wallet2"
]
To unlock a given wallet, use unlock wallet command followed by wallet name, then enter corresponding password :
cleos wallet unlock -n wallet2
Unlocked: wallet2
It is now necessary to stop keosd and return to the terminal in which cleos was launched, in order to open wallets to use (necessary in order to interact with) :
cleos wallet open
cleos wallet list
Wallets:
[
  "default"
]
To open a given wallet, use command : $ cleos wallet open -n wallettoopen
Once wallet is open, it must also be unlocked :
$ cleos wallet unlock
Unlocked: default
From now on, it is necessary to create and import EOS cryptographic keys in the wallet used.
Generating and importing EOS public keys :
Nothing could be easier with create key command :cleos create key --to-console Private key: XXXXXXXXXXXXXXXXXXXXXXXXXXXXXXXXXXXXXXXXXXXXXXXXXXX Public key: EOSXXXXXXXXXXXXXXXXXXXXXXXXXXXXXXXXXXXXXXXXXXXXXXXXX cleos create key --to-console Private key: XXXXXXXXXXXXXXXXXXXXXXXXXXXXXXXXXXXXXXXXXXXXXXXXXXX Public key: EOSXXXXXXXXXXXXXXXXXXXXXXXXXXXXXXXXXXXXXXXXXXXXXXXXXHere are two pairs of public/private keys to use for the account.
Adding --file filename instead of --to-console allows you to write your keys to a locally stored file.
Once those steps are completed, you have your new key pairs (which have no authority at the moment), and your wallet is opened and unlocked.
Next step is to import these private keys into the wallet. This maneuver must be performed twice, for each private key generated :
cleos wallet import PRIVATE_KEY_1With the second private key:
cleos wallet import PRIVATE_KEY_2Console will respond with the public key corresponding to the imported private key:
cleos wallet import XXXXXXXXXXXXXXXXXXXXXXXXXXXXXXXXXXXXX
imported private key for: EOSXXXXXXXXXXXXXXXXXXXXXXXXXXXXXXXXXXXXXXXXXXXXXXXX
It is possible to check which keys have been imported using wallet keys or wallet private_keys:
$ cleos wallet keys
[
        "EOS...",
        "EOS..."
]
cleos wallet private_keys --password YOURPASSWORD
password:
[[
    "EOS...",
    "XXX..."
  ],
  [
    "EOS...",
    "XXX..."
  ]
]
Corresponding file is encrypted, this is why it is necessary to enter your password to access the keys.
Saving the wallet :
As with any crypto-wallet, it is recommended to save the corresponding file in a secure environment. Files are stored by default in ~/eosio-wallet directory, or in data-dir folder you specified.cd ~/eosio-wallet && ls blockchain blocks config.ini default.wallet wallet2.walletIt is of course recommended to backup these two files in a secure storage space !
Creating an account :
We're getting to the point. In order to create a new account via cleos, it is necessary that nodeos and keosd are executed simultaneously on your machine.The first step is to differentiate nodeos and keosd ports (default: 8888). Here, assigned port to keosd will be 8899.
In the config.ini file located in ~/eosio-wallet directory, modify http-server-address to :
http-server-address = 127.0.0.1:8899
Run keosd with this argument:
keosd $ --http-server-address=localhost:8899Unlock the default keosd wallet :
cleos --wallet-url=http://localhost:8899 wallet unlockThen enter the password generated when creating the wallet.
Then start nodeos in parallel : open a second terminal in command lines, go to the directory where nodeos is installed, and enter following command :
cd eos/build/programs/nodeos
nodeos -e -p eosio --plugin eosio::chain_api_plugin --plugin eosio::history_api_plugin
Here, the account that will be used to create the new account will be eosio, the special account used to bootstrap EOS nodes. Corresponding key is located in ~/nodeos/config/config.ini directory.
cleos wallet import 5KQwrPbwdL6PhXujxW37FSSQZZ1JiwsST4cqQzDeyXtP79zkvFD3It is now possible to create a new account with cleos create account command, according to the following structure :
cleos create account eosio NEW_ACCOUNT OWNER_KEY ACTIVE_KEYThe different arguments:
- authorizing_account : this is the name of the account that will finance the creation of the new account, eosio in our case;
- new_account : name of the account to create ;
- owner_key : public key that will give authority and ownership over the new account ;
- active_key : public key that will have authorization to use account funds.
- They must be less than 13 characters long ;
- They may contain only the following characters: .12345abcdefghijklmnopqrstuvwxyz
Public keys generated and imported into the wallet previously will be used. Of course, you must remember which authorizations are assigned to each key : owner key gives complete control of the account, and active key gives access to the funds in the account.
The command line to generate this new account is then the following:
cleos --wallet-url=http://localhost:8899 create account eosio myaccount OWNER_KEY ACTIVE_KEYTo finish this tutorial, here are some details about the funds needed to create an EOS account.
Resource requirements : metrics
Currently, an EOS account requires 4 KB of RAM to store the necessary information. Bandwidth and CPU resources are allocated in proportion to EOS tokens staked by user. A minimum of 0.1 EOS for CPU usage and 0.1 EOS for bandwidth usage are recommended (this allows you to perform approximately one transaction every ten minutes). Thus, at the time of writing, with a price of 0.178 EOS/ko, creation of an account costs at least 0.712 EOS + 0.2 EOS : 1 EOS dedicated to account creation is sufficient.To know the price of RAM, determined by the Bancor algorithm, as well as the price per KB and per day of CPU usage and bandwidth, go to EOS Resource Planner, a tool developed by EOS New York. For much more complete information about RAM and to access this market, visit FeeXplorer.
That's it, you know everything about creating wallets and EOS accounts, either in the simplest and most intuitive way, thanks to the tools developed by EOS BPs, or by using cleos command line interface! Feel free to comment on this article if it is unclear or if you find mistakes.
Have fun on EOS !
Monitor EOS BPs, and vote for franceos, using your account, Scatter and our online interface :
franceos team