Micrometers and Precision Measuring
My father worked as a "Tool and Die Maker" most of his life. For those who aren't familiar with this type of work, I will explain.
A machinist is someone who uses tools (especially power tools) to manufacture things from metal, plastics, or wood, to a high degree of precision. Regarding this precision, machinists often measure their work in thousandths of a inch! To give an example of how small a measurement that is, I searched the Internet for the "thickness of paper." Of course, there are many different thicknesses of paper, ranging from "onion skin" to "cardstock." But the common paper used in most offices (referred to as "20-pound" paper) is described thusly on answers.com:
A ream (500 sheets) of 20 lb office paper is just under 2 inches thick, so one sheet... is close to 0.004 inches (more like 0.0038).
For the metric-minded folk, they continue:
At 25.4 mm per inch, this gives us about 0.09652 mm, or just under one-tenth of a millimeter thick.
The University of California at Riverside closely corroborates this information by giving the thickness of 20-pound office paper at 0.0035 inches.
So, imagine splitting a sheet of paper's thickness into THIRDS, and using that as a basis of measurement! It is astounding to consider, but that sort of precision is necessary for automotive engines, electronics, and many other things we use on a daily basis. And those measurements are large when compared to the even-smaller measurements necessary for work in biology, physics, CPU architecture, and other fields.
photograph by me
Anyone who has ever taken something apart has probably seen a handful of screws, springs, odd-shaped pieces of metal/plastic, gears, and what-not, that comprise the whole of the item prior to disassembly. Each of these "parts" had to be individually made by some piece of machinery that was equipped to make it. To do this, special "fixtures" are added to the machines, and that is where the special class of machinists known as Tool and Die Makers enter the scene.
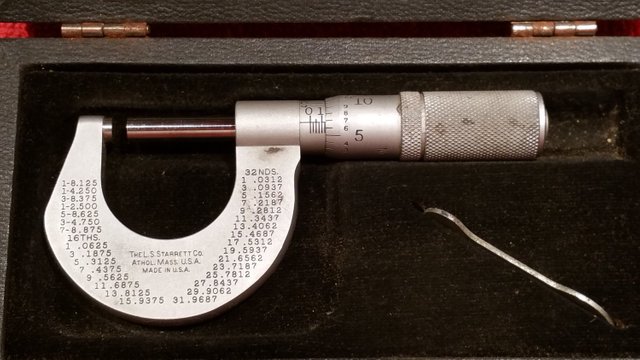
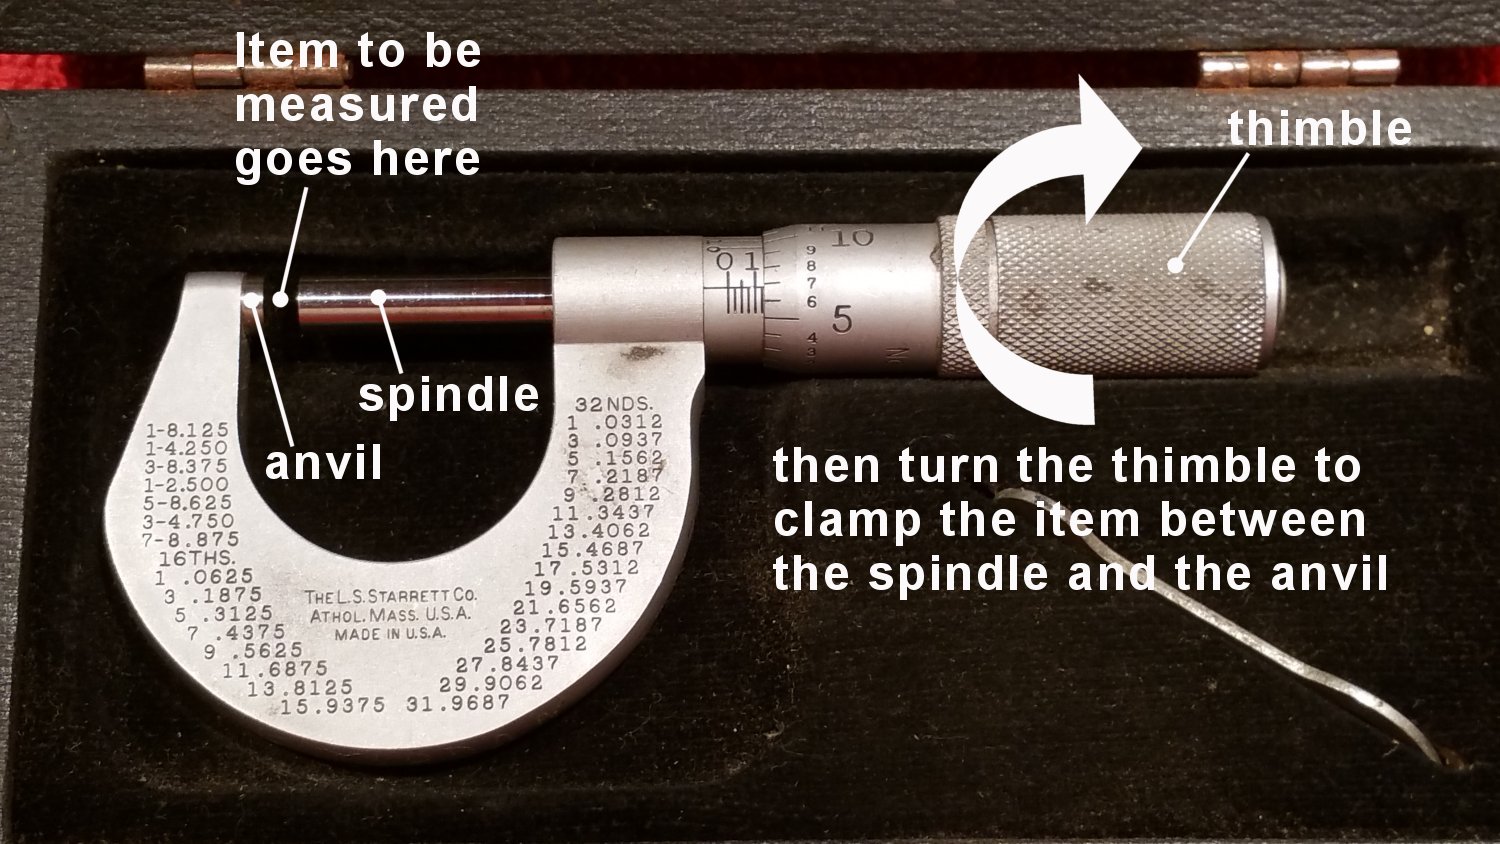
During his life, my father held a variety of positions, but the one he held the longest was that of a Tool and Die Maker. He began his career at a fabrication factory as Apprentice in their Tool & Die Department and learned the trade. After a few years, he became a Journeyman, who could work with less supervision. Finally, after many years at that level, he progressed to the level of Master Tool & Die Maker. He was very clever at his job and believed in giving his employer an honest day's work; in fact, he always arrived at work EARLY so he could unlock his toolbox and lay-out the tools he needed for the day before he clocked-in. I always admired his work ethic.To make measuremens of such a precise nature as required in his job, my father used many different measuring devices. But one of the most frequently used was his micrometer. He had a couple of them, but I think this is the one he used the most (based on the level of wear evident on the metal):
photograph by me
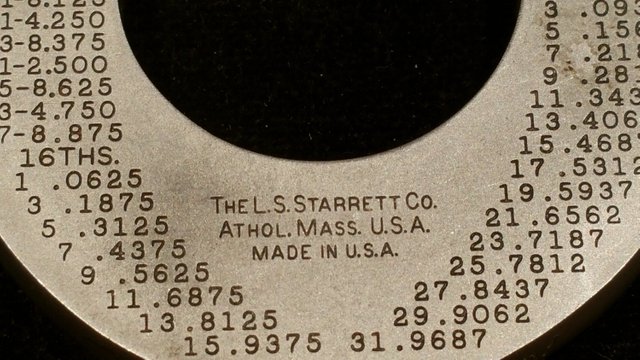
This one (Model № T230F) was made by the L.S. Starret Company, which was founded by Laroy S. Starrett in 1880. According to the company's website, they currently manufacture "5,000 variations of precision tools, gages, measuring instruments and saw blades for industrial, professional and consumer markets worldwide." Their website depicts some of the interesting variety of items they produce. Detailed information about the specific parts of the micrometer can be read in Wikipedia.
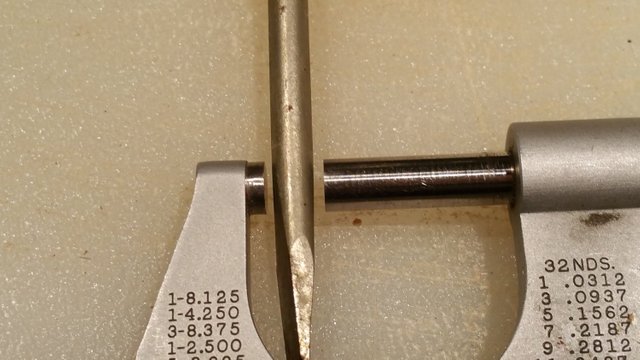
To measure something with the micrometer, here is the principle. Place the item to be measured between the spindle and the anvil, as shown, below:
photograph by me
Then, turn the thimble, which will slowly screw the spindle closer to the anvil. When resistance is felt as the spindle and anvil make contact to sandwich the item between them, the scales can be then be read to determine the measurement. There are three scales, referred to as the Barrel Scale, the Thimble Scale, and the Vernier Scale.
As an example of measuring an actual item, I grabbed a nearby screwdriver and placed the shaft into the micrometer to measure it:
photograph by me
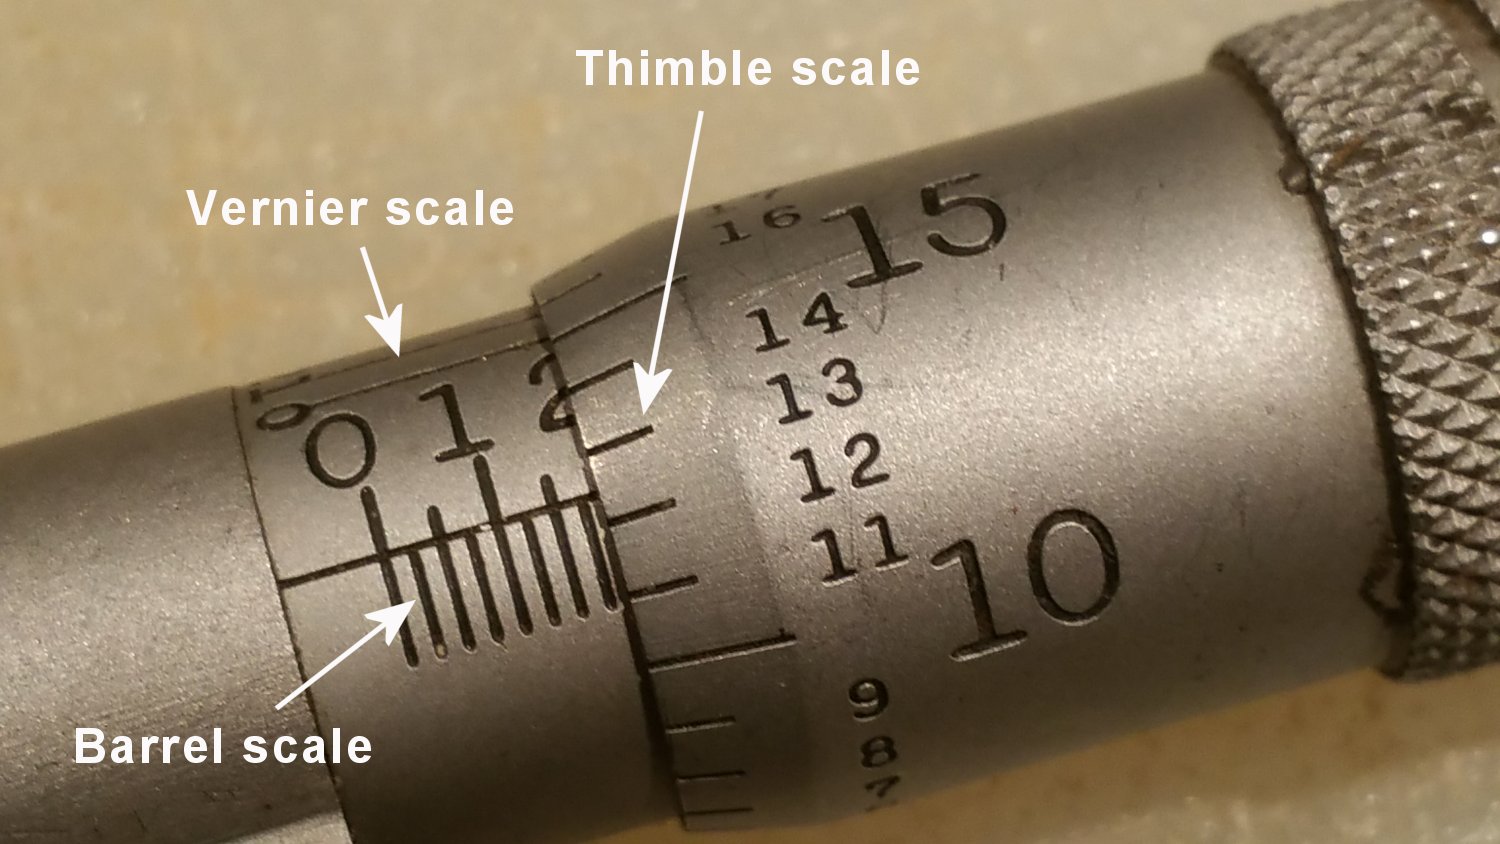
I turned the thimble until the shaft of the screwdriver was clamped between then spindle and the anvil. Then, looking at the three scales on the micrometer, here is what I discovered:
photograph by me
The Barrel scale has tick marks at intervals of 0.025" apart, and the numbers indicate tenths of an inch. The numeral "1" is showing, and three marks after it, indicating a reading of 0.175 inches. The markings on the Thimble Scale are between the "12" and the "13," so that indicates an additional measurement that lies somewhere between 0.012" and 0.013", and we must rely on the Vernier Scale to show the exact amount between those two numbers.
photograph by me
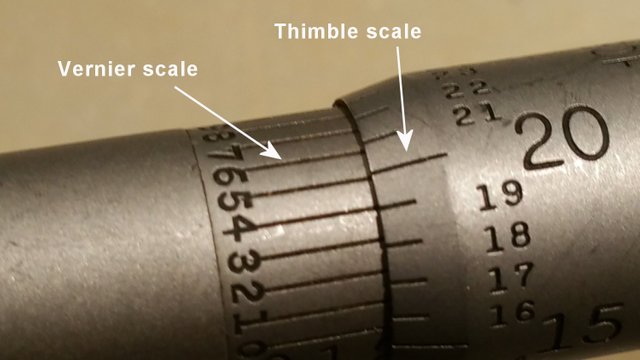
Since the Vernier Scale is lined-up at the number "4" (and not on any of the other numbers), that indicates a Timble + Vernier reading of 0.0124 inches. Adding that back to the 0.175 showing on the Barrel Scale, we see that the screwdriver's shaft is: 0.175 + 0.0124 = 0.1874 inches in diameter.
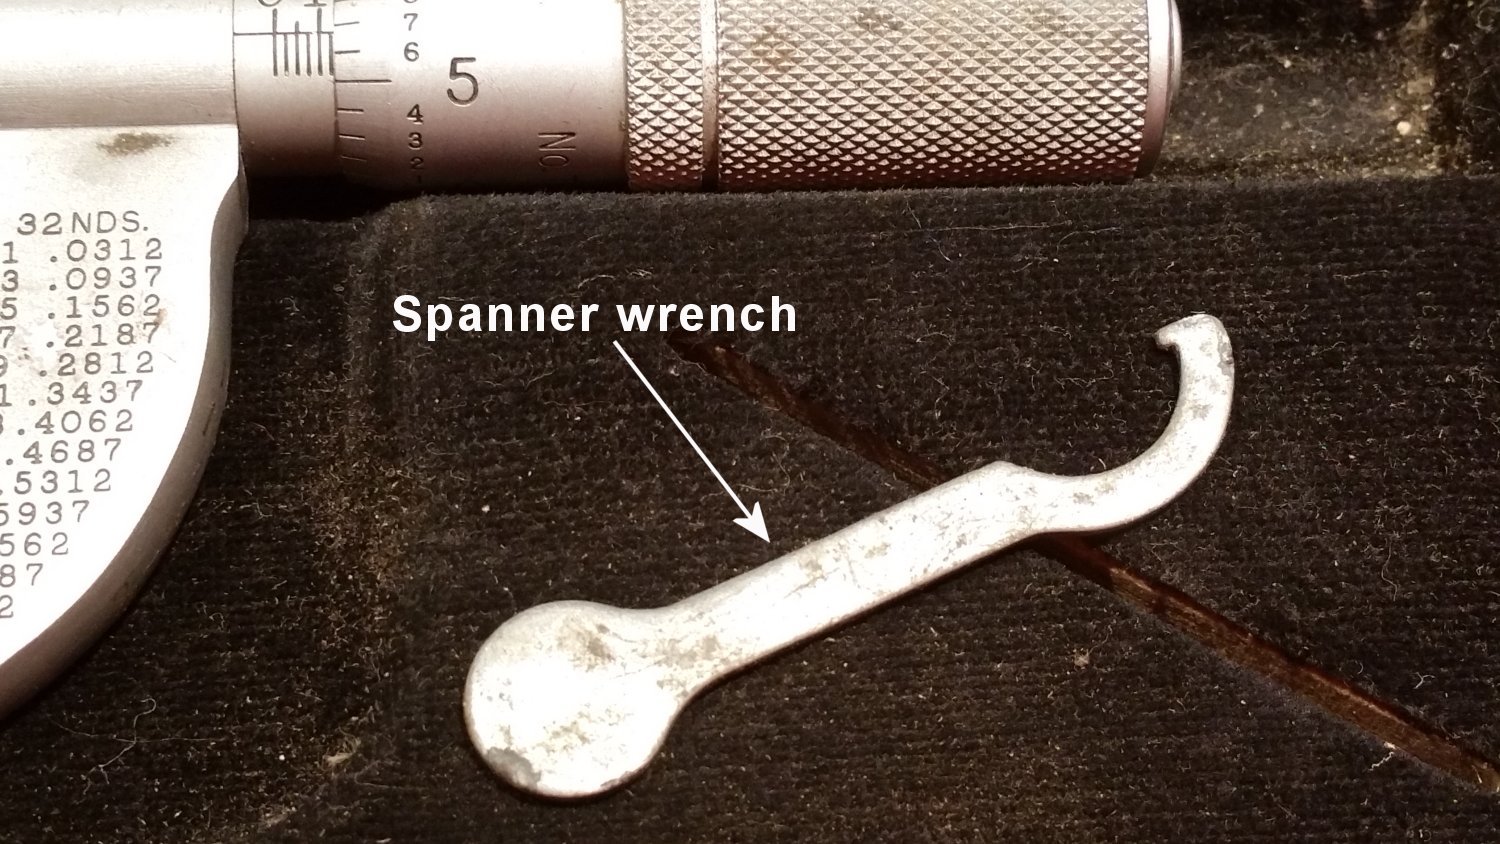
Most micrometers are also sold with a "spanner wrench" which can be used to tighten the friction on the thimble and to recalibrate the micrometer, if necessary.
photograph by me
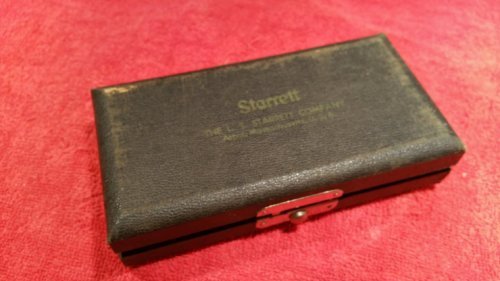
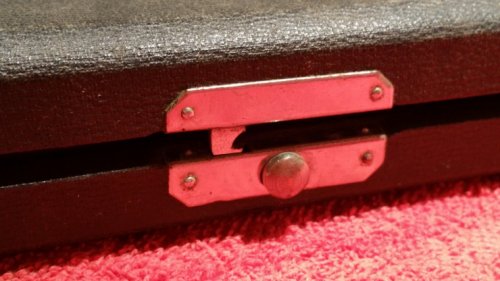
Because the micrometer is a precision measuring tool, the better-quality ones come in protective boxes with padding. This is the original box that my father's came in. It is slightly worn on the outside from years of use, but still very sturdy to protect the delicate instrument inside.
 |  |
|---|---|
| storage box, photo by me | detail of latch, photo by me |
The reason I know how to use a micrometer is because I earned an A.A.S. degree in Drafting & Design Tecnology and frequently had to use them for measuring things while drawing blueprints. Half of the Drafting Team were women, and half were men. I did this work for several years back in the days of drawing boards, using items such as t-squares, compasses, dividers, triangles, and french curves — before the advent of Computer Aided Drafting (CAD) systems! While I worked in that Engineering Department, we acquired a CAD system and I used it for a while before transferring to the Information Technology department to help program/maintain the backend of that system. That is when I went back to school to pursue a B.S. in Computer Science, and a new career was launched.
So, now you know a little more about micrometers, my late-father, and me. 😊



you must be so proud :)
Thank you! Yes, I was, indeed, very proud of my father! 😊
Thank you, kindly for the resteem! 😊
Darling, congratulations on your success! I'm very happy for you. You are worthy of this support. An exceptional story about your father's work.
Thank you so very much, sweetie! I appreciate it! 😊
Millimeter by millimeter, we learn more and more of the The Kitty Girl!
Ha, yes! I don't think I ever shared any of this stuff on Ello, nor here until now! Stay tuned! LOL! 😊
This is makes a phrase true ''hardwork is the key to success".
I will pray for your good life and I hope you will find more success.
very heart touching it was.
Thank you so very much! 😊
Very good explanation of the use, I have Starret micrometers also and they are the premiere tools in measuring as far as I am concerned
Oh, how cool! I didn't expect that any of my readers would have one of these things, too! 😊
It's a tool that I don't use everyday but is good to have when you need it, and when you are needing to measure for close tolerances it is better to have the best.
Do you do a good bit of close work once-in-a-while?
Not so much anymore, years ago when I was real involved in racing I used to mill a lot of engine parts to remove weight and balance the parts so I used it quite a bit then. checking parts for size and clearances. Last time I used it was last year when I rebuilt a engine for my father in law, he has an old 32 Ford hot rod.
Hi, I'm follow you now..😀
Thank you! 😊
Wow
Mind boggling. Your Dad was awesome
Thank you! Yes, he was a very remarkable man! 😊