" Create Angles Of Elbows And How To Install Bouwplank "
How to Make Elbow of Building
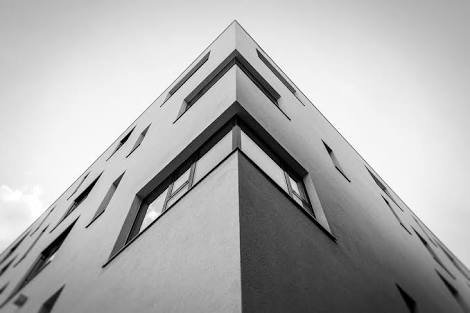
How to make the angle of the building is a science that is often used in the implementation of high-rise building construction. in the construction of dwelling house is also used in bouwplank work process so as to get an elbow construction. Although impressed simple but this kesikuan will affect the beauty, strength and even the cost of building. Executor of the building that specifically handles the manufacture and check kesikuan is named as a surveyor or uitzet.
Here are some reasons why buildings should be made elbow:
Household appliances such as cupboard elbows so that will facilitate perletakanya on the corner of the room the elbow.
The remaining installation of ceramic on the side of the room will be more neat and saving material.
High-rise buildings require horizontal or vertical placement of columns to create strong construction according to plan.

A). Make angle elbow with theodolite (Surveyor)
The way the theodolite tool is established first with the condition that the feet are in a safe position, the bubbles on the flat nivo tube and nivo upright in the circle.
Then the surveyor is ready to shoot through the theodolite binoculars toward the starting point of making the angle of the elbow with the help of the surveyor staff shows the point with the taper pencil tool, after the direction of the theodolite binoculars leads to the point of destination and then the surveyor locks the angle 0 then turns 90 degrees, from theodolite shots. this step if using conventional theodolite measuring devices, because in digital systems such as Total Section has its own way.
B). Make angles of the triangular way (builder)
Preparation in this way is the application of one of the triangular formulas which when applied to the execution of the building will produce a 90 degree angled angle. equipment used is yarn, peg or nail, and meter. the point is to make a triangle whose three sides have a 3: 4: 5 length ratio, for example, it can use 3 m: 4 m: 5 m size as seen in this right triangle image.


The size used in making the angles of the building's elbow may vary according to a 3: 4: 5 ratio for example if 3 is used 60 cm then 4 is 80 cm and 5 becomes 100 cm so it can be used the size 60 cm: 80 cm: 100 cm, how to determine building kesikuan.
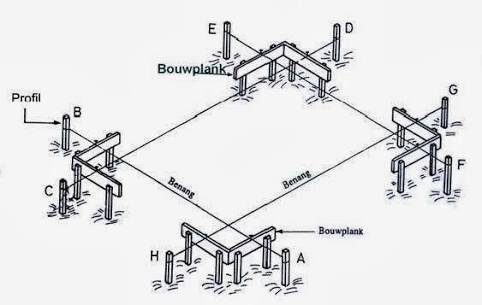
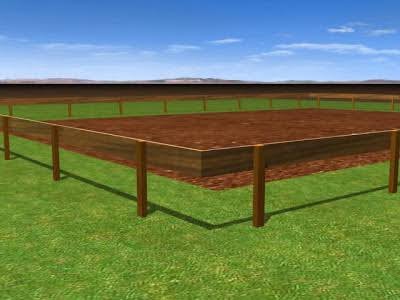
Bouwplank (Board Building)
Bouwplank is a temporary wooden peg to determine the point of the working area on a building or building poyek. Bouwplank also can befungsi as a point determination to make and put the size of buildings to be established and as auxiliary media for the process of making the foundation. In this bouwplank later we will put the spikes to pull the thread to create a straight line and then can make angle angle 90 degrees correctly. This thread will be a guide for foundation work, column, and brick wall installation.
a). Installation requirements bouwplank:
Position should be strong and not easily wobble / detached.
Quite enough from the excavation work plan, cultivated bouwplank position is not disturbed or not shake due to the implementation of excavation works foundation.
Bouwplank boards should be made of dots or made markings with paint or markers for mounting position of nail fastener.
The upper surface of the bouwplank should lie one field (horizontally) with another bouwplank board and water fitting.
Installation of bouwplank board must be uniform (facing into all building).
The line of yarn mounted on the bouwplank is the axis of the foundation plan and the brick wall.
b). Equipment and Materials used:
- Tools used :
- Yarn
- Elbows
- Pencil
- meter 5 meters
- Waterpass
- 5 kg hammer
- Plastic hoses
- Materials used:
- Board
- Wood 5 x 7 cm
- Nails
c). SAFETY WORK
- Wear a lab coat to keep our clothes dirty.
- Wear building gloves so that hands are not injured.
- Wear a building helmet to protect the head.
- Use boots to protect your feet from getting stones.
- Keep your tools and equipment neatly organized.
- Be careful when working and concentrate on the work.
- Use the tool in accordance with its function and avoid working while joking.
d). Work Steps
- Prepare materials and tools used.
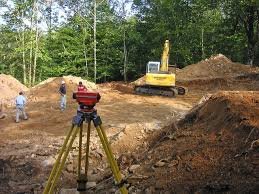
- Plug the wood size 5 x 7 cm into the ground by hitting the top of the wood by using a 5 kg hammer, keep the wood is not rocking ditancapkan.
- The distance of the foundation placement point 10 x 10 meters and the distance between the stakes one with the other peg ± 1 meter.
- Install the board that has been prepared on the peg, then pakukan and measure the flatness of the board by using waterpass.
- After that, measure the flatness of the ground between one bowplank with another bowplank by using a water hose in order to know the high low of a land.
- Nail the nails in the middle of the bowplank board, and tie the threads on each nail to find out the diameter of the foundation, keep the thread angle to be precise about the point of the foundation placement.
- Measure the triangle-shaped angle with the size 60 x 80 cm and the slope should be 100 cm.
How to install Bouwplank
- Embed a row of stakes according to the position of yarn tug (BA line) as the basis of building measurement.
- Punch the rows of stakes according to the position of the CD line made perpendicular to the BA line using the pythagoras (3: 4: 5) proposition.
- In the same way, lay the rows of stakes according to the EF and GH lines.
- On each mark give the placement of a dot of ± 0.00 by placing a flat field on each peg.
- Install the bouwplank by referring to that point.
How to Carry out Measurement Work and Bouwplank
- Embed a row of stakes according to the position of yarn tug (BA line) as the basis of building measurement.
- Punch the rows of stakes according to the position of the CD line made perpendicular to the BA line using the pythagoras (3: 4: 5) proposition.
- In the same way, place a row of peg-pa-tok according to the EF and GH lines.
- On each mark give the placement of a dot of ± 0.00 by placing a flat field on each peg.
- Install the bouwplank by referring to that point.
- Determine the location of the wall axis points on the bouwplank board, then plug the nail and mark with paint or wheeze.
Congratulations! This post has been upvoted from the communal account, @minnowsupport, by punkxer from the Minnow Support Project. It's a witness project run by aggroed, ausbitbank, teamsteem, theprophet0, someguy123, neoxian, followbtcnews/crimsonclad, and netuoso. The goal is to help Steemit grow by supporting Minnows and creating a social network. Please find us in the Peace, Abundance, and Liberty Network (PALnet) Discord Channel. It's a completely public and open space to all members of the Steemit community who voluntarily choose to be there.