How to series. ¦ How to assemble an electric standing fan. ¦ With illustrations!

Even with a good number of homes and offices worldwide having adapted to the usage of Air conditioners, Electric fans are pretty much still in use in a greater part of the world today.
Sometimes, for some basic home appliances, unboxing, assembling and maintaining can prove to be a very daunting task without a manual.
Heck, even with the manual in front of you, some could prove to be a headache. I've had such experiences, and I suppose some of us here might have too.
Today, in the spirit of spontaneity, (and of course due to the crazy heat of the African sun during the harmattan) I finally decided to clean up and assembly an old electric standing fan that I'd kept away for sometime now. and in very few words, I'll illustrate the steps I took with photographs below.

Let photos speak.
Step 1.
First off, I had all the components of the fan cleaned, spread out and arranged so I could easily see which was supposed to be attached to which first.


Step 2.
I did choose to start with the base first. One could always start from the motor on the head of the fan if they choose to.


The frame was attached to be base and screwed in place.
Be sure to check that the base doesn't rock after fixing the frame. The frame should stand at 90° to the base of the fan.

Step 3.
Next, we set aside the prepared base and frame, and began to assemble the hub of the electric fan.
Hold and insert the motor into the metal guard in the appropriate vertical position.

On my electric fan, there were a couple of slots and keys that helped guide the motor into place.

Screw the white plastic fastener to hold the guard to the motor.

Step 4.
Fixing the blade. The blade is evidently one of the most notable component of our electric fan systems. It has a "D" shaped hole on the center to act as a keyway onto the rotor's shaft. Simply guide the blade slowly onto the screwthread on the end of the motor's shaft.

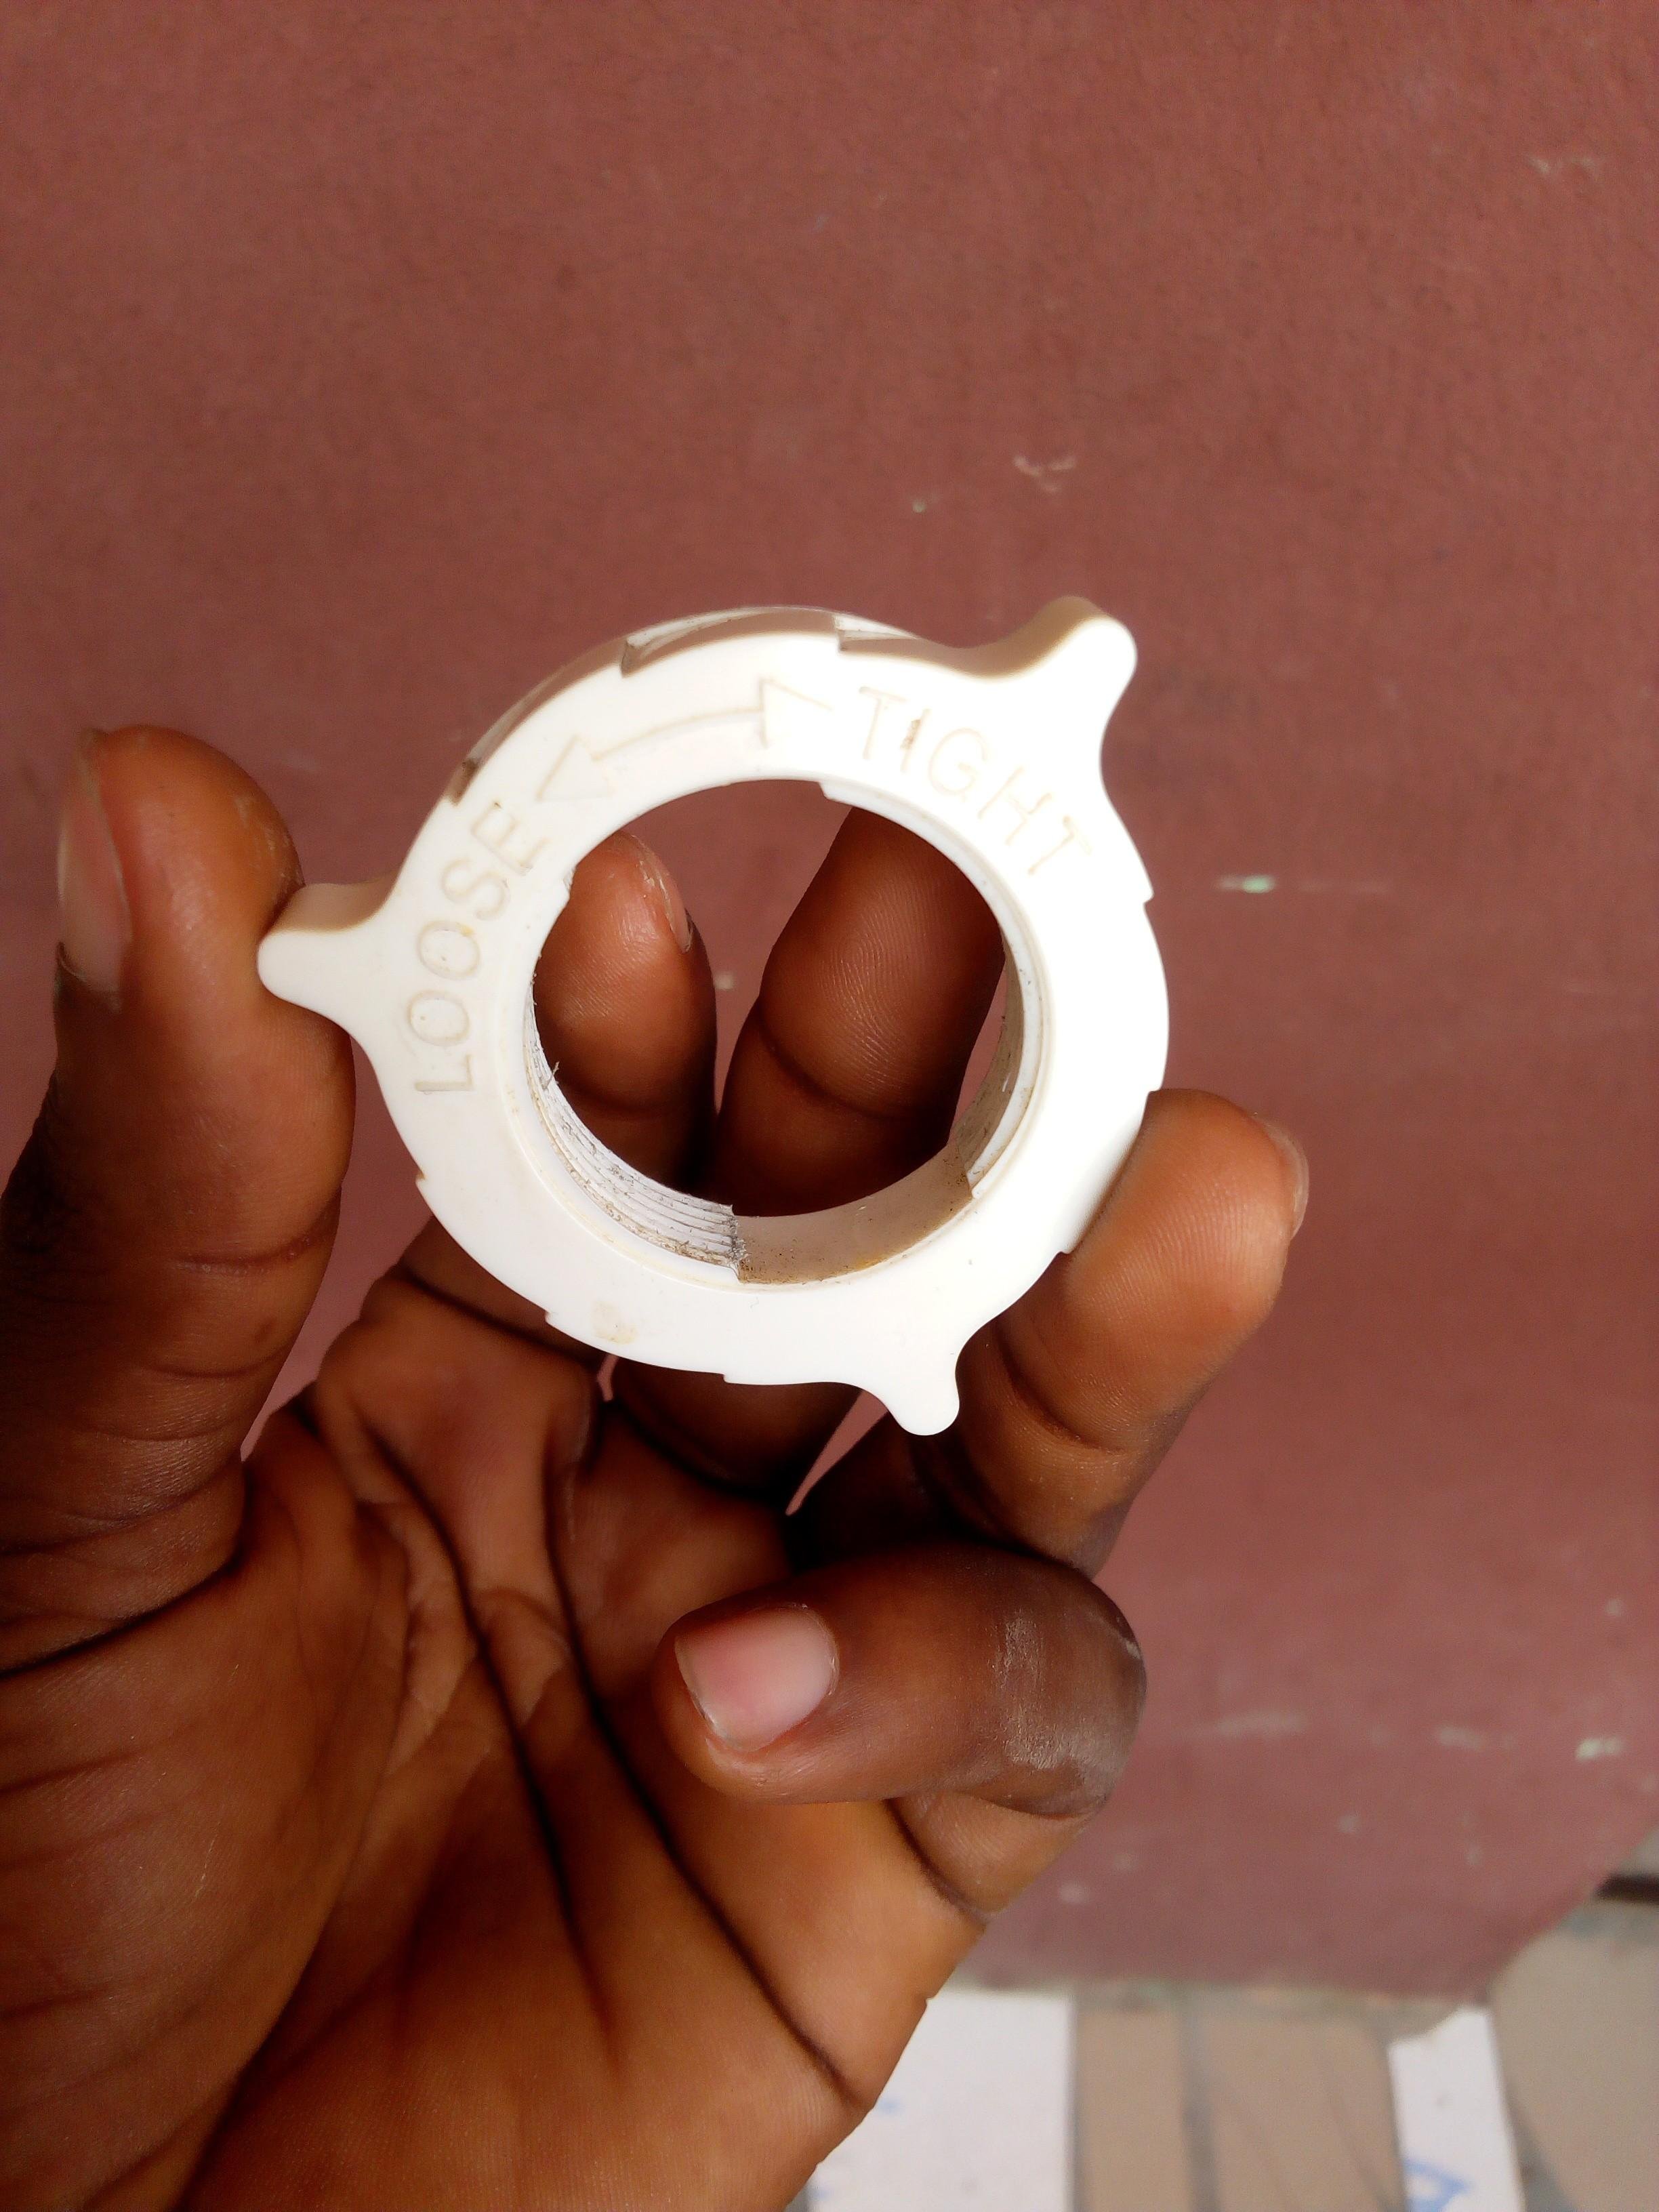
After fixing the blade in position, we need to fasten it with a plastic hub.


NB; Looking closely at the image above, we could see the indicated direction for screwing the hub into place. It's different from how we're used to screwing most things. This means that the thread on the rotor is left-handed. (Hence spinning the hub clockwise would loosen its grip and spinning it anticlockwise would tighten it's grip)
Step 5
Now we've fastened the blade properly and we're sure it wound slip out anymore. Secure the head of the fan to the stem by the neck. The neck has a fairly large screw hole for holding it together.


Be careful when working close to the wires on the speed controls. We don't want to sever any one of them.


Step 6.
Gently flip the fan over to the other side to enable you work on the speed control panel.
 You'd be needing these small screws

Next, you use the remainder of the screws to seal the Panel
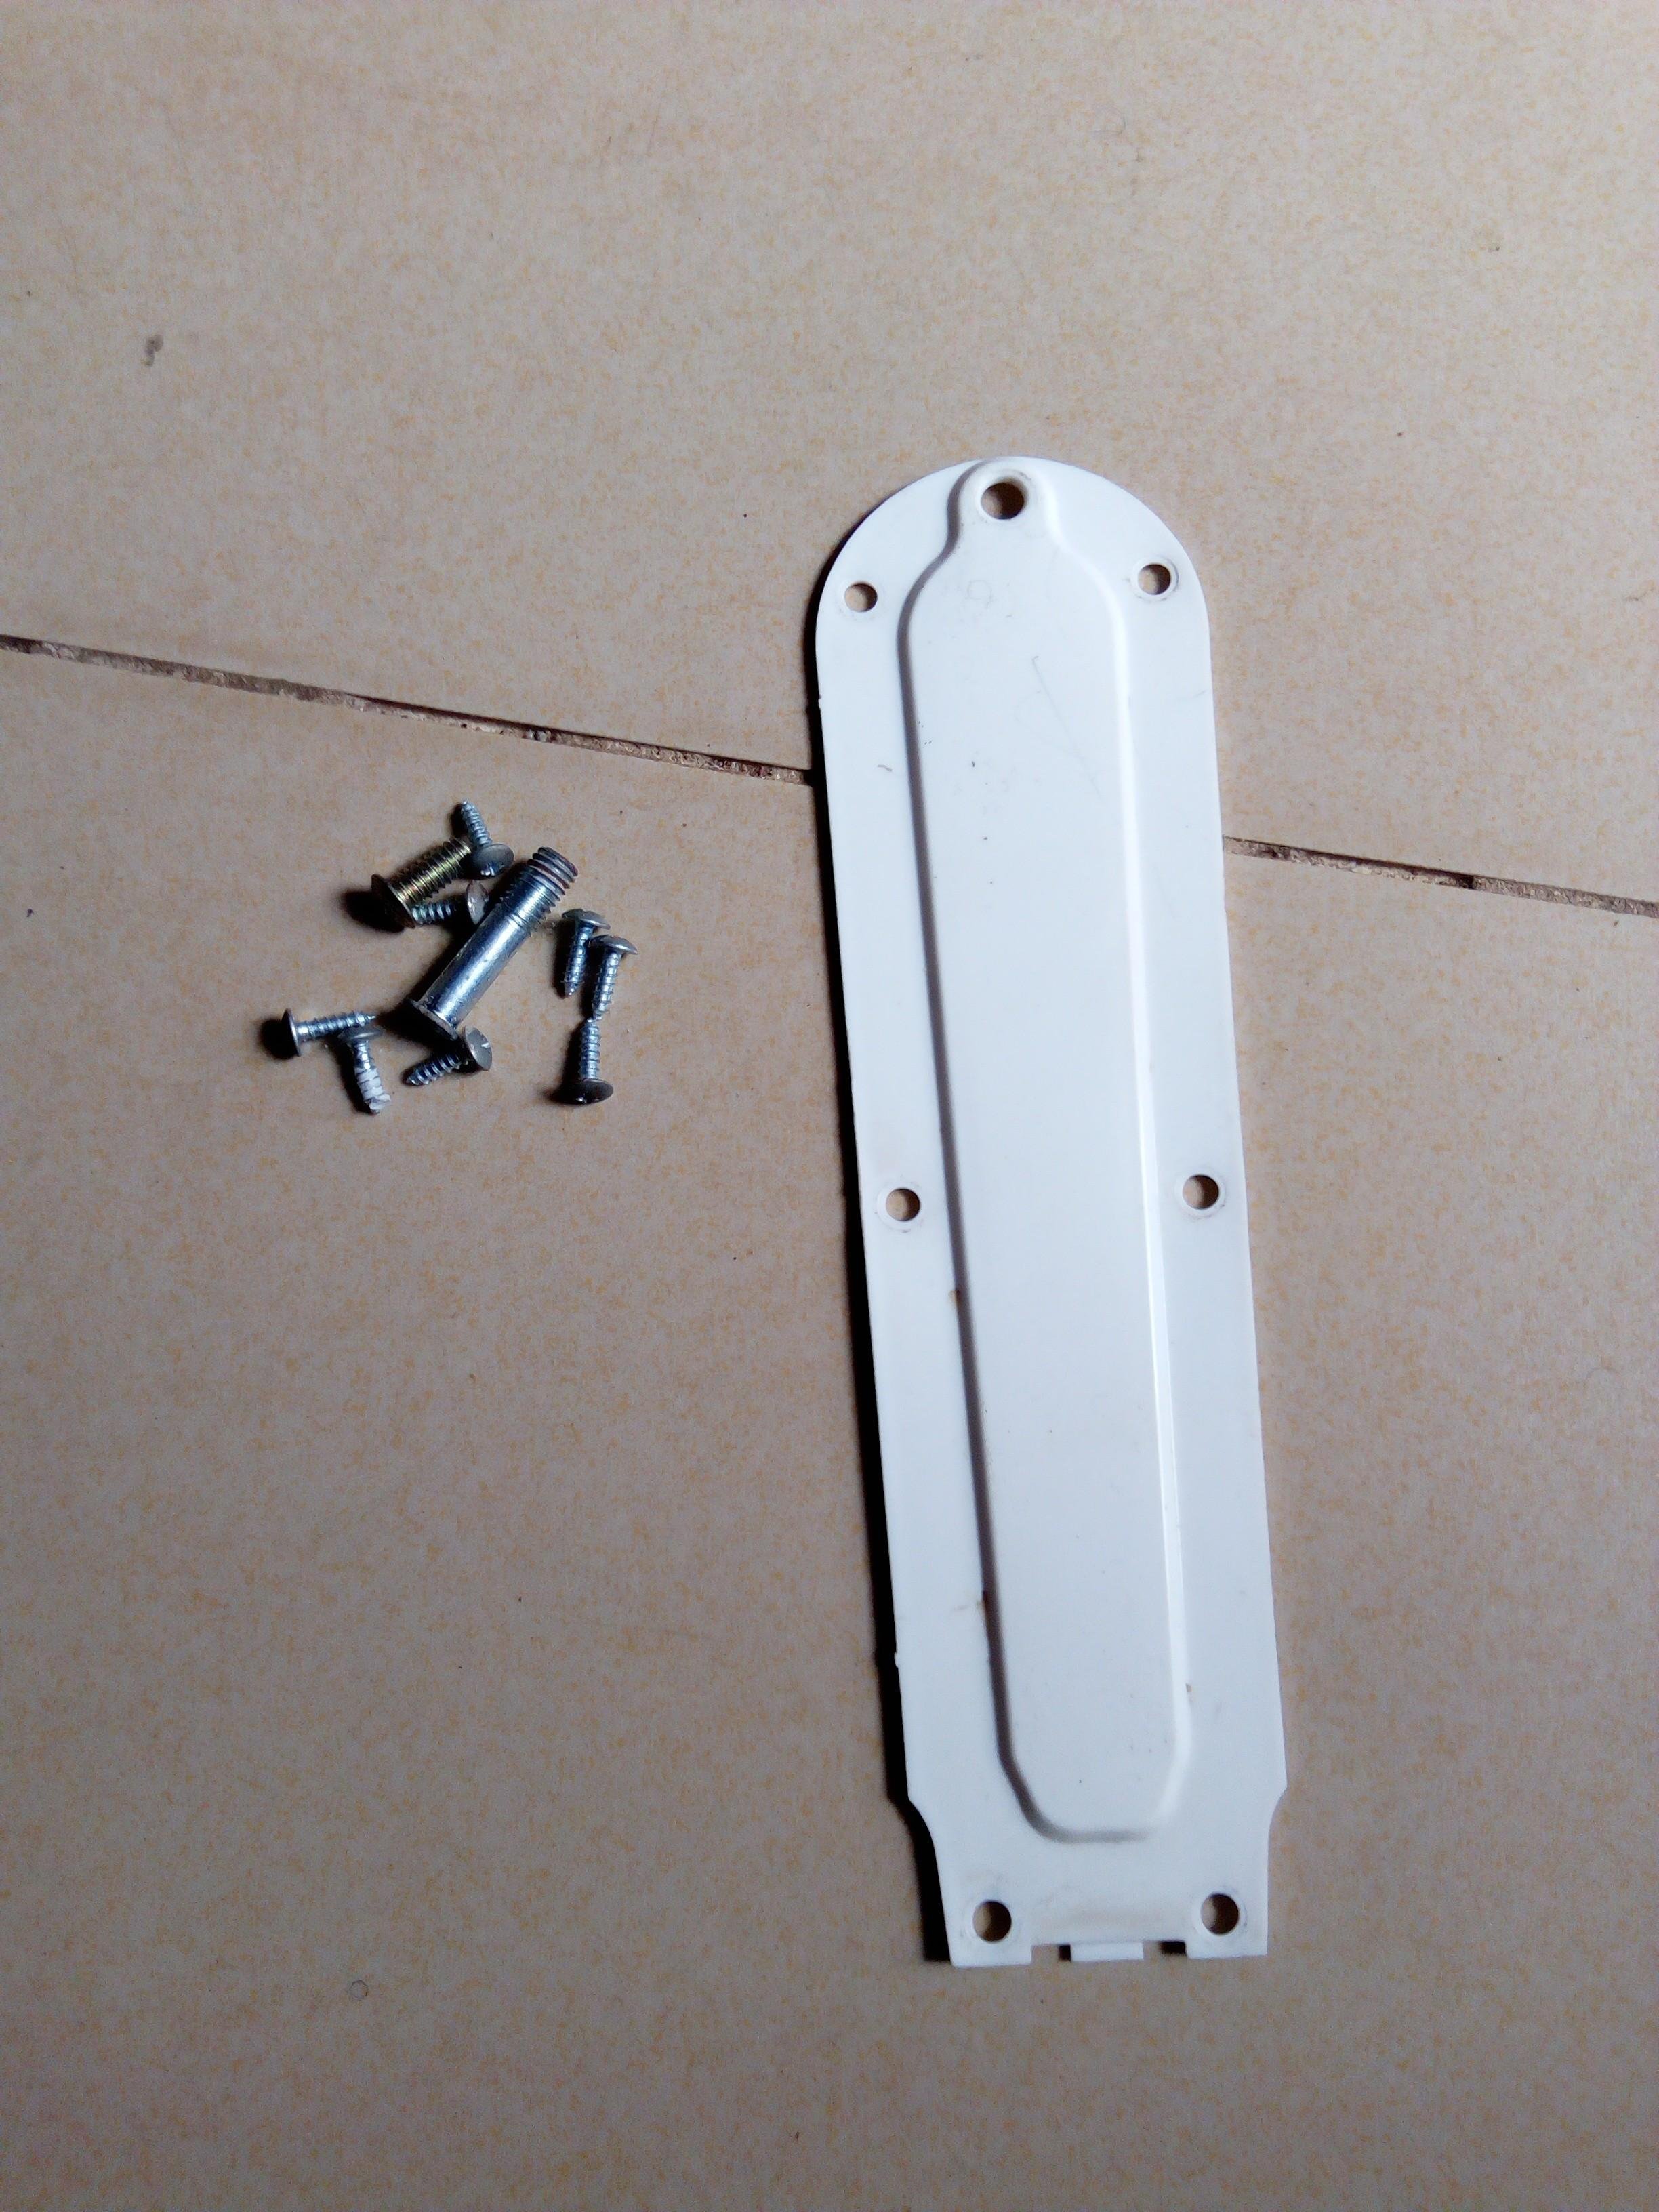
Here's the cover for the control panel.
 Easy does it

I'll be using all the slots for the screws except the lower one, which uses a bigger screw and I'll explain why I did that in a while.

There, fixed, looks good
Step 7
At the back of the head, fix the motor protective cover by pressing it until it snaps into place.
(some fan models might require a screw for this. which ever works)


Right!.
Step 8.
Simply mount the Coupled head on the base we'd already prepared and set aside.. Be sure its facing a good direction.

Remember the larger screw I didn't use when sealing the speed control panel? this is where we use it (below). It functions by holding the frame and the head together. Genius, ain't that? 😉


Finally, couple the front metal guard of the blade by lapping it with the metal guard at the back, and snapping those tiny things to grip them together in one piece...


Here's a photo of the fan functioning properly after maintenance! Was quite pleased to find out the bulb still works. Yikes! we did it, you and i!
Thank you so much for taking put the time to read this. Would love to converse with you on what you think about this.. Overall, it took about 20 minutes to assemble. Is there a better or faster way?
I remain a valuable contributor to planet Steem
Until next time.

@pangoli,
Been a while. How have you been? And nice tutorial here bro.
As a novice self, with this illustration, I will completely assemble a fan.
Bless you bro.
@stevenmosoes
Sir Moses! Been a while! Been good, real good 😎
Mr DIY!
Nicely done brotherly!
Thanks man... 🤣
What if it was a Ceiling model?
A ceiling model would require a different Technique, and would possibly be needing a ladder or a stool to fix it. Depending on the height of the room... However with electric fans, its all screws and nuts. 😎
Thanks for stopping by...
Thanks for the tutorial.
You're welcome bro.. Thanks for stopping by
Wow!! Nice work, this tutorial will come in handy for me one day..
It sure would dear...
Nice tutorial bro..we love to see more of it
Thank you dear
This excellent pratica tutorial work on real life. Nice one @pangoli
Thanks bro... I'm your handy man, anytime
@originalworks
The @OriginalWorks bot has determined this post by @pangoli to be original material and upvoted(1.5%) it!
To call @OriginalWorks, simply reply to any post with @originalworks or !originalworks in your message!
This post has received gratitude of 1.41 % from @appreciator thanks to: @pangoli.