Do It Yourself
The new do-it-yourself brick bed edge
When I designed my garden, the idea was to create a circular area at the bottom of the larger area of the land connected to the sidewalks that ran around the house from an "s" walkway. The circle had to be all surrounded by plants (forgive me the pun), without edges of stone or bricks, to give an idea of continuity and naturalness.
Over the years I realized that this solution makes it more cumbersome to remove the weeds from the beds that mow the grass. In the end, therefore, I convinced myself to review the initial project. I had to back down in the name of practicality, in short.
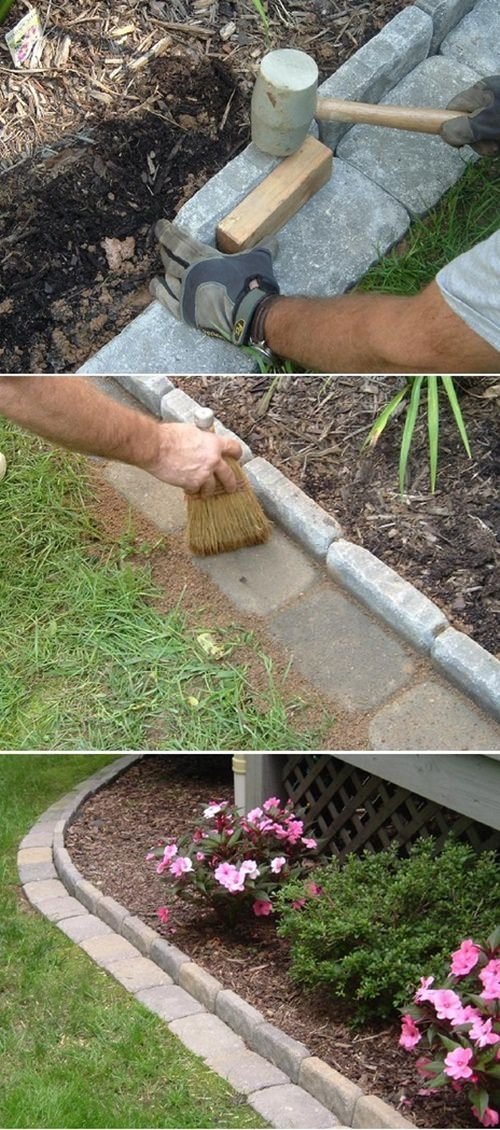
I immersed myself in the network looking for effective ideas but also easy to implement. At the end the inspiration came from an English site, Guiding Home , which in one article proposed different border designs for flowerbeds, including a border of gray tiles that seemed to be made for my garden ( link to page ). The photographic project was very clear, so I propose it below.
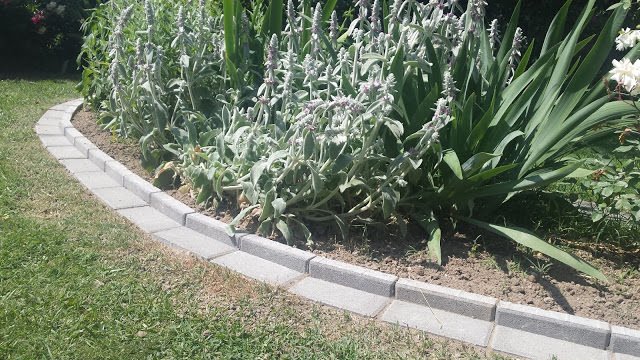
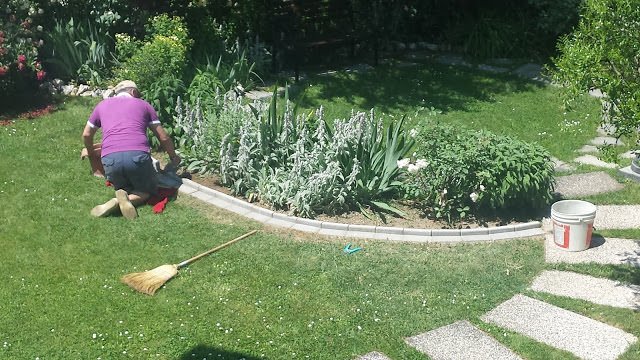
As you can see both from the images taken from Guiding Home and from those I took in my garden, the edge I chose is formed by a row of bricks arranged flat and buried at ground level and another formed by the same bricks planted vertically, protruding from the ground.
But how did I proceed?
First I hired my father, who is very skilled in precision work and now subscribed to those in the garden ...
MATERIAL :
We used full concrete bricks 22 x 11 x 4 cm . We simply chose them for the gray color; They are certainly not the most beautiful bricks on the market: if the rest of the flooring had not been of that color I think I would have opted for the classic red bricks ...
PROCEDURE :
We have laid the concrete bricks on the ground without breaking them to create the right curvature and use them as a guide.
We started to burrow the bricks starting from those placed flat flush with the ground.
To dig we used a simple garden shovel.We proceeded, then, with those arranged vertically.
To avoid having to have the bricks cut by someone, we used them whole and stuck them deeply into the ground, until they protrude 3 cm .
As in the image of the site to which I was inspired, we used as a reference for this measure an object, in our case not a piece of wood but a folding carpenter's tape that, coincidentally, vertically supported was just the perfect size.
The hammer hammer suggested by the photographic tutorial would have been very useful to obtain a homogeneous result but obviously I did not have it: fortunately my father solved everything with well-established fists ...We closed the gaps between one brick and the other with earth, swept away the excess and wet the bricks to make the ground even better.
Necessary time? A couple of hours at most, without haste.
And here is the final result.

My new edge of concrete bricks
It will be even better in a few months, when the edge will take on a more lived color, more similar, then, to that of the other elements of stone and grit already present in the garden.
As for the costs, they have not been high. Having chosen concrete bricks, their price has been low. For this border, long to eye ten meters , I spent, in fact, just over 10 € .
I really believe that a little 'at a time I will propose this edge in the rest of the garden!

