DIY Purple Worm Dungeons and Dragons Miniature
Today I just finished making a miniature for my Dungeons and Dragons campaign that I run. I have always wanted a purple worm miniature but an official one was always so dang expensive. That's why I went to Michael's and purchased $15 worth of clay and made my own worm that I am rather proud of. I figured I'm a creative person who paints, why not just try and MAKE my own!
The first thing that I did was that grabbed some aluminium foil and rolled it up into a rough shape I wanted the worm to be and roughly in the pose that I wanted. I then made some thin clay layers that I wrapped around the aluminium skeleton to fill it out. I made the mouth separately and used the ends of toothpicks for the teeth. After sculpting the mouth, I put it on the worms body. I then made some pieces flat clay to be used as the segmentation on the back and sculpted in a wrinkled look on it's underside where the segmentation wouldn't be. It turned out as follows:
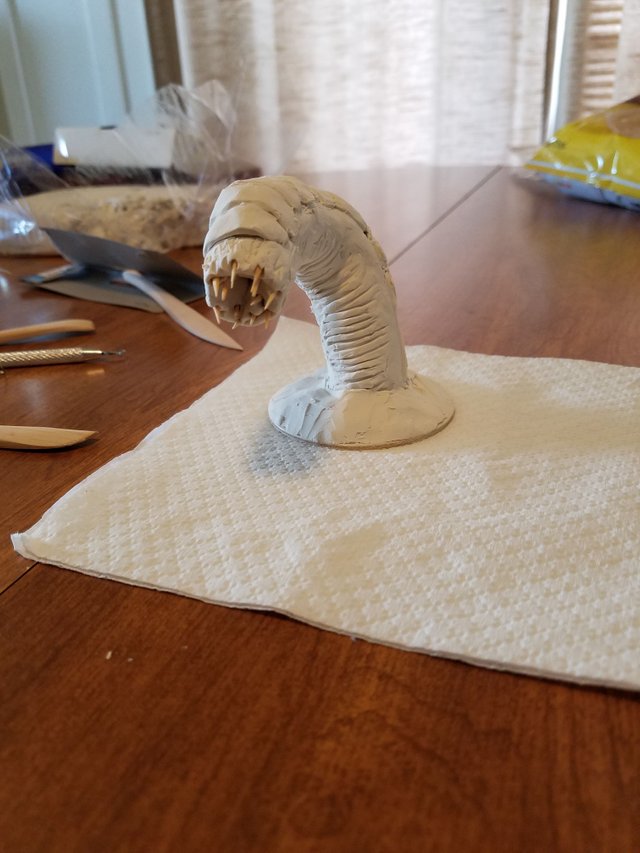
It's just a matter now of putting the sculpt in the oven. Sculpy says to put it in at 275 degrees Fahrenheit for every 1/4 of an inch of thickness. I used a lot of clay so I put it in at that temperature for 30 minutes.
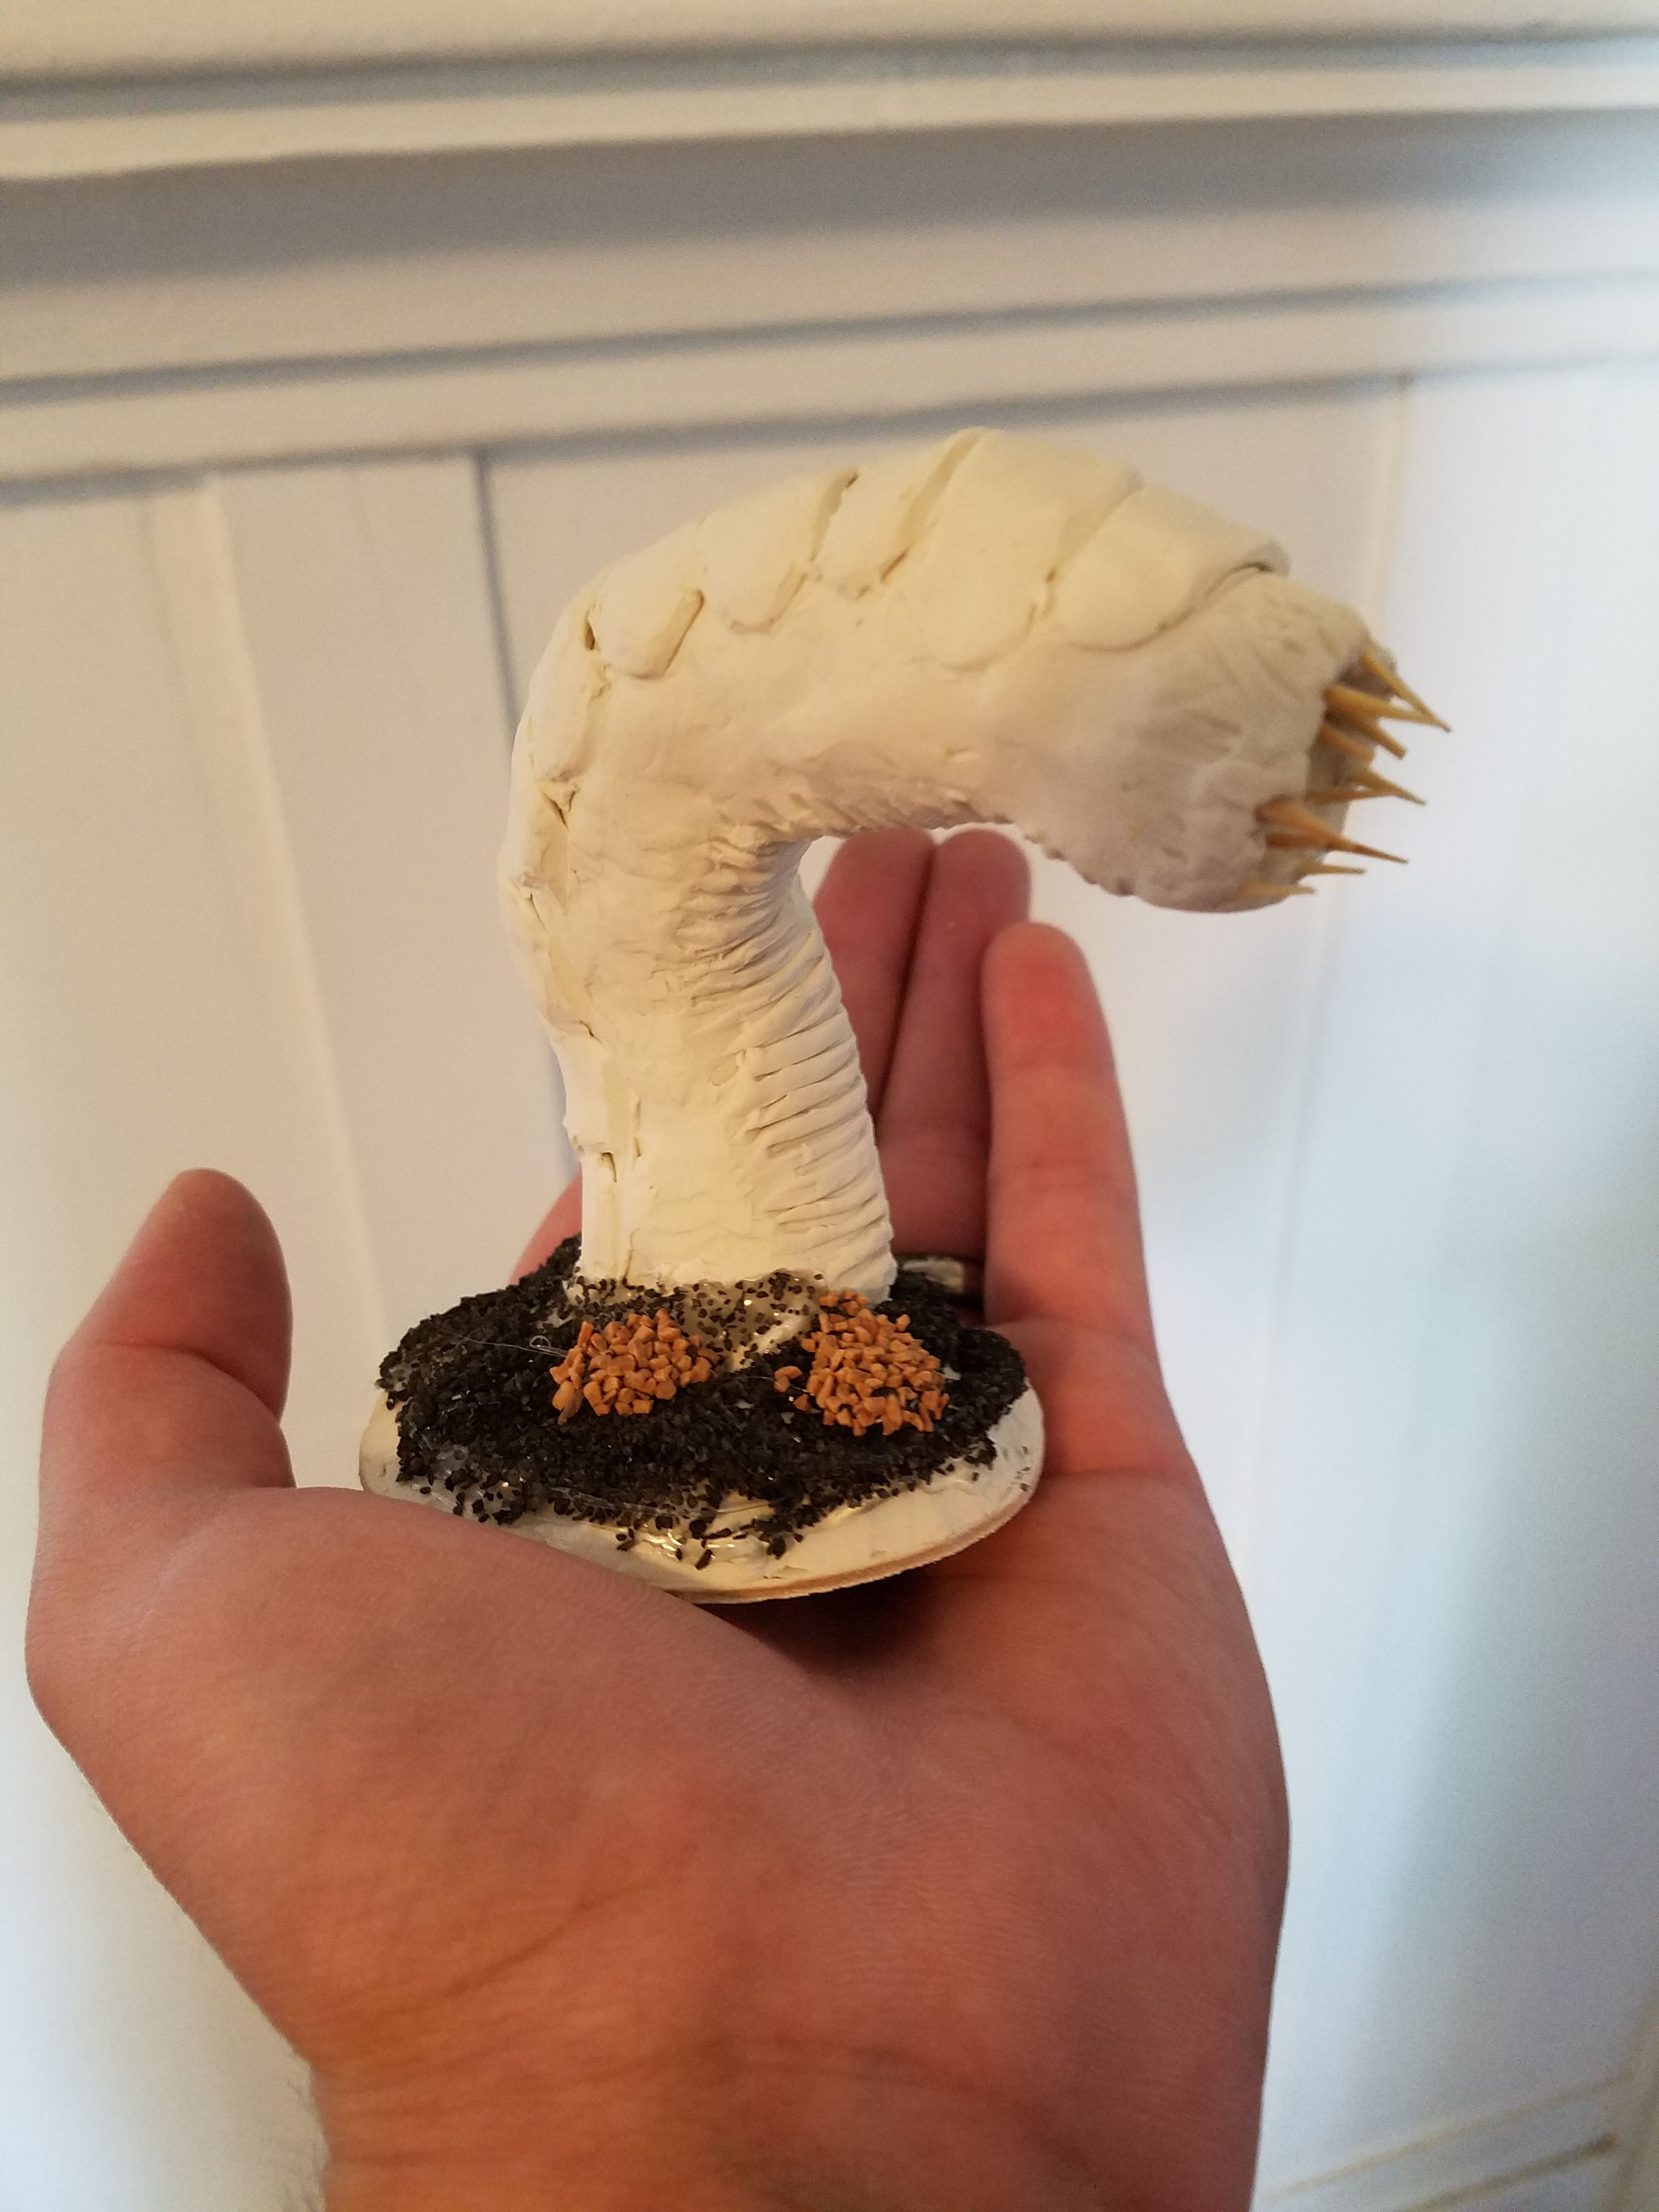
After being relatively happy with that, I used some glue and threw down some sand I purchased as the dollar store as well as some chunkier sand/gravel in places to make the clay base look like dirt and rocks.
After that, I took it out back and spray painted the whole thing in black to base it out.

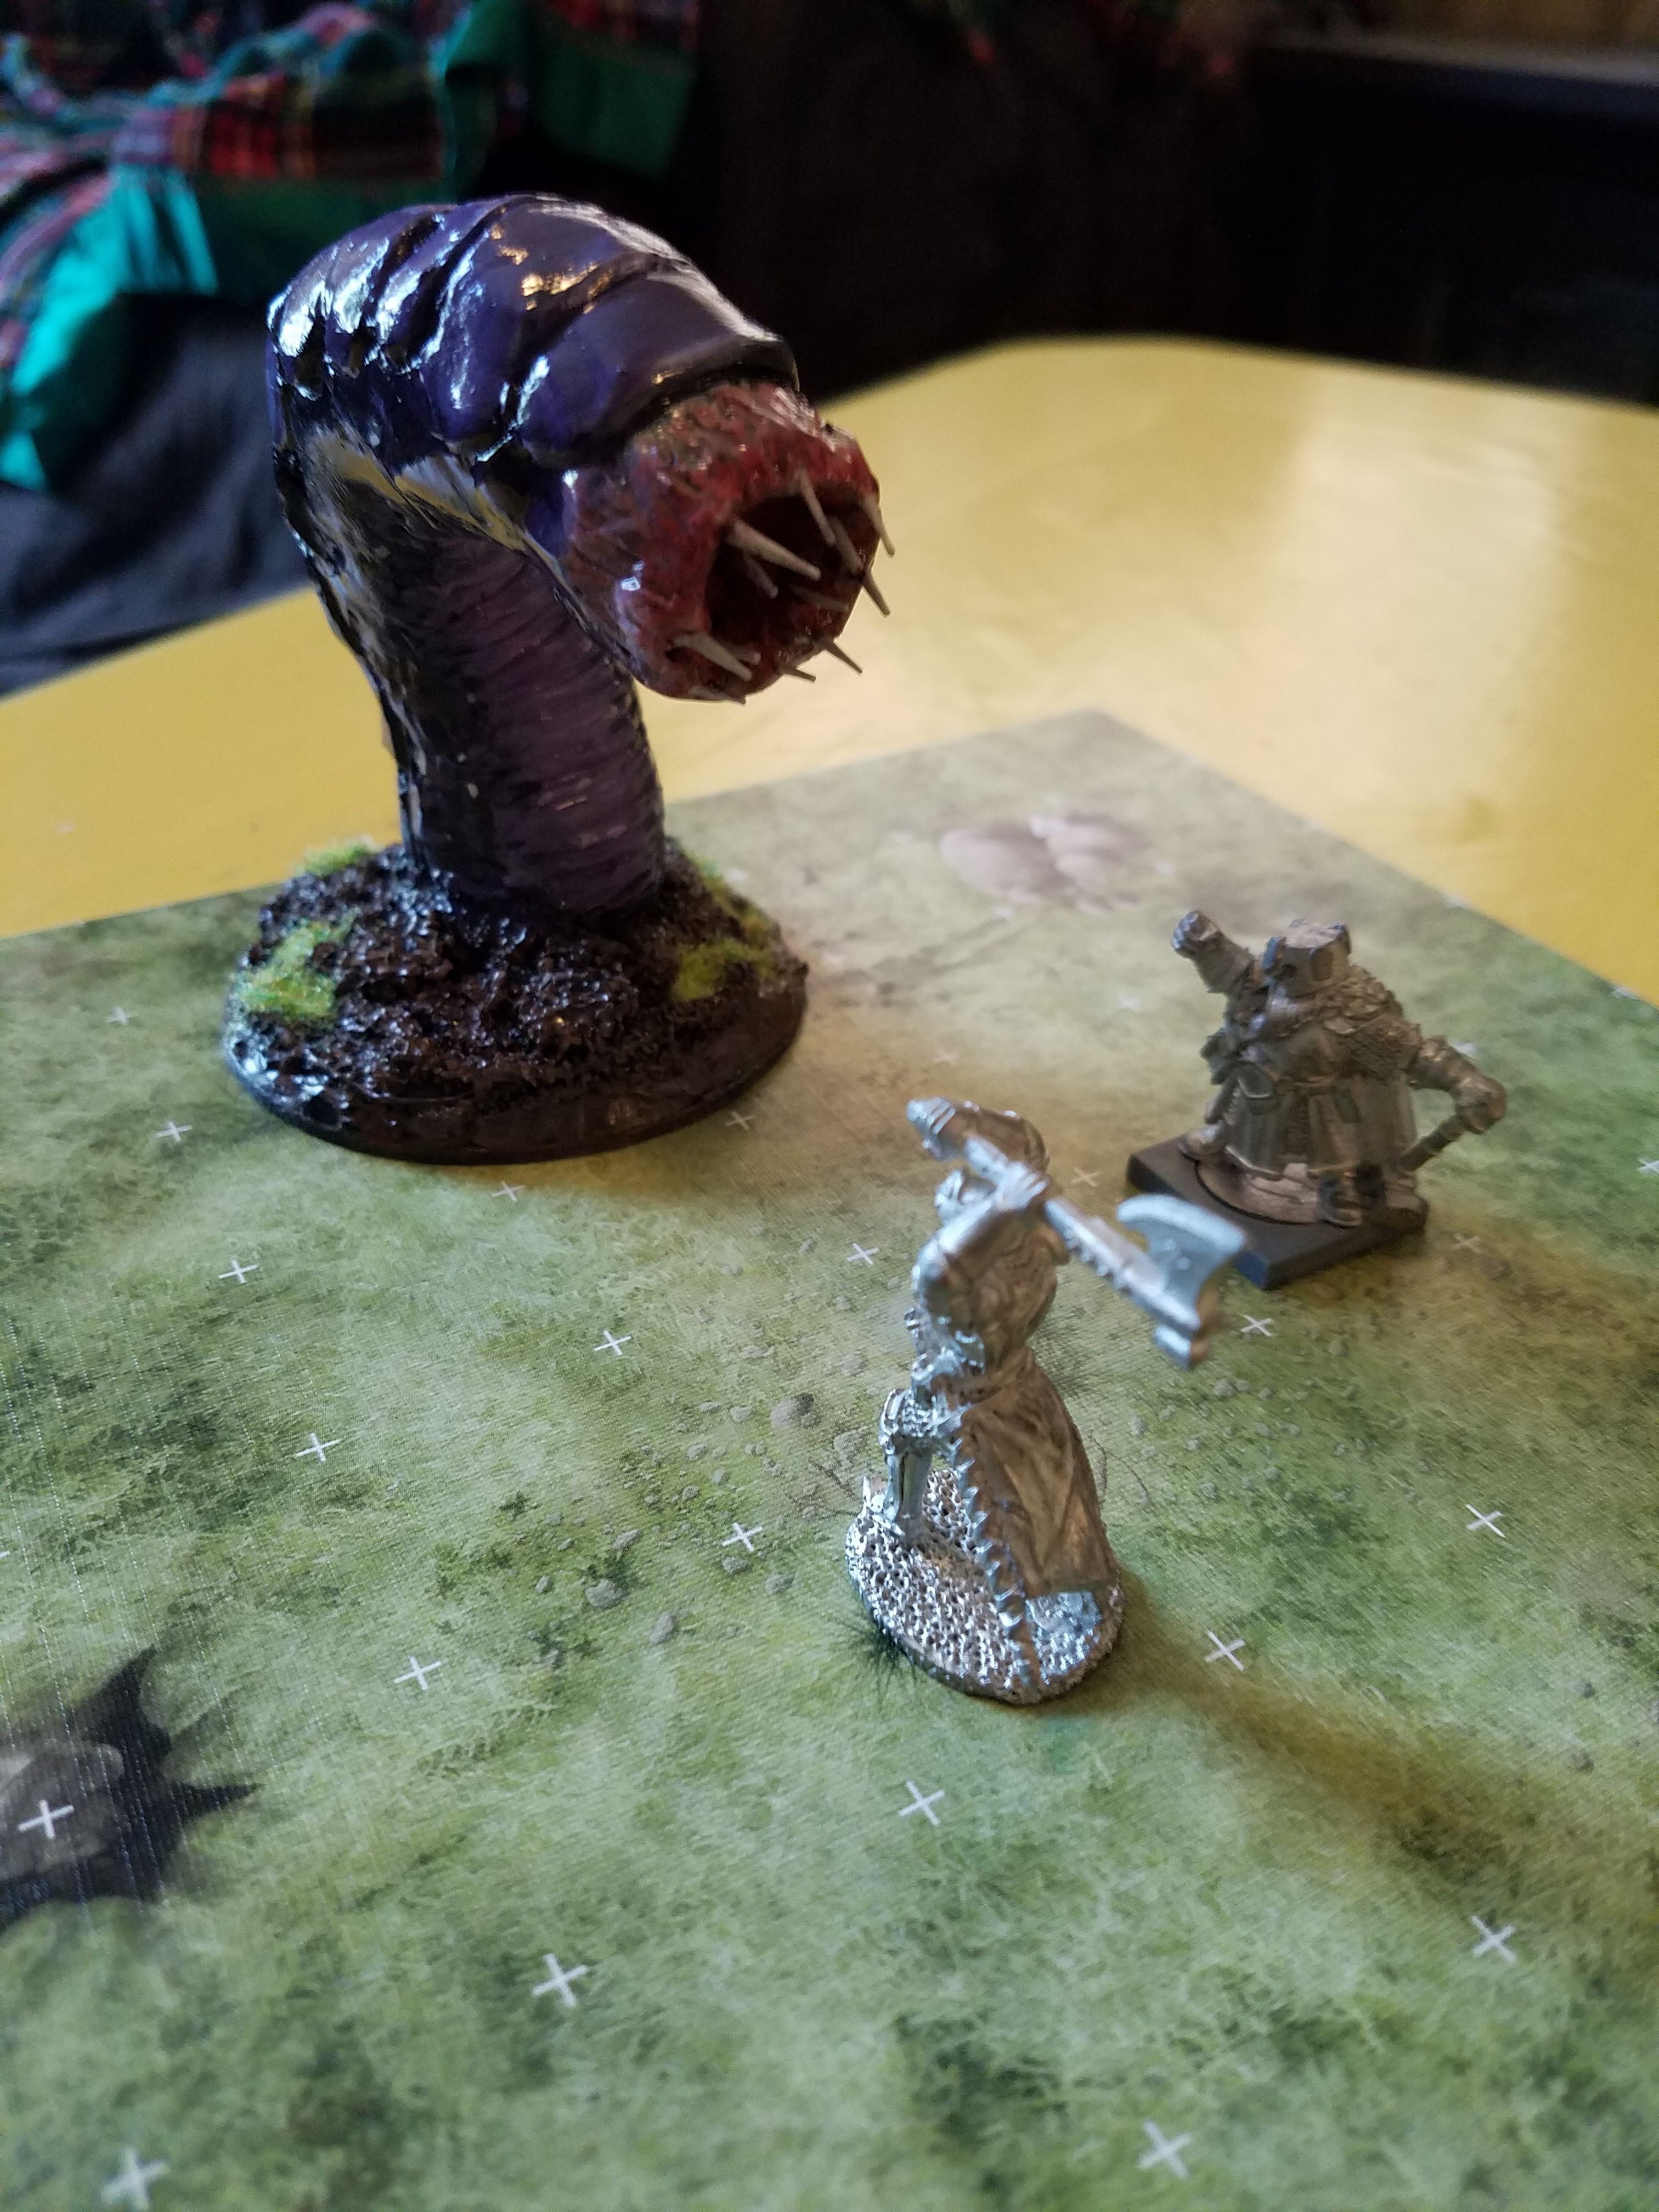
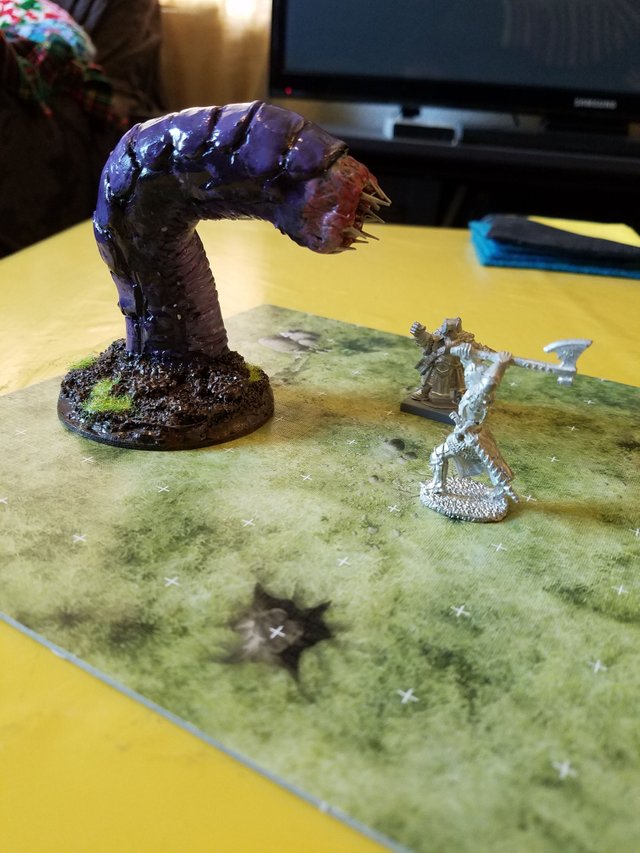
The next step was to get to the fun part! Painting the purple worm! I have a bunch of Reaper Miniatures paints that I used on the worm and some cheap acrylic paints for the dirt colors. I start with the darker colors and work my way to lighter ones until I'm happy with the contrast. After that, I used some more glue (just some white glue) and sprinkled on some green flocking to simulate little grass patches in the dirt. I then used a clear coat spray to spray the whole thing and protect it. That isn't really needed, but for this creation, I wanted that sealed protection. Plus, it was a glossy clear coat and kind of made the worm look slimy which I was fine with. Below is the finished product on a tile with other minis for reference.
I'm pretty happy with the the finished product and I know I will impress my players when I bust the thing out on the table. I'm sure they will get scared too!
I plan on making another worm., a desert colored one since my setting has two types of worms and the desert ones are more prominent in a specific desert in my campaign world. I think I will try an make a video about making the second worm.
That looks fucking amazing! I love it. Wicked.
Thank you!
This. this is magnificent! Well done on the craftsmanship!
Thank you. I had a lot is fun making it.
I thought about making token creatures for the players in my MTG group and this post has got me pumped! You did such a good job!
Thats awesome to hear! This only took 1 sunday afternoon so i think it was totally worth it. Nice little creative escape after a crazy week.
OMG..!

Wow that is awesome! I love the paint job around the mouth, those pinks look really fleshy and gross :) Very inspirational.
hey y'all I work ilustrating D&D maps. that's my job, head over to my blog @derekvonzarovich