Docker Tutorial - Essentials you need knowing
Docker allows developers to develop and ship applications in a way that can be deployed anywhere with almost no effort.
- Docker provides smaller footprint of the operating and reduces development of system via containers.
- It becomes easier for development, QA and Operations teams to work across different units, seamlessly across applications.
- Docker containers can be deployed anywhere, on any physical and virtual machines and even on the cloud.
- Due to lightweight nature of containers, they are very easily scalable.
Docker components
- Docker client - It is used for interacting with docker engine on your machine
- Docker Engine − It is used for building Docker images and creating Docker containers.
- Docker registry − This is the registry which is used to host various Docker images so as to make them accessible over network.
- Docker Compose − This is used to define applications using multiple Docker containers.
Installing Docker
Depending on the development machine you use please follow
Installation instructions
You can use following command to check if docker installation is successful
docker version
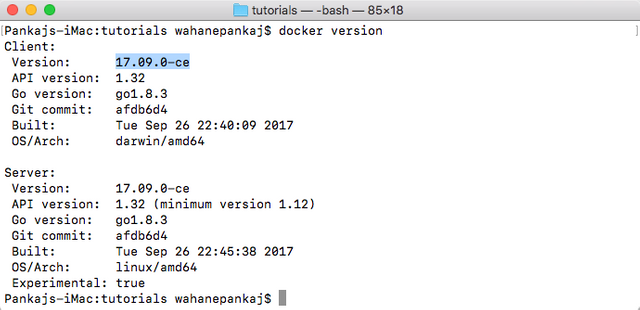
The output should show the version of docker installed on your system. In our case it is 17.09.0-ce
Basic Usage
docker run hello-world
This command runs a container build out of hello-world image.
- The run command is used to mention that we want to create an instance of an image, which is then called a container.
- "hello-world" represents the image from which the container is made.
Output:

The output should show text Hello from docker! and this output means the docker run command was successful.
If you observe what happens while this command runs, you will see that the command initially checks if the local image to create and run the container is available. When it doesn't find the image you want instance of, it will download it first in your local repository.
You can also explicitly download an image that you need to your local repository without creating its instance (without running) as explained in next section.
Managing docker images
Download image
docker pull jenkins
Output:

The output should acknowledge that the relevant image was downloaded from repository. We can check all the downloaded images in our local repository as shown in following section
View Images
docker images
Output:
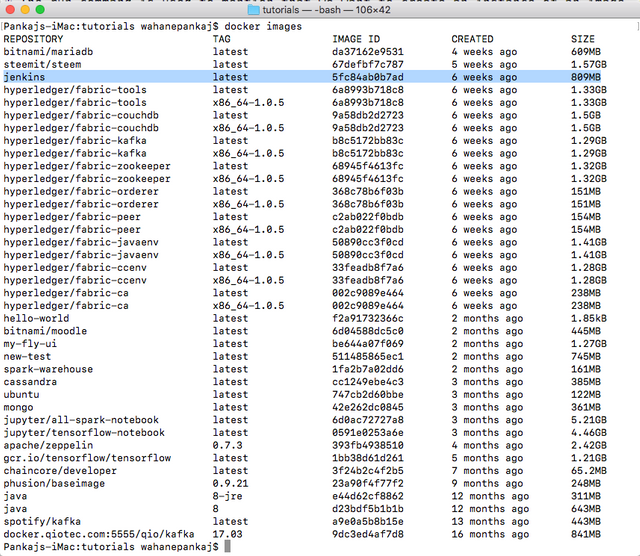
In the output should show all the available images in local repository with the one we downloaded in previous section, highlighted in blue.
The various column headers mean following:
- TAG − This is used to logically tag images.
- Image ID − This is used to uniquely identify the image.
- Created − The number of days since the image was created.
- Virtual Size − The size of the image.
Remove Images
docker rmi jenkins
Output:
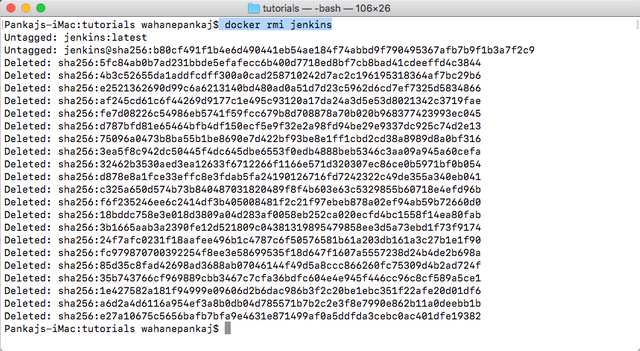
In the output should show that the image was deleted from local repository.
Running a container
Let's run our jenkins image using docker
docker run -d jenkins
Observe the -d flag in command above. It tells docker to run the container in detached mode which means it will run the container in the background and give you the control back to perform other tasks on your terminal
Output:

The output should show that the command runs the container in background and outputs an identifier that can be used later to reference the running container.
View the running containers
docker ps
Output:

The output should show the running containers (processes) on our system while the command was executed.
The various column headers mean following:
- CONTAINER ID − Unique identifier for the container
- IMAGE − The image from which the container was created
- COMMAND − The command that ran inside the container after it was initialized
- CREATED − When was it created
- STATUS - Current status of container
- PORTS - Exposed ports from the container (We shall see how to access these ports on your system in a later section)
- NAMES - The name given to the container (this can be explicitly assigned using --name argument ex:
docker run -d --name my_jenkins jenkins)
Removing the container
docker kill my_jenkins
The command kills the running container. Observe that we used an explicitly given name for referencing the container. We can also use the CONTAINER ID alternatively.
docker rm my_jenkins
The command completely removes the container from your system. When docker kills the container it still preserves it so that it can be instantiated again.
Looking at container logs
docker logs my_jenkins
Output:
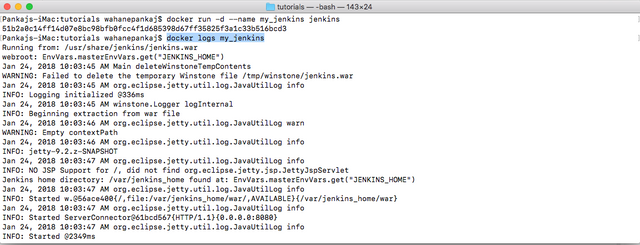
The oputput should show the logs of the service running inside container. This are essentially the logs of the command that was run after initializing the container. (We shall look at how container initialization and running commands in later in this tutorial in advanced section)
--tail $n option can be used with command to print last $n lines
--follow or -f option can be used to keep the log running on your console
ex:
docker logs --tail 100 -f my_jenkins
The command will print last 100 lines of log and keep it running on console.
Accessing the container
With docker any command can be run on a running container.
docker exec -it my_jenkins ls
Output:

The output should show the result of ls command inside the container.
Console access can also be achieved through exec command of docker.
docker exec -it my_jenkins /bin/bash
lscpu
Output:

The command should give bash console access to the container and in this example we have executed lscpu command within the container and then exited.
Forwarding ports to your local system
docker run -d -p 8080:8080 --name my_jenkins_with_ports_forwarded jenkins
Output:
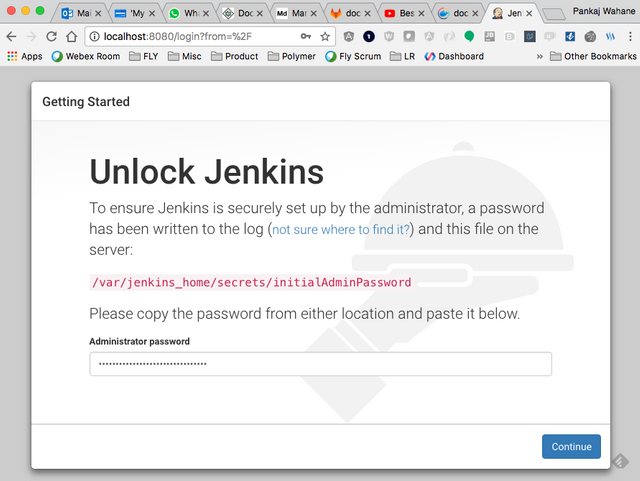
The command forwards the traffic on 8080 port of your local system to 8080 port of the container. The jenkins UI can be accessed through the browser pointing to localhost:8080
Advanced Usage
Commiting the changes to the container
docker commit --message 'adding p.cpp' my_jenkins jenkins:my_changes
Output:
The commands make a change to the running container and commits it to local repository creating a new version of base image with a tag. In our example we are creating a file in the container and commiting that change with a comment and tag to local repository. If we just kill the container after creating file and not commit it then the change will not be persisted when the container is initiated again (restarted).
Note: docker internally uses git for versioning management.
If any changes are made to the container that we want system to persist can be commited and will be available with new docker image.
These locally changed images can be ported to other systems that do not have direct access to internet using export and import features of docker.
Exporting Images
docker export --output="my_jenkins_with_changes.tar" my_jenkins
Output:
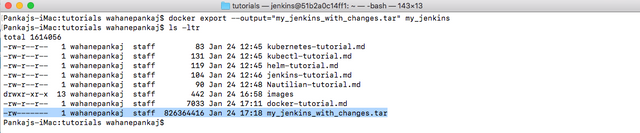
The command packs the image into a tarball and saves on your local file system.
Importing Images
cat my_jenkins_with_changes.tar | docker import --message "New image from tarball" - jenkins:imported
Output:
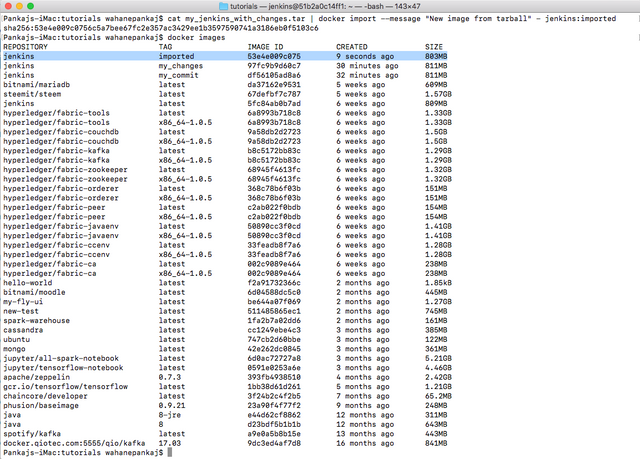
The command unpacks the tarball and creates a new image in your local repository.