Become a live streaming expert - Set up a broadcast on @DLive
A basic guide of getting your live stream started on @DLive today.
I'm going to break this post down into 3 sections which are listed below. If you have already setup streams on different platforms and just want to know how to start your broadcast with @DLive you can head down to section 3. For everyone else that is just getting started follow all 3 sections.
Table of Contents
Section 1 - Requirements
Section 2 - Setting up OBS - Basic settings to get you started
Section 3 - Going Live!
1. Requirements
Accounts
Since @DLive is running on the Steem blockchain you can use your Steemit account to sign in using Steemconnect. If you don't have a Steem account yet you can sign up for one here.
Software
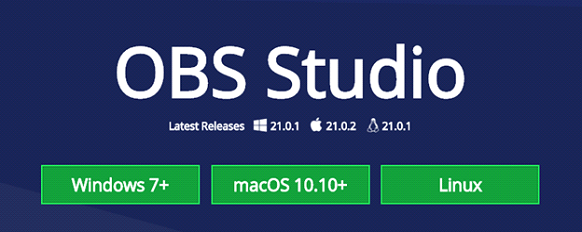
In this guide I'll be covering the setup of OBS Software. Open Broadcaster Software is free and open source. It's also compatible with Windows, Linux and macOS.
Computer Specifications
Depending on what you’re trying to stream the minimum computer specifications may vary. My recommendation would be to have at least an Intel i5-4670 processor or equivalent. 8GB of ram and some sort of a graphics card to get you started. If you are playing resource demanding games, you will require more computing power to stream and play at the same time.
Internet
Last but not least, you will need a decent internet connection. Personally I would aim for something above 10mbps of download and upload speed. Although I know this might not be achievable in all areas of the world.
2. Setting up OBS - Basic settings to get you started
There are tons of settings within OBS to help you customize the look and feel of your application and stream. In the steps below I will be covering the basics to get you started.
- Download and Install OBS Software.
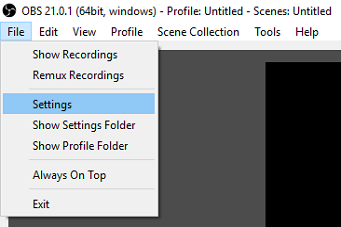
- Launch OBS.

- Click on File > Settings.
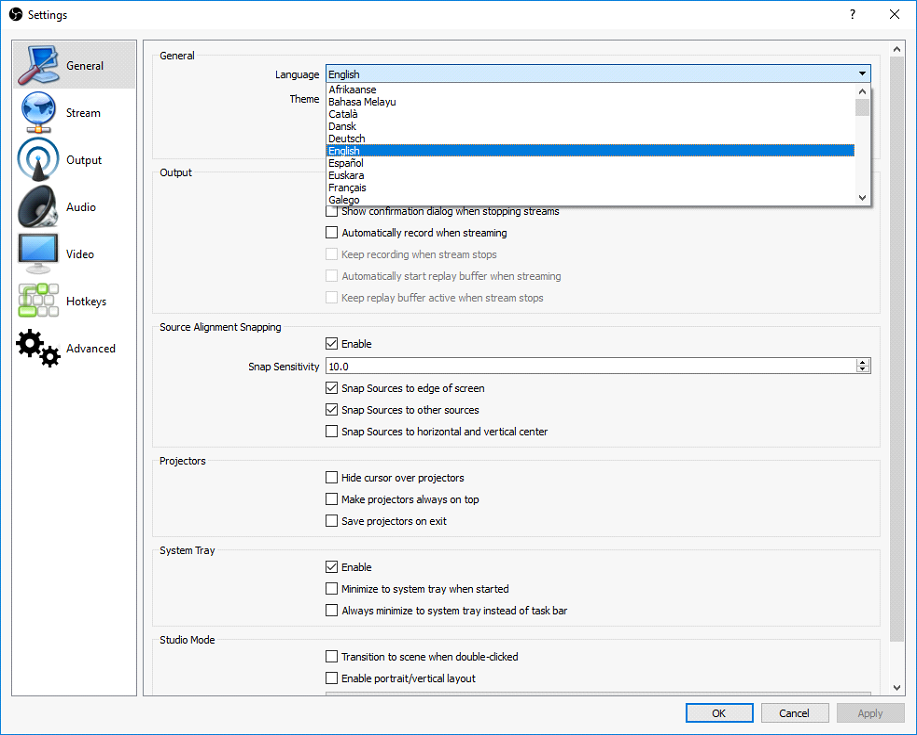
a. The General tab is where you will be able to select your Language.
b. The Output tab is where you can select your Video Bitrate. Depending on your location and Internet speeds this will vary. A good starting point is between 1000-1500. If you don't experience any lag on your stream you can increase this value.
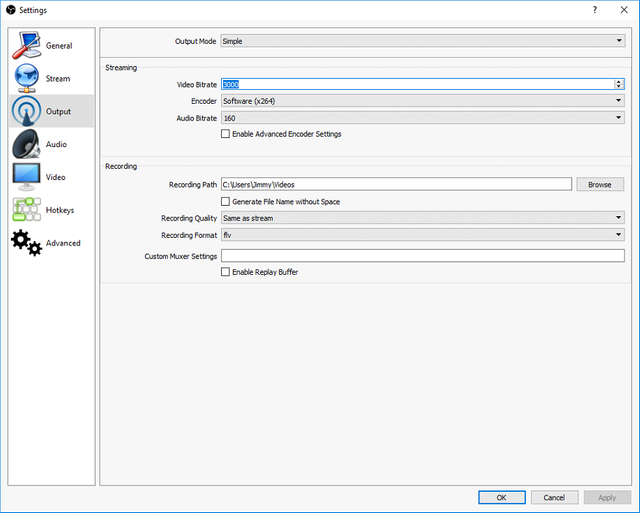
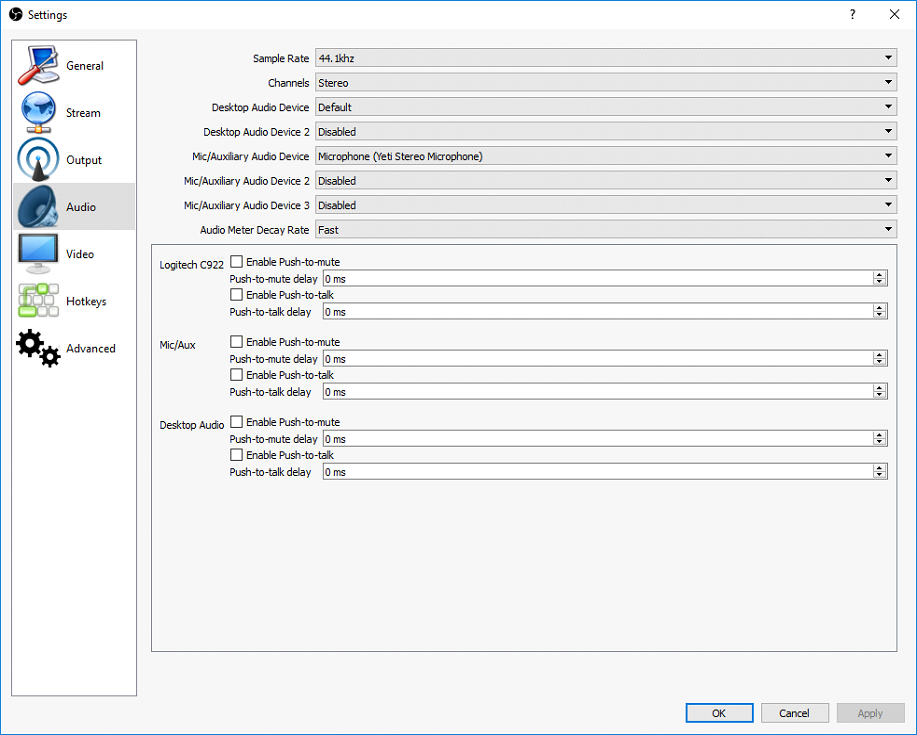
c. The Audio tab will be where you can select your Audio devices (example. Microphone, Default Sound).
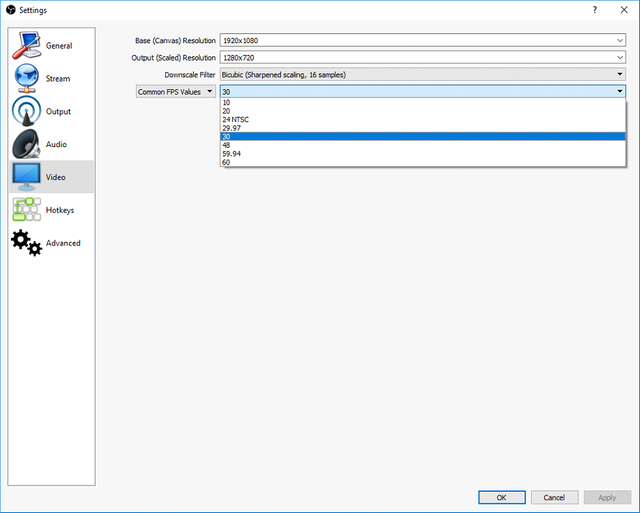
d. The Video tab is where you will be able to change your Output Resolution and FPS. The majority of streamers will use 1280x720 for their Output and 30 for FPS.
2a. Adding Scenes and Sources
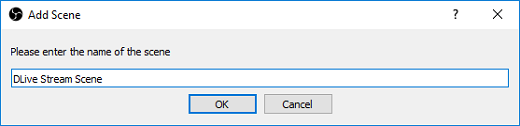
- In the bottom left hand corner of OBS you will see a box for Scenes click on the + button to add a new one.
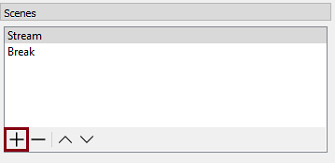
- Name the scene anything you want to.
- After you’ve created and named your Scene you can now add Sources.
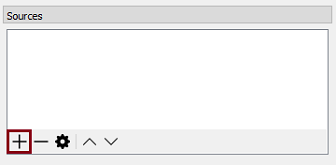
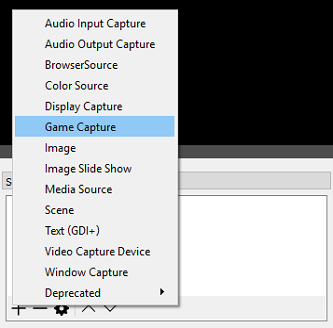
a. The most common Sources that you will add will be Game Capture and Window Capture. Before adding these Sources make sure they are open or launched.
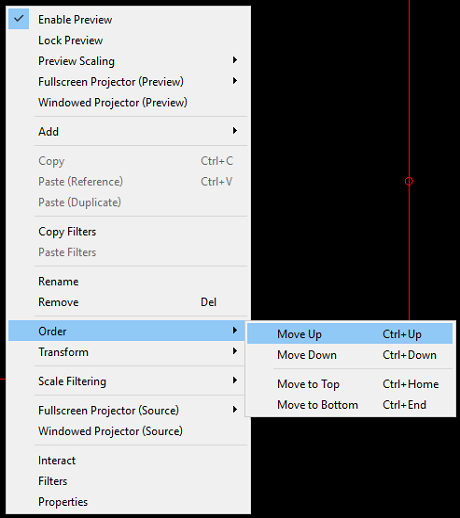
- You can add as many Sources as you’d like. If you are adding more than 1 source make sure that they are layered correctly. You may have to right click the source and move it to the Top if it’s being blocked by another one.
3. Going Live!
- Open DLive in a browser.
- Log into DLive by pressing the Login button in the top right of the homepage.

- Once you’re logged in click on Go Live.

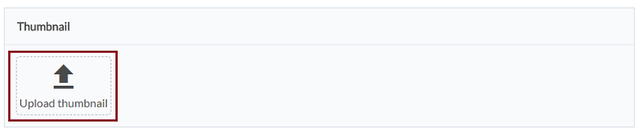
- Click on Upload thumbnail. Select an image file from your local hard drive. This can be a .png, .jpg or even .gif. This will be the image of your stream that will appear on the DLive homepage and the image that will be posted on your Steemit post.
- Fill out all of the following under Options.
a. Title – Pick a good one! This is the first thing people will see.
b. Description – Be as descriptive as possible. If you enter in something like “Come chat with me” you better be watching the chat!
c. Category – There are only 4 right now. Game, Learning, Music or Lifestyle.
d. Tags – Enter in some tags, this will also help Steemit users find your stream as well.
e. Language – Enter in your language.
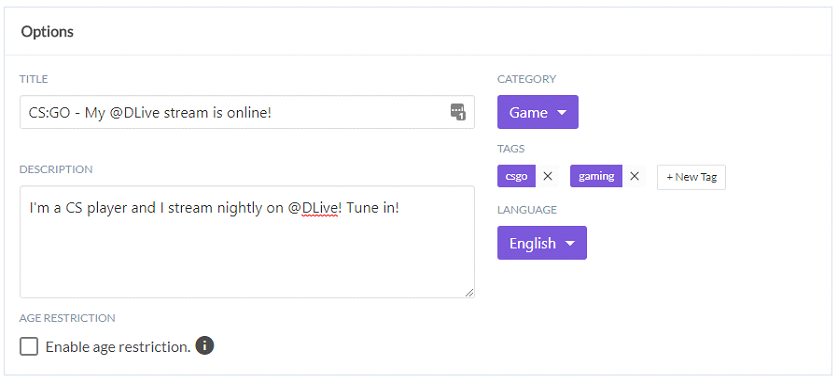
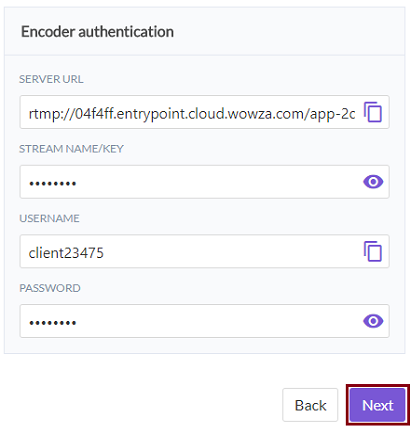
f. Enable age restriction if it is NSFW content. - Click on Next under the Encoder authentication box.
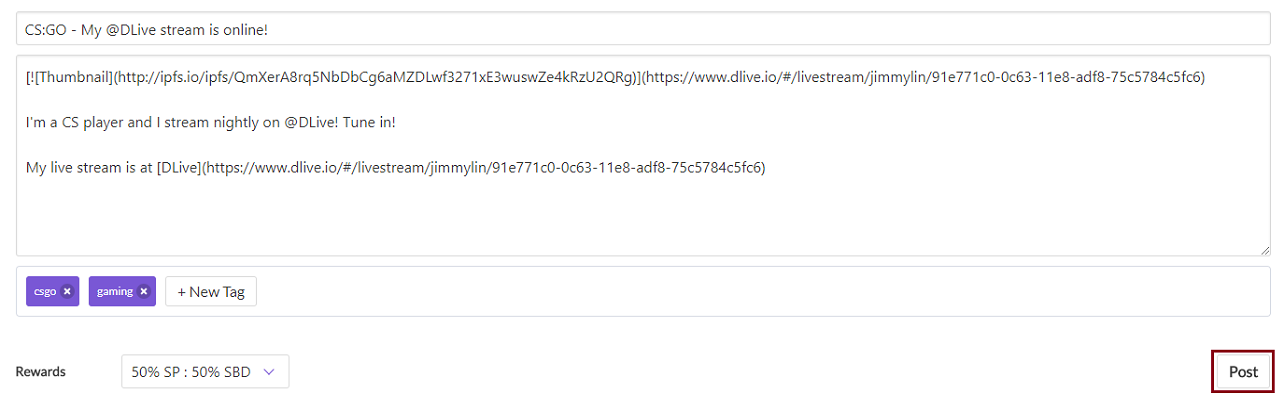
- You will be able to preview your Steemit post before posting. You will also be able to choose your payout if you want something different than the 50/50. If you’re satisfied with how it looks click Post.
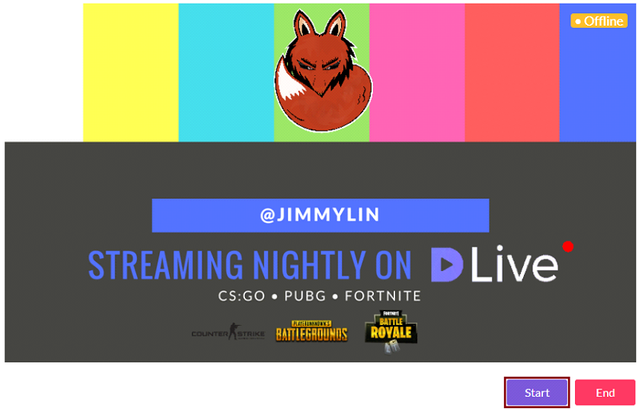
- Click Start in DLive under your thumbnail (this step is very important).
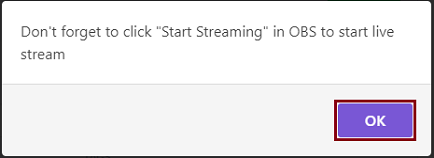
- Wait until you receive the popup that says Don't forget to click "Start Streaming" in OBS to start live stream.
- Copy and paste the Server URL, Stream Name/Key, Username and Password into the Stream settings in OBS. (File > Settings > Stream)
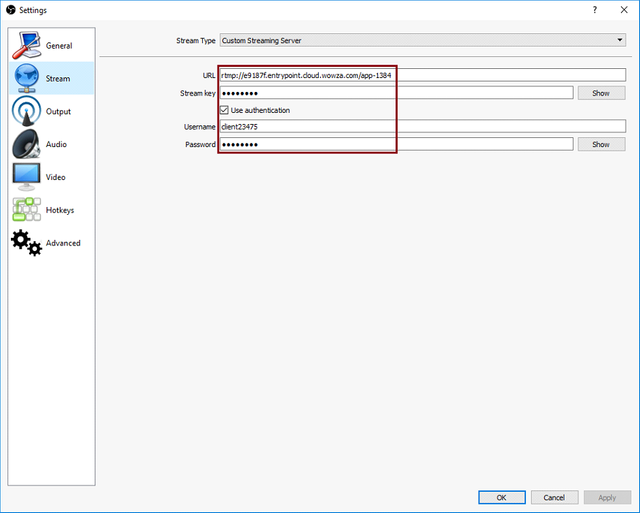
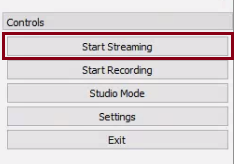
If you do not see the fields above make sure to change your Stream Type to Customer Streaming Server - Click Start Streaming.
AND YOU'RE LIVE!
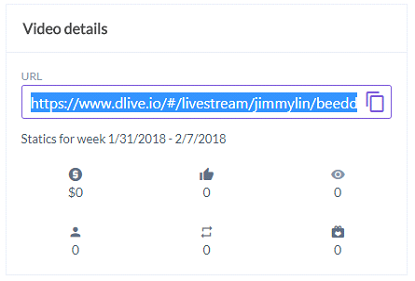
Always check your stream to make sure it is working. Your stream link can be found right under Video details on your DLive dashboard.
I know this was a long read but I tried to make it as easy to follow as possible. I look forward to seeing your streams on @DLive.
If you have any questions or comments please feel free to comment here or join the DLive Discord.
Thanks everyone!
Jimmy
I followed the step by step but obs tells me "failure to connect to the server". I tried several times by checking the url / steam key etc ...
Obs works on twitch without problem, do you have a solution. thank you
Yes i experience the same issue
I contacted on discord support that explained to me that the problem came from the domain name, not from us.
I was able to do twice live with the same parameter dlive bdset.
It must change our domain name to use DLIVE properly.
I'm struggling with embedding chat from DLive to OBS scene. Can anyone help?
Join the DLive discord and we can give you a hand there. It might be hard over steem comments. https://discord.gg/vnXQBsM
works very nice! Thumbs UP!
Simple, effective and well written :)
Pretty good and easy to follow if you're totally new at streaming.
Keep it up :)
I'm glad you said that, I wasn't sure if it would be hard to follow. What makes sense in my head might not in someone else's :P
When I first tried I missed the step and it didn't work. I missed the part where you need to click the post button first. Here, in your tutorial you pretty much guide anyone almost by hand step by step and I think it's well written and formulated.
Good job :)
Awesome I'm glad to hear that :D Look forward to seeing more of your streams :)
Big thanks to you @jimmylin , its easy to follow your instruction.
you are the best
Thank you!
Thank's @jimmylin.
A few week ago i've tried dlive, but failed. tonight I will try again.
I see your stream online right now :) If you see this try lowering your bitrate it's lagging a bit.
@jimmylin nice information, thank you for sharing
Congratulations, this post was rewarded with a 100% SteemGC Upvote and Resteem!
Want to meet fellow Steemit gamers and earn upvotes yourself? Join the SteemGC Discord channel!
your friends belong to one of the successful in steemit, please support to be like your friends
How many bits should we use for 2 megabit upload speed? obs video bit speed?
As a starting point I would use 1000 bitrate. If you can view your stream and it doesn't lag you can up this value.
thank you for the advice :)
No worries! I look forward to seeing your stream :)