[DLIVE] Creating an animated thumbnail to attract users!

DLIVE: Creating an attractive thumbnail to promote views!
Getting viewers on DLive can be a struggle for any newcomer to broadcasting livestreams, I am here to help you promote your channel and create an attractive animated thumbnail to draw viewers to your stream.
What we will be making
In this post I will show you how to create an animated thumbnail to promote your channel on DLive Using Photoshop CC16 but all versions of Photoshop support this method so everyone is capable of creating their own unique images.

How to begin!
Firstly we have to understand what makes a thumbnail attractive in the first place. Bright colours, a good focal point, a font that stands out and an animation will make any thumbnail you create stand out. You can create anything you like, this has to be unique to your channel, it's important to incorporate something that relates to your content.
For this guide I will be creating a generic thumbnail that doesn't really revolve around any content, instead it's just going to show you how to create a different variety of animated images.
Step 1: Grab a free stock image & add your context
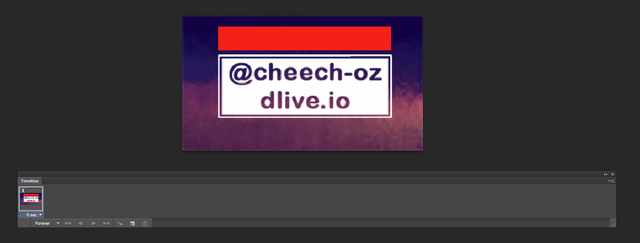
When I upload a thumbnail I like to make my image sizes 1280x720, so try to find a stock that's the same size or larger. This is an image I found, and all I'm going to do is add a motion blur, I add some text and a stroke. You can add more effects to make the text standout a lot more: example provided.


Step 2: Happy with your context? Time to animate!
Once you're happy with your context of the image, you can start to animate your image. First I will show how I do the basic left-to-right animation.

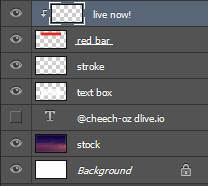
Next I am going to manually move the "live now" layer to the right by just holding down the right arrow.
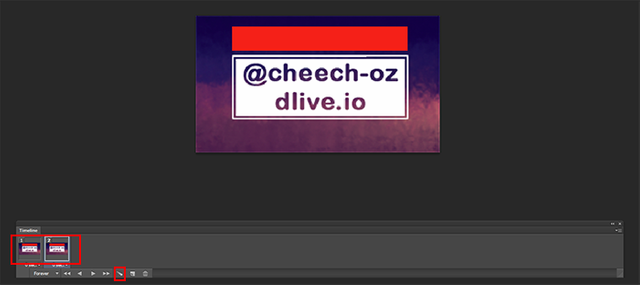
This next part is kinda hard to explain in text but what you want to do after you have moved the live now layer to the right on the 2nd frame, is to select both of the frames and press the tween button in the frame window.

Next you will be prompt to a new window, you can add as many frames as you'd like, 30+ more is good enough to give you a good animation, when you press play it should animate like this:

Step 3: We can finally save!
Once you are happy with your custom made image, you can now Save for Web and this will save your image as a .gif.
Simply go to file - Save for Web (Export if you're using newer versions of CC) and select the GIF 128 preset, you can then save this image in a location you'll remember.
Now when it's time to broadcast, you can upload your thumbnail and it will animate on the front page! Be unique and try out different ways to animate your images!


a great and helpful guide :) thx m8
Good Post, I like this :)
I've been using photoshop for so long, but I never knew I could make animated text like this (moving from left-to-right) like this. Thanks for sharing!