Cobbling a Hitch for the Lawnmower and Saving a Dump Cart from the Dump
So a couple of weeks ago I got it into my head that I was going to take some dirt from a pile I found on the back of my property and deposit it in a low spot in the yard up by the house. Now my lot borders a creek at the back and so there's a significant drop at some point, below which you'll find said dirt pile. Well, I threw some of this dirt into the wheelbarrow and headed towards the house, but I got to this steep little hill, made it about a third of the way up after a running start, and I was stopped dead in my tracks by gravity. There wasn't a whole lot in there, but I just couldn't push it up that hill any farther, so I temporarily retreated from this battle and resigned myself to dumping the contents into a low spot down near the creek.
Not being one to easily admit defeat, I decided that I should get a cart to pull behind the lawnmower. Surely the lawnmower, with 20+ horsepower will have enough oomph to pull a wheelbarrow sized load up that steep little hill as long as I can get some traction. That same day I noticed in my neighbor's yard, strangely enough right near my dirt pile, was a couple of these little wagons made for towing behind lawn tractors. Both were in varying states of disrepair, so I figured that since he obviously wasn't using them that maybe he wouldn't mind parting ways with one.
The next time I saw him I asked him about them and sure enough he straight up offered to give me which ever one I wanted. I didn't exactly feel right about just taking his stuff for free, so I offered to fix up both of them and just keep one of them in return, and so he agreed.
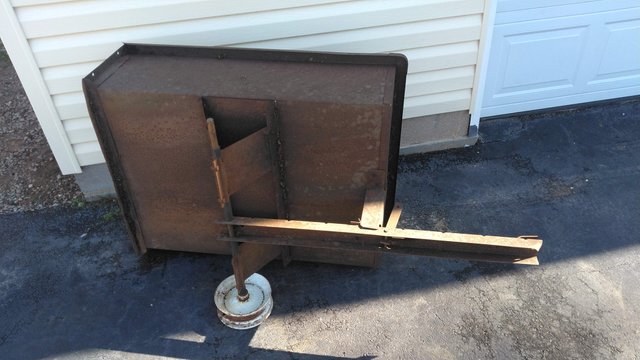
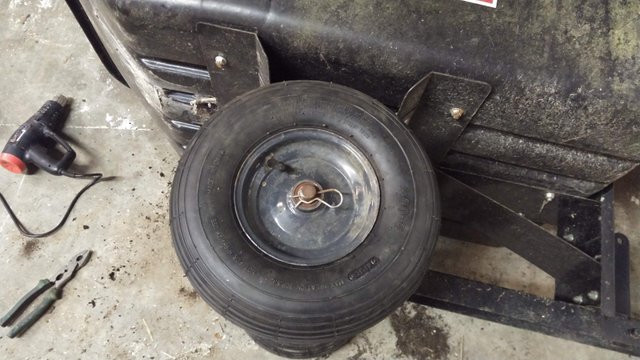
So here's the one I decided to keep. It's not much to look at, which is kind of why I picked it. I reserved the nicer looking one to return to my generous neighbor. As you can see the first thing that needed to be addressed was the tires, which I started to take apart before realizing I hadn't taken a picture of the cart yet. Turns out that one of the tires would hold air, but it was dry rotted and the other tire was completely trashed.
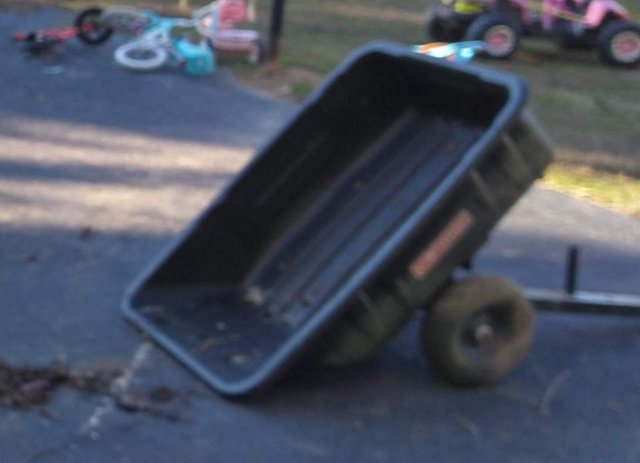
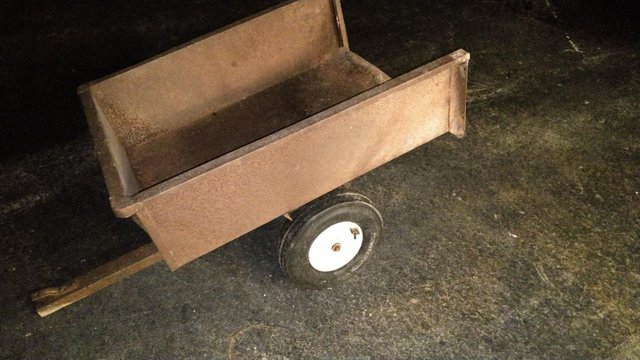
Here's the other one that's going back to my neighbor. Sorry about the image quality, but you get the idea. The tires both actually held air, at least temporarily, but these were also pretty dry-rotted so I figured it was only fair to replace them. That evening all the parts were ordered off the internet.
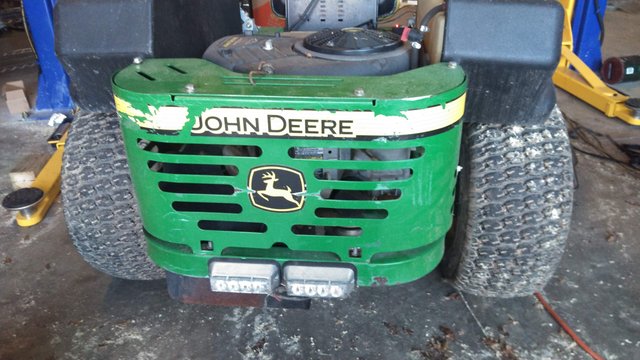
The next issue that needed addressing was the lack of a hitch on the back of this mower. They don't really design these things to do anything other than mow grass, so it didn't come with a hitch from the factory.
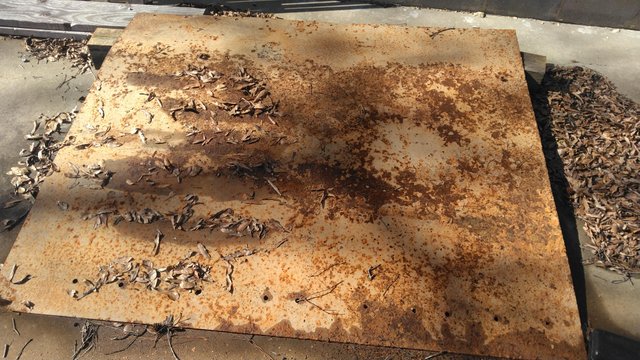
Lucky for me the previous owner of this property happened to have been a welder/fabricator and I found this piece of 3/16" steel plate laying in the mud when we bought the house. It was quite the workout to move it over to this concrete pad here, but now it's going to good use already and it'll be the material for that little hitch.
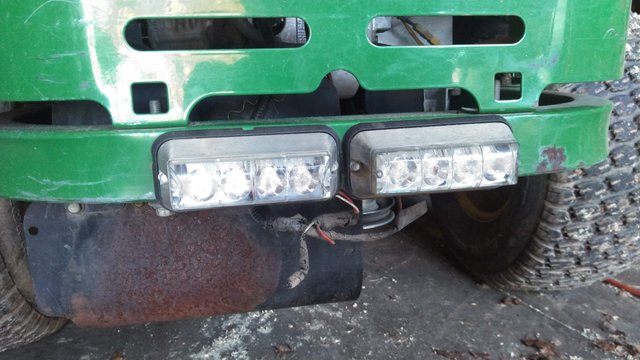
Beneath those lights on the back are a couple of bolts holding the shroud in place that are about 10" apart. Those will be the anchoring point.

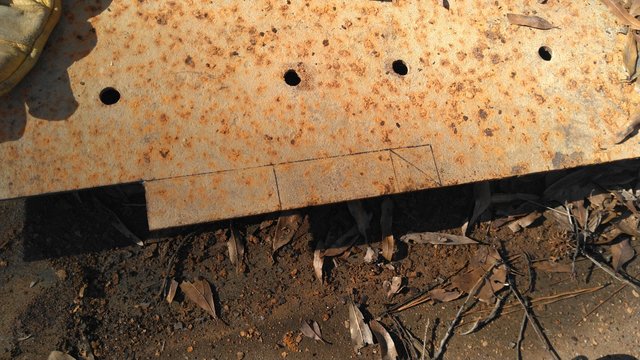
Here's the first piece drawn out on the piece of plate. The angle grinder with a cutoff wheel made short work of these cuts.
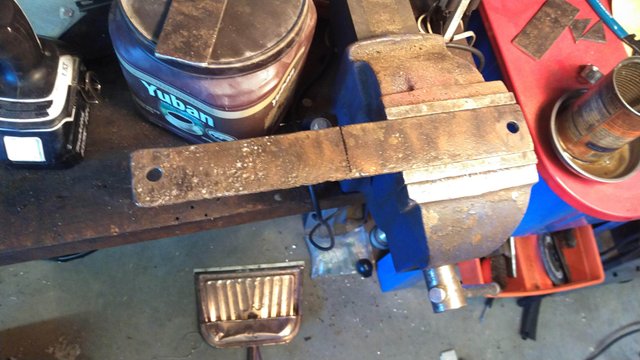
It needed quite a bit of cleaning up with all the rust scale, but here it is with all the corners chamfered, most of the rust wire wheeled off, and the two mounting holes drilled ten inches apart to match the lawnmower. You'll notice the center line drawn to indicate where the other pieces will be mounted.
A piece of material sticking straight out the back wasn't low enough, so about a four inch drop needed to be added to properly mate up with the trailer tongue. Here are all the pieces drawn out on the stock material, again cut with the angle grinder.
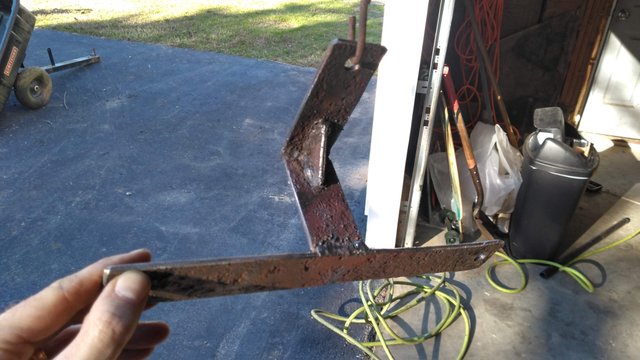
Here it is all welded together.
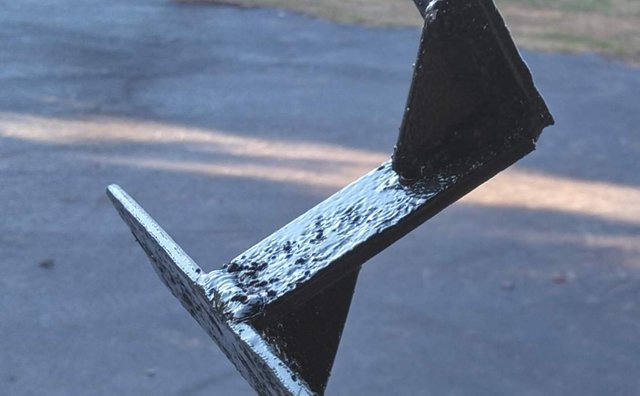
After a couple coats of paint. In the picture it looks pretty much black, but I made an attempt to get a match to the green on the tractor with the only green paint I had on hand. This is actually a dark metallic automotive paint and it looks kind of like a fancy hammered finish in person with the pitted metal.
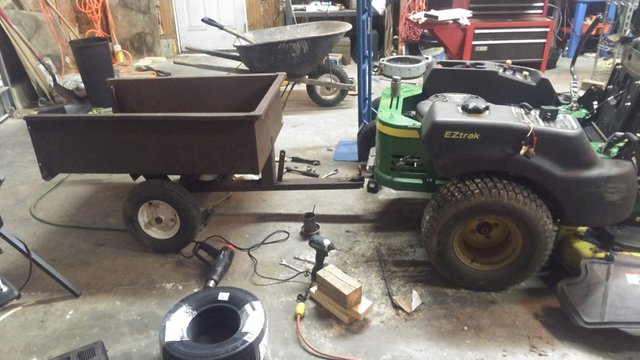
This evening I bolted it up into place after cleaning up some of the wiring on those rear lights. The wire loom was left sitting on the exhaust and had begun to melt all the insulation. It's tucked up out of the way with some zip ties now.
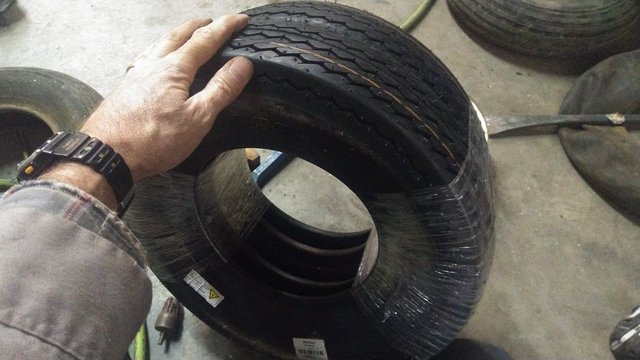
The tires on this dump cart are actually the same size as a wheelbarrow tire, which I assumed would be cheap to replace as a result. Not so much. One tire and tube was more than you would pay for some car tires. During the search I came across these trailer tires of the same size, which are actually intended for road use, and the pair of them were just a few bucks more than one wheelbarrow tire. Strange.
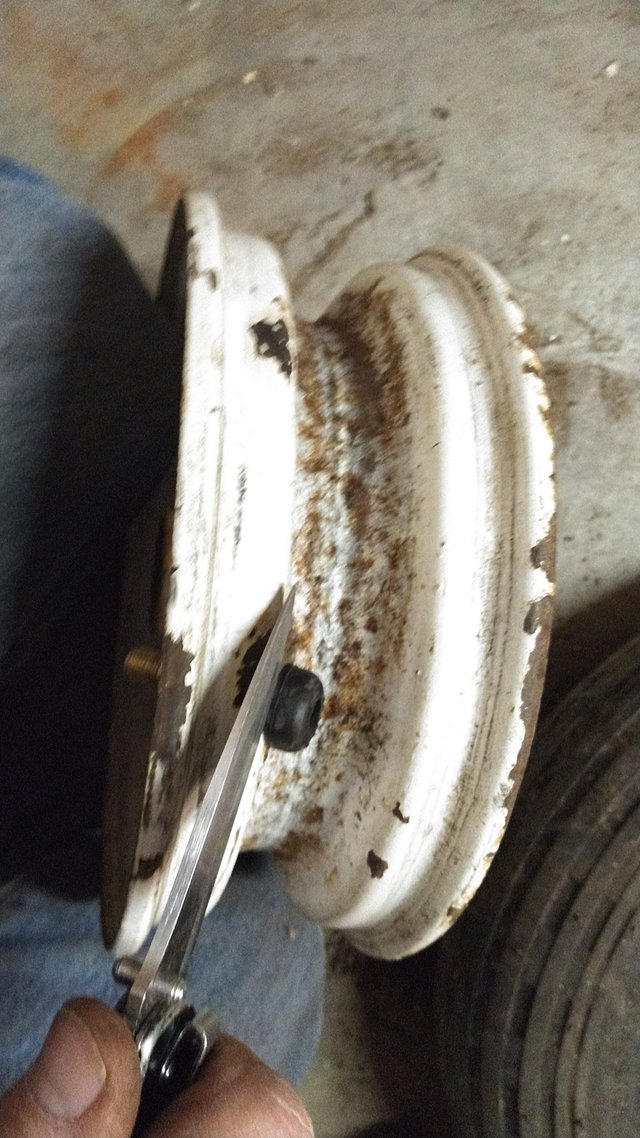
Being tubeless tires these need a valve stem mounted directly into the rim. This one was dry-rotted and leaking so I just cut it off. I keep a collection of valve stems on hand because I find myself doing this kind of work often. It kind of comes with the territory when you resurrect old junk that needs new tires.
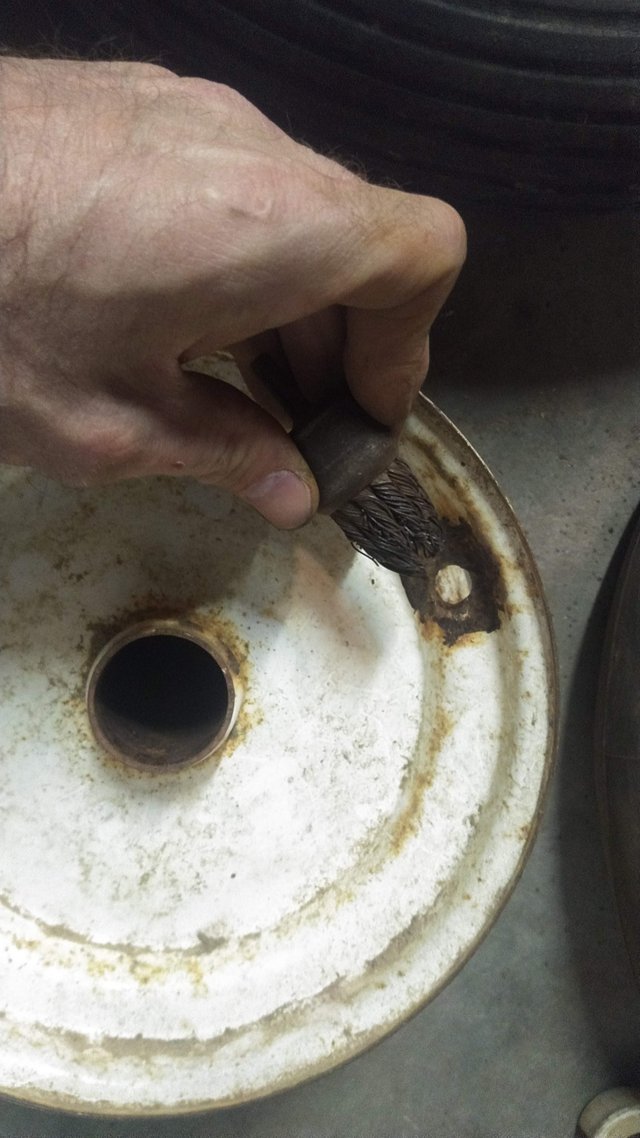
These valve stem holes can actually be kind of messed up and still hold air since the rubber in the valve stem will fill any voids when under pressure. One thing they can't be, however, is full of any loose dirt or rust scale like this one has. This little drill-mounted wire brush is great for cleaning these holes up.
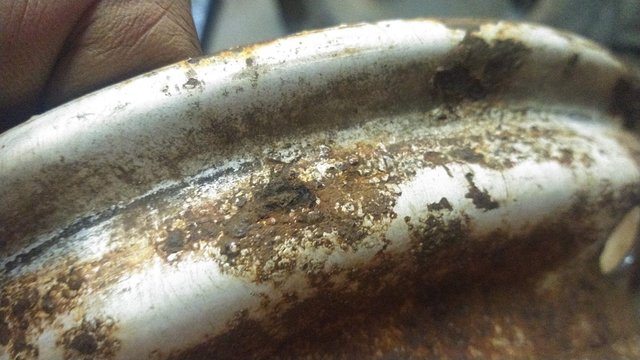
Here's the bead sealing area on the rim. This is the same as the valve stem, in my experience it can have some imperfections from rust pitting or tool marks, but all that loose paint, rust scale and any dirt needs to come off or you won't get a good seal. This part was cleaned up with a drill-mounted wire wheel.
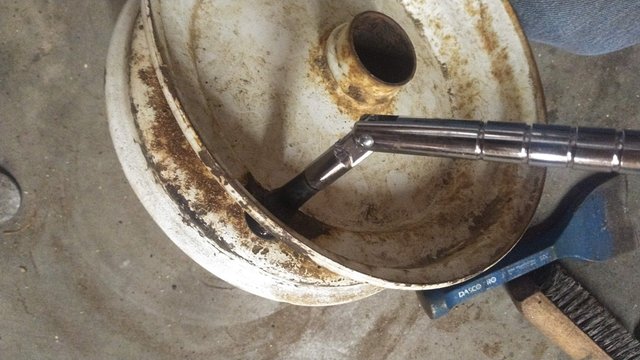
Here's the tool used for pulling the valve stem into the hole. This needs to be lubed up with soapy water before it goes in, otherwise there's the risk of tearing the rubber during installs and getting leaks.

I could write a whole post about how to mount a tire, so I'm skipping over that here. With the tire now mounted to the rim and aired up, the final touch was these new bearings. The cart had these nylon bushings as bearings and they were so wallowed out that the wheels would wobble back and forth about 15 degrees. I bought a pack of 10 of these bearings online for like $15 to replace them.
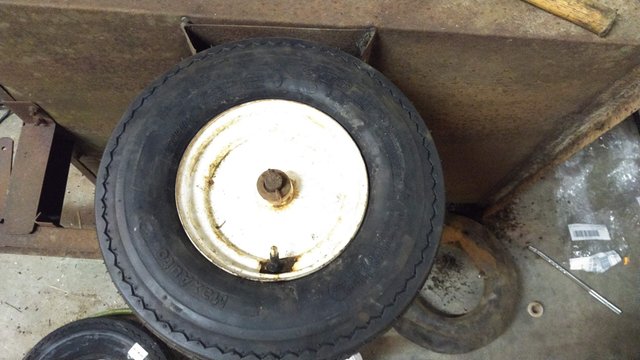
Here's the tire all mounted up and installed. This 3/4" shaft used for the axle was so rusted up that the bearing had to be beat into place with a socket and a hammer. At least I don't have to worry about the wheels falling off!
The cart going back to my neighbor got the same treatment by the way, which is why I paid the extra $5 to get 10 bearings instead of only 4. His tires are a smaller size, and they are dirt cheap, so I just got the same kind he had on there to begin with.
There you have it; a lawnmower cart designed to carry a couple hundred pounds, now with wheels, tires and bearings that will support about three quarters of a ton. It's super overkill, but hey, it actually saved me money to do it this way. That's it for this one. Thanks for reading, and until next time, Steem On!
Congratulations! Your post has been selected as a daily Steemit truffle! It is listed on rank 3 of all contributions awarded today. You can find the TOP DAILY TRUFFLE PICKS HERE.
I upvoted your contribution because to my mind your post is at least 4 SBD worth and should receive 201 votes. It's now up to the lovely Steemit community to make this come true.
I am
TrufflePig, an Artificial Intelligence Bot that helps minnows and content curators using Machine Learning. If you are curious how I select content, you can find an explanation here!Have a nice day and sincerely yours,

TrufflePig