Tackling Reupholstery Wingback Chair Style
Today I am sharing the most difficult DIY project I have done thus far, reupholstering a wingback chair! This post is to encourage anyone who has been wanting to try their own DIY project, whether it be reupholstering or any DIY project in general, but is too afraid to try it that you can do it!
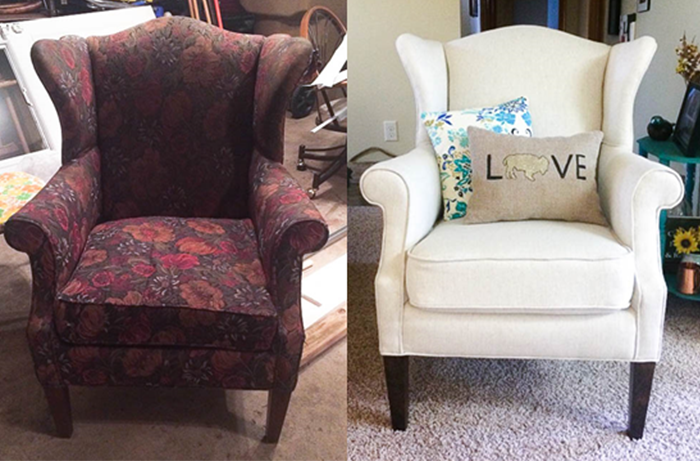
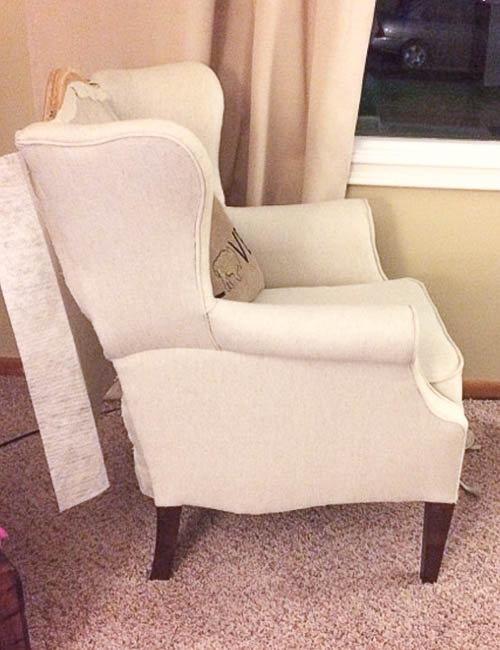
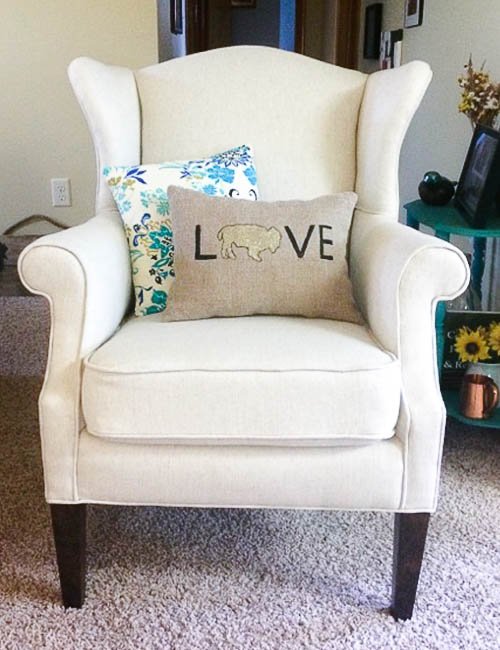
You guys, this project took me 18 months to finish!! Yes, 18 months!! because I was so nervous about it. But I did it and I was never prouder of myself than when it was finally finished. This was my very first reupholstery project, and possibly the biggest project to tackle for my first go but I am so happy with how it turned out!😊
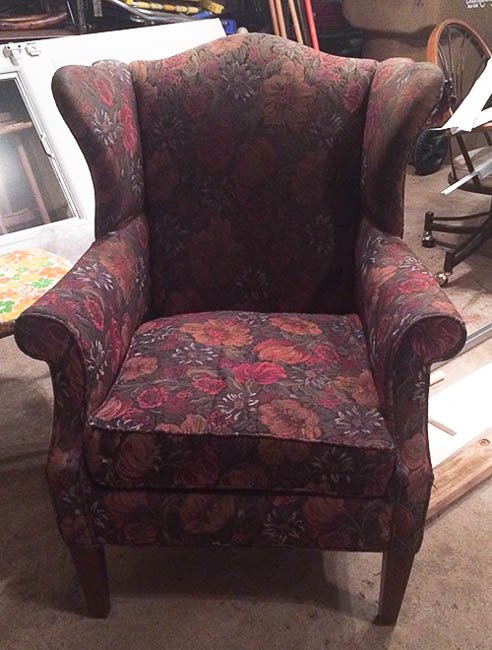
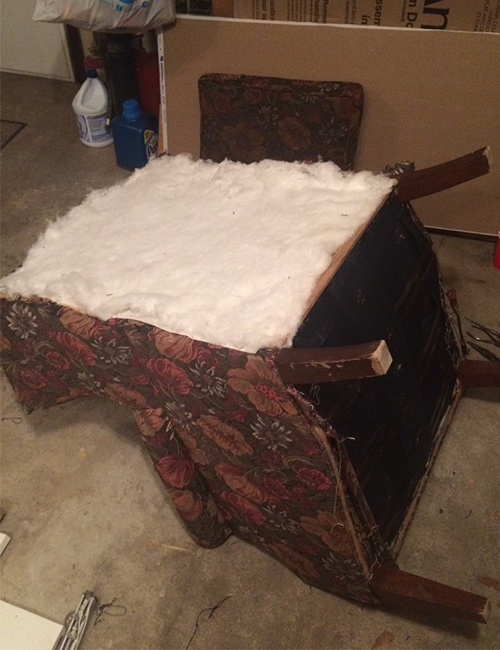
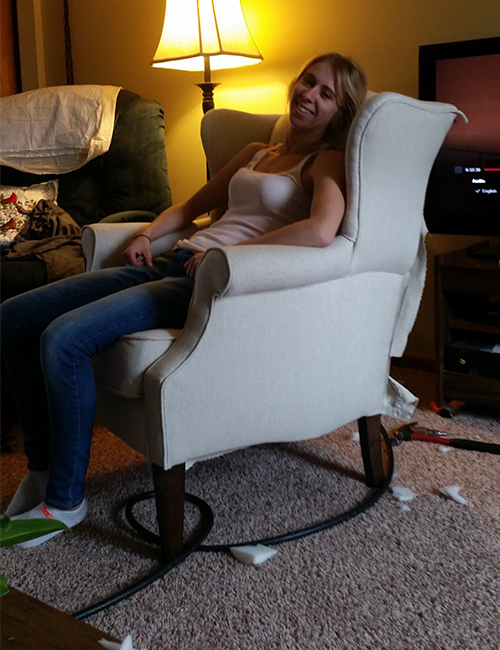
I actually got the idea to try it from my mom. One night she called me and told me that she found an old wingback chair in the garbage down the street from their house. It was rainy and windy that night, but I had to check it out, after all it was FREE…too good to pass up. I just bought a brand new car 3 days prior when I decided it was a good idea to go garbage picking! Of course when I saw the chair I knew I had to have it…the only challenge was how the heck I was going to get the soaking wet, most likely dirty chair in my brand new car. Luckily I had a blanket so we got the chair in no problem. It’s a good thing I had the new car because it would have never fit in my old car. It’s like this chair was supposed to belong to me!
.jpg)
.jpg)
.jpg)
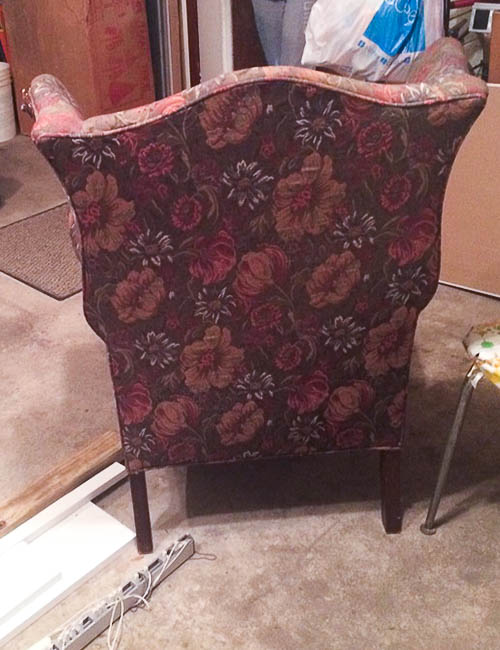
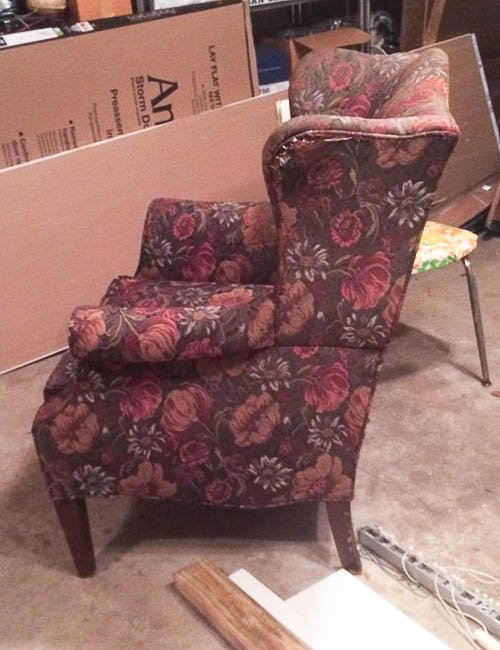
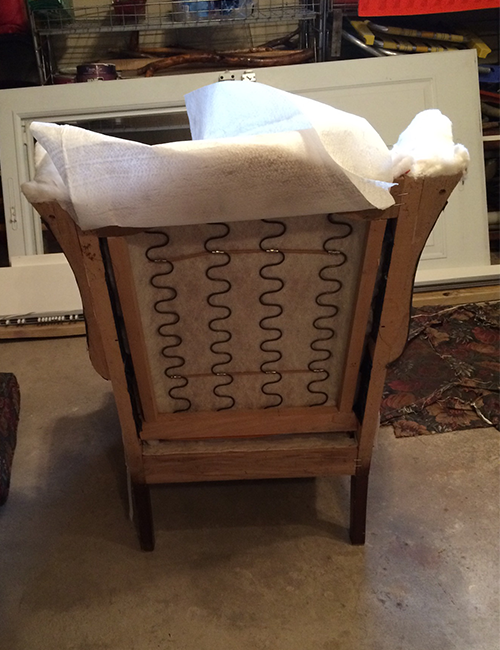
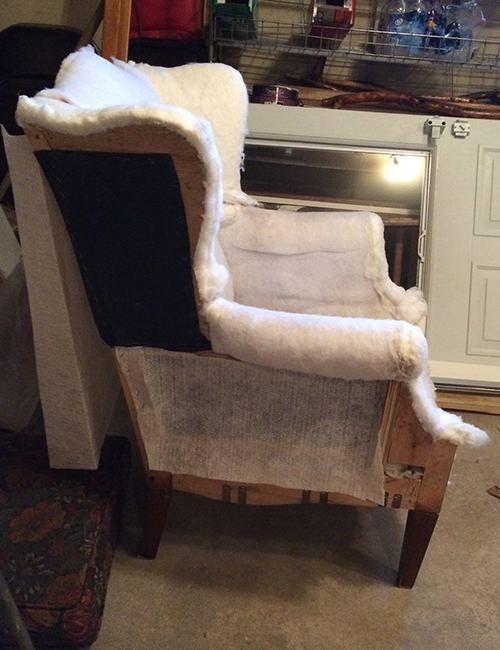
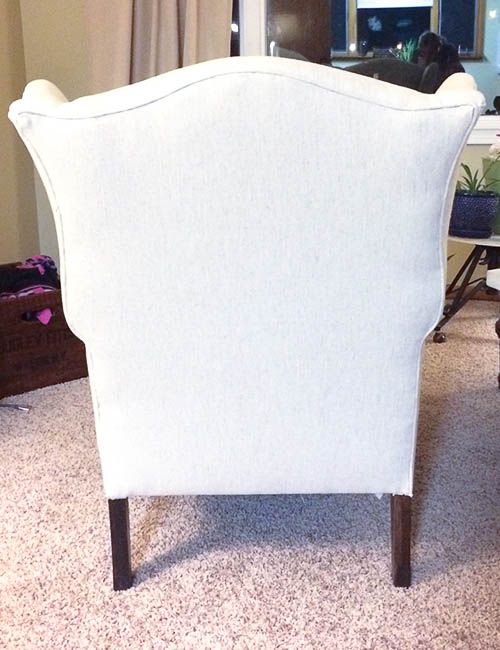
I let the chair dry overnight and started tackling removing all the fabric. I’m not gonna lie I was a bit nervous at first that I would mess something up, but hey it was free so worst case scenario is I just throw it out.
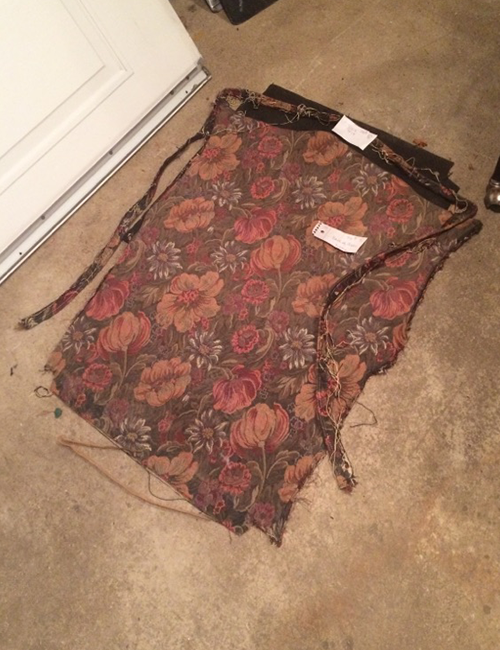
To get the staples out I used a flat screwdriver, hammer and pliers. I thought this part was going to be easy, boy was I WRONG! This was the most tedious task since you want to preserve the old fabric to use later on as a template for the new fabric. Not to mention the billions of staples that holds the fabric on. Overall this process took me about 16+ hours. Thanks to my mom helping take some staples out or else this part would have taken a lot longer!
If you are going to try your hand at reupholstering make sure that you label every piece of fabric you take off so you know where it goes on the chair when you start putting new fabric back on. I labeled mine with numbers and a description of the component of the chair. For example: #1 Back Piece.
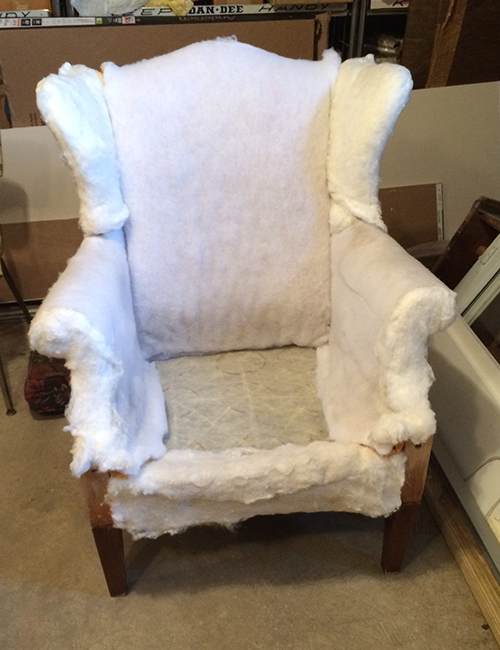
When reupholstering it you will start with the last piece you labeled and go backwards in order until you get to the piece labelled #1. So the piece you labeled as #1 will be the last piece you put on and the piece you numbered last will be the first piece you put back on.
Next step was picking out fabric, unfortunately this process turned out to be longer than expected because I was so indecisive on what color and pattern fabric I wanted. I went to multiple fabric stores many, many times! I am not exaggerating when I say this was a long process, it took me 10 months to pick out a fabric!!
I finally choose a nice neutral fabric without a pattern because I read that was the best type of fabric to use for beginners since you don’t have to worry about a pattern repeat. I ordered 6 yards from Bassett Furniture that took about 4 weeks to come in. The fabric cost me $190 on sale for 25% off. To figure out how much fabric to order I used the general guidelines I found here. (keep in mind this is just a guide and you may need more depending on the size of your peice and if you want to make matching pillows)
By the time the fabric came I was even more nervous than I was to take the fabric off because now I had about $200 invested into it. 8 more months, yes another 8 months!! went by and I didn’t do anything with it. My mom kept asking me when I was going to finish that chair and my grandma kept telling me she was gonna throw it out if I let it sit any longer. Finally I reached out to a local reupholster who owned a family business to see if he would be willing to give me some guidance. I actually met with him back when I picked out my fabric… he probably thought I fell off the face of the earth after it had been 8 months since I last talked to him! He was great, he showed me how to get the project started and gave me a rounded needle to borrow, some heavy duty thread and a cut of fabric for the bottom of the chair that goes underneath the cushion.
I also watched a bunch of YouTube videos (those guys make it look so easy!!) and read some how-to tutorials to learn how to reupholster specific parts of the chair. Getting your project started is the hardest part, but once you get going you just can’t wait to see the finished product!
The first thing I did was lay the old fabric on the new fabric to cut each section of the chair. (Note: when using the old fabric as a pattern do NOT cut the new fabric exactly the same size. You will need to leave extra so you have fabric to pull. You can always cut any excess off later if need be. In this case more is best.)
To attach the fabric back on to the chair I used this staple gun. There are a lot of staple guns made specifically for reupholstery but they were rather expensive and I found that this one worked perfectly for me.

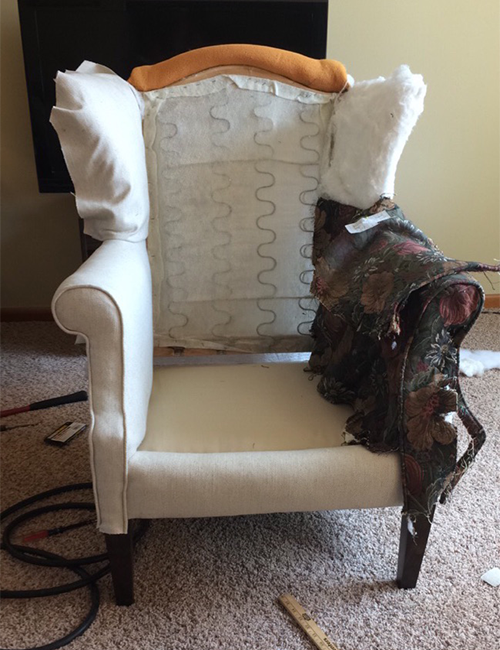
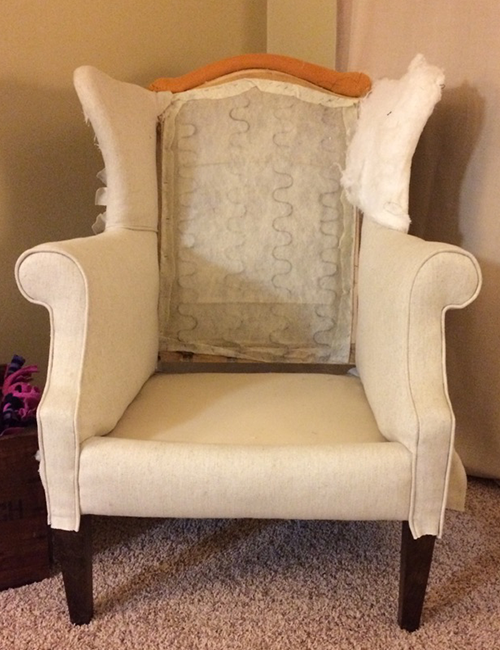
The hardest part was sewing and attaching the arms for the chair. I was so unhappy with the way the first arm piece turned out I end up cutting a whole new piece of fabric and resewed it (be careful if you do this because you don’t want to run out of fabric, I was extremely nervous that would happen to me but luckily it didn’t).
I can’t tell you how many times I stapled parts of the fabric down only to hate the way it “pulled” and repositioned it until I was happy with the way it looked. (One way to avoid stapling and pulling the staples out is to use thumb tacks to tack the fabric in place and then step back to look at it.)
.jpg)
.jpg)
.jpg)
This is great @poppiejanes!
I love the step by step process and seeing the chair look so barebones and then look so good at the finish!
It's actually super inspiring! Keep up the great work!
Thanks so much! 😊
upvote back dan follow back
Hello! really good work.
Thank you!!