Doin' Shit Yourself #4: HVAC Blower Motor Replacement
Hello Again Steem Folk!
In the first episode of "Doin' Shit Yourself," I talked about how to replace the blower motor coupler (HERE) as mine had shorted and partially melted.
That worked for a few days, but the fan quit blowing again and I was stumped. I did a little research and decided it was time to replace the blower motor itself.
I want to shoutout my Mom and Dad because they ordered the motor for me and I didn't even ask them to, so thank your parents when they do these kinds of things for you!
As usual, I'll be working on my 2001 Saturn SL1, but the same principles apply to several small cars according to the multiple YouTube videos I watched of this being done, so don't quote me.
Anyway, let's get started.
What is an HVAC blower motor?
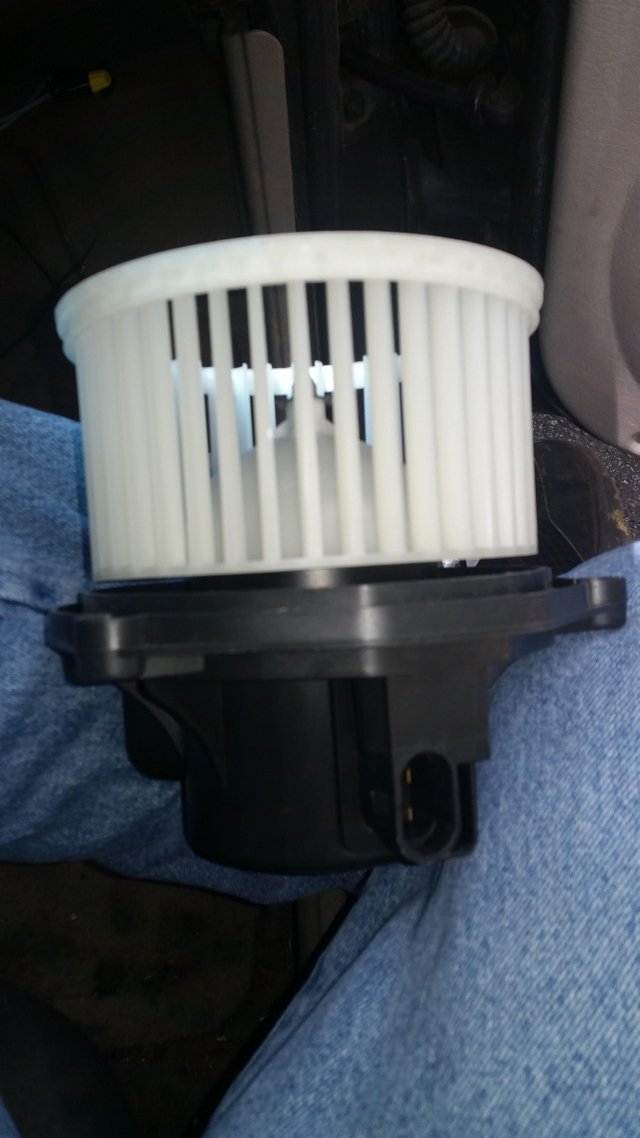
This is an HVAC blower motor. It looks kind of odd, doesn't it? You can see the coupler slot in the bottom right, which is where our problem is in the old one I believe.
Before We Get Started:
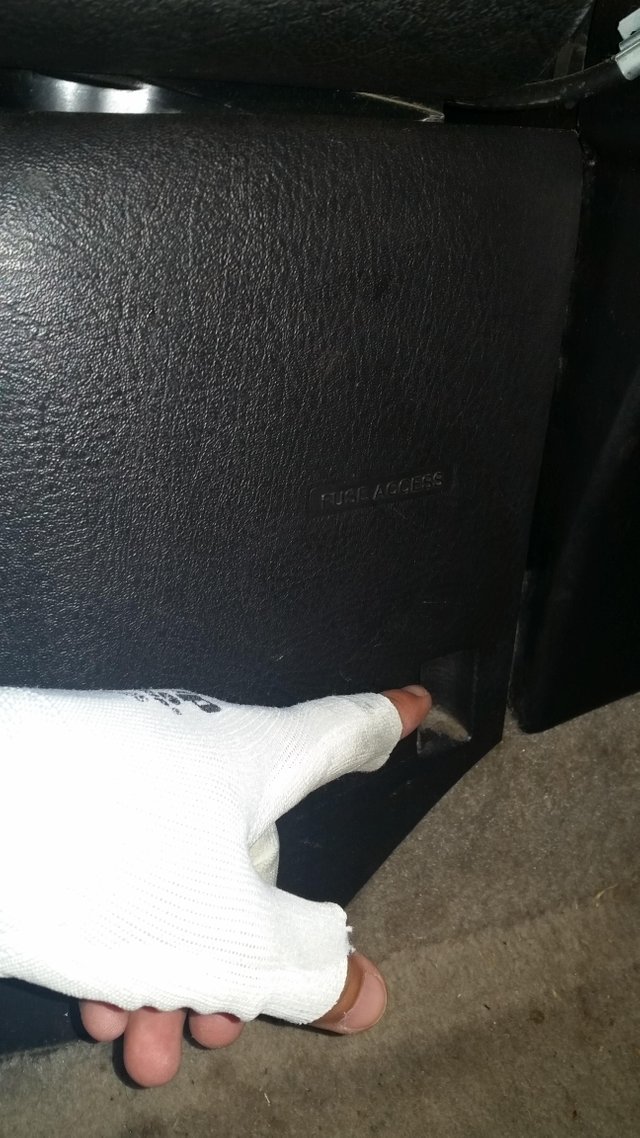
One thing you might want to check beforehand is your fuses. The fuse box in this Saturn is located to the left of the motor under the dash.
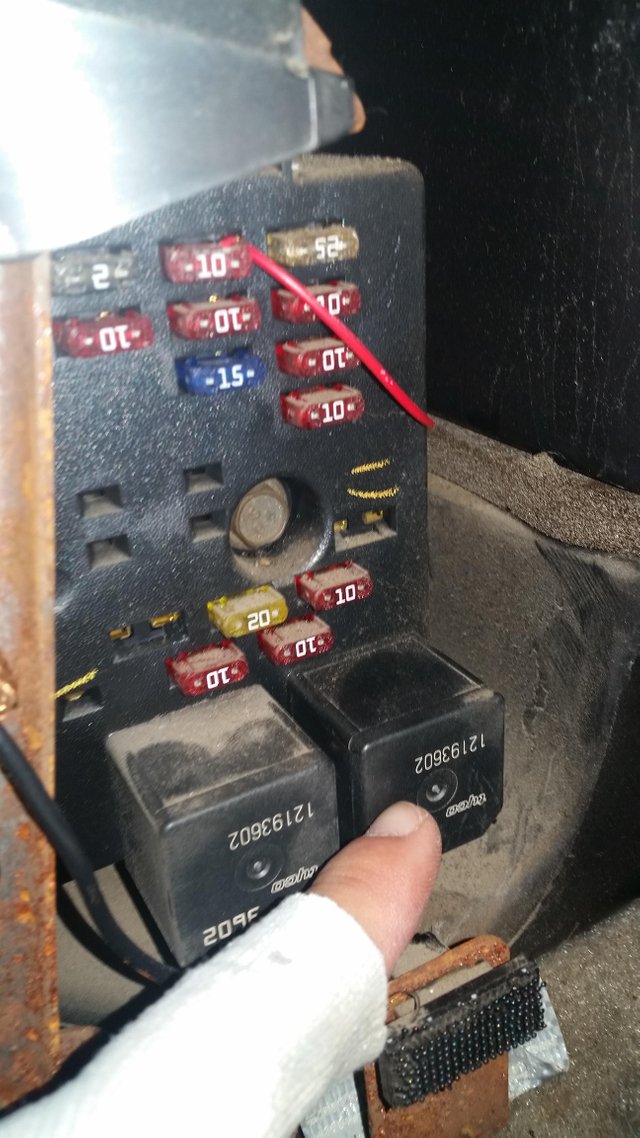
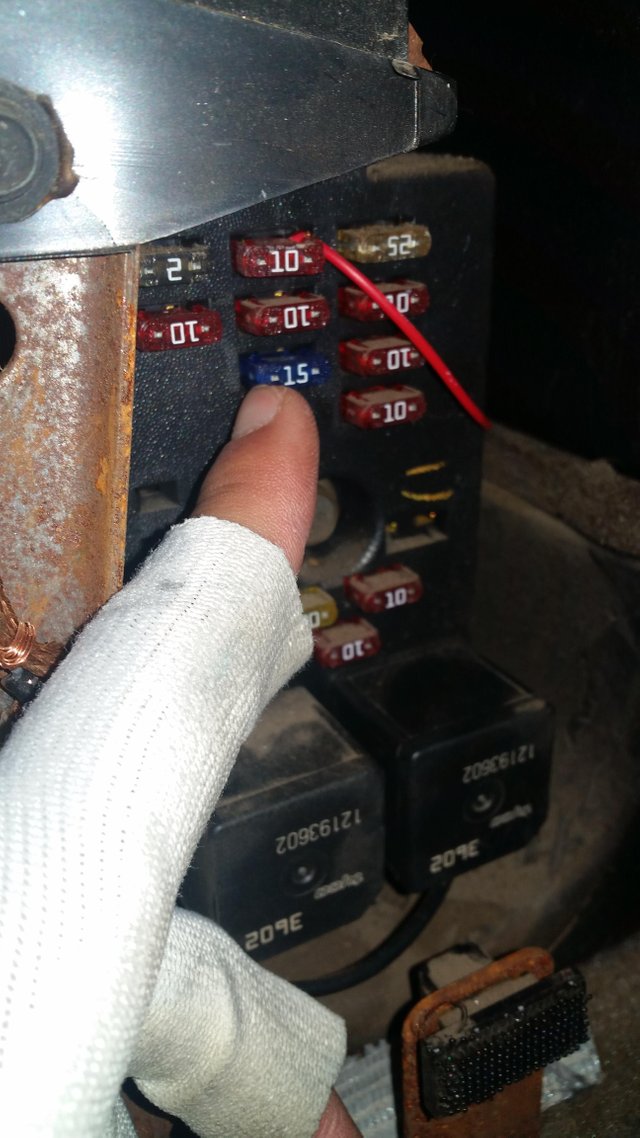
The fuses I'm pointing at are the relevant HVAC fuses for this car, but you should check your fuse diagram for their locations. Mine has a diagram on the back of the panel that covered the fuse box. Check for any burns or blown out fuses. These looked great, so I moved on to the motor.
Out With the Old:
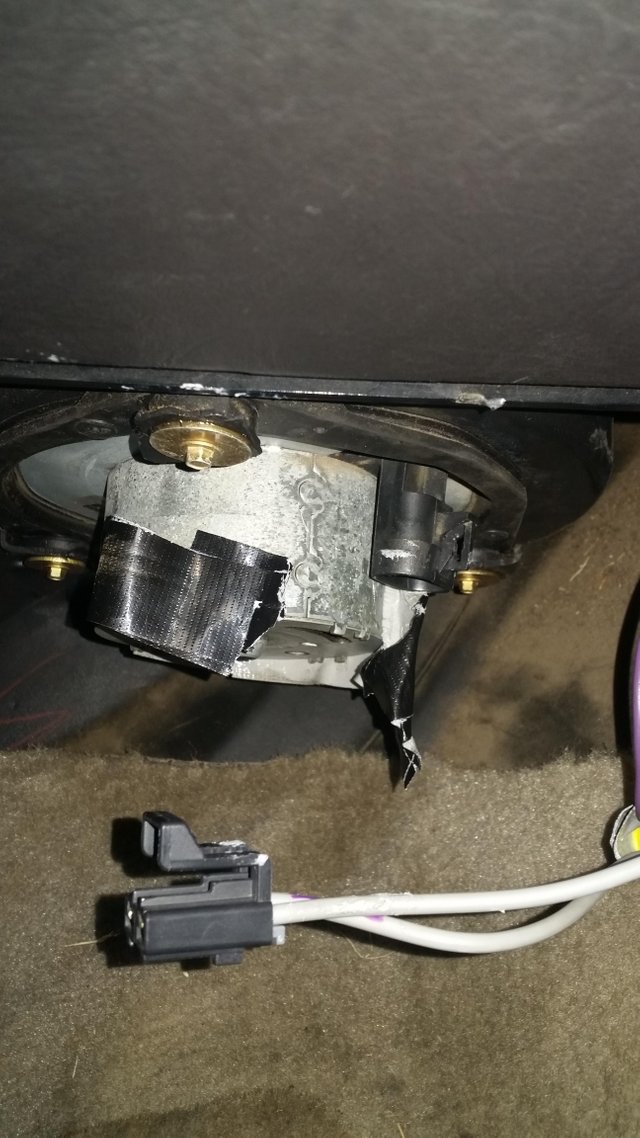
As you can see here, I made a few modifications since I replaced the coupler (i.e.: I wrapped gorilla tape around the shit). You can see our old friend hanging there at the bottom all willy nilly.
The first thing you'll want to do is locate the motor. It's under your glovebox and sort of awkward to reach without laying halfway in the floorboard. This may not be true for all cars, but it is for this little Saturn.
Go ahead and unplug your coupler from the motor.
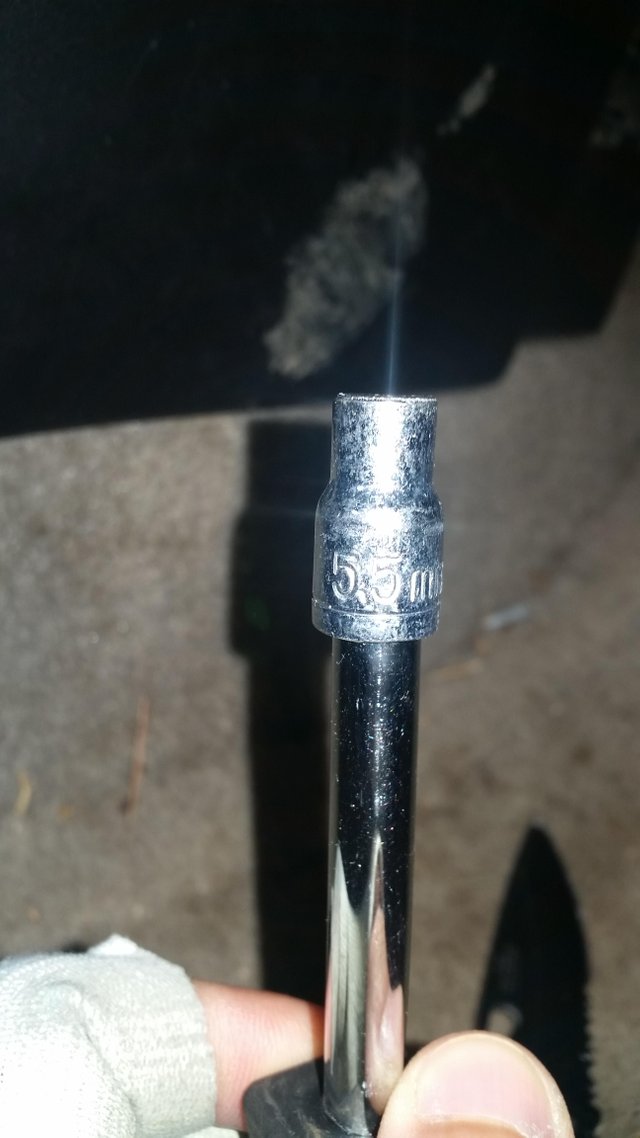
To remove the motor, you'll need a 5.5mm socket. I had ordered a metric set off eBay a while back for another project as none of my socket sets had this size. I used a hand socket tool, but you can use a ratchet if you feel like fighting the small space.
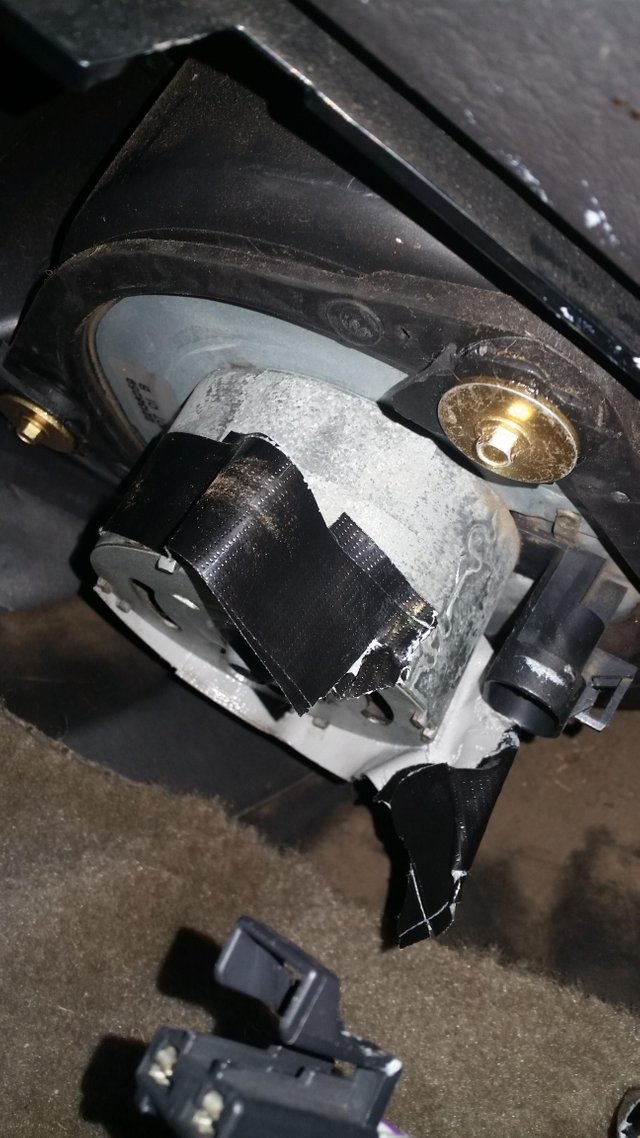
You can see here two of the three bolts you'll need to remove. They are the shiny brass looking ones in the top right and far left. The third bolt is located behind the motor and easier to see from underneath. While holding up the motor, remove all three bolts.
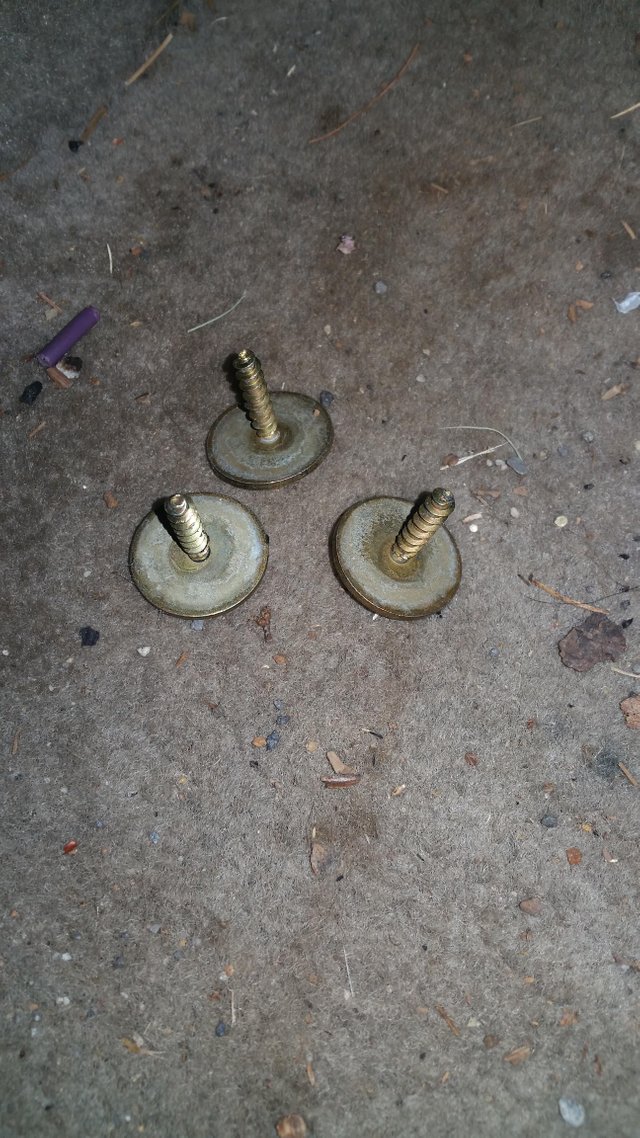
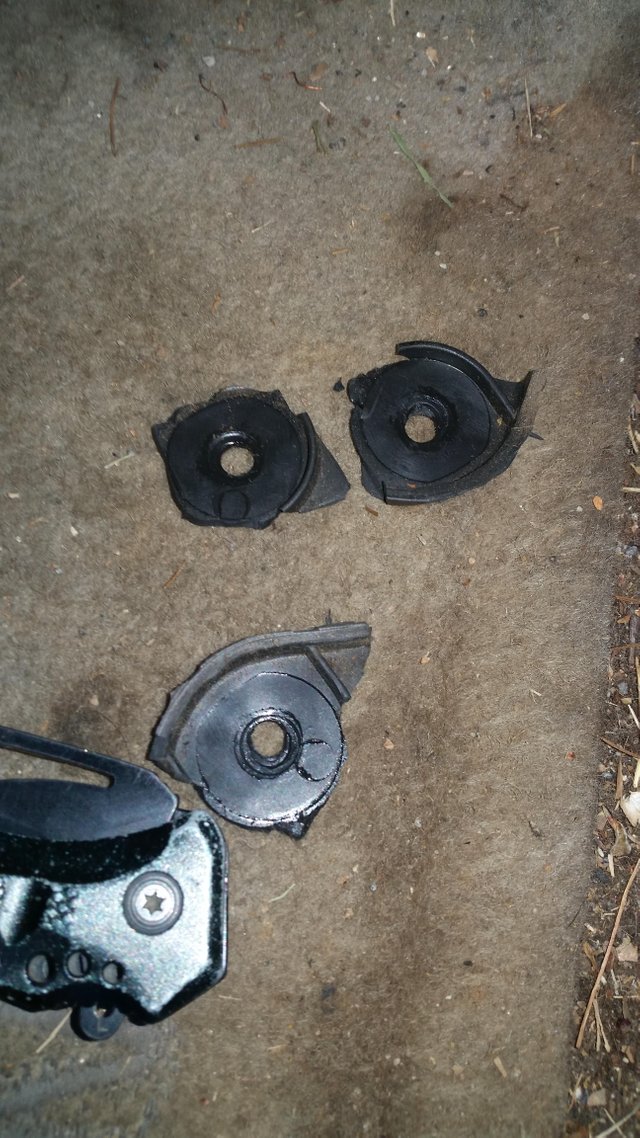
When I removed mine, these small plastic circles were stuck to the washers, so I just pulled them off. They appeared to have been adhered with a sticky substance and, over time, had broken free from the motor housing.

The motor should come right out of it's hole. Here you can see the inside of the fan component. It's dirty as hell and probably is the stock motor.
In With the New:
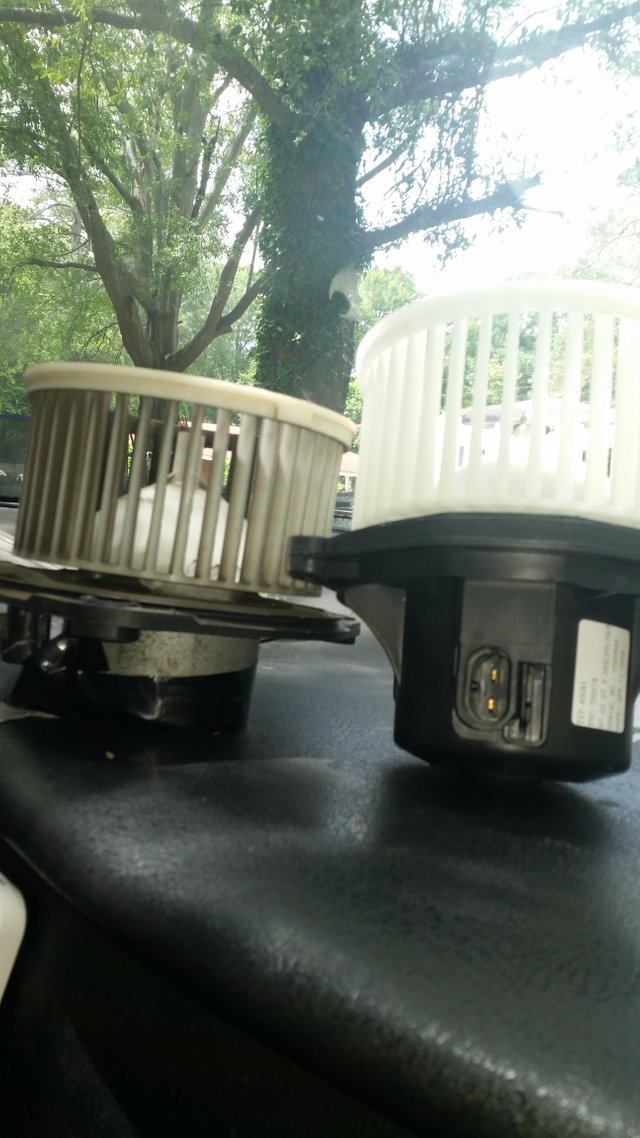
Here is a comparison of the old (left) and new (right) motors. What I found interesting is that the coupler socket on the new motor is facing the side rather than vertical. Alos, it seems that the new motor has a plastic housing rather than a metal one. You can see the difference in the cleanness of the fans.

Now just push the new motor into position. The bolt holes should line up to where the coupler socket is facing toward the car door.
While holding the motor up with one hand, use the other to start the three bolts and then you can just screw them in easy.
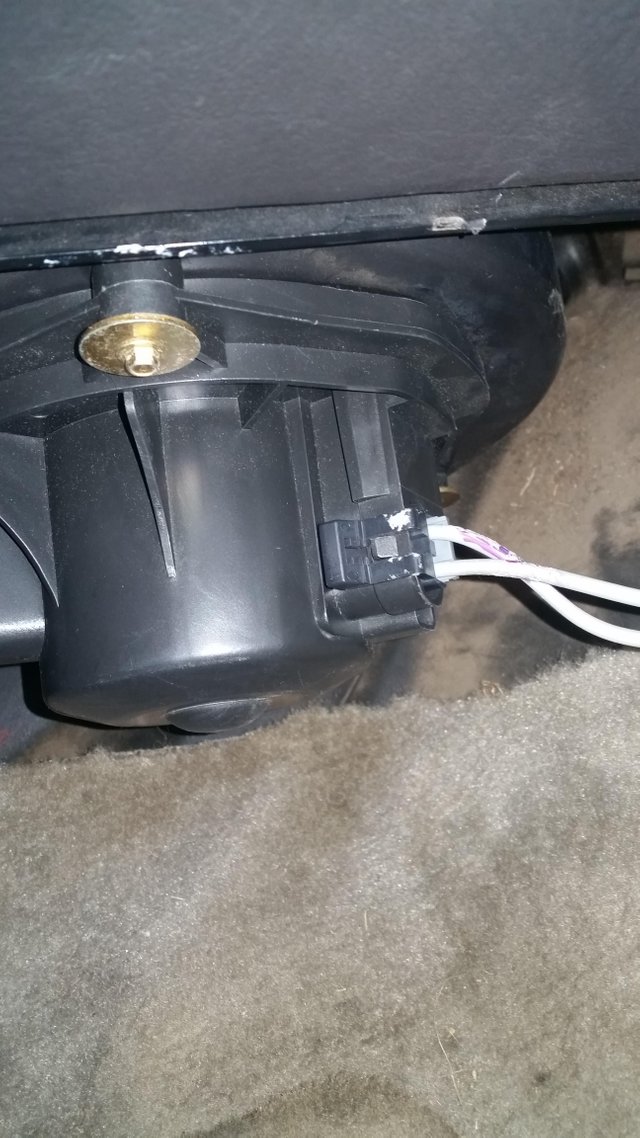
Now that your new motor is installed, you can plug your coupler in and try it out.
Just crank your car and hit your fan switch. This new motor blows air better than when I bought the car!
Enjoy Your A/C in This Summer Heat!
Now you can sit back and not melt to your seat while driving in the crazy hot weather.
Also you can have hot air blowing for the coming winter!
Lookin' good!
Thanks for Reading!
I hope you enjoyed and learned something from this guide.
If you have any questions or advice, leave a comment and I'll respond to the best of my ability.
This is an easy job and only took about half an hour even with taking pictures.
This is P5ych0path, signing off.
I need to learn how to replace my valve cover (leaking) and my spark plugs
and I am not touching the ac ;) ... as I am quite sure it is the compressor. I attempted a recharge and nothing.
Keep up the amazing work! Steem On.
Thank you @clevercreator. I could teach to change your spark plugs as it's fairly easy, the valve cover on the other hand is something I haven't done yet. Lol.
:) thanks.... I am just going to avoid it for another month ;)
honestly, I do not have patience that you do :) and the valve cover job is only about 240 -- even at ford. so just gotta keep saving up :)
Glad to see you doing good!!!
Same to you. Sad that the chat has been down. I miss all you crazy cats.
OH dear loard...
:) sorry. thought you knew :) if you dont use the password for financial matters...
use http (leave of the s) :) in the address bar.
happy chatting
Do you mean all this time I've been trying to get on chat I was off by one letter?
nah... just the past 24 hours
Nice bodge-up with the red live wire into the 10amp fuse. LOL
You've found my secret! That's actually a redneck engineered dash light cord. It's in the radio fuse so that when I crank the car I can see the dash at night. I'll replace my old ones eventually but it's a pain.
LOL redneck engineering. In the UK we call that "Ooh look mum, my legs on fire!"
In America we can't afford a doctor visit, so we just rub grease and mud on it and call it good.
LOL