Doin' Shit Yourself #2: Oil and Filter Change
Hello Again Steem Folk!
It's me with another installment of Doin' Shit Yourself!
Today I'm going to discuss how to change your oil and filter. My car is a 2001 Saturn SL1, but the same principles apply to most oil changes I believe. The biggest difference is, since this is a small car, it's hard to reach the filter from above the engine.
So, here we go.
Getting Started: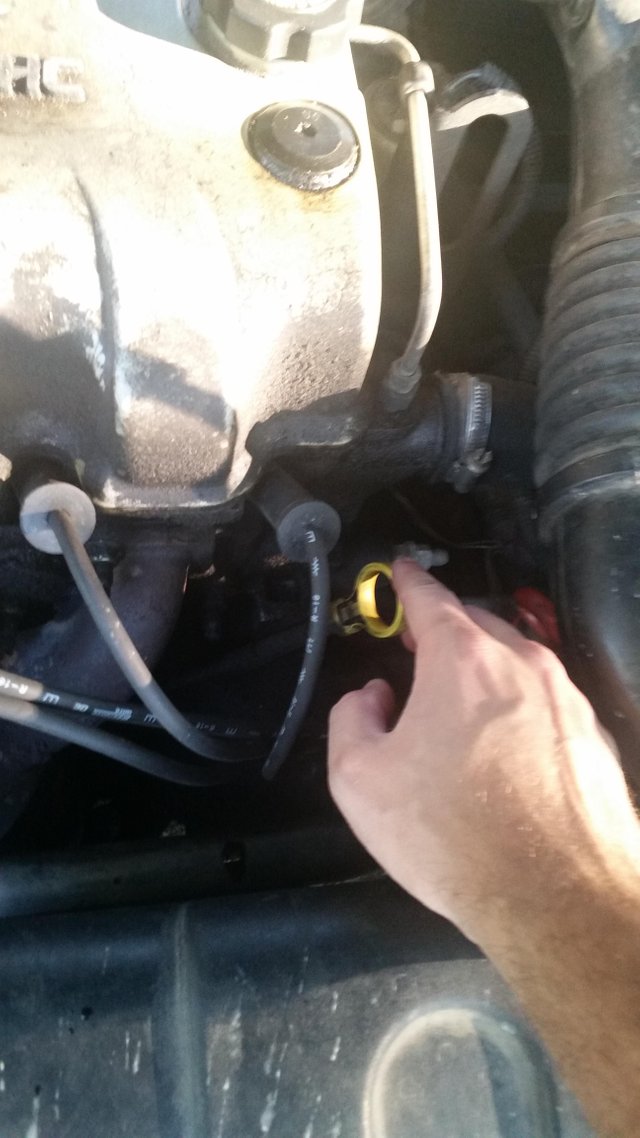
To begin with, let's establish how to check your oil. I've met a fair amount of people who have no concept of checking their oil and I think it's important to be able to do.
Here you can see the dipstick. Just pull it out.

You'll be looking at the very bottom that is marked. The oil present will tell you the level of oil in your car, so you generally want it to be close to full or in the etched pattern is acceptable. Just don't let it go below that.
Typically you'd want to wipe this initial oil off and reinsert the dipstick, then pull it out again to get an accurate gauge of your oil level, but right now I'm just looking at the color and viscosity of the oil. It's a brackish color, which indicates fairly heavy use. I will admit, it's been a long time since I've changed the filter.

The next thing you'll want to do since you have to take the passenger front wheel off is to jack your passenger front side up. Here I've also placed a jackstand underneath because you can never be too safe when doing mechanical work.


Another thing you'll want to do in this stage is to block off your back wheels with something like a brick or board. This is another safety measure in case the car tries to roll. In the event that happens, this should give you more time to get out from under the car or stop it completely.
Draining Old Oil:

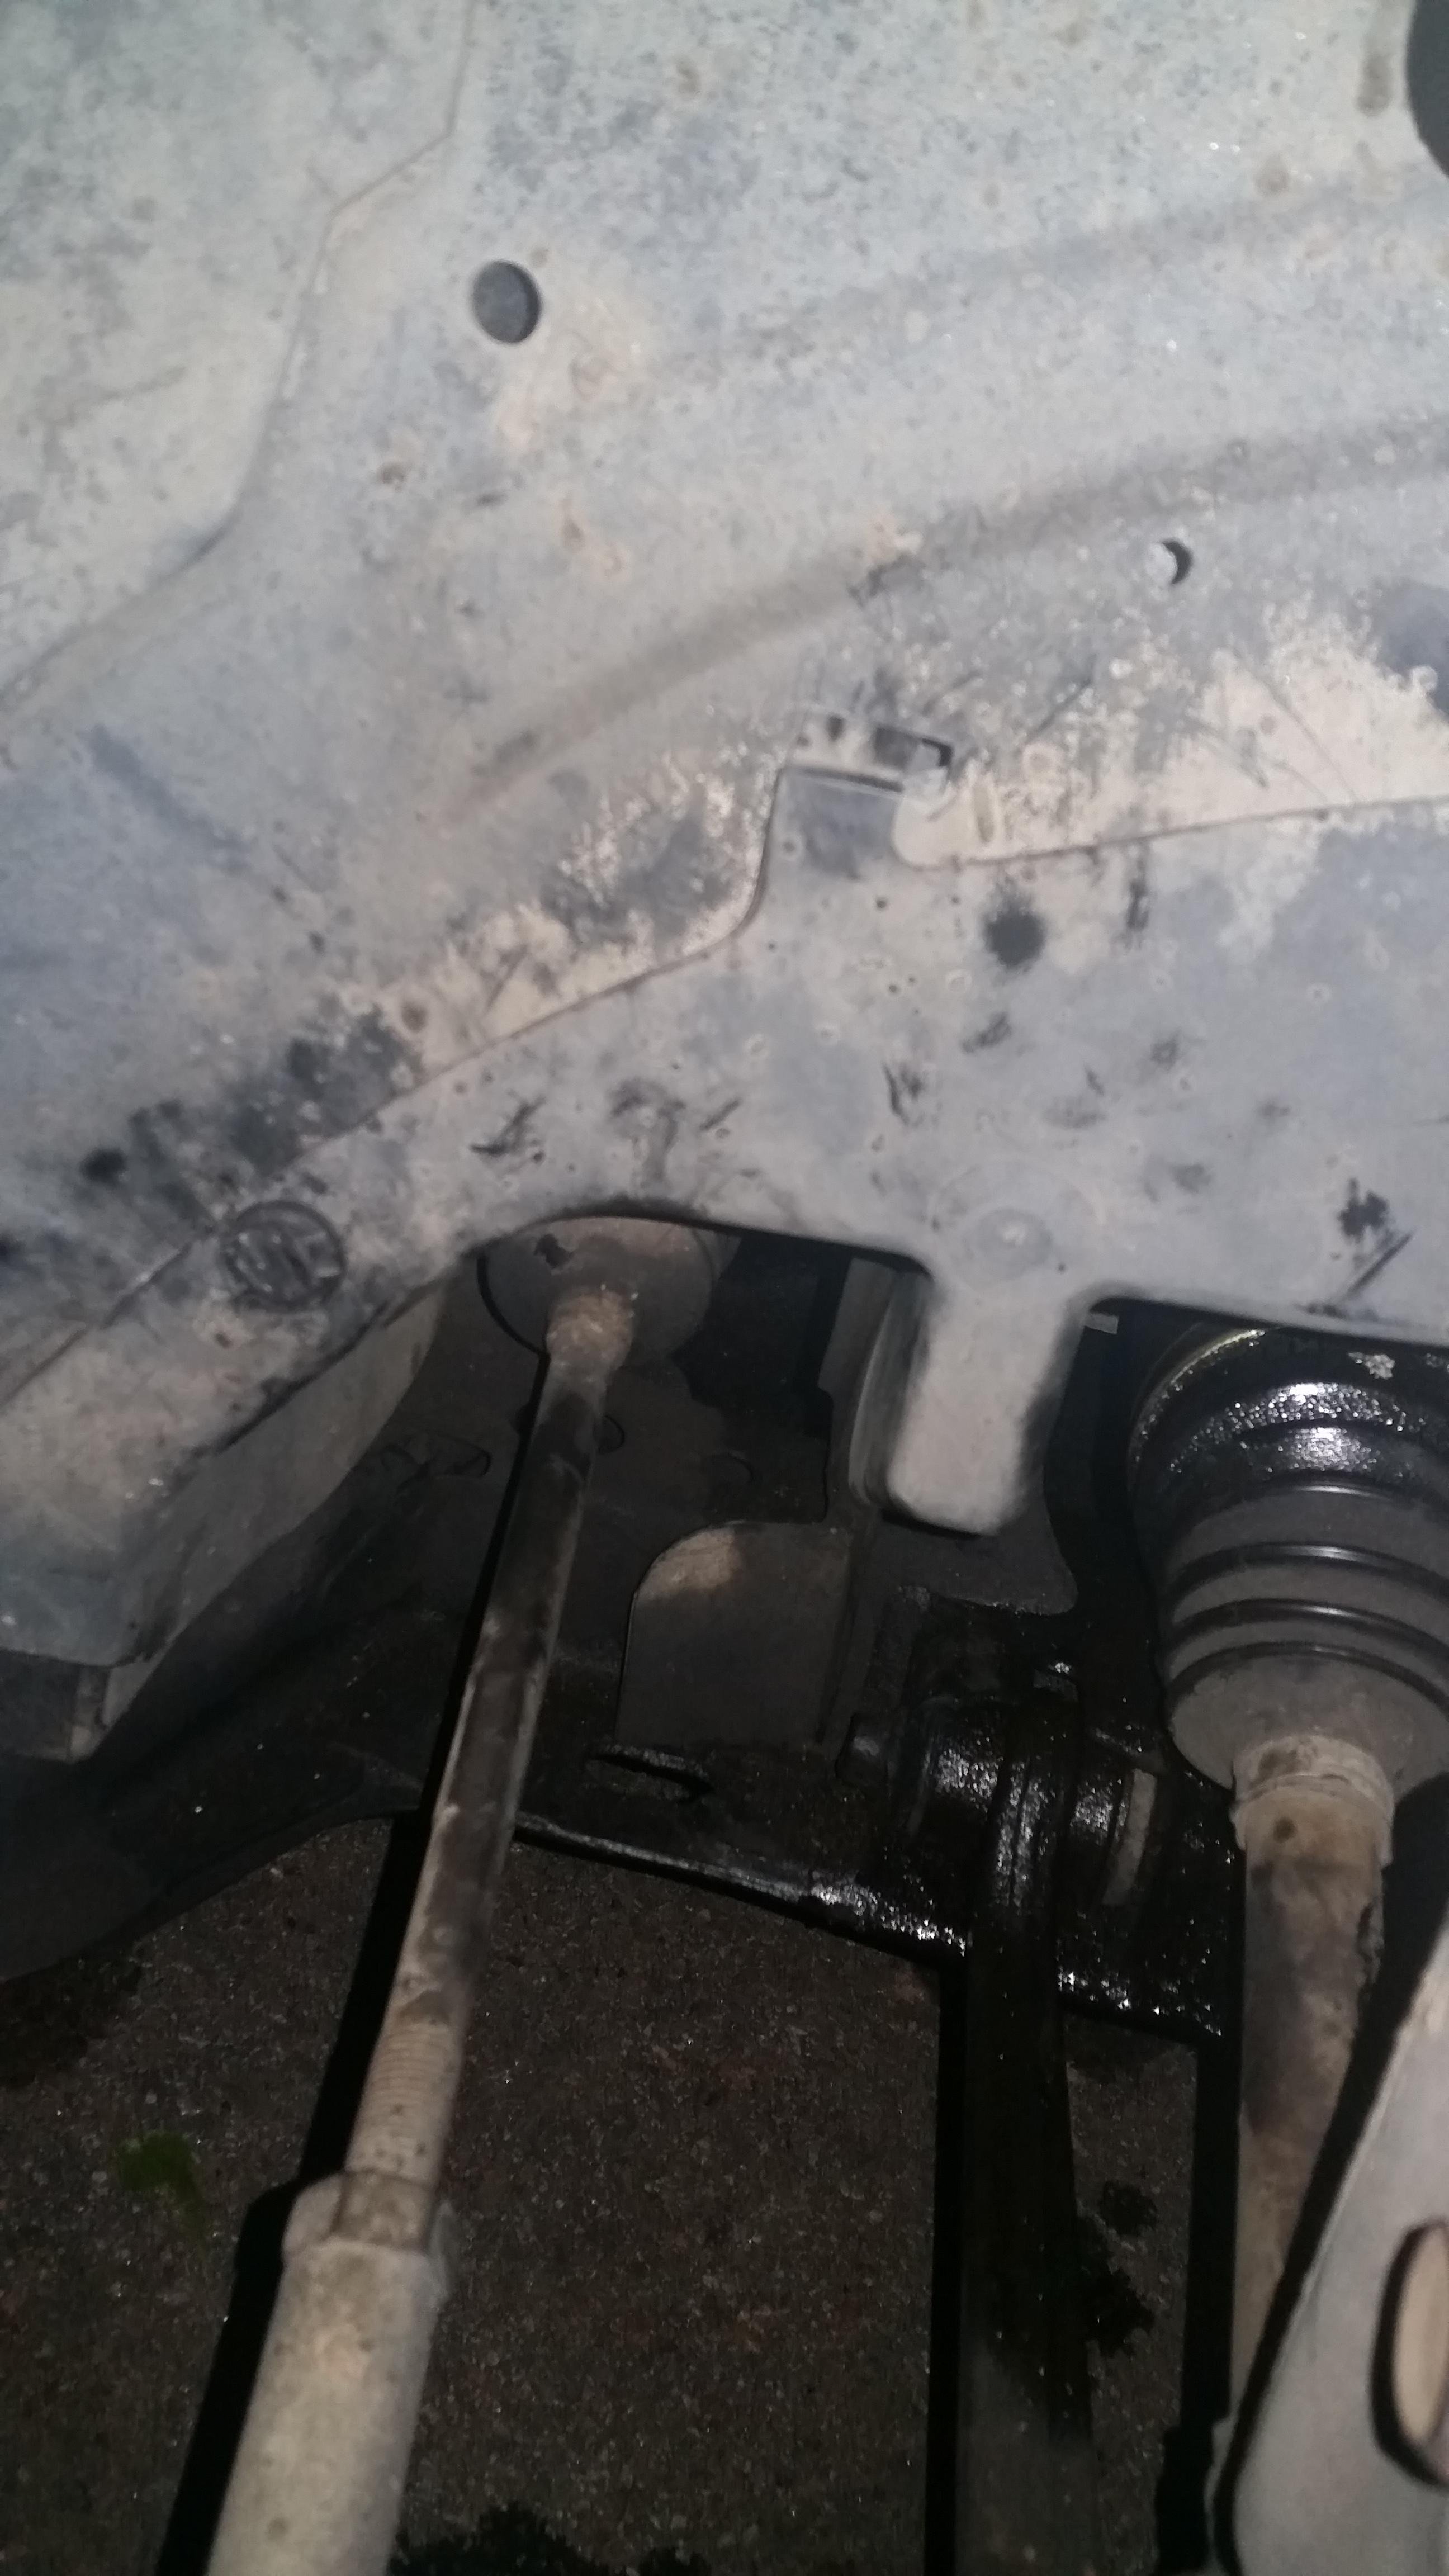
The next thing you'll want to do is to drain out all the old oil from your oil pan. The oil pan is located beneath the car behind the air dam and engine. They usually look like this with the grooves in them.
The bolt sticking out of the corner there is what you're looking for. It keeps the pan plugged and removing it will begin the draining.

To save time and frustration, I started removing the bolt with a ratchet using a 1/2 inch socket. It shouldn't typically be difficult to get the bolt started, but don't strain yourself too much. Lying flat on my back, I am able to get both hands ahold of the ratchet, making it super easy!

Here's the little guy. This is what keeps your oil in your pan. Without it, you are nothing. Without you, it is nothing. Well, it's still a bolt.

As you can see, I've placed an oil catch beneath the oil pan. I should've mentioned this in the Getting Started section, but it ought to be self explanatory. Some people catch their oil and reuse it, but this current oil is old and has seen better days, so I will dispose of it later.
Let the oil continue to drain while you continue on to the next steps.
Removing Old Oil Filter:

The next thing you need to do is to remove the old oil filter. To do this, you will need to remove your passenger front wheel. I've met people who don't know how to remove a wheel, so I'll briefly explain how to do so.
You can take your hex wrench (I use the one that came with the original car jack) and begin breaking the lugnuts loose by putting the wrench onto the lugnuts and stepping on it. Your legs are much more powerful than your arms unless you strictly workout only your upper body. I usually start with the bottom lugnut, breaking it loose, then going to the top, unscrewing them in a diagonal pattern so as to put less stress on the threads from the wheel's weight. Once you get them broken loose, you should be able to spin them the rest of the way off by hand and remove the wheel.


Next, you'll need to remove this panel from the wheel well. The filter is just behind it.
To do so, you'll have to remove the push pin that I'm pointing at and then holding. I like to use needle nose pliers to yank the middle part out, then just pull the panel off.

As you can see, this oil filter has seen some shit. By the way, it was really on there. I mean it was very on there.

I attempted to use this oil filter wrench to remove it, but it was in vain. The wrench handle was far too long to grip the filter and get any leverage, so I did what any redneck would do...

...and gave it a little TLC. Now that the handle has been custom fitted, we can continue.

Presto! With our newly modded filter wrench, we're able to easily remove the old filter. Speaking of, the old filter will try to leak oil all over you. Just hold it with the screw on end up and set it down.
One thing you'll want to look for is buildup in that silver ring around where the filter goes. Sometimes the old gasket will stick to the engine and leave a little bit hanging on. If you see anything in the silver ring, best to take a screwdriver or something and scrape it off so that your new filter's gasket will fit flush to the engine.
Installing New Filter:

Now you can install your new oil filter! Look at you! One thing you'll want to do is to check the size of your filter against the old one in case the store gave you the wrong part. I've had this happen only once, so now I check every time.
Note the black circle around the metal. That's the gasket I was talking about previously.

Before you slap that bad boy on, you'll need to take some of the old oil on your finger and run it around the gasket. This will ensure that the gasket makes a seal to the engine.

You can then screw the oil filter on the threading by hand until you are no longer able. You will then need to take your newly modified filter wrench and give the filter another turn and a half or so to make sure it's nice and tight and won't leak oil.
Putting New Oil In:

Now that your new oil filter is secured, you can put the bolt back into the oil pan. Hand tighten as far as you can and then use your ratchet to make sure the bolt is secure so that your pan won't leak oil.

Now you can take your oil cap off and insert your funnel.
Note that the oil cap shows the weight of oil your vehicle typically uses. Mine says "5w-30," but I tend to use "10w-30" because, to me, the heavier weight allows the oil to last longer. I don't know if it's true, but it seems that way. I've been using it the whole time I've had the car and had zero problems.

As I said, I'm using 10w-30 oil. I also like to use "Full Synthetic" oil. I use it because my car is old and has way lots of miles on it. Synthetic oil has many advantages over regular oil, the main one being that synthetic oil doesn't break down nearly as quickly as regular oil on the moving parts of the engine, thus causing less stress on them. To me it's easier to begin pouring with the jug sideways and then gradually turn the jug up.
Also note that this is a 5 quart jug of oil. The engine calls for about 4.5 quarts, but you can use the whole 5 because, when you start your engine, the oil will go through and then you'll have to add a little more anyway.
Finishing Up:
Now you can put your wheel well panel back on and then put your wheel back on, reversing the steps to remove them.
Now that you're done with the wheel, you can safely remove your jackstand and jack.

Now go back and check your dipstick.

The dipstick will initially need to be wiped off and reinserted and then taken out once more for a more accurate reading. You can see here that my oil level is slightly over full, which is fine.
Also you can see that the oil is a nice golden color. This is how new oil should look as opposed to the brackish color of the old oil.
Now you're ready to drive! Don't forget to remove your tire blocks!
Thanks so Much for Reading!
I hope that this post has been informative and helpful and that you've enjoyed reading along.
Please feel free to leave a comment and I'll respond!
This is P5ych0path, signing off!
suggest that you run the car around the block first to warm, not hot, the oil, it will flow easier and you will tend to get the oil sitting on the head as well. If you have it to hot you won't the second time.
Having removed the oil plug have a look at it, some cars have a magnet inserted into the end of the plug to show any steel fragments in the oil, indicating a failure somewhere, and needing attention.
Likewise look at the oil in the catching pan, looking for metal suspended in the oil, again a big bill coming up.
When the filter spanner like yours won't work to remove the old filter, remember it is going to be thrown out anyway. Use the hammer and literally drive a screwdriver right through the filter, then you can use a hand on both sides of the filter,
This will make more mess of course, but if you have no other options it can save your neck.
I have seen a pipe placed on the screwdriver where it emerged from the filter and a FBH [Fairly Big Hammer] used to start things turning.
Also, for your car, put in 4 quarts of oil, start the engine and let it idle for a minute or so, stop it and then top up the sump to the correct level of oil. The level will have dropped because the new oil filter was empty, they can hold a lot of oil, let one roll down the driveway and see how much oil was in there. Leave the half quart in it's sealed container in the garage for top ups as the engine requires.
In some cars the conrods/piston skirts come in contact with the top of the oil if the engine is overfilled. This can create problems with frothing etc.
Remember, the design engineer spent a lot of years going through his training, and he will have spent a lot more years learning his trade. If he says '4 and a half quarts of oil, there is a good reason for it
Thanks so much h for the feedback @len.george. I had no idea about the magnet on the oil pan bolt.
I had considered knocking a screwdriver through the filter, but the problem I was having is that the wrench handle was catching on the engine and losing grip, so that's why I shortened the handle.
And for the warm up, I forgot as well, so thank you for mentioning it. I will remember this next time.
kudos for these added hints on what to pay attention for during this process!
I've also heard about sticking magnets to the oil filter was supposed to be a good idea... you mention something about some cars having magnets on the plug... what's your take on the idea of sticking one to the oil filter to collect metal dust and keeping the oil "cleaner"... just a myth or a reasonable idea?
the better idea is in the oil plug. It is not there to clean the oil, just to draw your attention to a big bill that is coming your way.[maybe time to sell the car quickly]
Make sure you are using a good brand oil filter, we were offered a cheaper line of filters once, the rep left one behind and I opened it up to see what they were using for a filter medium.
Nothing.
No wonder they were a lot cheaper.
what is your next DIY item? in case I can help.
thanks for elaborating! I just got my car through the safety inspection and I hope there won't be anything that needs diy-ing too soon!
following you though, in case something happens... maybe I will remember to reach out to your knowledge!
untrained, just what I have learned through a lot of stuff ups, and listening to the experts.
If I can help, give me a yell.
have followed you, if that helps keep track.
If you want shit done right... you gotta do it yourself!
may I suggest a little trick:
stick a neodiddlium magnet to the outside casing of the oil filter (preferrably on the top of the domed end) it will collect small metal dust and keep your oil cleaner for a longer time.
At least that's what a seasoned mechanic once told me... and i've been driving around with a magnet ever since...
That's a neat trick. I've not heard of such a thing, but I will have to try it!
Nice post! I think basic vehicle maintenance is something everyone should know, you can save a few bucks and know its done properly.
Thank you! I agree. I think people, especially younger people like myself, generally have no concept of doing things for themselves and it troubles me deeply, so that's why I started this series. I hope that at least someone can learn from it.
There's not much better than cranking the car and nothing bad happening after you worked on it yourself.
Yea, my first car was a $100 beater, but after a couple hundred bucks in parts it was running like a new one. I enjoy wrenching on cars though, clears my mind of stress.
It really is a stress reliever. There's a book called Zen and the Art of Motorcycle Maintenance that isn't quite the same, but is agreat read on this.
I just did my first oil and filter change on my car a couple months ago since I ran out of vouchers for free changes at the dealership, lol It was pretty satisfying to do it myself, but after the expense of the oil and the filter, I think next time I will just take it to a shop because it will cost about the same (strangely)
It really does feel freeing to do it yourself. I would urge you to continue to do it yourself.
I don't know what brands you're using, but I got the Microgard filter for $4 and the 5 quart full synthetic oil for only $23. The shops I used to have it done at charged anywhere from $45 to $70, so to me it's much more cost effective to do it yourself.
I would try to catch good oil on sale as I know that some oil is very costly.
Thanks for reading and commenting!
The cost for oil and filter was about the same for me, but to get it done at a shop would be like $20-$30, according to people I talked to AFTER I did it... The dealership though would charge more like $55+ so that was my motivation in the first place :)
If that's the case and you can get it done that low, I say go for it. I just really love working on my old clunker. Lol.
Yes, I know the feeling. I used to have a 1971 VW Beetle back in high school and changing the oil on my current car brought back a lot of memories, good and bad LOL!
Oh man! German engineering at its finest!
And oh man... it never goes how you want it to!
Working on your own car! Hopefully u dont break anything
This is something I do often, so if I break something, I'll learn from it. But I hope so too lol.
My life is complete.
LOL you know it's true. :)
In all seriousness thanks for voting and commenting. One day I'll be half as cool as Chuck if I'm lucky.
Smiling. Just commenting. Chuck Norris once felt he was a man trapped in a woman's body.
Of course then his mother gave birth . Hehehe. Kills me everytime.
Dear sweet mother of Jésus.... We were all men trapped in women's bodies at some point... My mind is shattered.
Now you see the greatness that is Chuck. Enlightenment is just a kickass away. Lol.
well, we can dream i suppose but then if we were to succeed i'm pretty sure he would have to kill us
I like the idea. I'll give you a follow. Keep on keepin' on. Do you take requests? I'd like to know how to convince a mechanic not to overcharge. The Vulcan death grip? The Rock's hooked eyebrow of doom? Yoda's Jedi mind control?
Well, the reason mechanics charge so much is that the work is tough and no one wants or knows how to do it, so I would try to find a real country mechanic and they may charge less.
Or just watch YouTube videos and learn to do it yourself!
Thank you!!
No, thank you for commenting!
following, upvoted and resteemed!
thanks for this informative post!