Solar Powered Kids Vehicle That Runs FOREVER w/Trailer; How To Make It
Power Wheels Vehicle Powered By The Sun
Power Wheels are every kids dream right? Until they get one and realize they can only drive around for about 45mins before the battery has to be charged for 8 hours....I mean who designs these things? We decided to make some changes so that it never has to be plugged in.


Also, to make it more fun for our 4 year old to help collect firewood...we added a hitch and trailer made from scrap material. (Please excuse our photos...we had a blizzard outside so we brought it into our project room) You could also attach a wagon if you have one laying around. We have hauled around 80lbs around in this thing without a problem.


In this post we will discuss how to convert the 12v Lead acid battery vehicle into a 7+Hr Solar Powered Driving Machine.
First things first... find a used Power Wheels with a busted battery or lost charger etc. You don't need any of that and that is going to be the most cost effective way to do it.
Now lets discuss the battery...The Power Wheels Vehicle originally came with a 12v lead acid battery with a rating of 9.5ah (amp hour). We replaced it with (4) 3.2 V LifePO4 batteries with a rating of 25ah (amp hours) purchased here; https://www.aliexpress.com/item/4pcs-Promotion-price-LiFepo4-25Ah-3-2V-cell-25ah-rechargable-battery-12v-20ah-diy-motorcycle-electric/32797010949.html?trace=msiteDetail2pcDetail.
We DO NOT recommend using Lithium Ion batteries because they can be unstable and after all, you are putting your child in this thing.
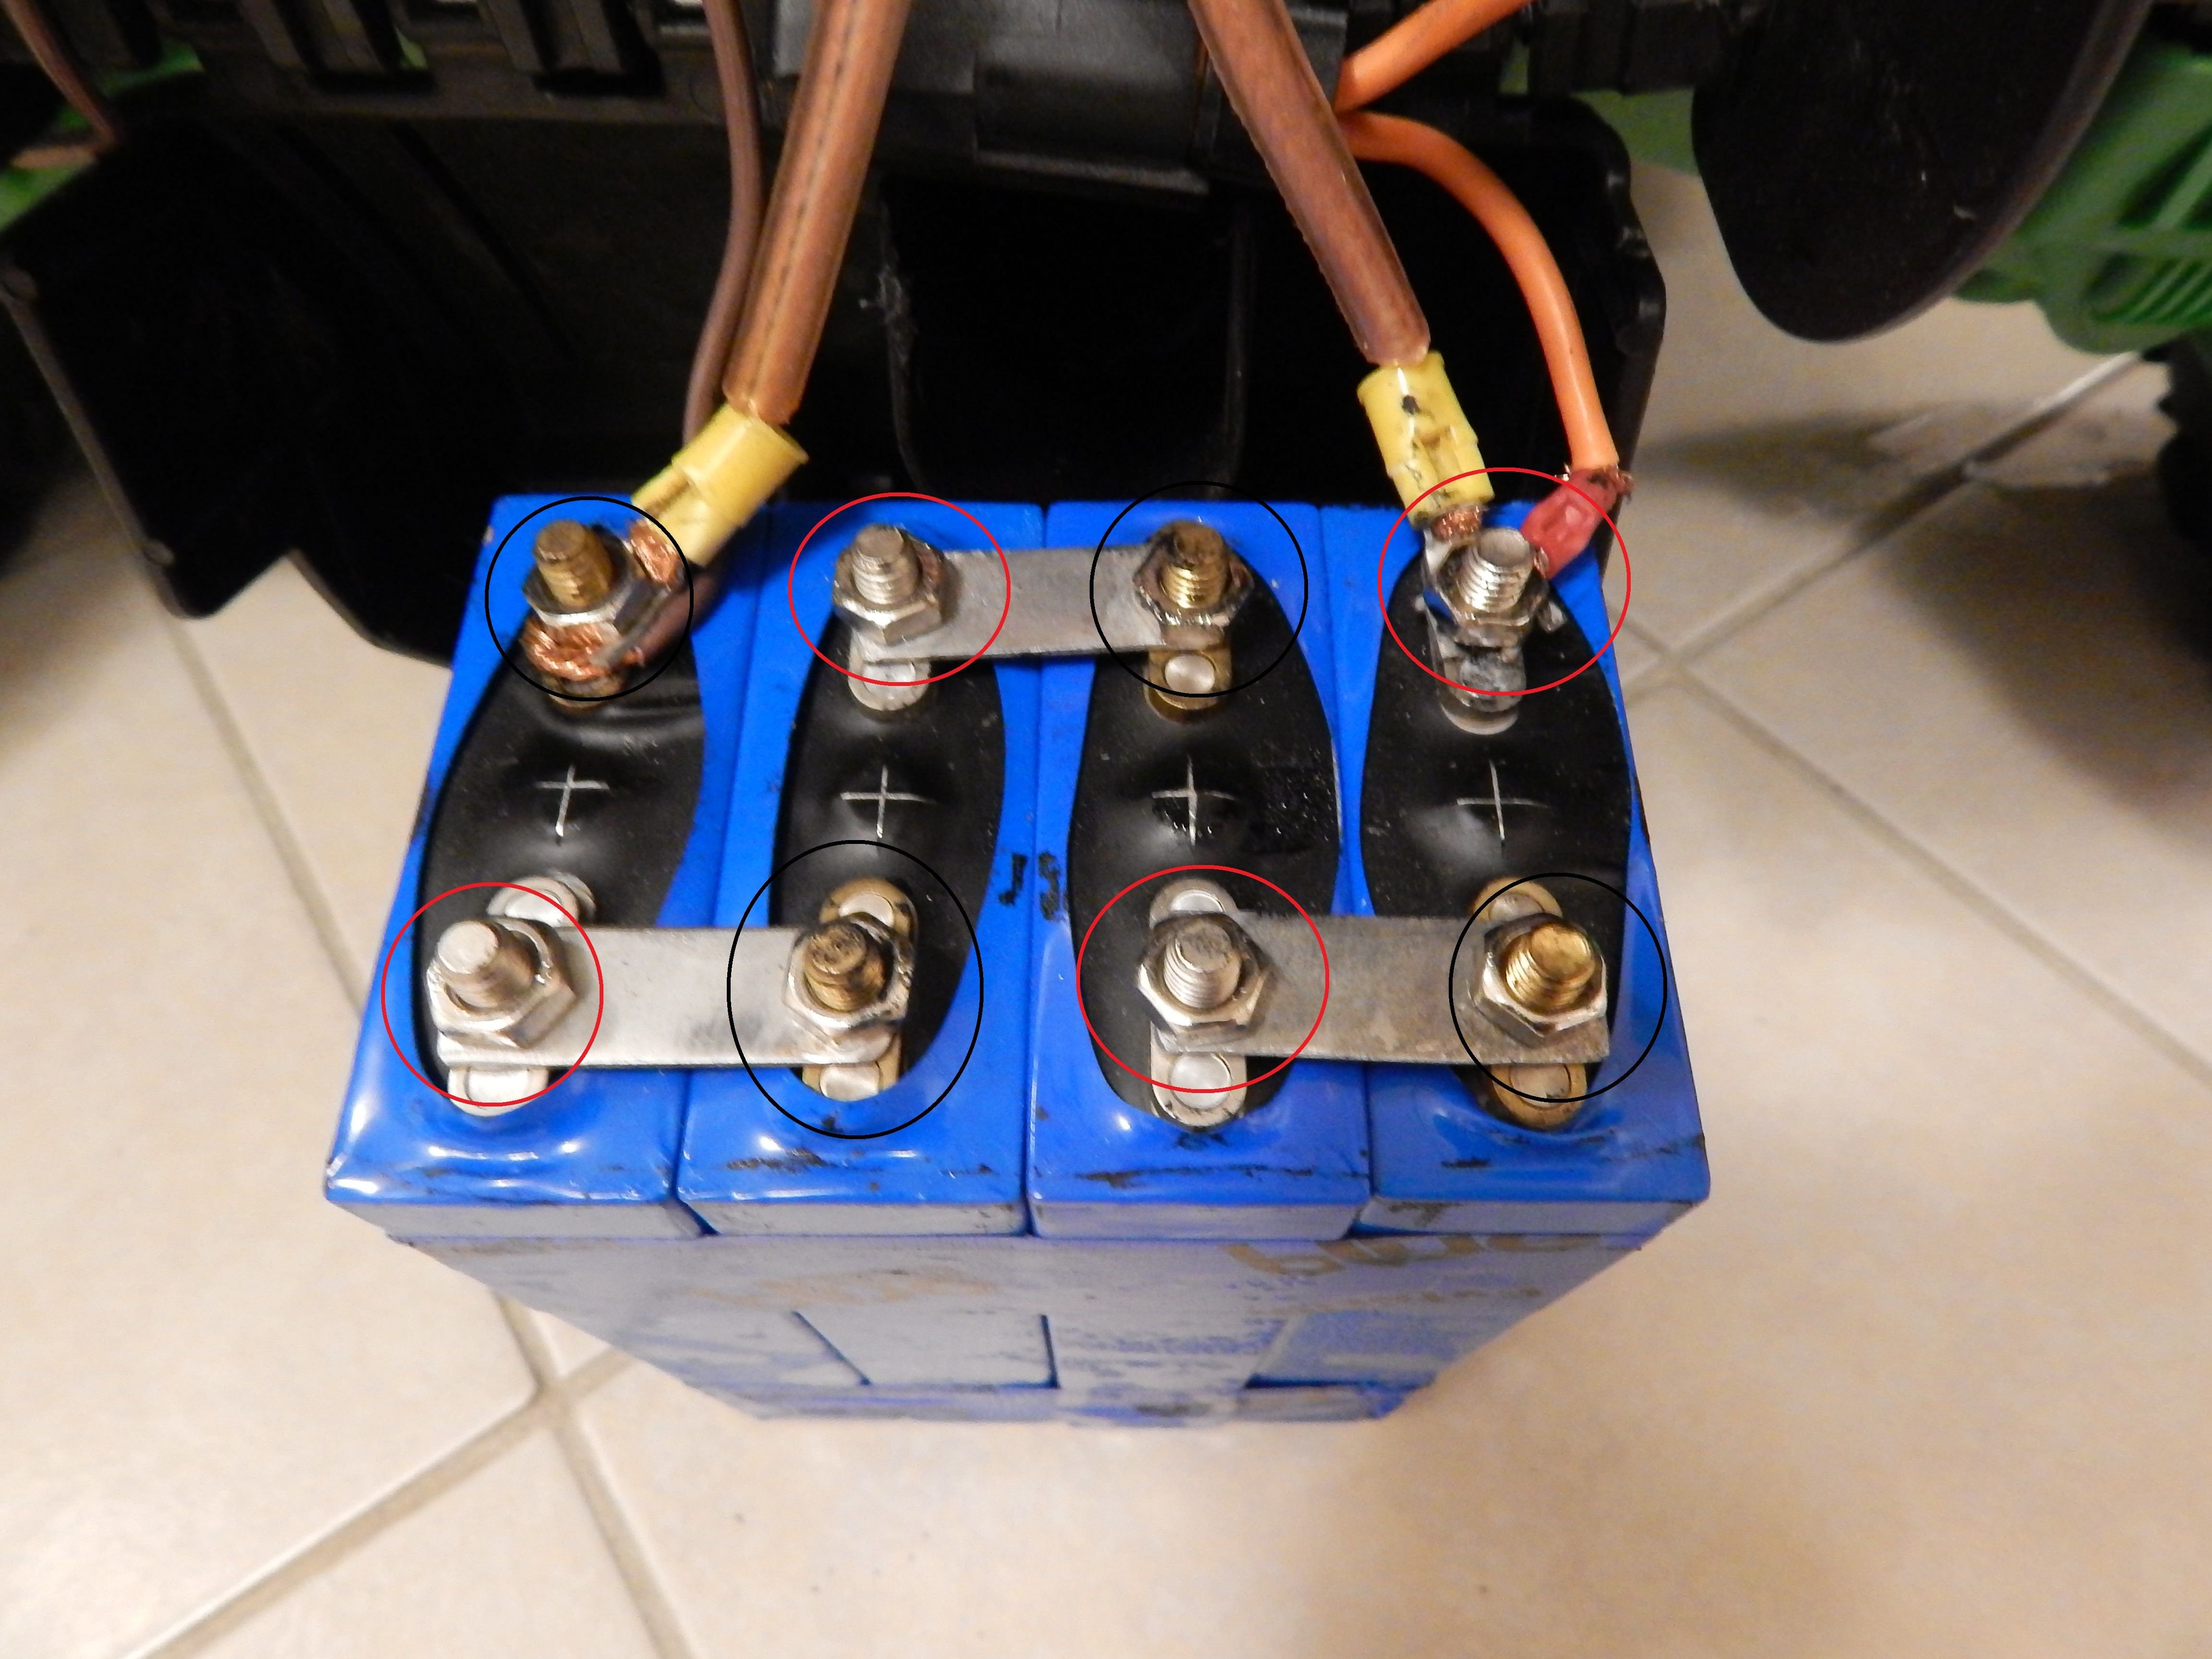
We wired the batteries in series to get to 12v (black circled in photo is negative post, red is positive). We did this by simply drilling holes into some scrap pieces of aluminum.
We drilled holes in the top of the plastic compartment that contained the original battery. We ran the wires from the new battery to the charge controller (we used old speaker wires for this, on right in photo), the load wires from the new battery to the charge controller (these wires were the original ones that plugged in to the 12v battery. We removed the plug, stripped the wires and put them directly into the charge controller). Your Solar Panel wires seen in photo go directly from the solar panel to the charge controller.

The charge controller we purchased is a 30amp but you could do as low as 10amp, since you are not using it to carry the load. Here is one similar to the one we have; https://www.aliexpress.com/item/VOCNR-PWM-30A-Solar-Charge-Controller-12V-24V-LCD-Display-USB-5V-Solar-Panel-Charge-Regulator/32621288030.html?trace=msiteDetail2pcDetail

The Solar Panel is a 100watt Flexible Solar Panel found here; https://www.aliexpress.com/item/100-w-watt-semi-flexible-solar-cell-solar-panel-100w-12V-solar-panels-monocrystalline-solar-cell/32820223833.html?trace=msiteDetail2pcDetail. Hooking up the panel to the charge controller is pretty straight forward, it comes with all wires needed and directions. All of these items can be found on ebay as well with quicker shipping, but they are more expensive that way.

We made a simple frame out of 1/2" PVC, about 15ft worth. You could customize this and make it as tall or short as you like.
We used (4) Caps screwed into the base. Make sure you screw them in from the bottom up.

..which will hold the risers that connect to the top box, they simply pop right in place.


We used (4) PVC Tee's to connect the top box to the risers

and elbows at all 4 corners... then some heavy duty zip ties connect the Solar Panel in place on the PVC box. We spray painted the PVC frame black before attaching the Solar Panel.

Your panel is now safe and secure, it also adds some much needed shade on hot days.

We also ended up making a small trailer out of some spare items we had laying around. It has been pretty useful for firewood gathering.
Made a simple hitch...

bolted it to the steel frame underneath. Ignore the wires there, those are for the LED headlight we added.

and used a hitch pin we had to make it easy to attach and detach the trailer.

Depending on what battery powered vehicle you find, some of this process might be a bit different but the batteries are all the same with them. If you wanted to just start with the charge controller and solar panel you could use the stock battery and at least extent the range of run time.
We run this car all day in the summer, then run it for a few hours some nights and have never lost power. The kids love it, and it always surprises me with the load it is able to carry. Plus the fact that we have never had to plug it in is just the best thing. We plan on converting our whole homestead to solar so we are constantly working towards being "unplugged".
We hope you found this post helpful! If you have any questions, want specific dimensions, or need some advice don't hesitate to reach out. You could leave a contact email in the comments and we will do our best to walk you through the process. We are all in this together after all.
Happy Homesteading!
What a great toys ! I hope he will be solar coach designers in the future.
its a very good project you son will be very proud of you.if the same project can be done for adult it what is need in African country we have enough sun light .
Thank you kindly for the nice words. I dont see why this couldnt be done for an adult size vehicle. You would need to keep weight to a minimum. You would probably also want to get a higher voltage motor to deliver more wattage efficiently and add as many solar panels as possible. You could use a sprocket/chain setup to adjust the gearing. So yes aside from it costing more you could definitely do this.
Wow, nice Project and Post
Thank you so much! It has been a really fun project for us and the kids :)
By any chance do you have experience in making an instructable, the details and explanations in your article are on point, at 7hr+ on a 12v battery system that's impresive, and you have built it sustainably by reusing some stuff (aluminium battery terminals).
Thank you! I don't have any experience with making an instructable, but I will look into it. The long run time is just due to the high capacity of the batteries, increased depth of discharge ability in lifepo4 batteries and the solar panel offset. We always try to hold on to scrap metal and parts, because we seem to find a use for them later on. Thanks for reading our post!
Wonderful. What would it cost to do that with a golf cart?
If you can get me the voltage and wattage of the motor, the amp hours (ah) of the current battery and the dimensions on the canopy I can get you some links to get you started.
What a great post, truly inspirational. 🤓
Oh my gosh! This is so awesome! Why doesn’t this have more on it, seriously! This is awesome!!!
You win the internet!