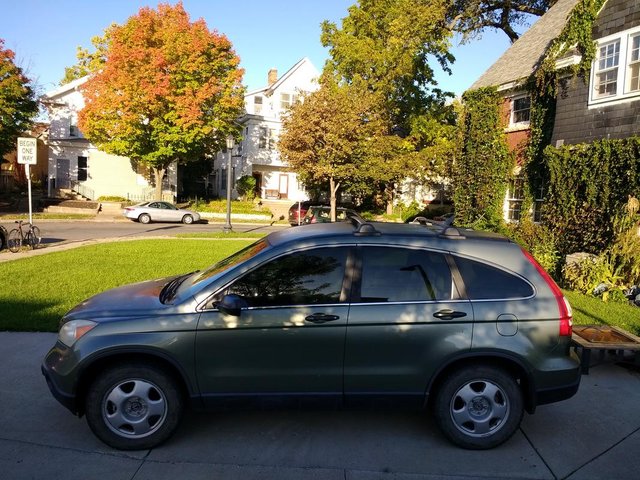
My Honda CR-V DIY Car Stereo upgrade - Part 1 of 3
When I purchased my older 2007 Honda CR-V, it came with a very poor sounding stock audio system. At first I was going to accept it and just roll on. It did not take long before I just couldn't enjoy playing anything on it. I am certainly a bit of an audiophile and while I do not need extravagance, my baseline for truly enjoying music far exceeded this old Honda OEM.
Music is a work of art. The artist and production team have filled each track with delicious layers of sonic life. Hungry for the missing vibes I decided to commit my time to the task and upgrade the audio.
I took pictures along the way. I did this in large part so could remember what I had done along the way - later I realized it would be nice to post on Steemit and share some of the images and a taste of the journey. I had a blast, I love doing this kind of project. The best part may have been the glorious warm fall weather that allowed me to relax and really enjoy myself. I started in the fall and Minnesota that could have meant very chilly air.
What follows is not a universal tutorial or how to. It is a documentation of the essential experience I had putting this gear in my vehicle. You may find some some tips and tactics useful for your own project or you may just be curious what this kind of thing is all about. I am not a professional and this is not a competition quality set-up. I have been an audio hobbyist for awhile and the music sounds very good. Best of all I did it myself, as a DIY kind of person I will take a quirky home brewed experience on a budget over a plastic polished cash & delivery one just about any day. That is who I am.
Have an amazing day and please feel free to comment and check in.
Just an amazing fall afternoon to work on the car in question;
Part 1 of 3
The gear I am installing adds up to a great sounding stereo audio system with a budget price tag. It far exceeds the stock music system in this car and cost me under $800 USD with everything accounted for.
The system is "audiophile" oriented/ that is designed for a smooth, energetic, dynamic, balanced sound with pleasing tone and good accuracy.
I am using a front stage with tweeters and midrange/midbass units and a small subwoofer in the back. There are no other speakers.
The major components I am installing are the following
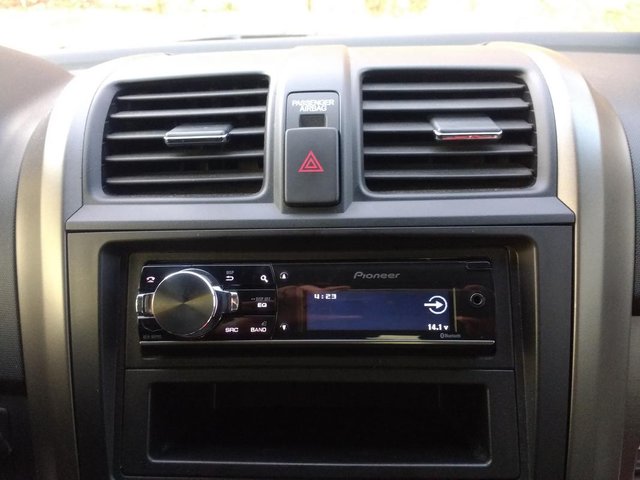
Pioneer DEH-80PRS Headunit / Audio Player with full adjustable active crossovers1 pair of SB Acoustics 29mm Soft dome tweeters (NVX branded, model NVX XSPTW)1 pair of Silver Flute 6.5" Mid-range/Mid bass driver (W17RC38-04)Soundstream 5 channel amplifier (Soundstream TN5.950D)Alpine 10" Subwoofer in a sealed box (Type-S SWS-10D4)RCA cables/ 14 gauge speaker wire/ 8 gauge power&Ground
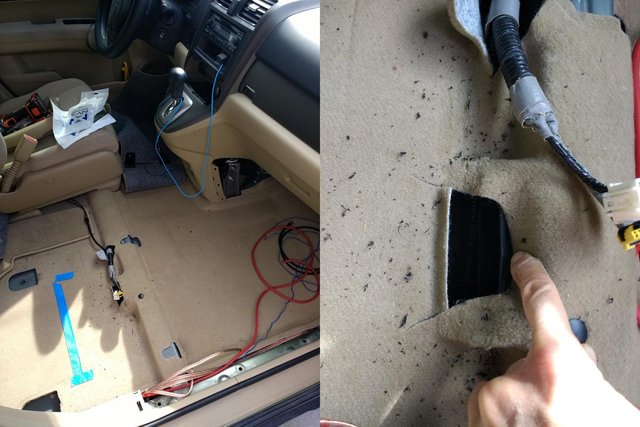
*at all times during the install I have the negative battery terminal disconnected, this is for safety and ensure that at no time do I trip the airbag disconnect sensor*
The 5 channel amplifier is going under the front passenger seat. There is not a lot of room here. I selected the Soundstream amplifier primarily because it fits. I wanted all 5 channels of amplification under this one seat. Only a few amps would fit the space and my budget. Generally in an everyday driver car audio system, I do not see the need for expensive amplification. Road noise and very imperfect seating position requirements keep any subtle amplifier SQ benefits from being of any value. Put the $ elsewhere.
There was a heater vent under the seat that needed to be cut out of the way so the amp would fit.
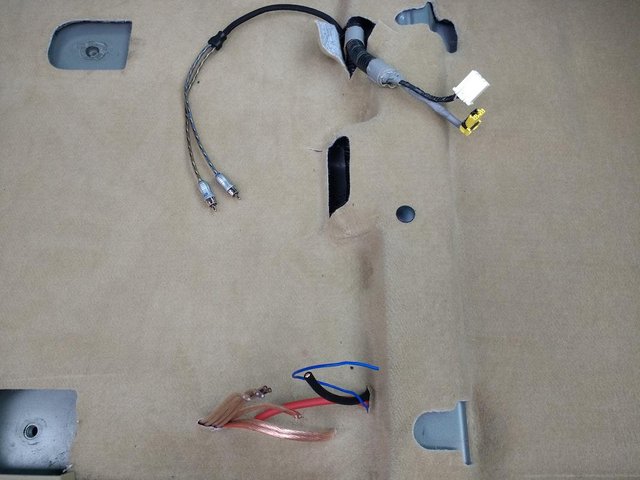
Here you see how I like to bundle my wires. The RCA cables are kept running separately from the amplifier power and speaker wires. I ran the speaker and power around the outside and the RCA cabling up the middle to the center console where the audio player will live.
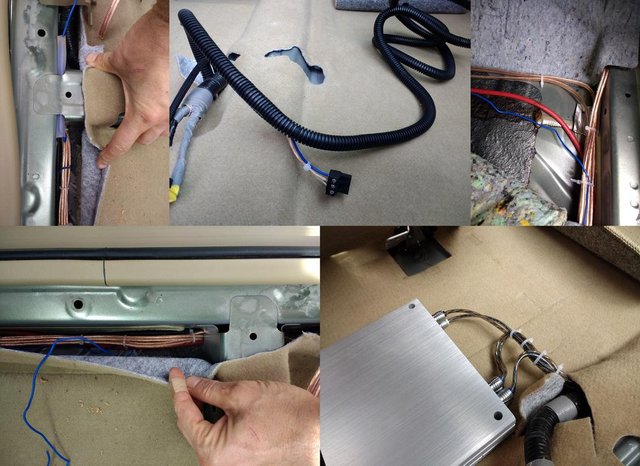
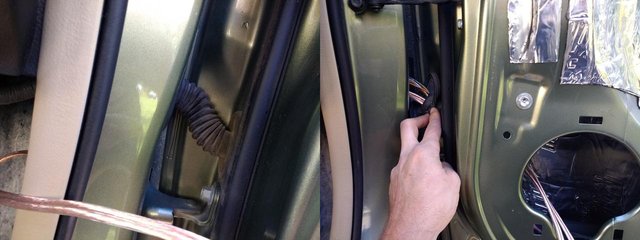
I ran one run of speaker wire to back hatch area for the 10"alpine woofer to use. I removed the plastic trim and drilled a hole for the wire, inserted a rubber grommet and covered the wire in flex loom plastic. This wire will be subjected to the environment of my hatch area and I want it to stay undamaged.
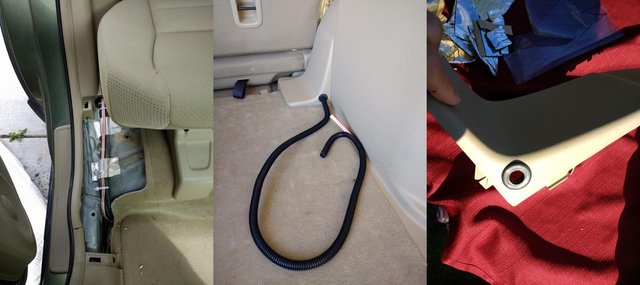
The finished look and notice how everything is bundled up and tight. There is no room for loose wires to get caught on the seat as it slides back and forth. I used industrial Velcro under the amplifier to hold it in place. I did not want to drill through the floor boards this time. The seat frame has a crossbar that will pinch the amp against the carpet when the seat is in , it is not going anywhere.
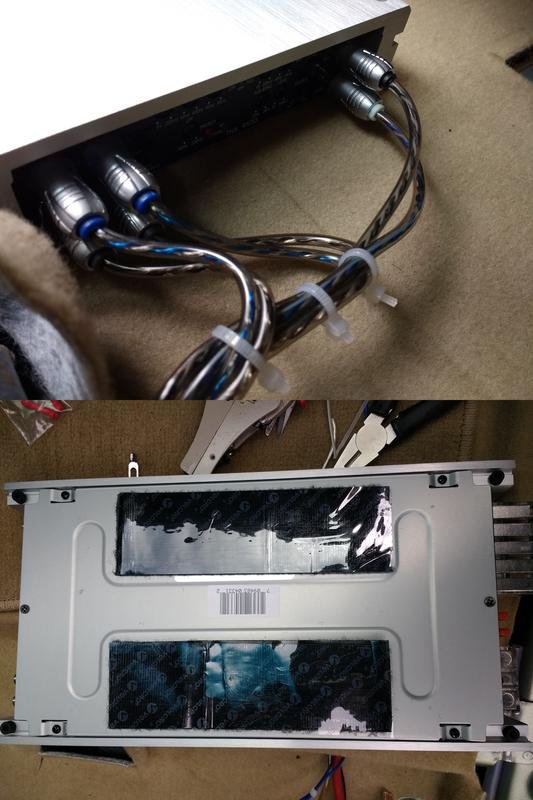
The amplification is almost finished. I used decent quality 14 gauge speaker wire, 8 gauge copper core power and ground wires and decent quality twisted pair RCA cabling. I now have 1 channel with 270 watts of power for the subwoofer and 4 channels with 85 watts of power for the 2 tweeters and 2 mid-range drivers.
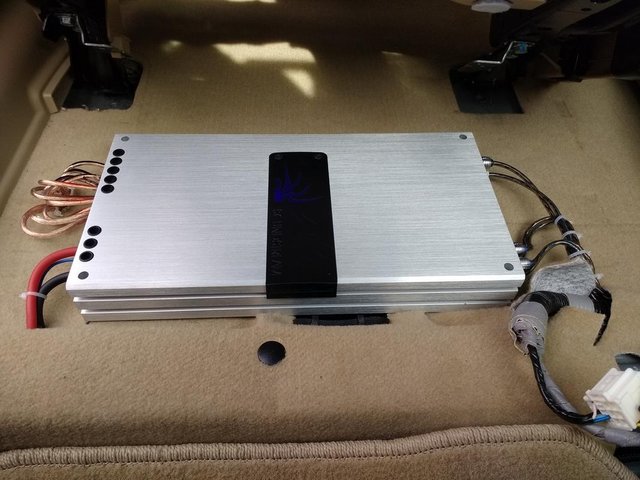
The amp fits perfectly under the seat and really doesn't get in the way at all. Here is a view of the fully installed amp from the back passenger seat looking down. Nice and tidy and hidden.

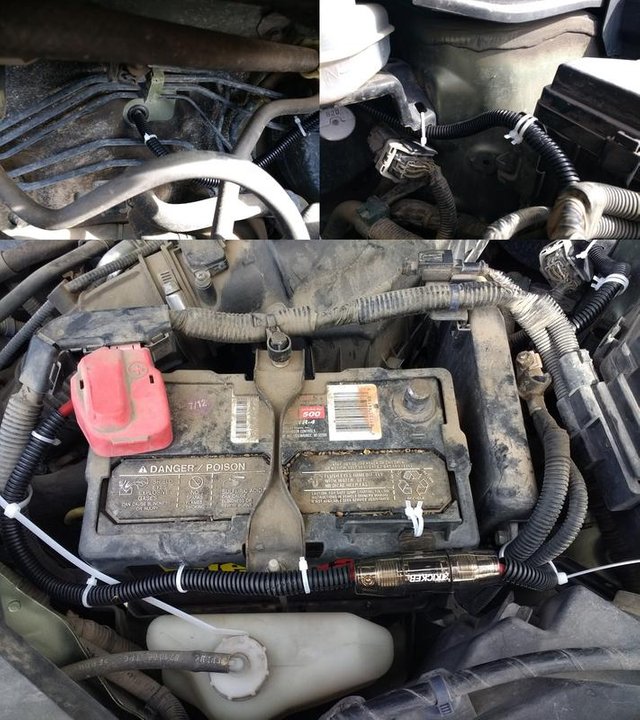
Here the power wire has entered the engine bay through a pass through grommet. That battery is about to be replaced so I left it dirty. (Must have been a dusty trail.) I used a high quality 60 amp fuse. This fuse should be as close to the battery as possible.
I ran the wires for the Pioneer head unit right up the middle of the car under the carpet and into the console area. Here is a gaping hole that makes working in this area really easy.
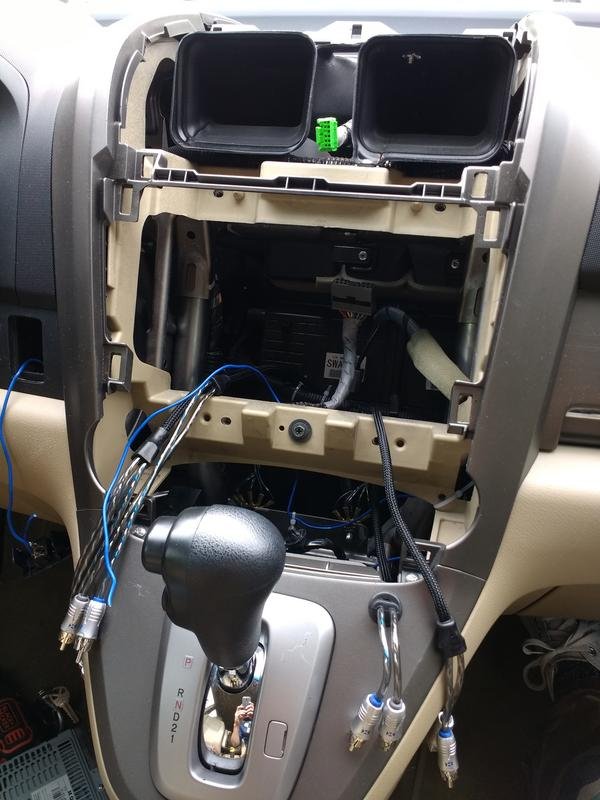
The head-unit looks great. I will discuss some of the cool inner workings/setting up the head-unit in post 2.
Running this thick wire into the doors is a tricky task. Patience is a virtue working it through the tight spaces and the water seal. There is really no need for 14 gauge wire, it will make zero sound quality difference and is a bit tricky to work with. Any decent 16 or 18 would perform the same, I already had this thick wire so I used it.
************************************************************************************
At this point all wiring has been run.
The amplifier and head-unit are installed and this post is getting pretty full.
The next post will pick up here at this point and the really interesting part of the install.
The doors will be customized a bit and the new mid-ranges will be installed, the tweeters will be installed and the subwoofer as well. I will show a few other things and then at that point you know I will be rocking out to the tunes!
*SEE YOU IN PART 2 of 3 to be posted in next day or two.*
Interesting post! We have also a Honda CR-V as a familycar. Really a very god car. It is one year older, 2006 . It`s a dieselengine and manual gearbox with 6 gears.
How ever i have two SAAB:s .
The newest one is from the year 2000 ande the other one is from 1963. That one is my favourite!
Howdy, thanks so much. I will post part 2 today or maybe tomorrow. You cars are cool, that 1963 is really great man!
beautiful cars that car from 1963 i like the most how much beautiful
Cool post! Resteeming and letting @picturesofsaab know of another car post.
Awesome. Thank you very much, I hope you are having a superb day. I will post part 2 in the next couple days.
https://steemit.com/dtube/@hilmerwhite/alan-walker-faded-fl-studio-cover
congratulations sir it's beautiful :)
i wish I could buy my own car one day