Nature Inspired Terrain for Next to Nothing - RPG DIY
Save Your Money and Make Terrain the Easy Way
There are quite a few ways to make terrain. I have seen some elaborate and crazy additions to games. I have seen some crappy ones too. These are neither. I have been playing with making terrain for a number of reasons.
It's Fun.
I Like Saving Money
There are low priced options out there, of course. If you don't want to make your own, you are best off piecing the items and finding dollar a piece items or waiting until the holidays. You can usually get trees and other natural items for relatively decent prices at the hobby stores around Christmas.
I Prefer My Own Usually
As I have said, there are some really cool pieces out there that without a way to make a mold or the time to invest in a complete castle setting that it doesn't make sense to make your own RPG terrain. That being said, most of the time I prefer to do it myself. Over the years, I have found that there are so many ways that you can make the terrain and I find that these days, it is relatively easy to make what you want with a bit of effort and knowledge.
Now, don't get me wrong, when I was 13 and I started gaming, I got wide eyed at some of the awesome Warhammer terrains. That stuff was art for sure. I didn't realize that was going to cost me 2K which I didn't have. Making it is an experience though and it slowly became to where this was part of the whole gaming experience. There were plenty of nights that I spent up late with my friends, crafting some awesome landscape while pounding mountain dew. Oddly, we don't actually do that now. I end up making my own and am one of the few of our group that still makes my own. I don't know. I could drop the cash, but I prefer to do the craft. It is one of those things that I share when I can but have no problem doing on my own.
Simple DIY RPG Terrain Instructions
With that in mind, I would like to share one of the ways that I make terrain. When I began writing on Steem, I had planned to do something like this once a week, but things always take longer to get together than you think. I have been sitting on this one for a while and have actually taken pictures over the course of a couple of sessions.
A batch of terrain like this takes about an hour or two of time, including collecting materials and crafting. I am going to explain how I made the ones you see in the images on this blog, but keep in mind that you can use all kinds of other materials to add into the process in order to get terrain looking specifically how you want.
So, first of all, to get started...
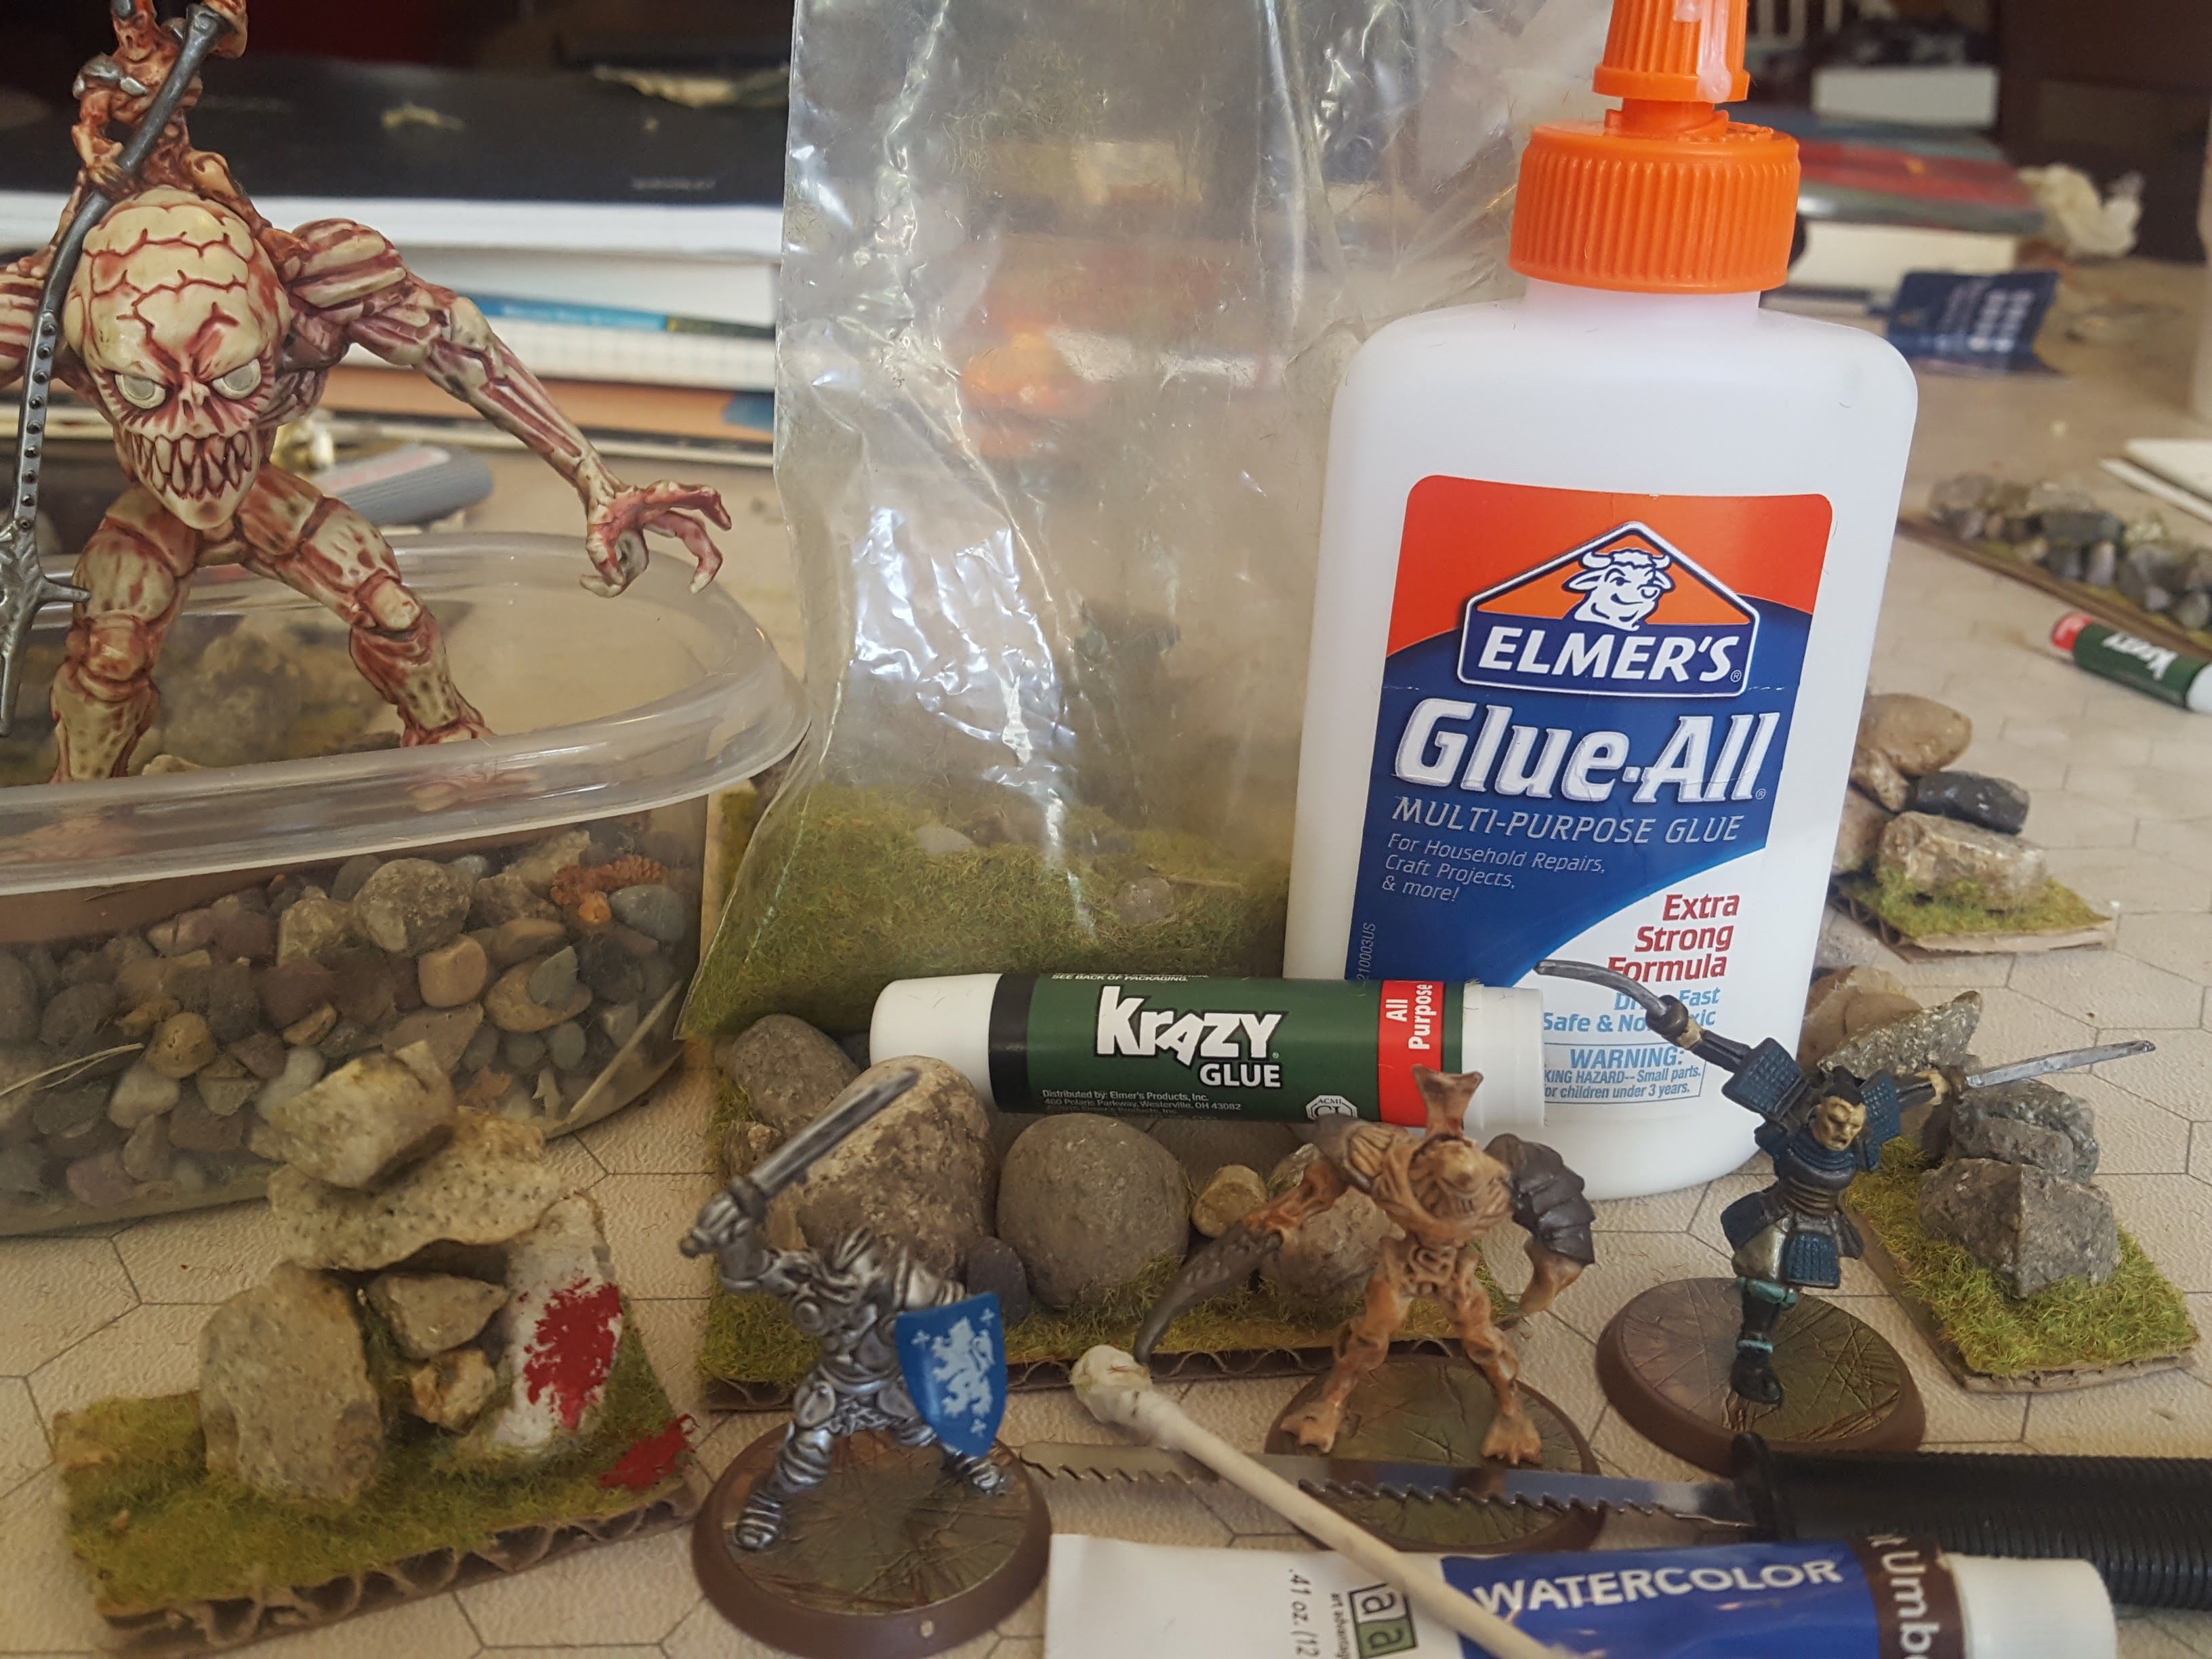
Items Needed
When you want to create your own RPG terrain, first you want to go foraging for the things you need or want to include. In my case, I had gone hiking and got quite a few rocks. I find that they work best if you do one about the size of a quarter and no bigger. If you go much larger, the glue won't always hold it down. Here is a list of the main tools that I used.
- Rocks
- Small pebbles and larger rocks
- Paint
- Glue
- Elmers for the main areas and sticking things together, superglue or Krazy glue for direct contact.
- Hot Glue works as well. I just didn't use it this go-around.
- Flocking
- Cut pieces of cardboard (to desired size)
Preparing Your Terrain
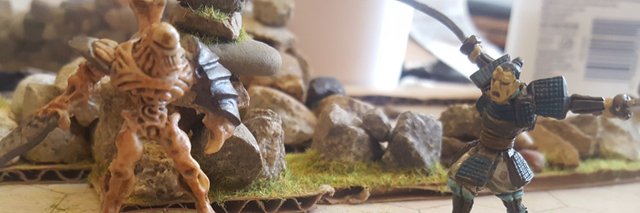
The actual process is pretty basic with these. You have a few options. As you can see from the bottom of mine, there is a base that you can see the cardboard. If you don't want to see that, you can get small pieces of fabric or even thick paper, wrap the cardboard and then start placing items on top in the order.
You place the rocks on the base and glue them securely. Allow them some time to dry before placing color or flocking. I usually do a bunch, so by the time I am done designing and placing the rocks, they are done and dry. Sometimes I will put a paperclip or something in them, so the metal sticks out. This not only helps to stabilize, but it can also help with shrubbery or other additions later.
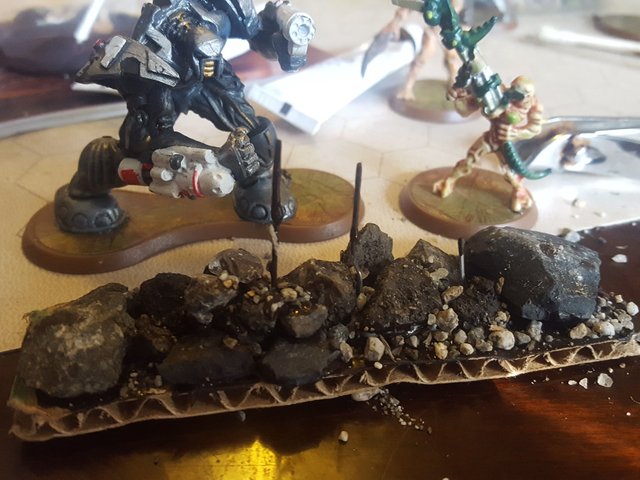
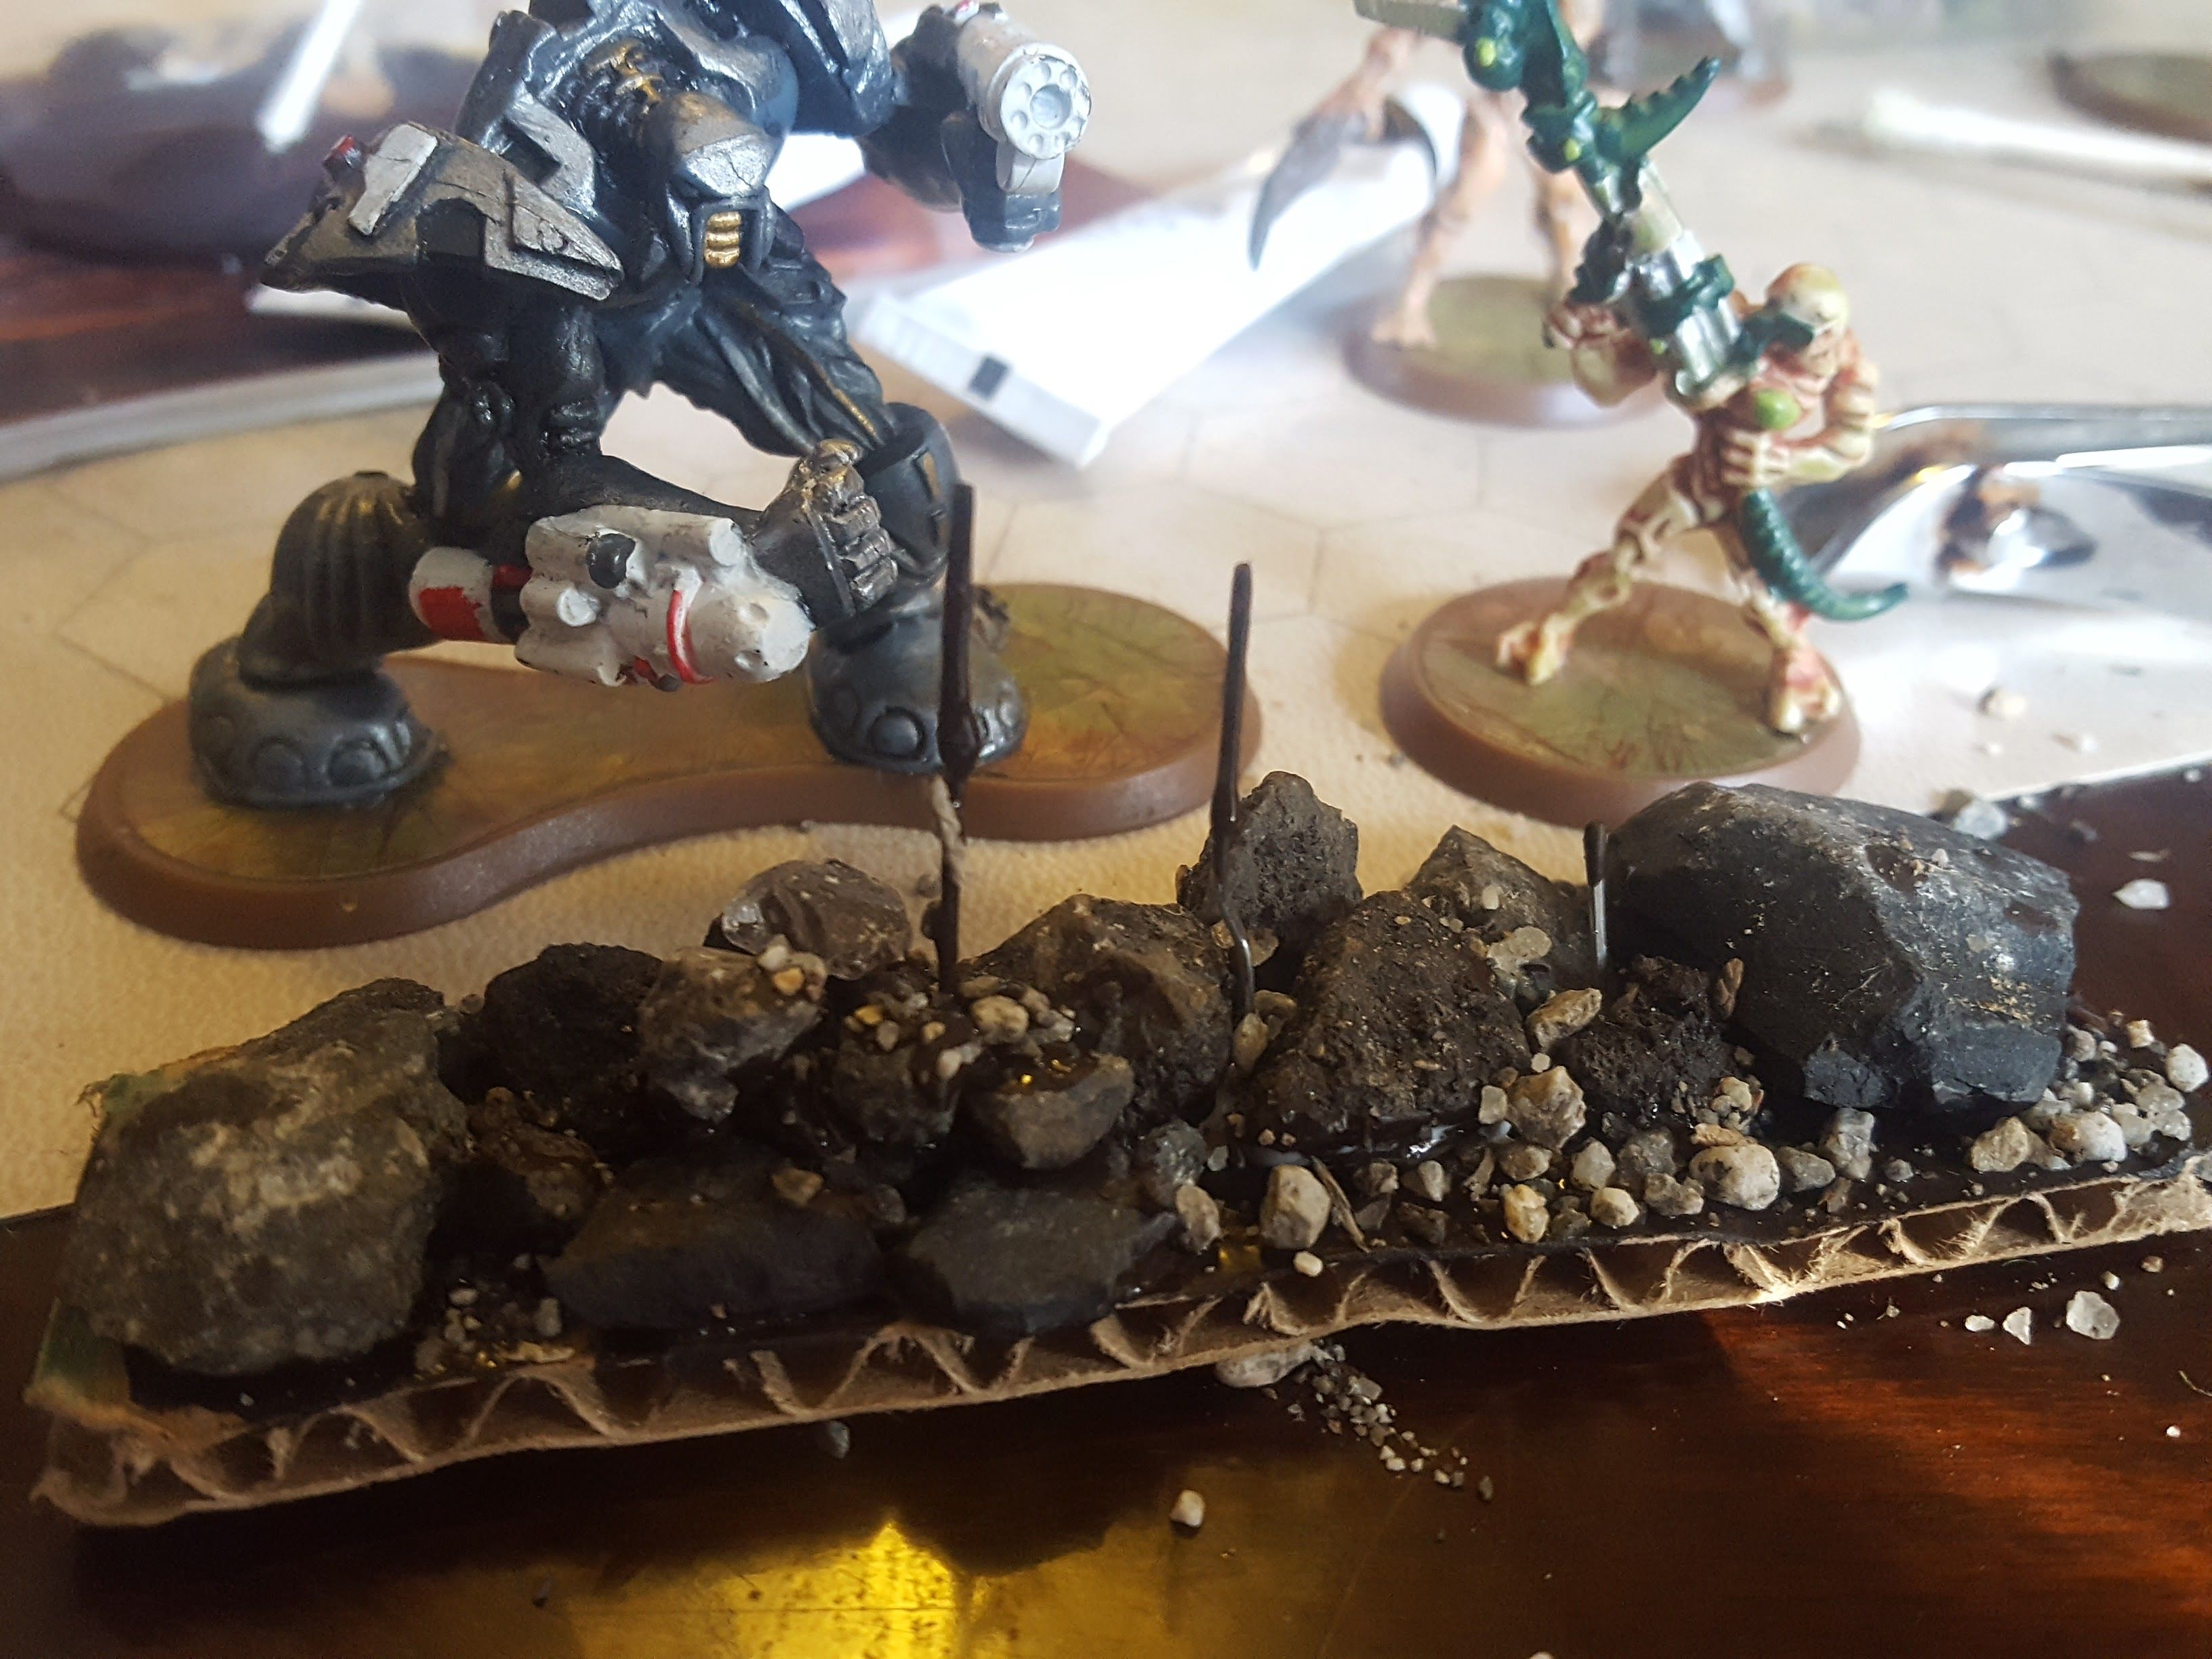
For this one that you see here, I actually tried something I hadn't before. I mixed a bit of paint in with the Elmer's Glue.

In doing this, I was able to darken up the glue and it gave it a nice tar like texture. The game we were playing / using it for was (is) Alternity, which is a modern setting. Tar and rebar are totally possible. I ended up leaving it kind of like this and paining the base. It was a good find and you may have your own ways to use it.
Where it is thick and gloopy looking, the Elmer's does that too but dries clear. But you can probably see why it takes a bit of time to dry.
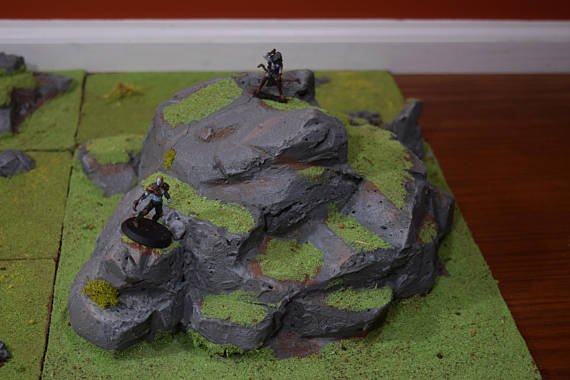
Once it is all added on there though, you are then able to place any additional decorations. This can be more glue and flocking, paint, or outdoor material to make it look more realistic.
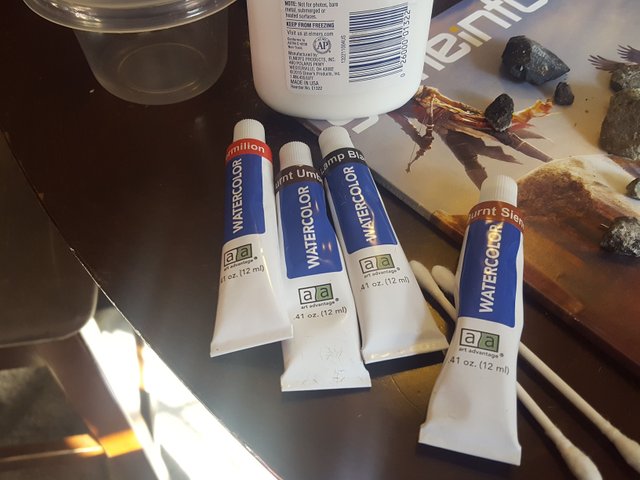
I actually used water color for this one, but you can use accrylic or even cheap finger paints. I have tested and know that works!
The main thing is to use your creativity and have fun! So, tell me what you think or if you make your own, make sure to hit me up so I can check it out :)
Game On Gamers!
Come On! Why Not Read Some More?
Follow the links below for more ART GAMING and MAGIC!
Gaming Makes You a Better Person
Quick Draw Batman – He’s Easier To Draw Than You Think
How about some Local Street Art from Boise, ID?
OR Check Out These Other Rad Steemians!
RumDancer- Part Hippie / Part Entrepreneur – Magick, Art, Dreadlocks and More!
Atomramble Rambles About Cool Shit
Congratulations @art.gaming.magic, this post is the most rewarded post (based on pending payouts) in the last 12 hours written by a Newbie account holder (accounts that hold between 0.01 and 0.1 Mega Vests). The total number of posts by newbie account holders during this period was 1129 and the total pending payments to posts in this category was $592.82. To see the full list of highest paid posts across all accounts categories, click here.
If you do not wish to receive these messages in future, please reply stop to this comment.
Great post.. A penny saved is a penny earned!! Keep On Steemin On!!
Danka, and very true. As a man with too many hobbies and interests, I've found it necessary to cut corners on costs if want to have things run smoothly. And I already like arts and crafts so it's kind of a win-win.
Keep the great post coming!
Congratulations @art.gaming.magic! You have completed some achievement on Steemit and have been rewarded with new badge(s) :
Click on any badge to view your own Board of Honor on SteemitBoard.
For more information about SteemitBoard, click here
If you no longer want to receive notifications, reply to this comment with the word
STOPCongratulations @art.gaming.magic! You have completed some achievement on Steemit and have been rewarded with new badge(s) :
Click on any badge to view your own Board of Honor on SteemitBoard.
For more information about SteemitBoard, click here
If you no longer want to receive notifications, reply to this comment with the word
STOPReally great post! Making your own terrain can be fun, and you are only limited by your imagination! Great work!