Developing a very basic Rails and React app in Amazon Cloud9 IDE - Part 1
Since the start of my developer career, I've been neglecting the whole "making side projects" deal. Today, I decided to tackle this technical debt by starting something very simple, using the technologies I usually work with on a daily basis.
Another driving factor: at my current and past jobs, all projects were already there. I almost didn't get a chance to iterate on those cool first architectural decisions, most of my experience lies at adding features to an existing structure. Setting up a new application is an one-in-a-few-years task, so I fear that knowledge may have got a bit rusty. Thus, instead of delving into an unknown framework or language, I decided to hold that up for now and try to understand more deeply the current technological stack I have at hands.
For today, I just set up my working environment and goals for this project:
I'm starting with a simple, basic and boring Ruby on Rails monolith app. The idea is to have a taste of deciding when and how to extract key components and services as I build the project.
Front-end will be done with React. This is the first front-end framework I learned since the 2016 and 2017 "Javascript framework fatigue", things seem to have settled down now and ignoring Angular 1 was total bliss.
It will be developed on a online IDE. I'm lazy as a panda and don't want to keep switching "personal" and "work" notebooks. My personal machine runs Windows 10 (yeah, yeah, I know). It does support a Ubuntu bash shell, but boy oh boy, is it slow.
Now, let's get the hands dirty!
1) A long time ago, I discovered the existence of online, browser-based IDEs. Usually, these services give a free tier machine for new users, and it goes offline after a certain amount of idle time. No Linux installation required, most basic tools are already there!
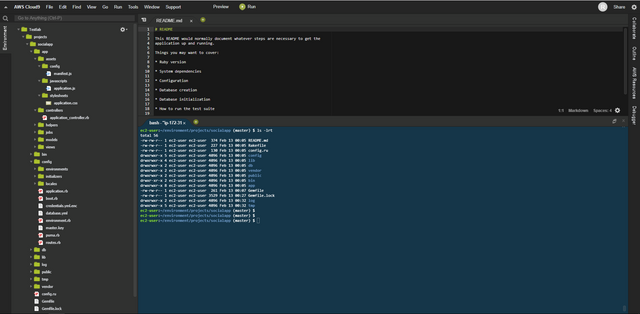
Had an account on Cloud9 way before Amazon acquired it, but it was time to log on and recreate my old "TestLab" EC2 instance as a free tier t2.micro type.

Only thing I'm missing now is a second screen!
2) The instance is already provided with Ruby Version Manager. Installed the lasted version of ruby (currently, it's 2.6.0):
rvm install ruby
The Rails framework (version 5.2.2):
gem install rails
And our dependency manager (bundler 2.0.1):
gem install bundler
Same for nodejs (v6.16.0) / npm (3.10.10):
yum install nodejs
A quick note: if you try to apt-get, you'll be gently warned that this instance uses yum instead!
3) Frameworks tend to add so much stuff when generating a new application, that I feel like missing something, some steps back to as to why they are there in the first place. Fortunately, Rails gives the option to skip most addons right at the beginning.
My setup is by no means a bare-metal Rails application, nor I did use the --api flag, but still much clear. Let's call the new project "Socialapp":
rails new socialapp --skip-yarn --skip-sprockets --skip-spring --skip-coffee --skip-turbolinks --skip-test --skip-bootsnap --skip-action-mailer --skip-active-storage --skip-action-cable --skip-keeps --git --skip-bundle --database=postgresql
The reasoning:
- --skip-yarn: will be using NPM instead;
- --skip-sprockets: will be using Webpack instead;
- --skip-coffee: personal choice, I prefer pure JS6 and React syntax;
- --skip-turbolinks: I don't know the implications of using it with React. Postponed until futher research is done;
- --skip-spring --skip-bootsnap: I hate Spring, and Bootsnap is a new thing added to the Rails stack. Maybe I'll get a chance to learn and properly configure them later, if I ever feel the need to "speed up" development;
- --skip-test: will be using Rspec instead;
- --skip-action-mailer --skip-active-storage --skip-action-cable: I've been actually looking for an opportunity to play with Action Cable, maybe in a chat feature. But for now, let's take these extras from the initial project;
- --skip-keeps: no more annoying dotfiles;
- --skip-bundle: I'll tinker with Gemfile first;
- --database=postgresql: no particular reason to chose Postgres over Mysql, other than familiarity;
- --git: start Git repo right away
Similarlly, also stripped the Gemfile a bit, leaving only gems rails, pg, and puma.
4) Installing databases are the least fun part of initially configuring a new project, specially if it's a new installation.
Instead of listing all steps, I'm linking this very simple guide from Donnie Flood.
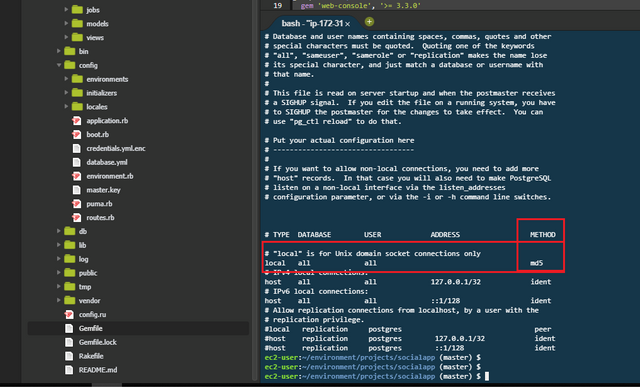
Just to point something that took me sometime to notice: when editing the /var/lib/pgsql9/data/pg_hba.conf file, pay attention to the METHOD column. As a matter of fact, the only change made to this file was set the METHOD at the "local" row to "md5".

5) Final setup and start the server!
bundle install
rails db:setup
rails s
Here I hit a bit of a snag: for some reason, I got the 'You must use Bundler 2 or greater with this lockfile' error when trying to start the server, despite having the latest version of Bundler (had just generated a Gemfile.lock with it!).
If you ever run into this problem, try: gem update --system and it should go away!
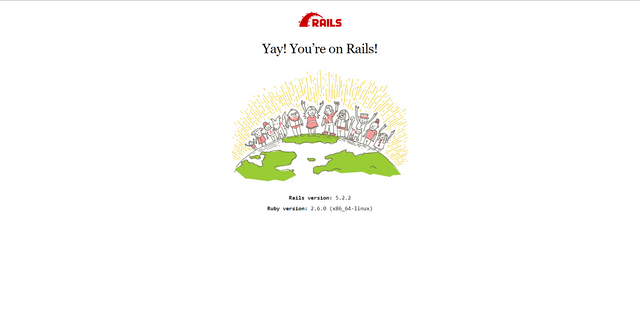
Now, just click on Preview, Preview Running Application and there it is, the 98729347234zillionth "Hello World" app ever done! (I'm not ashamed, though)

It's alive!
And that's it for now! In Part 2, I'll be adding the test tools (Rspec, Capybara, etc) and setup Webpack with React, Babel and Bootstrap!
✅ Enjoy the vote! For more amazing content, please follow @themadcurator for a chance to receive more free votes!
Hello @dinellian! This is a friendly reminder that you have 3000 Partiko Points unclaimed in your Partiko account!
Partiko is a fast and beautiful mobile app for Steem, and it’s the most popular Steem mobile app out there! Download Partiko using the link below and login using SteemConnect to claim your 3000 Partiko points! You can easily convert them into Steem token!
https://partiko.app/referral/partiko
Congratulations @dinellian! You received a personal award!
You can view your badges on your Steem Board and compare to others on the Steem Ranking
Vote for @Steemitboard as a witness to get one more award and increased upvotes!