Fusion360 Tutorial – Swiss Victorinox Knife

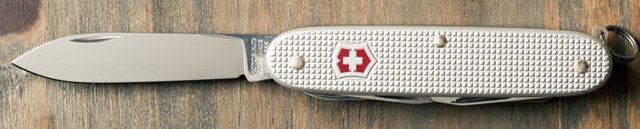
1. Reference Image (Victorinox Knife)
As usual, if possible you always want to prepare some reference images you can use for modelling. In this case I found below picture that I will use for an high level overview of the shape and features.
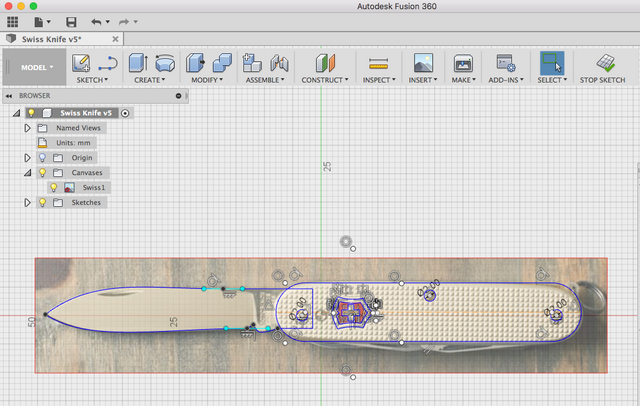
2. Add reference image to Fusion360
Once you found a reference image you need to include it into the Fusion360 canvas. The way to do this is to press Insert and than Attach Canvas. Next you can choose a plane and select the reference image.
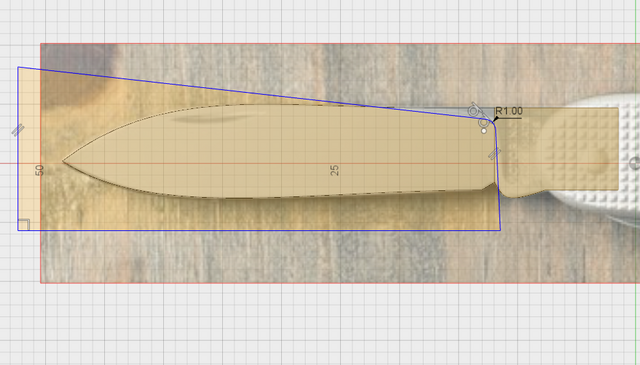
3. Sketch
With the reference image in place, we can start now to skecth along the profile. Best way forward is to first start with the easy and straight shapes. Once they are done we can add the more compliacted shapes. After using the Spline and Line tool your skecth should look like this.
Tip: Try to use as less spline points for a shape as possible for a cleaner surface.
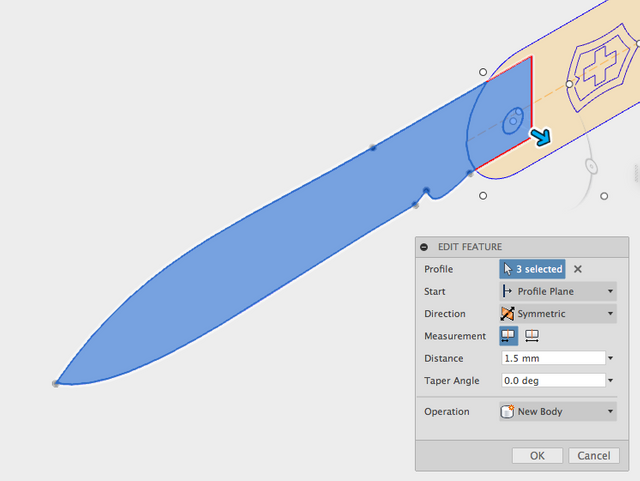
4. Model Blade
With the sketch being complete we can start now to extrude the various parts. We first start with the blade.
Select the blade shape and use the Extrude tool to transform the 2d shape into a 3d object.
In the Edit Features Box select Symmetric / New Body and 1.5mm distance.
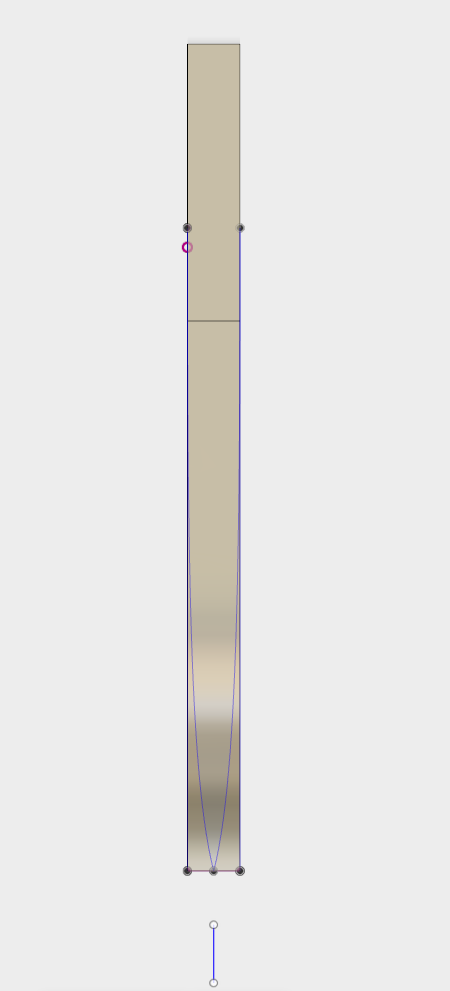
Next we need to draw another sketch to point the end of the blade.
Start another sketch choosing the Top Plane
Select the Spline tool and draw two curves that build a point at the end of the blade.
Tip: I draw just one Spline and Mirrored it over using a center line.
Once the sketch is complete, use the Extrude tool (Two sides) to remove the sketched face from the blade.
Now we need to go back to the side view and draw another sketch (not using the origin plane but the blade surface).
Following the blade profile on the right side you see that I we need to overdraw the shape to the left in order to cover the whole Victorinox blade.
Once completed, select the sketch, than pick the Extrude tool again and Cut 1.4mm from the blade.
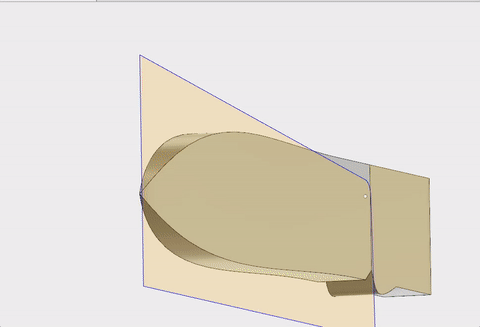
We are left now with an extreme ugly hard cut which doesn’t look like a blade at all. To fix this we need to select the Fillet tool, than select the upper line and drag it down as far as it allows us to go.
Mext we can select the surface and use the Mirror tool (Create – Mirror) to copy the blade surface over to the other side.
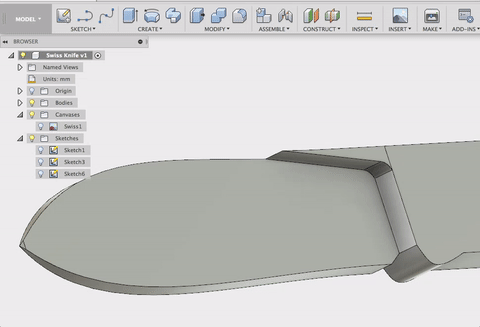
Congratulations, the blade is completed now. That was the most difficult part of this model. We can move on now to the Victorinox handle.
I have added an extra sketch to create the little cut in the blade for the finger nail (I am sorry I don’t know the correct word for this)
5. Model Handle
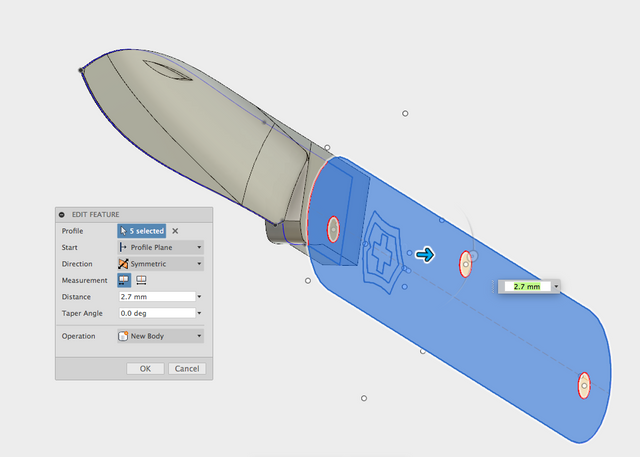
First show the the skecth we created in the beginning and select all the handle parts (including the Victorinox Logo). Bring them into shape using the Extrude tool.
Select Symmetric, New Body, 2.7 mm
We have now the blade and solid chunk of handle. As you know the blade will need room to slide into the frame when closed. That is why we need another sketch (same thickness as the blade) to cut out the middle from the handle.
Draw a sketch with the thickness of the blade using the Top plane. Once competed, select the sketch and cut out the middle of the handle.
Tip: Remember to hide the Blade as it will other wise also be affected by the cut.
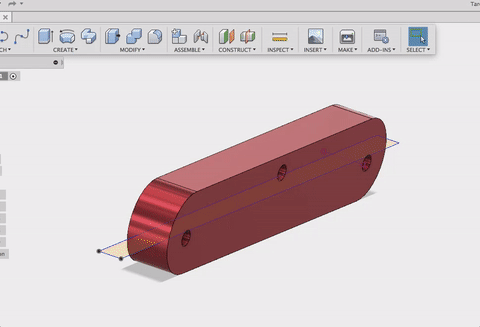
Very good! You completed nearly the whole model. All that is left now to Extrude the Logo and Bolts and close the upper part of the Knife.
I leave this for you as I think it will be a good exercise to think about who to complete the remaining parts yourself.
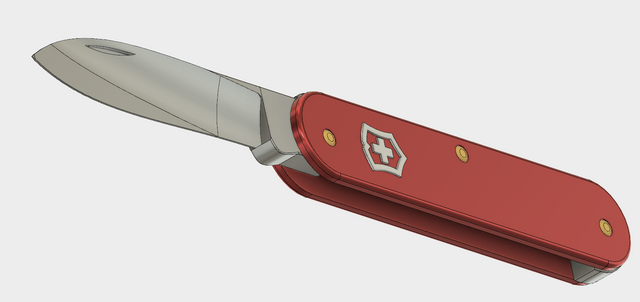
Once you are done your model should look similar to this or better!

Very interesting