Transparent PNG Tricks & Removing Backgrounds From Images [PHOTOSHOP TUTORIAL: Beginner +]
Have a cool idea for a picture, but can't take out the background ? This short tutorial will teach you how to completely remove backgrounds from images when using Photoshop using the magic wand tool. You can make eye-catching images quickly with this method!
- Difficulty: Beginner +
- Layers: 2
- Duration: <20 minutes
Alternate Option to Editing
Let's say that you would rather have a single color background, but don't want to edit backgrounds, you can actually use Google for your images! To find a picture you want to use, type what you are looking for, and type png after. PNG stands for portable network graphics, and a nifty little trick is that when you search with png at the end (example: png flower) the images returned usually have the backgrounds already removed. These are called "transparent pngs" and you can tell by the little gray checkerboard behind them. Double check just in case, but these are almost always from free stock image sites, that you can use on your picture!
Download them and slap them on top of your plain color background,
in Photoshop, Gimp, even in Paint!
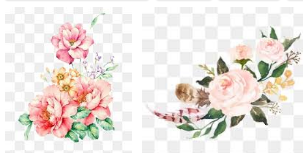
If you don't want to spend time digging around Google for something, you can always visit a site called PNG Tree. Although you can spend $20 a month to browse and download these super high quality images without backgrounds, signing up is as easy as connecting you social media or Google account (seconds) and you can grab 3 free images everyday!
source
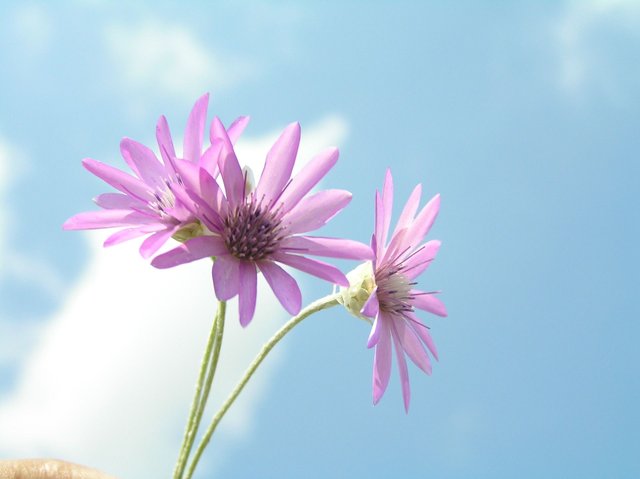
This will be the image we are editing today. To save right click the image and "Save-As", or visit the source link and grab a free account for a good stock image site that I use! I will be using Photoshop CS5, but any later version works just as well.
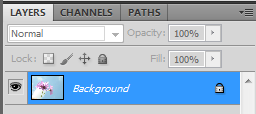
1- After opening the image click on the lock to "unlock the image", making it able to be edited. The name will change to "layer 0" but you can rename it whatever you want.
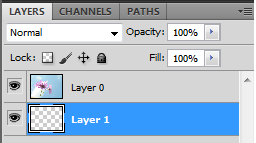
2- Make a new layer by going to Layer> New> Layer> or by pressing Cntrl+shift+n. In the layer menu (in lower right), drag the new layer down under the picture, so it will show "behind" the flower.
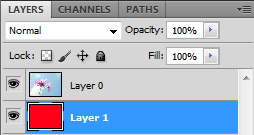
3- After making the new layer "layer 1", select it in the menu, and use the paint bucket tool and make the new background a solid bright color (I chose red).

4- Look for and click on the tool that actually looks like a magic wand (this is in the tool ribbon as the default option as each icon has more than one tool).
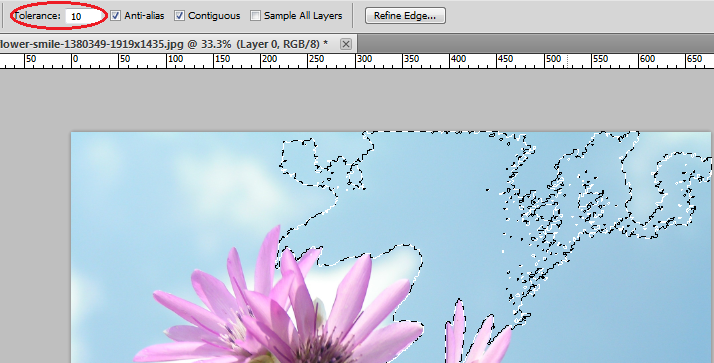
5- Choose a "tolerance level". Tolerance is how strong or weak the tool will be when using it. A smaller number will sample a small area, and will not be useful in cropping out everything. Click outside the picture to make the dotted line go away or to reset the tool.
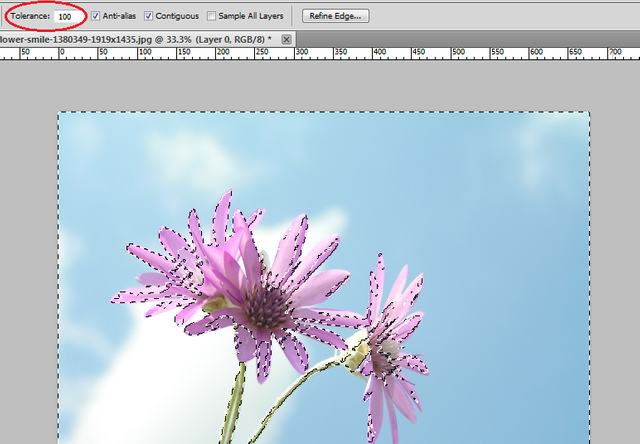
6- Try again. Too big of a tolerance will over sample, and cut out important parts of the image.
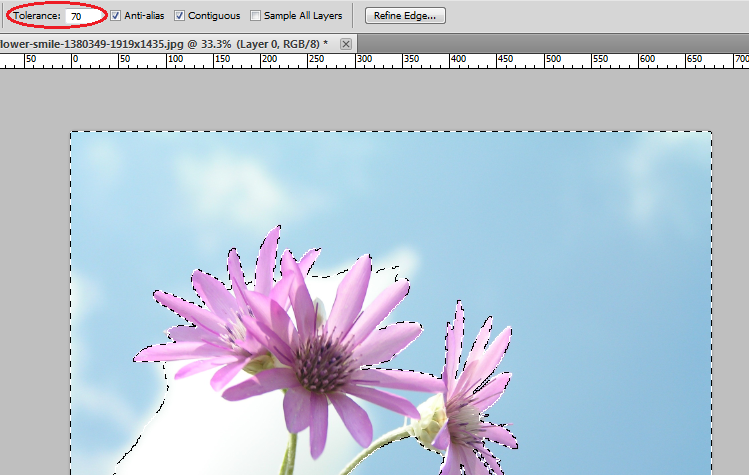
7- See how the dotted line goes around the flower? We want to get as close as possible without cutting the flower. A good measure is to change the tolerance by multiples of 10, until we find one that does this.
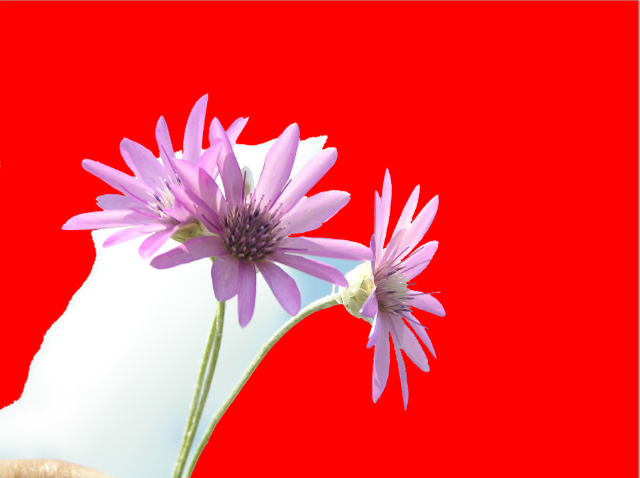
8- After the area is selected how you want, press Esc or Delete, and it will erase only that part of the picture. Since the red layer is underneath, we can see it after we started cropping our image. A good portion of the background is already gone!
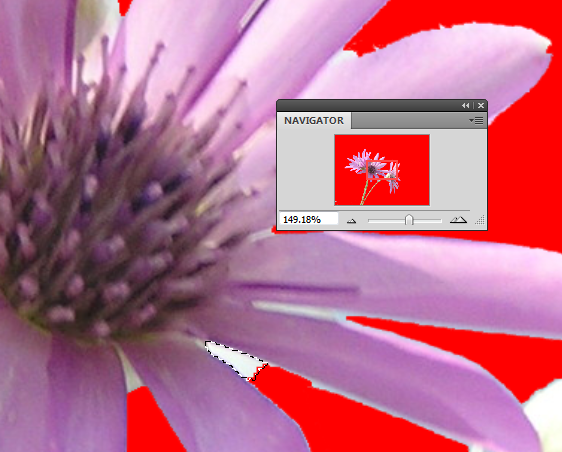
9- To zoom in on the picture, we will want to bring up the "navigator window" and drag the slider to the right a little bit. If the navigator is hidden go to Window> Navigator to bring it up. Now we can make the wand's tolerance lower to get the harder to reach places!
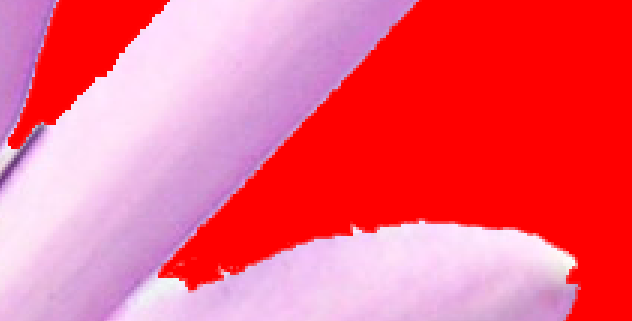
10- Don't worry if the image looks a little ugly. After zooming in, you will notice that it is not cut 100% perfect, this is okay.
Make sure to always get the biggest size available for an image so that when you resize it smaller it looks nice.
The above is fine, but if you make really huge mistake, go to Window> History> and you can retrace your steps until you made the mistake! This is 300% If you are zoomed in too close and cant reset, use rectangular marquee and click it on the image.
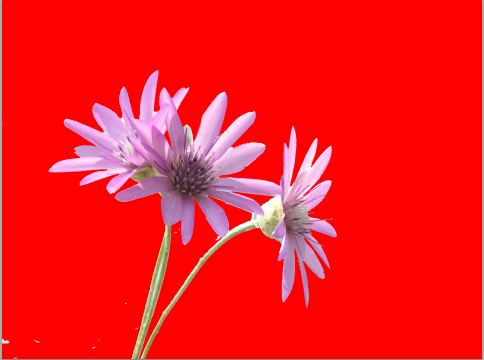
11- After you are done wanding the harder places. Zoom out to 25%, look how nice the image is! We can erase the little speckles with the eraser tool now!
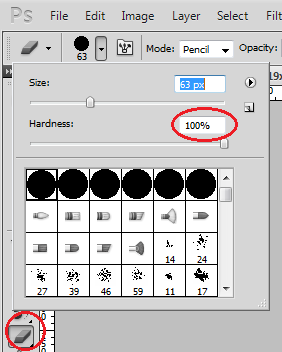
12- Open the eraser, and adjust the size to something reasonable for your picture. In order to get a "clean erase", make sure the hardness is set to 100%.
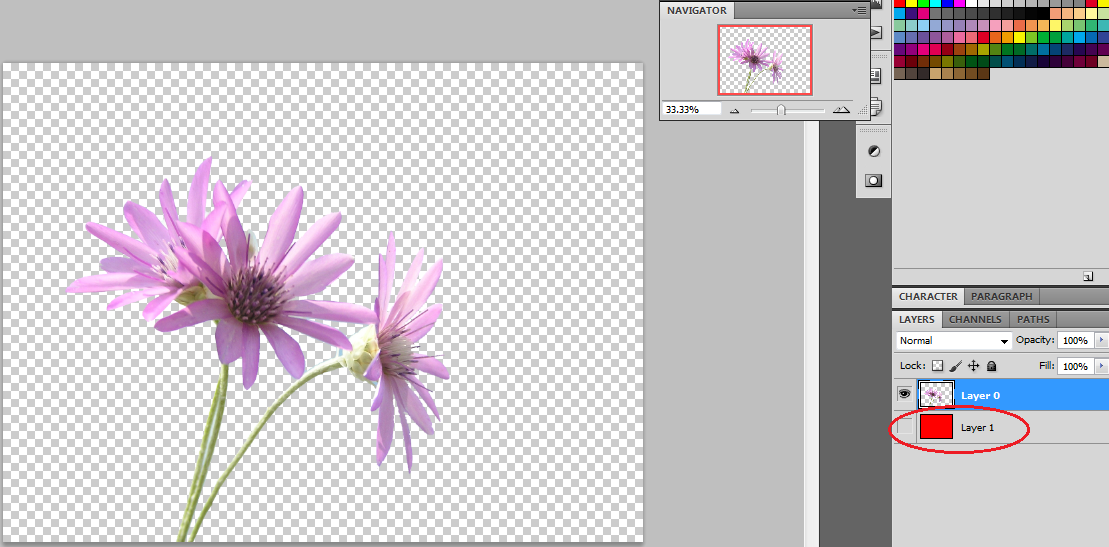
13- After you are done erasing, go back to the layer section and click the eyeball on the red layer. This "hides" the layer, and now your image has no background! You can delete the layer of use right-click> merge visible, or layer> merge visible to remove the tester background. Save your image with the PSD extension so you can come back later!
![]()
14- I didn't like the flower centered, so I clicked on the "move tool" to move this flower more to the left.
source
15- (Before adding a second image, resize the flower smaller. Go to image>image size.I resized the imaged to 500 pixel width (constrain portions so it doesn't stretch) and it chooses 374 height automatically, this is a good size, making the little mistakes disappear!)
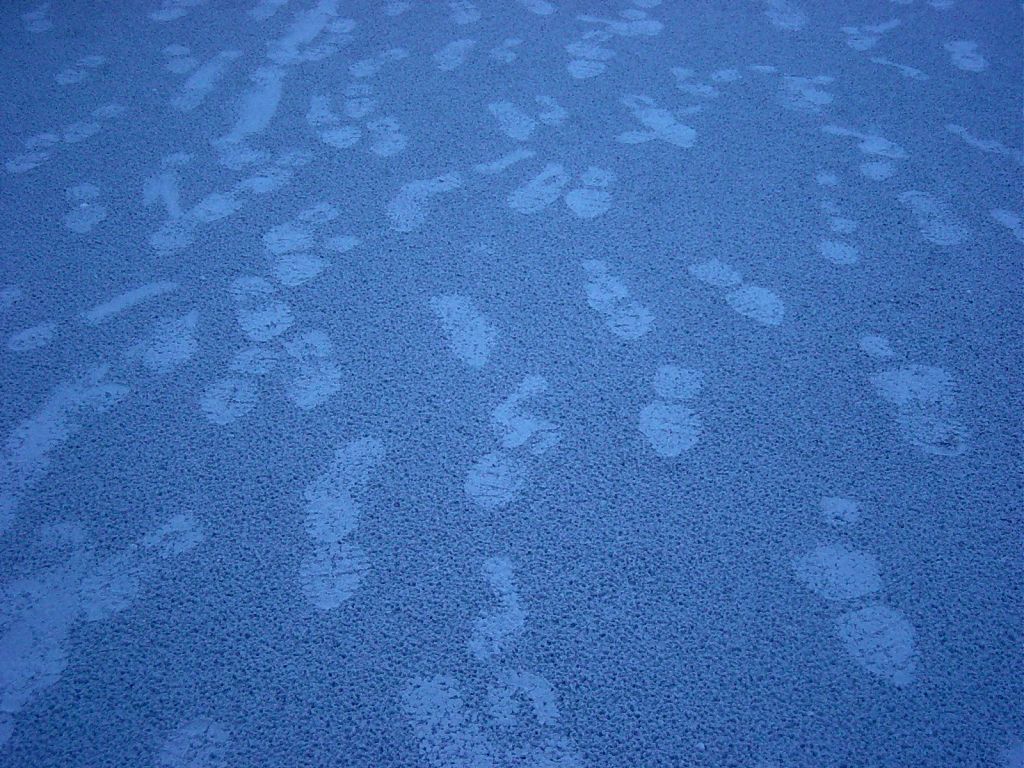
16- Go to the source link to grab the same background I got, or use a different one of your choosing. Open it in Photoshop, it will open in a new tab. Use the rectangle marquee to select it, and cntrl+c then cntrl+v or right-click and select copy, then paste it into the flower picture.
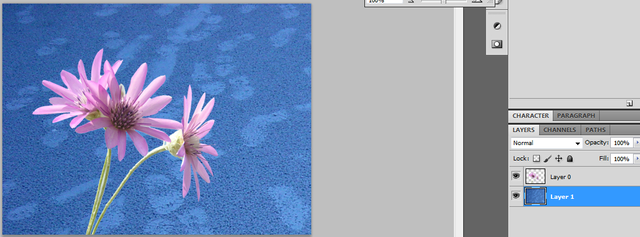
17- Drag it below the flower, so it shows up behind.
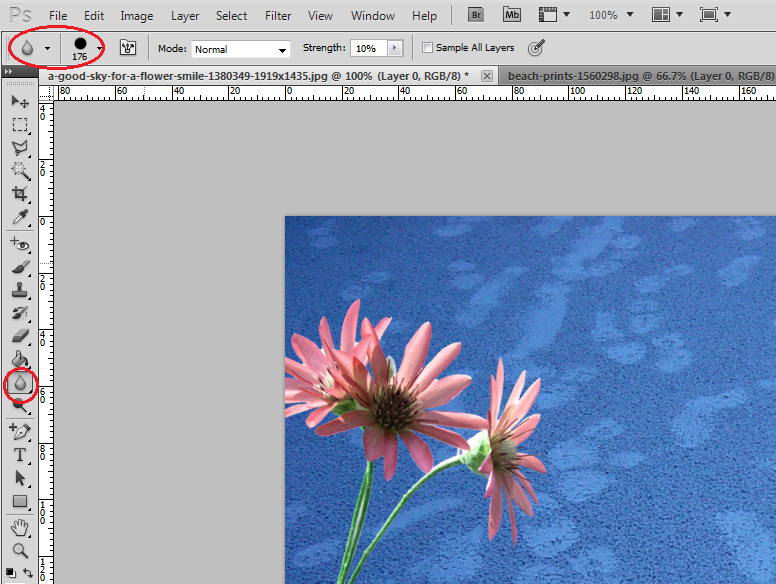
18- For extra measure, select the tear looking tool called blur. Adjust it a little big so that you can move it over the entire flower once. This is not that noticeable, but really helps blend the two images. Most of the time the pictures we use are different resolutions, doing this will help make the image look slightly more "natural".
Now you can throw on text, and have a nice looking little image for a video thumbnail, or for your blog. I will be covering color editing and manipulation in another tutorial. But! If you need nice fonts, or good tools and resources, please feel free to look at my previous art tutorial below. Thank you for stopping by, and I hope you enjoyed this article! c:
THE TIPS AND TRICKS STYLING GUIDE to Finding, Using, and Creating with Text and Images



at my former workplace, they made me draw a flipping path
Oh no, that does not sound very fun! Then again, if you can draw things along the path..
I didn't use magnetic path either so my bosses would never complain to me again. I had to make sure I got Trump's cologne and ties right. Funny how I doze off and my paths go everywhere. boring !
Hey,
I just upvoted you,
Please follow me and upvote me..
for tending topics..