💻 Adobe Illustrator TUTORIAL - 3D presentation
Hello,
this is my very first graphic design tutorial. In this one, you can learn how to create isometric presentation of images in a few simple steps.
What will we create?
STEP 1
Arrange your images into the grid. Use any spacing you want. In example, I have used around 8% of image width for spaces between them.

STEP 2
Group all images (Ctrl G) and change height of the group to 86.026%. To do that, multiply height by 0.86026.
*0.86026
STEP 3
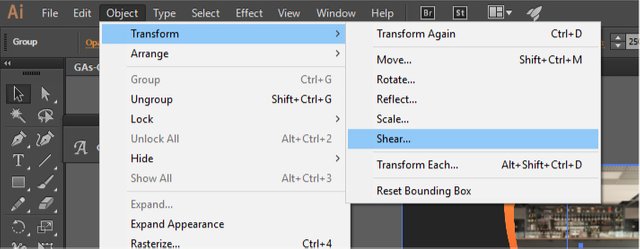
Go to Object > Transform > Shear ...

STEP 4
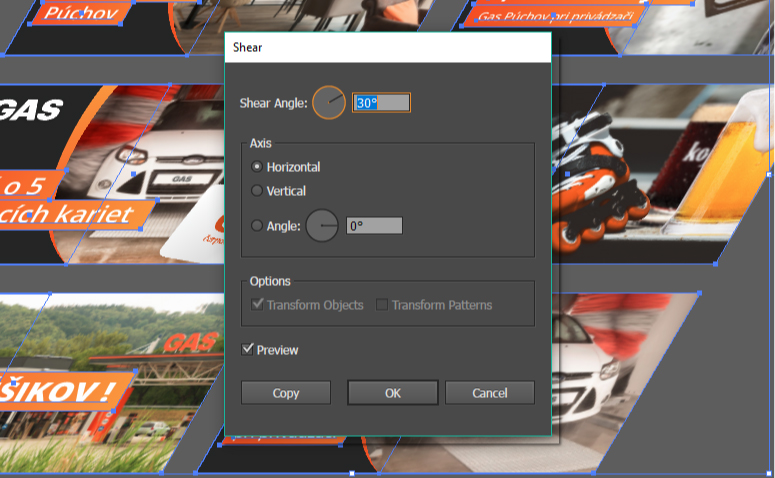
Set Shear Angle to 30° and click OK.

STEP 5
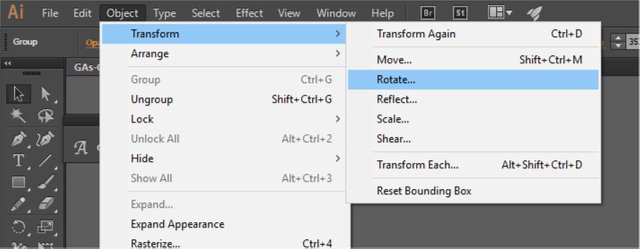
Go to Object > Transform > Rotate ...

STEP 6
Set Rotate Angle to -30° and click OK.

STEP 7
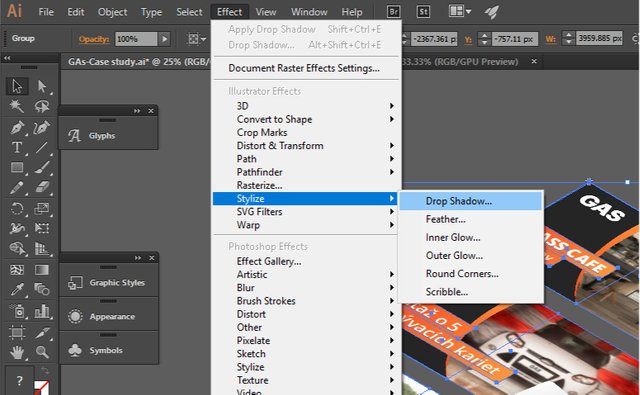
Optionaly. You can add Drop shadow if you want.

Good job you!
If you like this tutorial Upvote and Follow me and I will make some more.

Andrej Cibík @andrejcibik
Web design | Web development | Logo design


Thank helped me to increase my Illustrator knowledge, good job mate :)
This post has received a 1.81 % upvote from @booster thanks to: @andrejcibik.
Thanks for this. I always appreciate a tutorial or two and maybe find a way to do this in Affinity Designer based on it.