Improve your Software Development – Continuous Deployment with Docker – Part 2: Example Application

Source of this image: maven.apache.org
Motivation
If you are interested in this topic I guess you already know how to code an application – So why do I write an additional chapter for a simple example application? The answer is that, atleast in my experience, most developers and students know how to code, but know nothing about the automation of the developing process.
As you develop your software, you have to do a lot of tasks over and over again. For example you have to compile your code and create an artifact (e.g. this can be JAR for Java projects). You can now say „hey dez1337 – Every IDE like eclipse can do this for me by pressing one button“, and you are right, but you forget that in larger projects, you are not the only person that has to write code. If you use your IDE, the complete configuration like dependencies of the project and the description of the build process is defined in your IDE and no one of your team members can ever rebuild the project without using the same IDE and the same IDE configuration. The manual configuration can lead to strange errors on other machines than your own and not reconstructable results in general, which you always want to avoid as a good developer.
The main target that we want to achieve is that the same revision of code leads to an equal build result on every machine and with every IDE or even without an IDE. In professional software development, so called “build management tools” are used for this. For Java projects Maven (see maven.apache.org) is a common one and will be used in this guide.
Maven
Please keep in mind that I will not describe every single thing that can be done with Maven. I will only show you some basics that enables you to work with this tool.
Installation
As the installation is quite simple, I will not describe it in detail. You only have to download the latest version (https://maven.apache.org/download.cgi) for you operating system, place it where ever you want, set a MAVEN_HOME environment variable pointing to the place where you placed the tool and add %MAVEN_HOME%/bin to your PATH variable.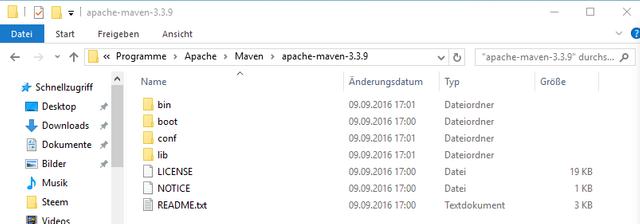
Picture 1: Extract Maven to a place of your choise
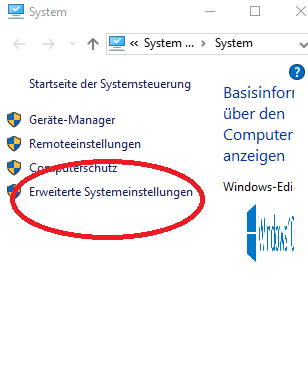
Picture 2: Press Windows+Pause to open the System window. Then press Advanced System configuration
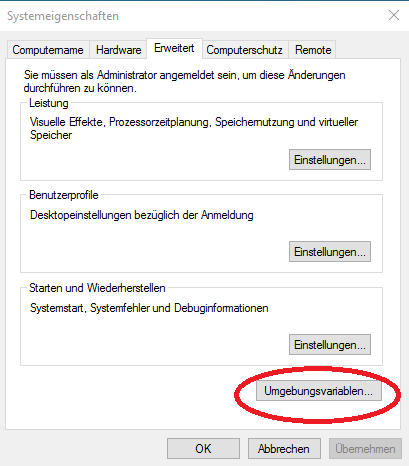
Picture 3: Then press Environment Variables
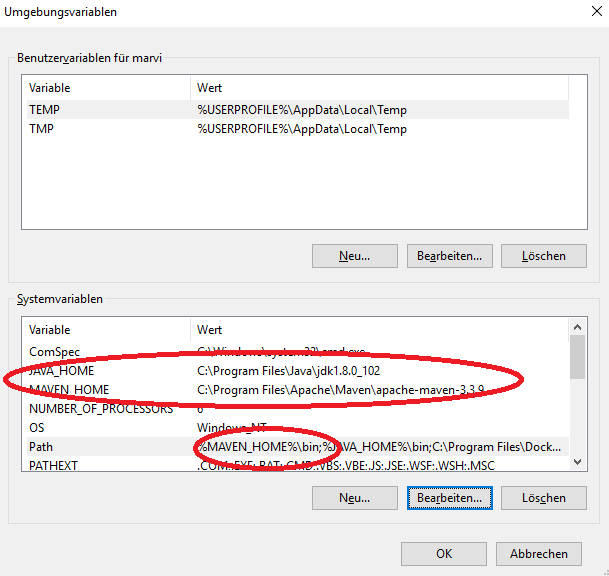
Picture 4: And add the variables.

Picture 5: After that you can call “mvn -v” directly under linux or with the windows command line to test your installation.
Basics
Maven uses so called pom-files to describe the build process of your project and its dependencies. Those poms are simple XML files. Here is a minimal example pom.xml.
<project xmlns="http://maven.apache.org/POM/4.0.0" xmlns:xsi="http://www.w3.org/2001/XMLSchema-instance" xsi:schemaLocation="http://maven.apache.org/POM/4.0.0 http://maven.apache.org/xsd/maven-4.0.0.xsd">
<modelVersion>4.0.0</modelVersion>
<groupId>example.steemit.com</groupId>
<artifactId>exampleApplication</artifactId>
<version>1.0-SNAPSHOT</version>
<packaging>jar</packaging>
The above pom.xml only defines who (groupID) developes what (artifactId) in what is the current version (version). The packaging defines what kind of artifact will be created. In this case we will create a JAR which is also the default. You can describe complex build processes with those pom files which we will see later. At this point I will not describe complexer pom files to make it easier to follow.
Before we run the first maven command, I will tell you about the basic concept of Maven. Maven differs between two lifecycles by default: The clean lifecycle, which is used to delete everything that has been created in earlier builds, and the default lifecycle, that contains everything from compiling to deploying.
You always call mvn and a step of a lifecycle. For example, to delete everything from earlier builds, you run:
mvn cleanTo clean and build your project you can run
mvn clean installOr to only build your project without cleaning up the old files you can run
mvn install
The install command is a step of the default lifecycle. Before continuing reading, you should take a look a the complete list of steps of the default lifecycle. As you can see in the list, the install step is nearly the last step of the default lifecycle. If you run the install command, maven will do every step from validate to install that you can see in that list.
Example project
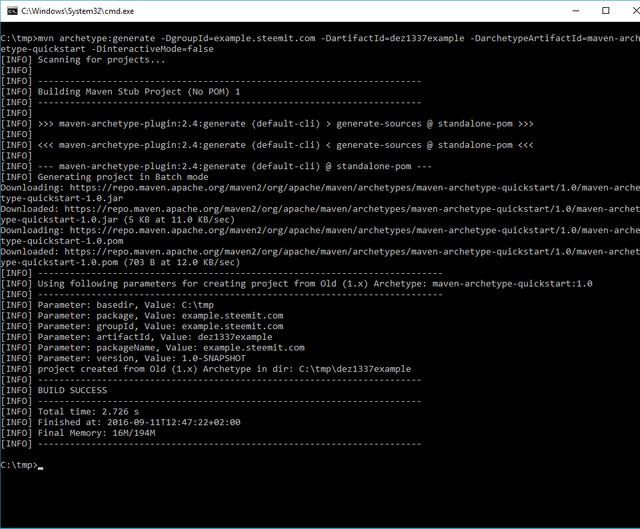
To use Maven, we first create a folder structure for our example application. Maven supports so called archetypes to automatically create the structure for us.We will let maven create the maven quickstart project (see quickstart) with the following command:
mvn archetype:generate -DgroupId=example.steemit.com -DartifactId=dez1337example -DarchetypeArtifactId=maven-archetype-quickstart -DinteractiveMode=false
The generated folder dez1337example should contain the following files:

Maven has created a pom.xml, a class called App and a test for this class called AppTest. The code just prints "Hello World" and is very easy to understand.
We will take a look at the generated pom.xml as it contains a new thing: Dependencies
<project xmlns="http://maven.apache.org/POM/4.0.0" xmlns:xsi="http://www.w3.org/2001/XMLSchema-instance"
  xsi:schemaLocation="http://maven.apache.org/POM/4.0.0 http://maven.apache.org/maven-v4_0_0.xsd">
  <modelVersion>4.0.0</modelVersion>
  <groupId>example.steemit.com</groupId>
  <artifactId>dez1337example</artifactId>
  <packaging>jar</packaging>
  <version>1.0-SNAPSHOT</version>
  <name>dez1337example</name>
  <url>http://maven.apache.org</url>
  <dependencies>
    <dependency>
      <groupId>junit</groupId>
      <artifactId>junit</artifactId>
      <version>3.8.1</version>
      <scope>test</scope>
    </dependency>
  </dependencies>
</project>
You can see that the pom.xml contains a dependency for the testing framework junit which is required to run the tests defined in AppTest.java. Before using Maven, you would have added the Junit.jar directly into eclipse, which requires every developer to do the same, if he still wants to be able to build the project. Now, with Maven, the tool will download and add the junit dependency automatically.
We will now run
mvn clean installon our project to see maven downloading the dependencies. You should see Maven downloading a lot of stuff, compiling the code and executing the Junit test. While the build process, the tool creates a target folder, where everything that gets created within the build, gets stored. You can also find the result of the build, the file dez1337example-1.0-SNAPSHOT.jar in that folder.
IDE Integration
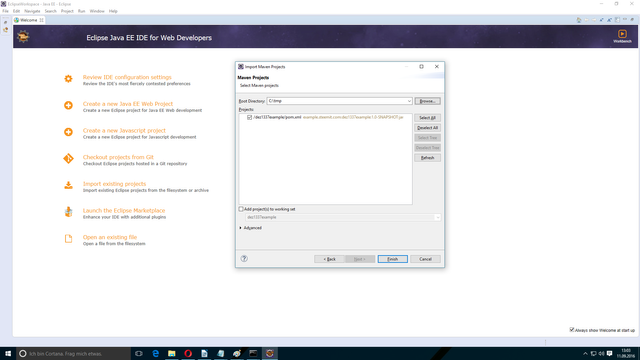
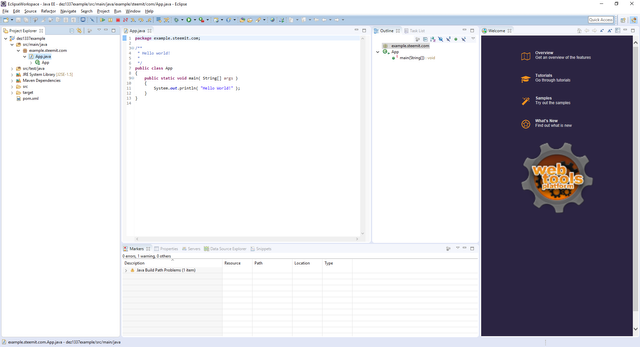
The last question is how we import a maven project into our IDE. I will show this for eclipse as the most of you may use it. With Eclipse Neon (download at https://eclipse.org), eclipse has a Maven integration by default. You can import our example application by using File -> Import -> Maven -> Existing Maven Projects.Then you can work with the project like you did with normal java projects.
Closing words
I hope this article is understandable and helps some of you to understand why a build management tool should be used and how it can help you to improve the development process of your projects. Let me know your thoughts and ask everything you want - I will try to answer it. You can find the previous part of this tutorial here Improve your Software Development – Continuous Deployment with Docker – Part 1: Introduction and motivationIn the next part of this series we will add some code to our exampel appliation using test driven development. If you like this series, please like and share it.
Best regards,
dez1337
