Advance C# Programming with MongoDB
Hello to all !!! It's January 12, 2017 and I decided to share my finding about using MongoDB as the database program for my C# projects.
First and foremost I'm not a technical person who usually discuss about the terminologies and jargon words about software development and programming. So we will not expecting thorough introduction about the platform we are using. But I'll try my best to make introduction about this platforms in the near future.
In this tutorial I will discuss how we can use the said database platform in our programming language.
Why MongoDB ???
Many software and application developers that deal with big number of data recommend the MongoDB to be the database option. According to them using MongoDB will enhance the performance of the application even if it deals with file storage.
C#
C# is an Object Oriented Programming (OOP) language, also it is a statically-type of programming language which defines the types of variables before using. Syntax for C# is somehow similar to C and Java.
MongoDB
MongoDB is a free open-source cross-platform document-oriented database program. This database platform makes developers more productive by accelerating the performance of the application and services to the market.
Done with the brief introduction to the platforms, but I will do my best to have another discussion about C# and MongoDB itself.
I'm using a Visual Studio 2013 and MongoDB for this discussion, link for the MongoDB is provided for downloading the platform.
Installation of The MongoDB
After downloading the platform from the given link, enjoy and install
[screenshots]
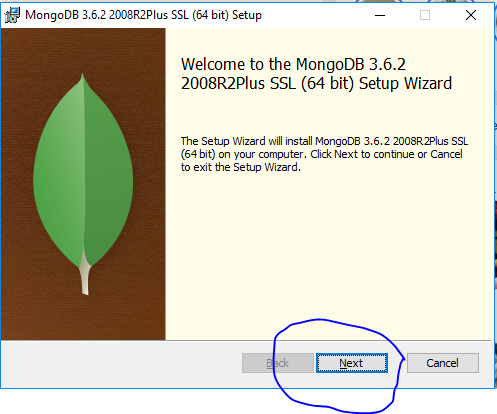
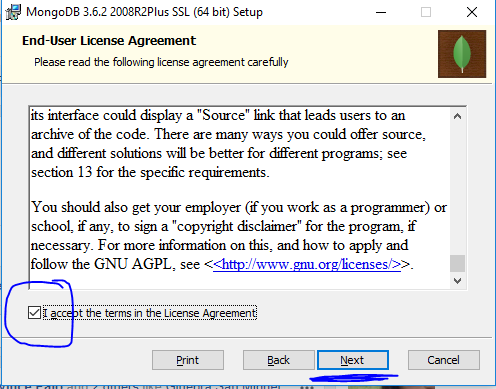
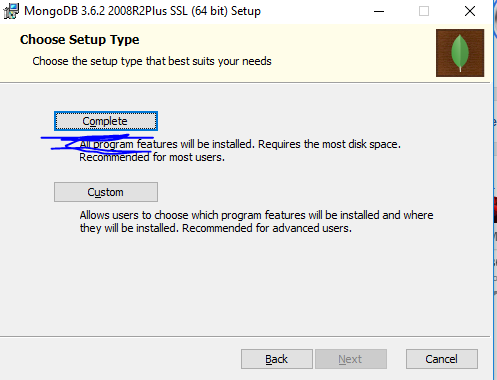
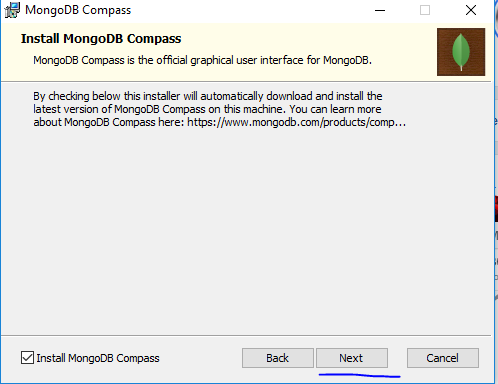
Click Install and wait for it to finish
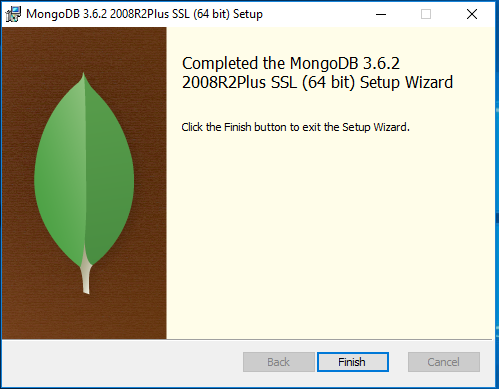
After the installation open the command prompt and type "mkdir data\db"

The said command makes a directory/folder where the information will be saved
then type the following command and the database is now already setup
"cd C:\Program Files\MongoDB\Server\3.6\bin"

"mongod.exe"

Starting Up
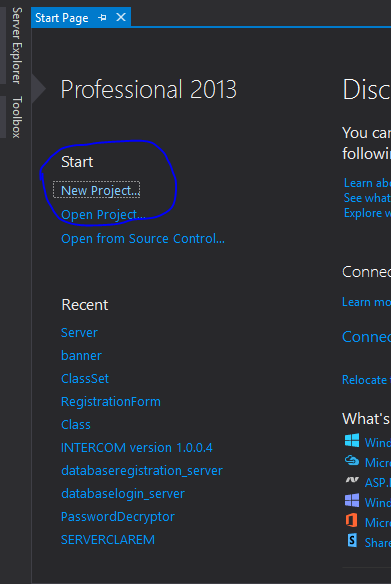
After the Visual Studio started, create a new project as below
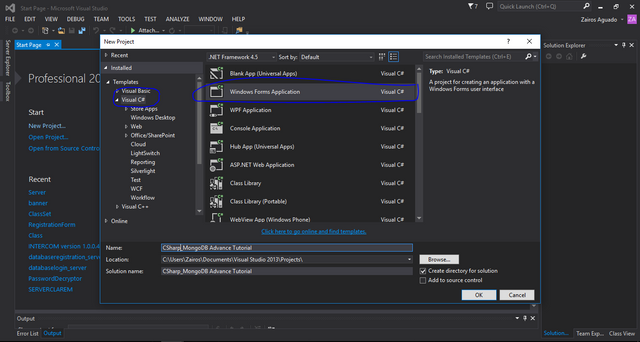
A form will pop up where we can set our project as shown below (Encircled fields must be done)
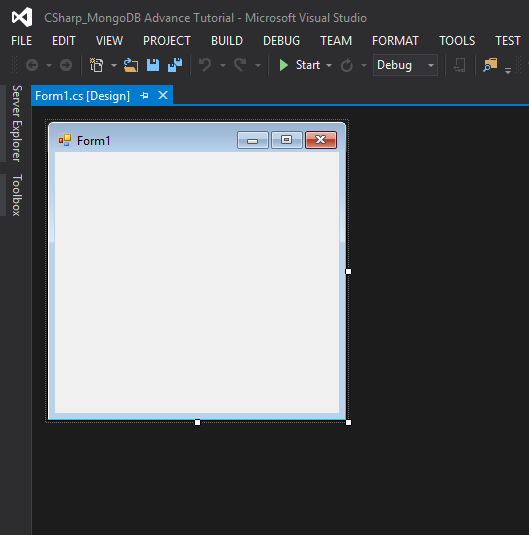
After a short wait a blank form will pop up and this is where our simple project will be developed :)
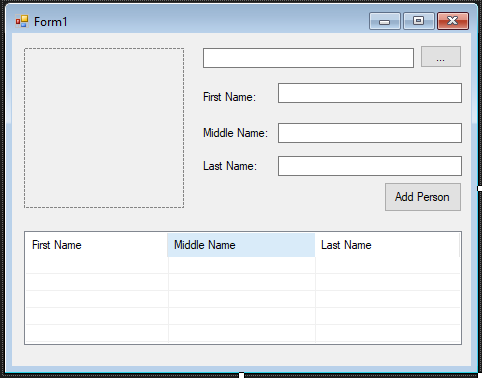
I provided a simple design for the project. The project will accept personal information of a person as well as a picture for its identification
In the solution explorer
After the simple design is made go to project>>manage Nuget Packages, a form will pop up and will allow us to add and install packages
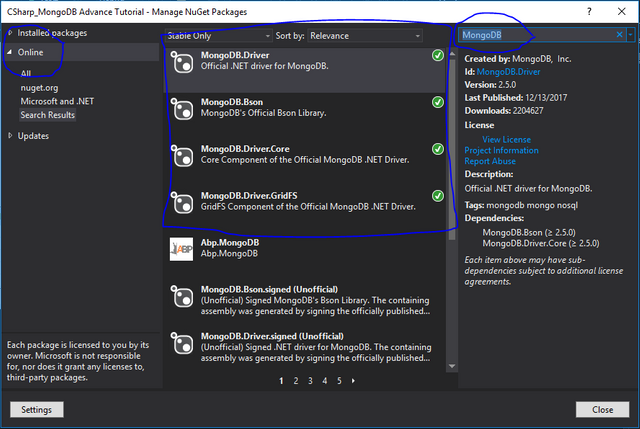
Install all the encircles packages to ensure the smooth running of the project :)
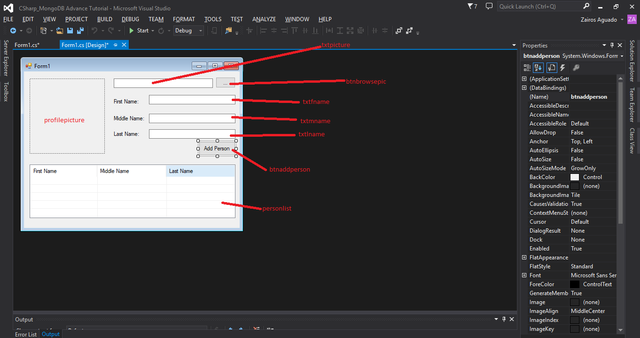
On the right side of the application there will be a form for the properties of each tool, just click the tool, go to name and change to what you desired :)
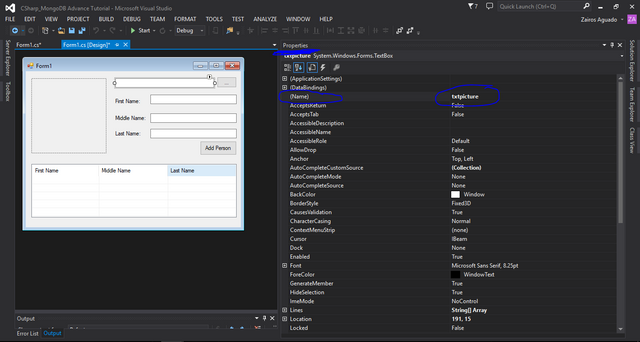
Name of the objects can be seen as below
Running Project
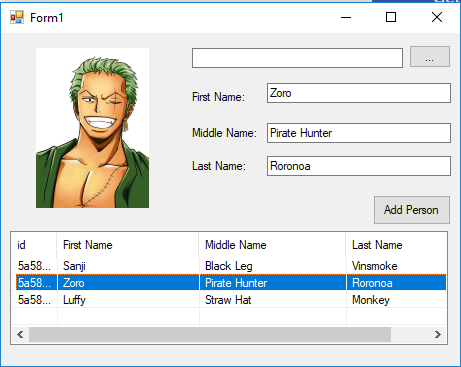
As shown below, I have stored personal information of my favorite anime characters, all the information was saved using the MongoDB platform. Data can be retrieved by clicking the name of the desired character in the list
Code Review
Here, we are going to discuss the codes of our project, we will be discussing the MOST IMPORTANT part of our syntax. Meaning basics such as namespaces will not be discussed in this tutorial :)
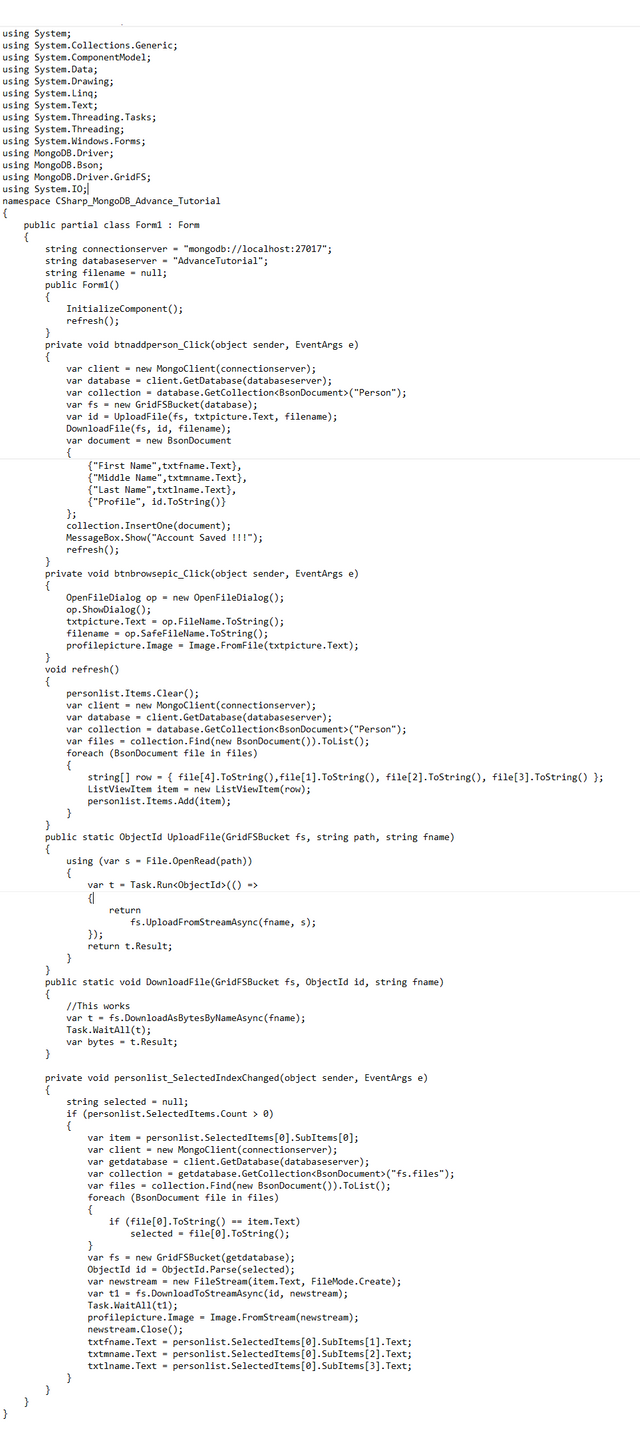
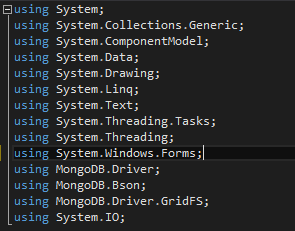
Below is the header which shows all the reference that was used during the program, As we start to create a new project several reference was automatically generated, however in our case we import new references for the mongodb database that we use
References like MongoDb.Driver, MongoDb.Bson are some of the references that we use. If we failed to install the nugget packages earlier this references will have errors

Defining the connection string of our database is necessary for our project, all of our work will became useless if we provided wrong connection string
The connection string is defined as the connectionserver and the name of the database we are going to use is defined as the databaseserver.
this is default for the mongodb database so just copy the connection string

Next segment will be the loading event of the form, the refresh function deals on refreshing the list of the information that were saved to our database.

the client identifier primarily establish the connection between the C# and the MongoDB, next to this will be the database identifier which setup the database we are going to use (Database name can be existing or not, once the C# failed to locate the specified database it will create a new database for your project)
The collection identifier will identify the collection we are going to use inside the database. In MySQL and other database we are familiar with, collection is the table name for our database.
The files identifier on the other hand deals with all the files saved in our collection, BsonDocument is the datatype of the information inside our collection. BSON is a computer data interchange format that was used mainly as a data storage. In MongoDB bsondocument was the default type used for documents, it is because MongoDB is a type of an unstructured database which means it don't rely on tables, rows and columns. Each data was saved in the database as a document format.
files is a list class which accepts all the document (which is BsonDocument in type) from the specified collection which is Person .
The next block of codes is to put all the gathered documents in the listview named personlist

Next to this is the event where we are going to choose for the Profile Picture of our desired information
Adding of Information
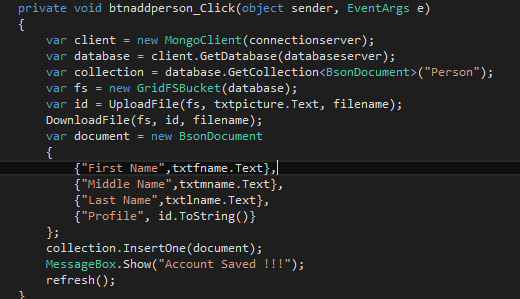
Next will be the event where we add information to our database, like the first block of codes establishing the connection between the programming language is necessary.
GridFs is a way to maximize the performance of our project. This is usually used when we are going to store binary information larger than the maximum document size (16 MB).
When uploading large amount of data and information to the GridFs the file was being broken into chunks

chunks
This chunks are now uploaded separately to reduce the weight of uploading. On the other hand when we download file from a GridFs the original content are now reassembled from the chunks of data and information.
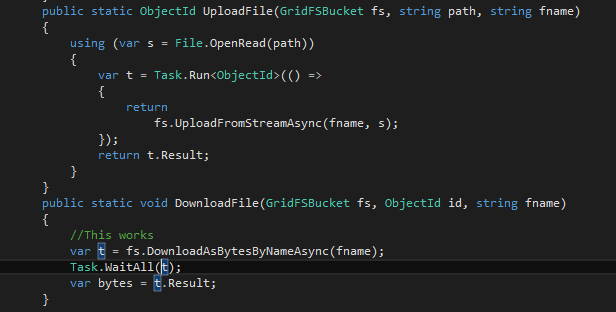
The upload and download functions can be seen above.
Upload Function (for the Picture)
The upload function have 3 parameters, first parameter will be the GridFsBucket where we save the chunks of files (if the file is larger than the maximum limit of a document), next to this will be the path or location of the file we are going to save in the database. If the location of the file cannot be seen in your computer The project might not work properly. Last parameter will be the name of the file we have selected.
The next block of codes will return a value and will now be stored in the id variable.
Download Function (for the Picture)
This function also needs 3 parameters, the GridFsBucket where the stream is stored, the ObjectId of the stored file (serve as the primary key) and the filename of the file. This also will let the MongoDB to download the specified file stored in the GridFsBucket.
Going back to the button where we save an information a variable named document will be declared. As I've said earlier MongoDb doesn't rely on tables and it accepts document type of data.
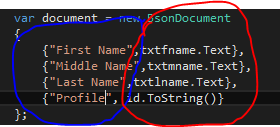
The image above divides the document into two different parts, Encircled in Blue is the definition of the document and the next part Encircled in Red is the value for each definition.
The next line of code inserts the document into the specific collection.
After the Message Box pops up the data is now successfully stored in the database
Retrieve Data
The last function will be the event for retrieving the information we have saved in the database, this event will occur as soon as the name of the desired person is clicked in the list
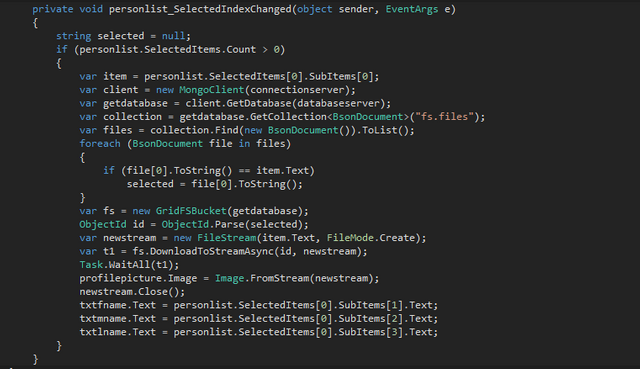
The condition if (personlist.Selected.Count > 0) deals with determining a name was been selected
The variable item will be used to store the ObjectId of the selected information. Then the connection will now be established between the c# and MongoDB. Differ from the previous connection the collection name that we are going to use is (fs.files)
Fs.Files
The said collection is automatically generated when a file is saved to the database, also together with it another collection named Fs.Chunks is also generated. As we discussed above files that exceeds the 16MB limit will be divided into various chunks, those chunks will be divided on the Fs.Chunks collection.
The selected information was now been compared to all the documents retrieved and stored in the files list. The *selected *variable is used to store the ObjectId of the selected information. This will allow us to access the file stored in the Fs.Files collection.
The id variable will be the storage for the ObjectId of our desired information, the parse method converts the string representation of the value to its equivalent in a ObjectId type.
newstream variable is a FileStream which converts the data into a Stream
After the stream is finished downloading it will be stored in a PictureBox.
Now the last part will be inputting the corresponding data from the table :)
Whooooo!!! \m/ There you have it :)
This finishes our tutorial about our project :) I hope you can follow the steps I make for this discussion, I'll answers all your question about our discussion, just comment your question and I will do my very best to answer and respond to you :)
I also planning to run a tutorial series where we are going to develop a software application, The said application will be depending on the respondents of my post, meaning any system you want may be chosen for the tutorial series.
The contest for the chosen software application will be help after the Basic tutorials about the C# programming language is finished
Here is the previous tutorial by yours truly :)
Csharp Tutorial Road to a Finished System [Introduction]


I haven't quite went through it all, but the content looks amazing and complete for this quick project.
Thank you for the attention you give for this post :)
I really appreciate.
Please if you found it knowledgeable and interesting be free to resteem. TY once again :)
awesome tutorial
wow :) flattered with your reply :)
I'll make more tutorials to help the community :)
P.S Thanks for the vote :), I really appreciate it :)
I am voting this up because it's a cool tutorial, hope to know more from you. Keep it up.. ;)
Thank You for the response sir :)
I'll try to make this kind of post as many as I can :)
Follow me for more tutorials :) thank you :)
Good work on this post mate!
Thanks :) so happy that many readers appreciate my work :D
good post , i love c-sharp
Thank you mate :)
Feel free to follow me for more tutorials about C# in the future :)
@coderzairos, please can u explain how to use xamarin with mvc asp. Net
php plz
owwww maybe other time, I'll study it first and I discuss my findings :)
Done
Tnx mate :) appreciated :)
@originalworks