Setting up a Parity Ethereum wallet

Hello Reader,
In the last article I took you through the various types of Ethereum wallet including my personal recommendations. In this article, I am going to provide you with an in depth guide to my favourite wallet, Parity.
Parity is an in-browser desktop wallet and dapp browser which is available for Windows, Mac OS and Linux. It is created by Parity technologies, a company setup by several alumni of the original Ethereum project, including Dr Gavin Wood.
The key design principles behind the project are to provide a light weight, fully featured, easy to use interface into the world of Ethereum and Web 3.0.My favourite features include:
- High performance and light weight resource usage
- Open source, so the code is available for review
- Available for all major desktop platforms
- Reliable, extensively peer reviewed and unit tested
- Future proof, compliant with common standards
- Snapshots the blockchain to enable fast syncing
- Supports software and hardware wallets
- You can control multiple wallets at once
- Includes an inbuilt dapp / smart contract browser
- Includes a browser plugin so you can browse dapps in your default browser
- Advanced transaction features, such as custom fees, data and timed transactions
- Supports ERC20 tokens
Sound like something you might be interested in?Great, let's get started...
A guide to using Parity
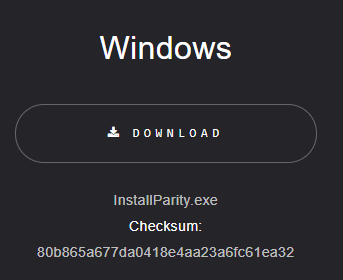
Step 1) Download parity for your platform of choice
The first step on the journey is to get hold of the latest version of Parity for your desktop platform. You can download the wallet software directly from the Parity website. I'm going to be using Windows 10 for this guide, but the principles are the same for all major platforms.
Step 2) Install parity
Run the install file and install Parity to your preferred system location.
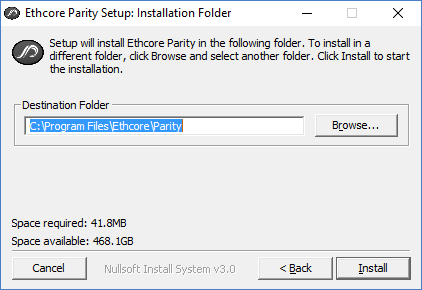
Upon completion, Parity should automatically start and launch within your default web browser, so in my case; Chrome. If it doesn't automatically start, you can find and open it by typing Parity in the start menu.
Step 3) Create your Ethereum account
The first time you launch Parity, you should be presented with the create account wizard. Note that there are two types of account within Parity:
- A basic account which uses a standard public / private key
- A parity wallet which stores your funds within a smart contract
For the purposes of this guide, we will be creating a basic account, so if the wizard hasn't already appeared, press the Accounts tab and then press + Account. You should be presented with a screen that looks like this:
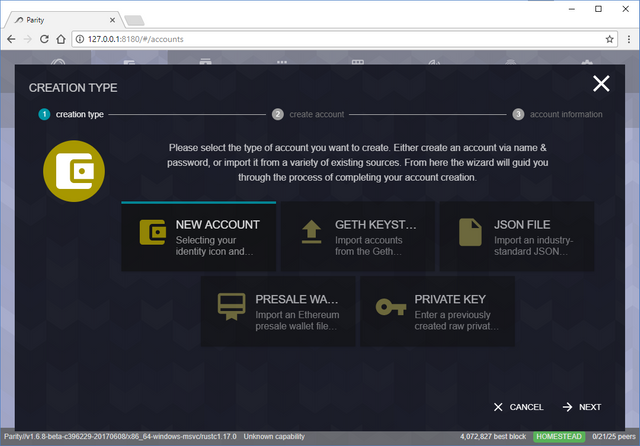
Select "New Account" and press Next to open the create account screen:
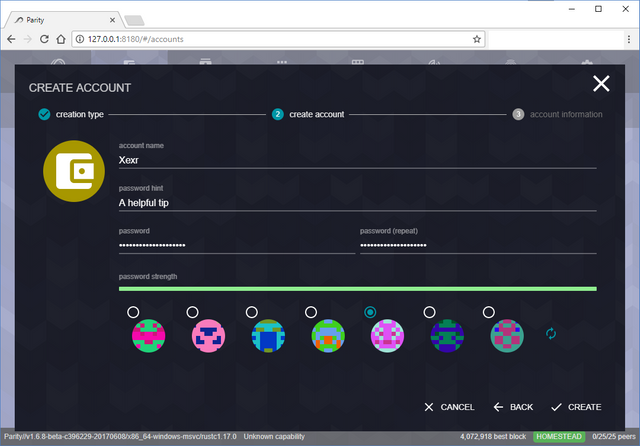
Enter an account name, hint, password, select an image and press Create
You will be presented with an overview of your new account information:
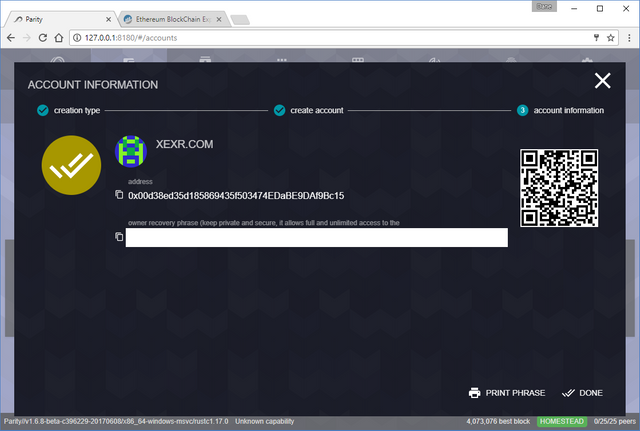
The address displayed is your public key which you can share with others to enable them to send you ether.
Beneath that you will be presented with a recovery phrase (deleted from the screenshot for obvious reasons). This is a backup seed which will grant you full access to the account. Write this phrase down or print it and store it somewhere secret. Do not save the phrase on any device connected to the internet.
Once finished, press Done to be taken back to the main Parity window.
Step 4) Check Parity is fully synchronised
At this point you are ready to start making transactions, but before you do, double check that Parity is fully synced with the Ethereum network.
Traditional ethereum clients require you to first download the entire blockchain before you can properly use them. Given the size of the blockchain, this process can take several days to complete.
Parity uses a process known as snapshotting to speed up this sync which means that you will typically only need to download the most recent ethereum blocks before you are ready to go.
You can see the latest block that Parity has downloaded in the bottom right of the screen:

In this example, my client has downloaded through to block number 4,072,957. As there is no " / block x" after this, I can assume I am fully up to date. However, you can always check the latest block number by visiting etherscan.io.
Step 5) Receive Ether to your new account
Press Accounts and select the brand new account you have just created to be taken to the account management page:
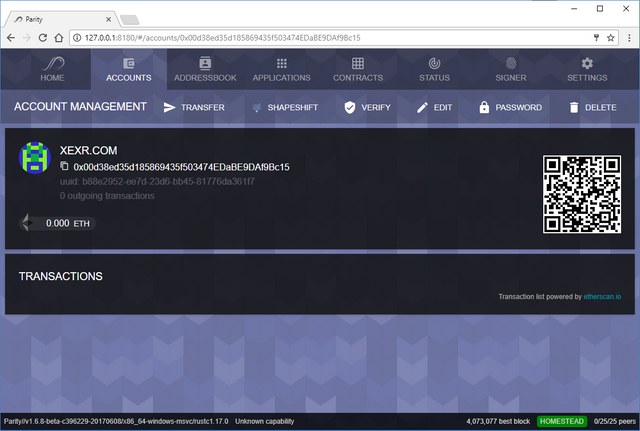
From this screen, we are able to do several things:
- Check the balance of our account
- View previous transactions
- Find our public address to share with others so they can send us Ether (or Tokens)
- Transfer, or send, our Ether (or Tokens) to others
- Deposit Ether into our account by sending another crypto currency (e.g. Bitcoin) via the third party service shapeshift.io
- Verify our account via SMS or Email
- Edit the key details of our account
- Change the password
- Delete the account
Let's get some Ether into our account. In my example I am going to send some that I have previously purchased from Coinbase.com, but any exchange will work in a similar fashion:
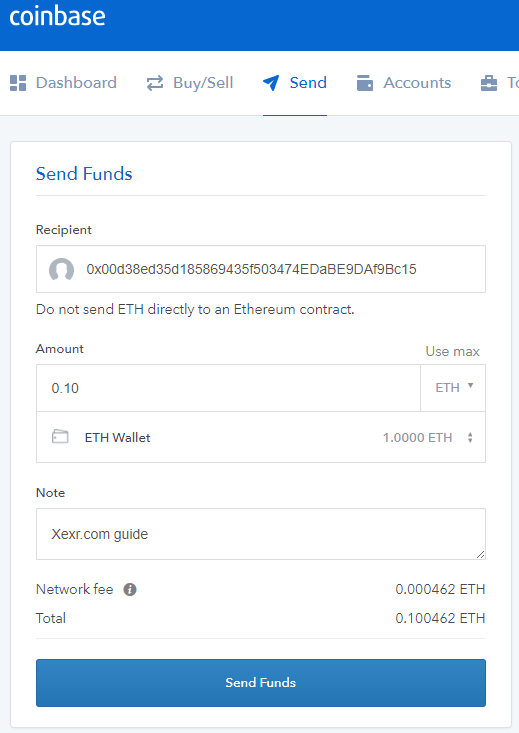
- Copy the address from Parity and enter it into the coinbase recipient field
- Enter the amount of Ether you wish to send from your coinbase wallet
- Be sure to select your Ether wallet (and not your BTC / LTC wallet)
- Add an optional note
- Check the totals and network fee look correct
- Press Send Funds
- Enter your 2FA key (you do have 2FA setup right?)
- Confirm the transaction
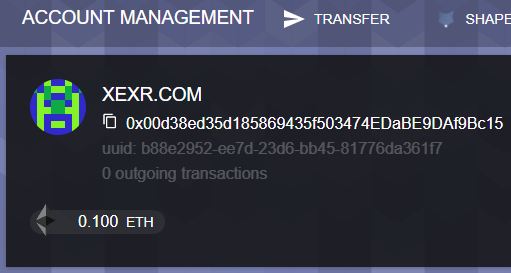
- Your funds will arrive in your parity wallet within the next few blocks
Step 6) Send Ether from your account
Now that we have ether in our account, we are free to send it to whomever we choose. In this example, I'm going to send it to my coinbase wallet as I'm planning on cashing out some lovely profit.
From the account management screen, press Transfer:
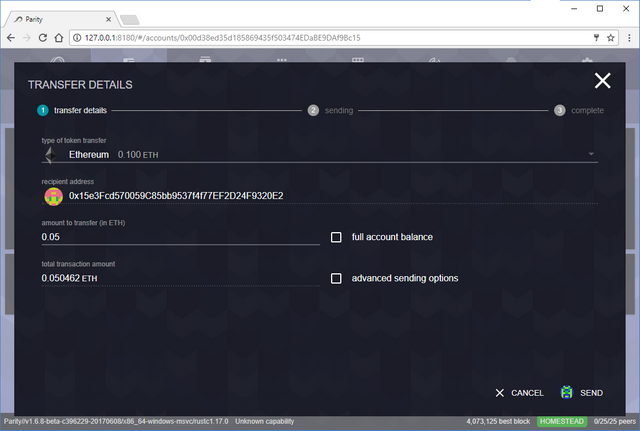
Complete the page as follows:
- Ensure Ethereum is selected from the type of token dropdown
- Enter your recipient address, in this case my coinbase wallet
- Enter the amount you wish to send
- By default, the network fee is calculated automatically
- Press Send
The confirm transaction dialog will pop up:
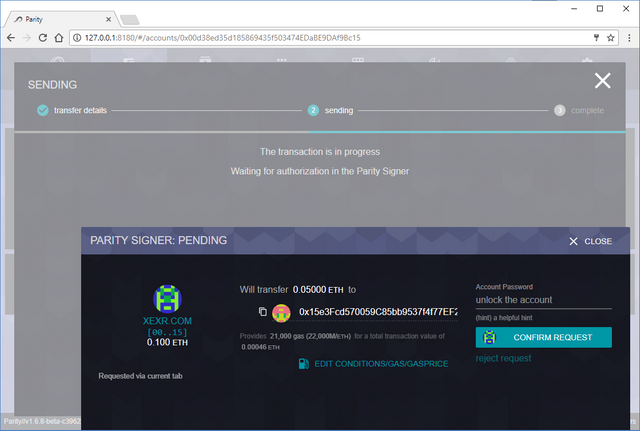
Enter your account password and press Confirm Request
Your transaction will then be broadcast to the Ethereum network and you will be presented with a screen to follow it's progress:
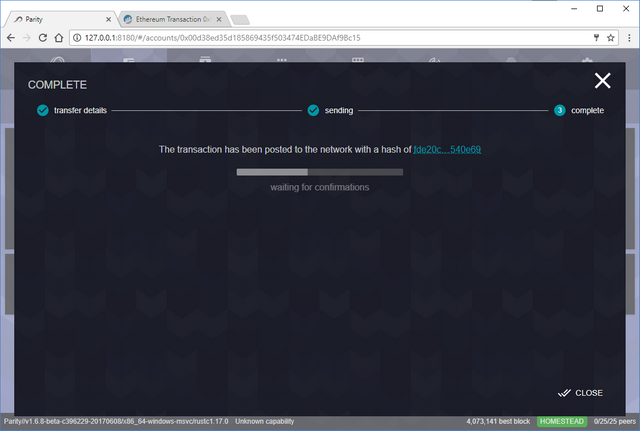
Once your transaction has confirmed with the network, your funds should appear in your coinbase wallet.
Key watch outs
- Always keep Parity up to date. Just recently a bug in the wallet smart contract was found which made user funds vulnerable.
- Do not click unknown links and keep your computer and anti virus up to date
- Write down your password and seed, store them offline in different locations
- Do not share your private key with anyone
- Double check all of your transaction details before sending. There are no do overs with crypto currency
- Read the official Parity help guide for more information
That's it for this beginners guide to Parity. You now know how to setup an account, receive and send Ether.
In a later article we will look at some of Parity's more advanced features such as sending custom transactions, transacting with Etherum tokens and browsing dapps on Web 3.0.
As ever, comments and questions are always welcome. I'd love to hear from you!
Until next time...If you’ve enjoyed this article, it would be my honour to have you as a regular reader.
Yours, X
Image: Parity.io
Content: Xexr.com
Roxy amongst the grass...

Congratulations @xexr! You have completed some achievement on Steemit and have been rewarded with new badge(s) :
Click on any badge to view your own Board of Honor on SteemitBoard.
For more information about SteemitBoard, click here
If you no longer want to receive notifications, reply to this comment with the word
STOP