Setting up Cosmo Coin ($CMOS) Master Node VPS with Vultr
I am writing this guide because the Steps after Step 1 from this guide (Guide for setting up a Cosmo Coin Masternode) did not work for me and setting it up manually helped me make sure I set it up right.
Things you will need:
Follow Step 1 from here (Guide for setting up a Cosmo Coin Masternode)
An account on Vultr
PuTTY for Windows
Some experience with Linux (optional)
Follow all of the instructions from the beginning of his post up until Step 2. Then continue off here.
Make sure you have your Master Node's generated key close and ready to be copied.
Sign up for Vultr
Sign up using your email, verify, and log in to your account.
After you do that it should bring you to a dashboard.
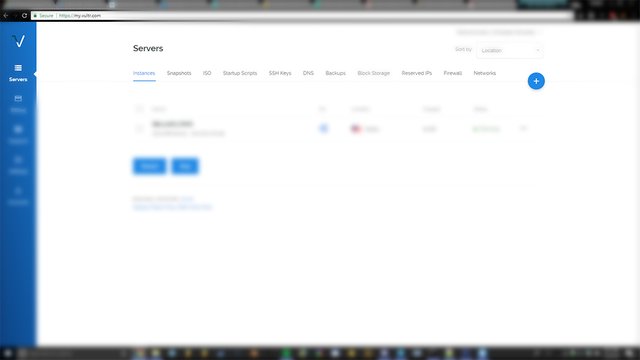
Make sure you are under servers, visible on the left side.
Deploy a new server
Look for the blue circle with a plus (+) sign and click on it.
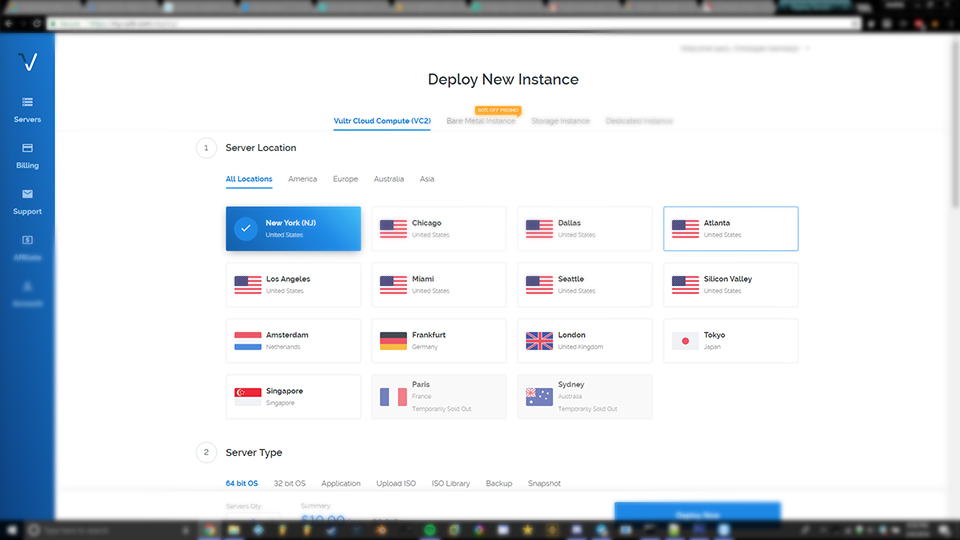
Make sure you are under Vultr Cloud Compute (VC2)
Select a location close to you for faster connection to your server.
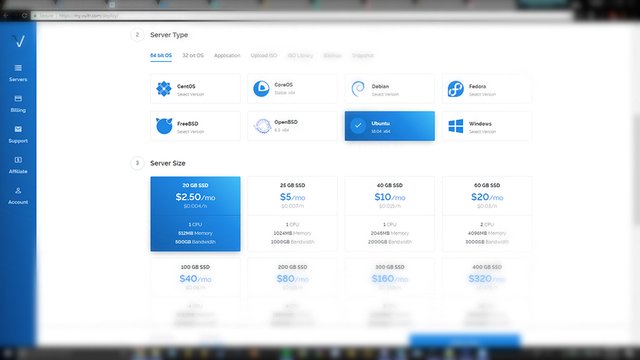
Server Type
Select Ubuntu 16.04
Server Size
The $5.00/mo plan is enough, however I have been using the $2.50/mo plan without any problems.
Addition options
These are entirely optional and up to you. I like having the back up feature.
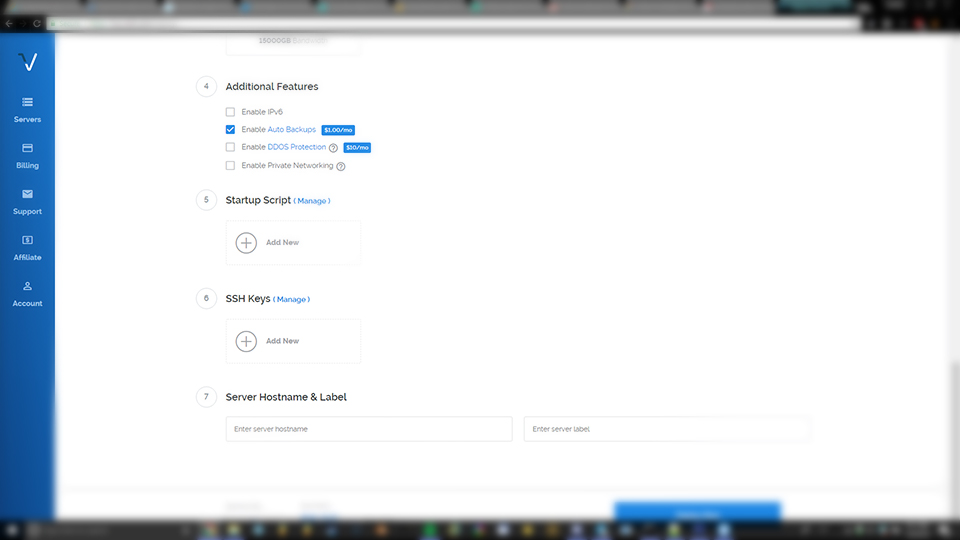
You may name your server with the 'Label' text box.
Everything else can remain blank, click on Deploy Now and it should be up and running!
Now click on your server to get the details.
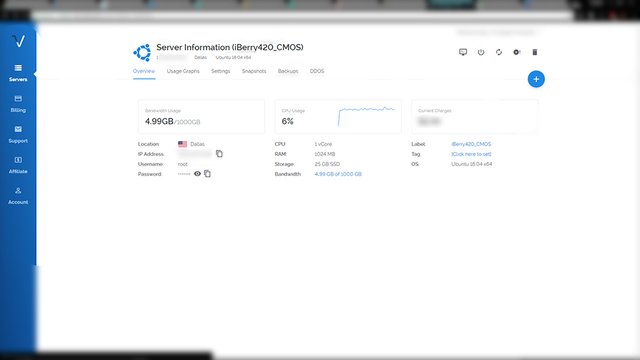
Take note of your IP Address, Username (should be root), and password.
Open PuTTY
and
SSH into VPS server:
For Hostname/IP Address type in root@(IP ADDRESS)
(IP ADDRESS) is your server's IP without the braces.
Leave the port on 22
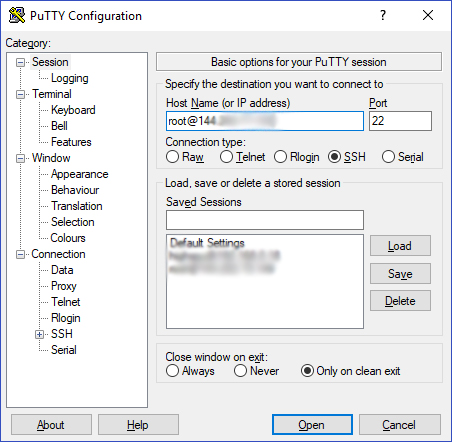
You may copy and paste the Hostname/IP Address to the box under Saved Sessions and click save, so you can use it again later.
Next click on Open.
PuTTY will give you a warning, hit Yes.
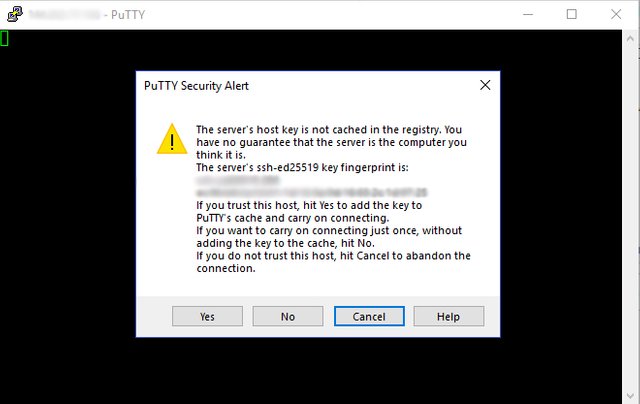
It will ask you for your password, copy the password for your server and Right Click into PuTTY.
This will paste your password into the prompt, but it wont be visible.
Press Enter and you should be logged in.
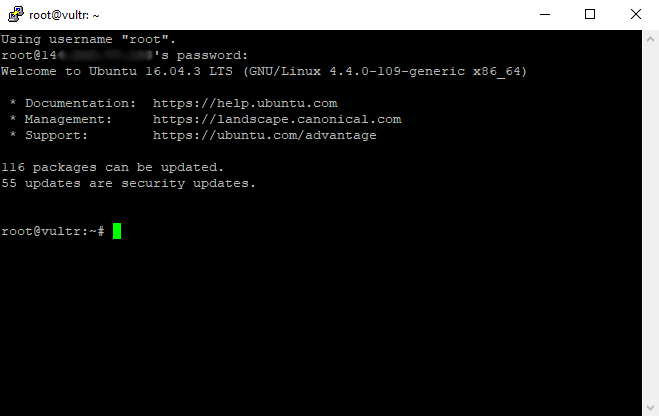
There will be no more pictures due to too much output from the server and it would be confusing to display pictures that may not align up with the output you are seeing.
Update everything on VPS:
This will take some time.
sudo apt-get -y update
sudo apt-get -y upgrade
sudo apt-get -y autoremove
Install needed applications:
sudo apt-get install wget nano htop -y
sudo apt-get -y install aptitude
Install safeguards and start service:
sudo aptitude -y install fail2ban
sudo service fail2ban restart
Install and run firewall:
sudo apt-get install ufw
sudo ufw allow ssh
sudo ufw allow 61146/tcp
sudo ufw default deny incoming
sudo ufw default allow outgoing
This wont disrupt your connection, hit Y when prompt:
sudo ufw enable
Download wallet for MN:
wget https://github.com/CMOS-Project/Cosmos/releases/download/v1.2.0/cmos-1.2.0-x86_64-linux-gnu.tar.gz
Unpack wallet files:
sudo tar -xzvf cmos-1.2.0-x86_64-linux-gnu.tar.gz
Remove download (not needed anymore):
sudo rm cmos-1.2.0-x86_64-linux-gnu.tar.gz
Install CMOS wallet:
sudo cp ~/cmos-1.2.0/bin/cmosd /usr/bin/
sudo cp ~/cmos-1.2.0/bin/cmos-cli /usr/bin/
Run CMOS (should give error [it's okay, this creates directories and files we need later]):
cmosd -daemon
Open cmos.conf file in text editor:
nano ~/.Cosmos/cmos.conf
Copy and Paste (right click) then fix/replace <[variables]> with correct information:
rpcuser=<[someuser]>
rpcpassword=<somepass[cannotbesameasuser]>
rpcallowip=127.0.0.1
listen=1
server=1
daemon=1
logtimestamps=1
maxconnections=256
externalip=<[VPS IP ADDRESS]>
bind=<[VPS IP ADDRESS]>:61146
masternodeaddr=<[VPS IP ADDRESS]>
masternodeprivkey=<[masternode genkey result]>
masternode=1
Save file:
CTRL+O [ENTER] CTRL-X
Make file usable and start the Master Node:
sudo chmod 0600 ~/.Cosmos/cmos.conf
cmosd -daemon
Everything should be set up now, but we have to let the VPS wallet Sync, to check its status type:
cmos-cli mnsync status (checking if blockchain synced is true)
cmos-cli getblockcount (check progress [how many blocks downloaded])
cmos-cli masternode status (Look for "Masternode successfully started")
Contact for help or questions
Twitter: @iBerry420
Discord: Cosmo Coin @iBerry420
Congratulations @iberry420! You have completed some achievement on Steemit and have been rewarded with new badge(s) :
Click on any badge to view your own Board of Honor on SteemitBoard.
For more information about SteemitBoard, click here
If you no longer want to receive notifications, reply to this comment with the word
STOPCongratulations @iberry420! You have completed some achievement on Steemit and have been rewarded with new badge(s) :
Click on any badge to view your own Board of Honor on SteemitBoard.
For more information about SteemitBoard, click here
If you no longer want to receive notifications, reply to this comment with the word
STOP