#4 Mining guide - How to build multi GPU open air rigs - Riser cards - Tips - PSU selection - Etherium - Zcash (ZEC)
Guide to building 4-8 GPU open air rig. Risers. One or two PSU's. How to do this safely without damaging gear and cutting costs.
This is my fourth guide. Guide #1 and #2 covered off basic and more advanced mining on your already setup single GPU rig.
Guide #3 covered configuring windows to get max performance and preparation for installing multiple GPU's.
Quick start step by step
Have a plan. How many GPU's do you want to run. Personally I am not a fan of running more than 4 GPUs on one rig but you can push it to 5 without too much issues. Above 5, any issue and the whole rig if offline. It is tricky to trouble shoot the problem the more cards you have. Support for more than 4 cards becomes limited and requires more advanced knowledge to get it all going and configured.
Pick a PSU. The GPU model you plan to run this will determine the PSU. If you want to run 4x 1080ti they use 250W each at stock settings. The motherboard, CPU, RAM, Risers and HDD will use around 50-80W. You will also need 1-3 risers which use upto 75W each. So in theory you will need a 1200W PSU as you always want to leave some overhead. In reality you will run your 1080ti at 65%-75% which will be around 150W-200 W. So you can easily run this system on a 1000W PSU.
If you plan to run 5x 1070 you might be able to get away with an 850W PSU. You need to do the calculations.
You must also consider the power efficiency of the PSU. Gold and platinum PSUs are a must as you can run them closer to their max output safely and they actually save you A LOT of money in power over a year. Enough that the higher rated the PSU the faster it will actually pay for itself in savings. I always buy Platinum only. You want a minimum of eight but ideally 10 6/8pin pci-e power connectors. Another method is running two power supplies but again you want to avoid this if you can.
Pick your motherboard. You can use any motherboard you want with a combination of Full size PCI-e slots and Mini PCI-e slots. Risers are great for keeping the heat down and spacing the cards. I recommend 2-3 full size slots. If the layout on the motherboard allows for good spacing 3, if not only 2. If you are using cards that are wide and take up 2 or more slots you might have no choice but to go with 2 GPUs on the motherboard. The rest will go on risers which require power. I personally use old unwanted Intel chipset MB’s that can take i5 or i7 CPU's. I used a couple of 5 year old motherboards recently I had lying around.
Pick your CPU, ram and HDD. This is pretty easy. Get the cheapest you can find of all three. A good CPU is the itel i5 6400t. This version runs with super low power and can still do very good CPU mining which is basically free on your mining rig. It is also very cheap and easy to find second hand, or any similar/free CPU. SDD must be at least 64GB so just get the cheapest you can find. Any 4GB of ram is fine 2x 2GB dual channel is ideal.
Case or no case. Custom built or on the cheap. If you want to build inside a case you can but you will only be able to fit two cards in there. The other two cards will be on the outside via the riser cable which are only 60cm generally. I don't recommend this but if you just want a 2 GPU rig building inside a case is ideal. In that case you want blower style cards such as this.

They suck air from the side fan and blow all the hot air directly outside the case. You can use these in open air rigs too. The other style generally has 2 or 3 fans on the side and all hot hair is blown out the top of the cards.
You can build your rig on anything. There is custom metal rigs you can buy or you can build a wooden one easily as found on sites like this one.
Wooden Frame Rig
Parallel miner have some cool alum ones and also stock risers etc.
Metal Frame Rig

Alternatively you can get shelfing or metal shelfing like I have done with wheels on, or just sit your motherboard on any non conductive surface such as a wooden board or the box the motherboard came in with the foam on the top. You can sit this anywhere you want really. The only danger is bumping the rig and moving the cards in the slots which may cause the rig to crash. You can secure these in several ways.
Buying Parts and Risers
It's different for each country about generally you want to get the best deal. Brand new is best for the GPUs unless you can get the original receipt and it still under warranty as they hold value well. Only buy second hand if it is a really good deal. Everything else can be picked up second hand as long as it's a really good price. PSU you may want new.
New Egg and Amazon have good deals popup all the time. You can use aliexpress to buy small components like risers and PSU pass through and they are very cheap but can take 20 days to ship with free shipping. If you can find a local supplier that is ideal.
Build it
For this guide I will give instruction on how to build it directly on top of the motherboard box as that is the cheapest and most simple method but you can build it on any non conductive surface or on the scavenged plate from a case that has spacer nuts on. I also assume you have basic PC building skills and know how to install windows. If not you can google those basic skills which are very simple.
-Position box on the rack or bench where you will install all the gear. Install CPU, ram and HDD.

-Position PSU. Most of the cables will be at the back of the motherboard going to the cards directly connected to the motherboard so behind the motherboard either to the left or right is an ideal position.

-Install one GPU into the main PCI-e slot. Connect the power supply to the motherboard, CPU power, HDD and one GPU. Make sure it is firmly in the slot and clipped in. Press it in firmly at the end that doesn't have the power connected to ensure its fully in the slot.
-Switch on the PSU. Then power on the PC. You will need any metal object like a screwdriver or you can use a switch salvaged from an old PC or purchase a basic switch. You may have to refer to the motherboard manual to find out which 2 pins you need to short to power on the PC.

Most Motherboards will have it labelled and it usually the two pins with red next to them. Just touch both pins at the same time with any metal object. (don't worry this is perfectly safe use a screwdriver).
At this stage you will need a monitor keyboard and mouse connected so you can see if the computer boots up and works.
-Install windows 10 or 7 and refer to my guide #3 linked above or by checking my blog feed. Use this guide to configure windows so you have everything required to start mining. If you are running an AMD based rig you will need AMD specific drivers.
-Install riser cards and extra GPU's. Power down your computer and install any cards you can onto the motherboard and connect them to the PSU. Install riser cards to either Large PCI-e or small pci-e slots. If you are installing risers into the large slots make sure get it around the correct way or you could fry your MB/Riser/Video card. You can only install it backwards into the large slots by mistake the small slots are idiot proof.
-Choose the location of the riser cards. You can sit a riser on a flat surface but they can easily fall over. You could lie a card down on any non conductive surface but this is not good for heat. Ideally you want to have them cable tied and hanging like pictured below or fixed into a custom rig so they are screwed down and there is no pressure on the riser.
-Connect power to the risers and GPU's. Because you are using risers this uses more power connectors from your PSU. Best practice is to power your riser with a 6 pin pci-e power connector directly from your PSU.
Other options for power include Sata-to-6pin pci-e (only provides 54W to riser) or Molex 4 pin (provides 75W to riser). You can also get 2x Sata to pci-e or 2x Molex and I think these provide more Wattage . Unfortunately this is sometimes not enough power and can damage your riser and GPU. Please do research before using this method. Generally most cards should be fine on 75W but high power cards like 1080 and 1080ti are probably not safe to use with this kind of power connector, these are connected to the sata or molex power connectors on the PSU you must be aware of how much power they can supply on their rail. I personally always power off the PSU which is why I don't normally do more than 4 cards in a rig. Make sure all connectors are pushed in firmly.
-Now Turn on the rig. Listen for a single post beep. If you hear this it is likely working even if nothing comes up on the monitor. If you get no display but everything seems to be running, move the monitor cable from card to card until you find the one that is doing the display. Usually it will be one of the cards on a riser (you maybe able to change this in the bios depending on your motherboard).
As it boots to windows again the screen might got blank. Leave it for 10 minutes and come back. To detect three or more new cards it can take a while.
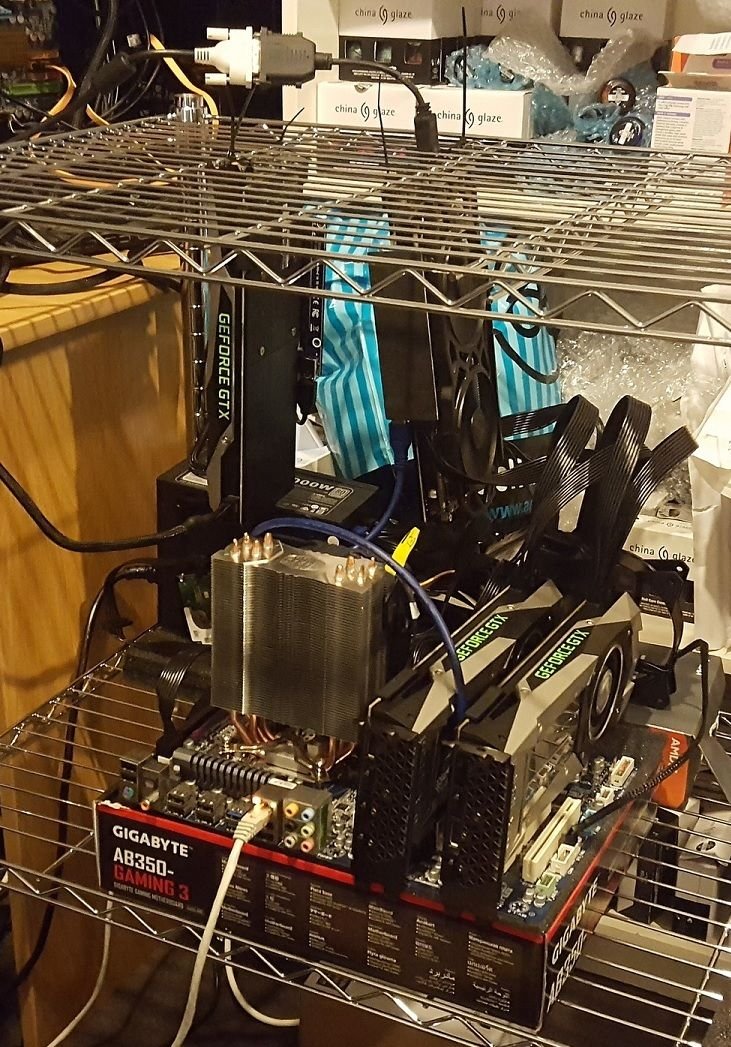
Open device manager and check display adaptors. They should all be showing in there or you can have it open and they will slowly appear. Below is my 2 card test rig.

Once they are all showing configure windows as per guide #3 and setup a miner yourself or by following #1 or #2 guide. This next part is IMPORTANT you must set each individual cards settings in MSI afterburner. If you have all the same cards you can link them and set all the settings the same but I still find each card will need small individual tweaks.
Set the TPD (power)to 65-75% in MSI afterburner and the fan speed to 75% and start your miner. Have all other settings on defaults you can clock the speeds up later once you are sure it's stable. Adjust fan speeds to keep the temp under 60-65C.
And just leave it going overnight. If it goes without issues now is when you can do clock tweaks to try and get more out of it.
Advanced rig building and more details
PSU
If you buy a gold PSU over the plat, the plat will generally save more than it cost in savings vs a gold over a year and same with buying a gold over a silver. Price is a factor though. If you are going to be only running one or two cards. A gold might be ok.
Sometimes it might be cheaper to buy two low Wattage PSU instead of one big one. Especially if you have more than 4 GPU you will need the extra connectors for all the risers. Two 850W PSU's can power 8x 1070 no issues and would be cheaper than a 1600W PSU. There is a few ways to set this up. But generally you need both PSU's to turn on at the same time or the second PSU to turn on directly after the first.
You can do this using the paperclip trick. Google other guides to find tidier methods. Its not pretty but it works well.
http://aphnetworks.com/tutorials/psu_paperclip_trick
Or I personally buy this cool little device. It's cheap and it turns both PSU's on at the same time when your PSU powers on.
PSU Relay add2PSU

Buying more cables for your PSU.
You can quickly run out of pci-e connectors as some powerful PSU's only come with 6-8 and have slots for upto 10. If your PSU is not maxed out and you want to add more pci-e power cables you must be careful to get the ones branded for your PSU. They are not cheap and some company's wire them differently to others which can cause you to blow up your gear if you use it on the wrong PSU. Some use a generic cabling system and can be used between each other.
Silverstone and Seasonic are interchangeable and use a generic cable. Please double check before buying and using I take no responsibility you must check before you use and test on gear you dont mind losing. Other brands such as EVGA must use EVGA cables.
PSU pci-e 6/8 pin cable

PSU Rails and power output
This is super important. Different cables on your PSU have different max output. If you use the wrong PSU and use the wrong cable not enough power will go to your GPU and it may kill it. Older or cheap PSU's spread the max output around the different pci-e cables. Gaming and most gold PSU's will have all the pci-e cables all on a single rail that has a max output as high or almost as high as the PSU is rated. To check your PSU look for +12v and under that it should have the most wattage and it should also be around the same watt as your PSU. Some PSU have multiple rails on the +12V this should be ok if they are really high numbers but generally a single rail is best. Some more reading here about rails and efficiency.
http://www.makeuseof.com/tag/6-things-know-buying-power-supply-unit-psu/
http://blog.superuser.com/2011/09/28/5-ways-of-finding-the-right-power-supply/
-Riser Cards. I purchased these ones and they work great.
Link to Riser Cards

Look for these components for quality risers.
- 6 pin Molex plug. Can be directly plugged to PSU
- Two tiny little chips. They are missing on some risers. They regulate power and stop surges. A must have.
- 3-4 Capacitors. Again provides a more stable power. The more the better.
Another thing to watch out for is really tidy soldering that is not touching. I always look on the mini pci-e connector.
This is an example of quality work. If any of those blobs of solder are touching or look messy it is a sign on cheap manufacturing and be super careful using it.

Monitoring Power usage
This is simple. You just need a power meter at he wall that you plug the PSU into and it will read the total Watt used. I use this Power Meter
Use http://whattomine.com to work out how much the power is costing you and if whatever you are mining is profitable you can find more details in my previous guides.
This can also be used to work out your cards sweet spot for power usage per performance. This is usually around 65-75% power. Some miner programs will give you the cards power output.
Extra info
Use TeamViewer to access the PC. This is a great little free program that is easy to setup. Make sure you use a strong password. It acts as though you are in front of the PC rather than creating a remote session. This way you don't need a keyboard mouse or monitor connected.
You can also run Windows from a USB stick. But you must do your own research on getting that going. It needs to be a certain speed I think it is called windows go and is smaller. Personally SSD's are so cheap I just use them.
Example builds
4x1080 ti 65% TPD with two risers is 710Watt. I would run this on a 1000W PSU as you may want to go as high as 75 and 85% sometimes.
7x 1070 mini with single power connector. (standard 1070s have two power connectors). This would require 4-5 risers.
Running at 65% TPD it would be around 1100-1200W so you would need a 1600W PSU or 2x 850W psu.
4x 1070 mini would require 1-2 risers. This would be 570-600W at 65% TDP so you could get away with a 850W PSU which would allow you to go to 75-85% TPD.
Trouble shooting
No display- Are you getting a single post beep? If yes then move the display cable from one card to another until you find the correct one. Start with cards on risers first.
If no. Check all power cables are connected properly. Make sure all cards are in the slots correctly. Remove each card one by one and see if it powers on and gives you a post beep (not all M/B's will beep as it might be off in the bios). You may have to move the display cable form card to card until you find the correct one. Start with cards on risers first.
Once you have located the problem card/riser. Swap the card into a known working slot and make sure the card is ok. If it is ok. Replace the riser or test it on another system with an old card.
I hope you enjoyed the guide and nothing is missing. Any questions fire away, happy to help.
really good article bud !!
Another great guide from you. Keep it up mate
Thanks I will continue to write them as long as I get enough people asking for them in the comments
Looks awesome. Thanks for all your hard work @evilmonkey
@aravindgre
THanks
Great guide, focuses a lot on the power consumption of things. Nice!
THanks. Yes power consumption is very important. It is often overlooked and people guess their power and it ends up giving htem false return values.
very detailed how-to ! thx
Hope you got some use out of it. Took me forever to write
haha i can imagen atleast you only had to do it once :-)
Great content! I just ordered 10x 1060s.. I may need some tips lol