How to add/change custom network to Metamask. Phaver Notion
Make sure that you are in “Polygon Mainnet” in Metamask before connecting to Phaver.
How to add a custom network to Metamask via Metamask browser (Alternative)
How to change your MetaMask network
Let’s first take a look at how to change your MetaMask network. Follow these steps and you can get the job done with ease.
1. Open your MetaMask wallet
The very first thing you should do is to open your MetaMask wallet.
2. Change the MetaMask network

When you open your MetaMask wallet, you will be able to see your current network at the top of the display. You can click on the down arrow next to where your current network is mentioned. After dropping down, you will see a list of different available networks.
3. Select a network and change
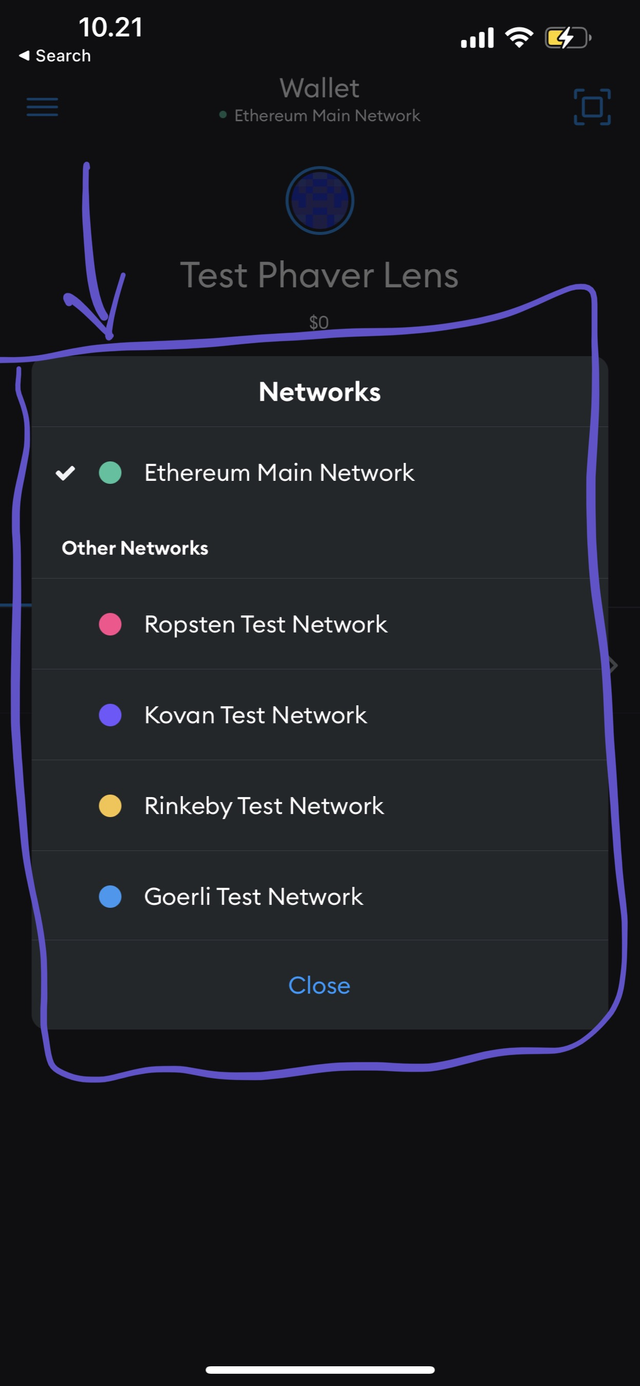
All you have to do is to select a network out of the options that you can see here and proceed with changing the network. The MetaMask network change will happen immediately. ✅
How to add a new MetaMask network
In case you want to add a new MetaMask network, even that is possible. Follow these easy steps and you’ll have it done in no time!
1. Open the MetaMask wallet
To add a MetaMask network, you should open your MetaMask wallet.
2. Go to Settings and select Network
Next, click on the menu button, which you can see in the top left-hand corner. Doing so will allow you to navigate to Settings in the sidebar menu. When you’ve clicked, select the option saying Networks.
3. Click on Add Network
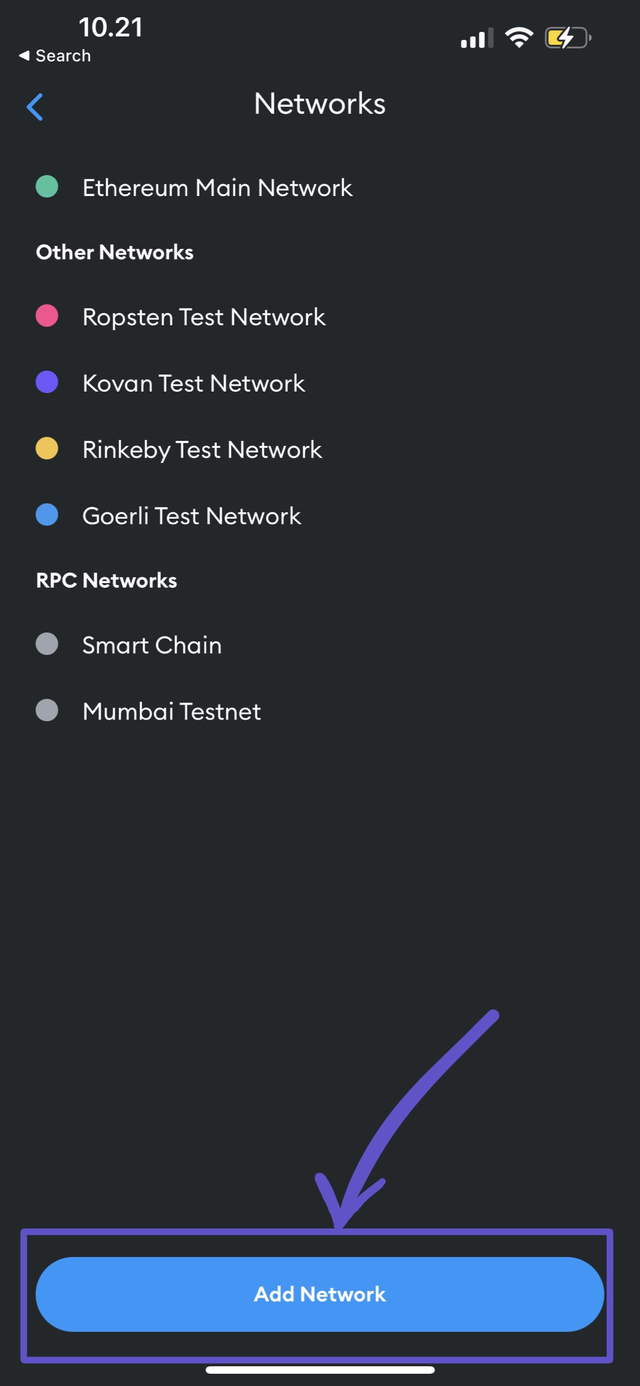
Once you select Networks, you’ll see all the networks that you have added. At the bottom of that menu, you can see a new button named “Add Network”. You may click on it and proceed with adding a new network.
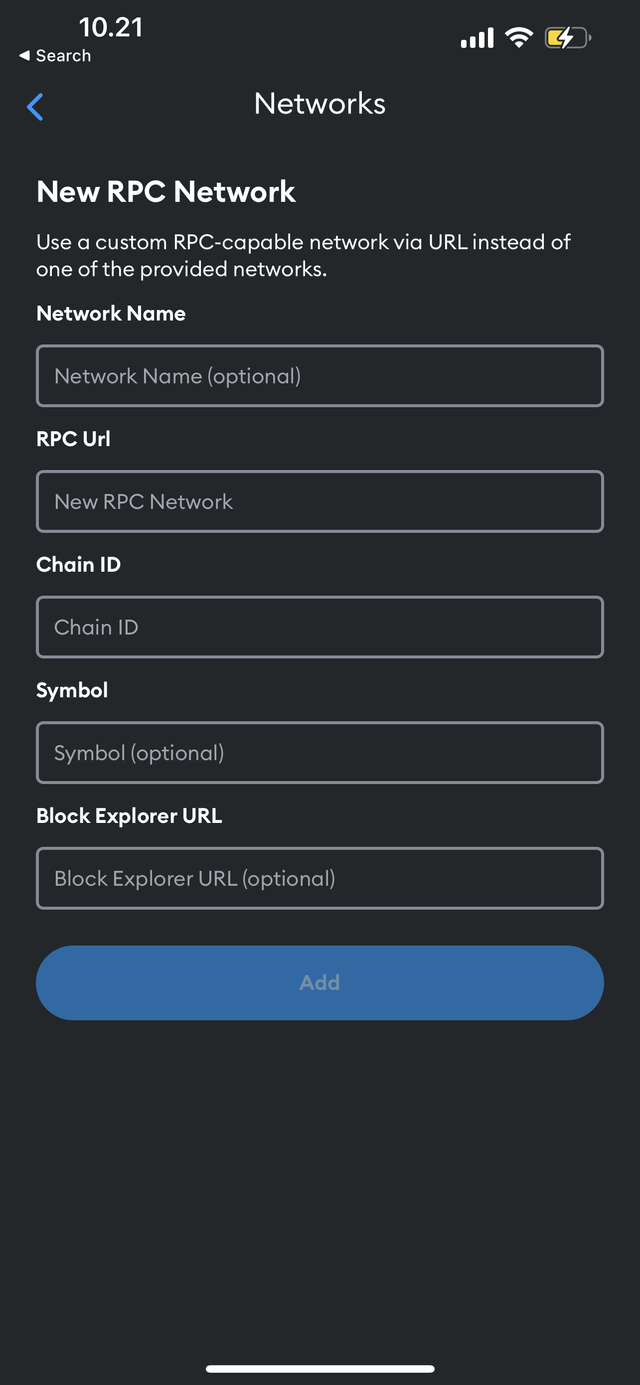
When you try to add a new MetaMask network, you will need to enter some information. That includes:
💡 Network Name – You can select any name for the network. However, I encourage you to add a meaningful name, so that you can easily figure it out.
💡 New RPC Rule – This would be a URL, which will act as the entry point into the Blockchain.
💡 Chain ID – This is a unique ID number, which is provided by the Blockchain network that you interact with.
💡 Currency Symbol – This is an optional parameter. You can pick an appropriate symbol from the ticker.
💡 Block Explorer URL – This is also an optional parameter. It is a URL that you can use to access Block Explorer. If you wish to get detailed information related to transactions, you may think about using this feature.
Polygon Mainnet
| Network Name | Polygon Mainnet |
|---|---|
| RPC URL | https://polygon-rpc.com |
| Chain ID | 137 |
| Symbol | MATIC |
| Block Explorer | https://polygonscan.com |
4. Click on Save
Once you are done with adding the network, you may click on the Save button. Doing that will let you see your newly added MetaMask network under the network selection.
I joined web3 with Phaver social platform, I am very happy.
Best web3 social app ever
Nice Project 💥💥💥💥💥💥
lets goooo
Yay!👍 We collecting more Crypto. Reshared your post🔁