Recycle plastics and re-purposes waste - Bamboo Geodesic Dome

Here's a fun project to do during lock-down or any other time
Tip: if you don't have space outdoors you can make it out any other material, like chopsticks!
The point of this is to have fun and be creative with what we have around us 🤠

Backstory: how it began
Last week, we (Becky's dad and I) started on the bamboo geodesic project. It was a thought that kept being bounced about the house until the neighbor needed his bamboo hedge cut back. The aim of this project was partly inspired by Dave Hakkesn, from onearmy.earth, who up-cycles plastics and re-purposes waste.
I've been toddling with the idea of creating a bamboo forest in Damanhur, the eco-spiritual community in northern Italy where I lived for 6 months before being here in Cornwall, as a way of sourcing sustainable material to use during campuses and various projects for the community. Bamboo is so versatile, it grows quickly, needs virtually no maintenance (once stem are established) and due to its weed-like invasive root system it requires yearly trimming (unless the desire is to reduce the biodiversity in the area).
So, the neighbor who though had a bamboo problem, as it was suffocating the magnolia, revealed to be the perfect opportunity for us to start!
| The clump | and four cartloads after... |
|---|---|
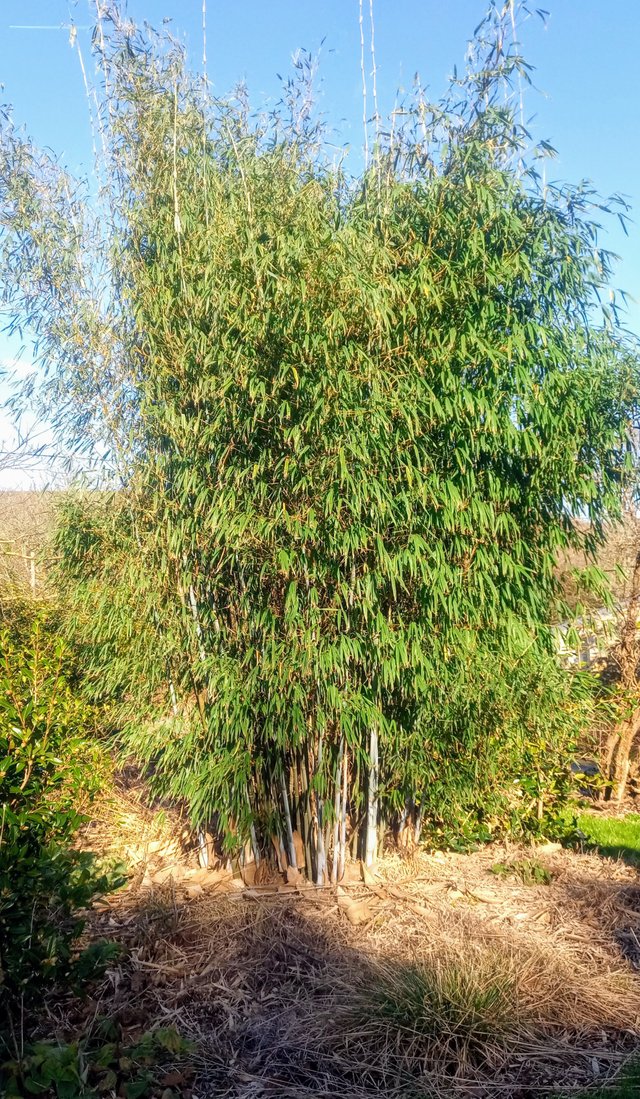 | 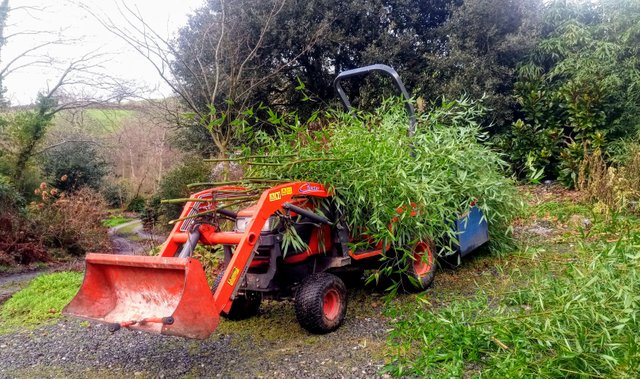 |
Backstory: how we went about it
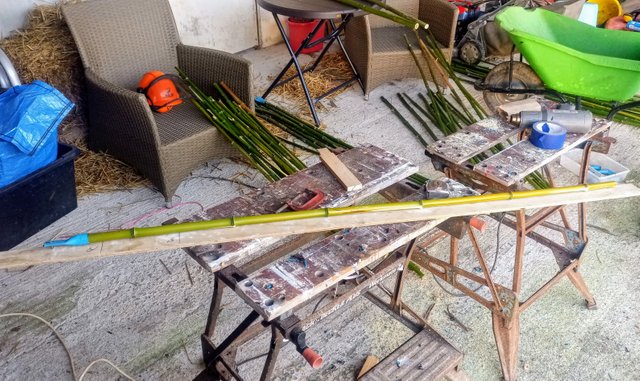
After a bit of head-scratching and research we found an easy way to fit the bamboos onto the frame. Around the barn there where several meters of HDPE 2.5cm and 2cm pipes. We used these two sizes to adjust around the various bamboo dimensions.

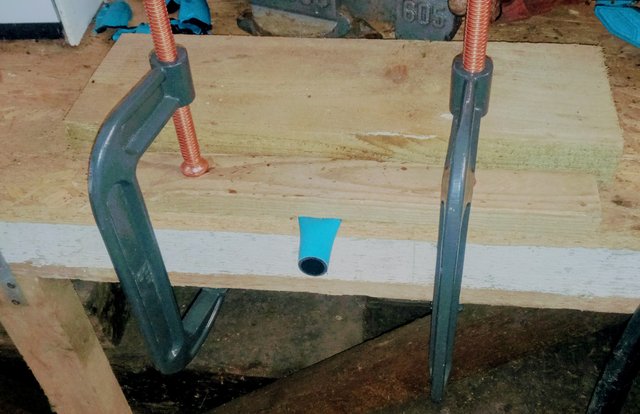
Making roughly 80 odd 10cm long blue bits (there where some accidents on the way). Backing them in a standard kitchen oven for 10 minutes at 100 degrees C. Molding 5cm under D-clamps until they cooled down retaining the new shape. We found that we could effectively mold four blue bits at a time and any longer than 10 minutes would result in some contemporary art installation... some post-modernism Salvador Dali look alike 😂
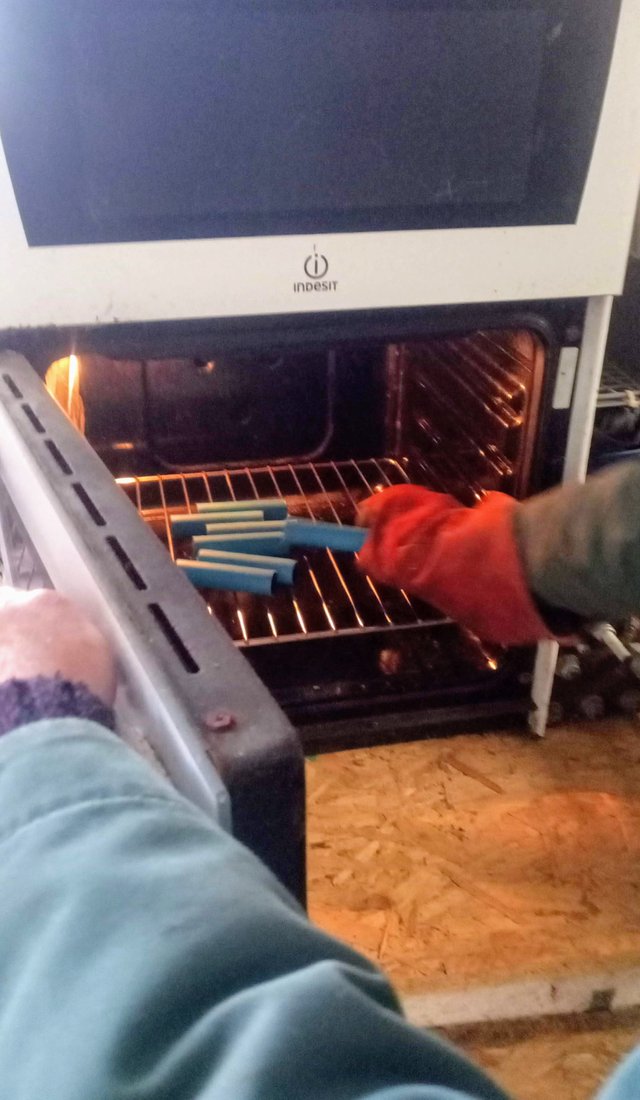 |  |
|---|
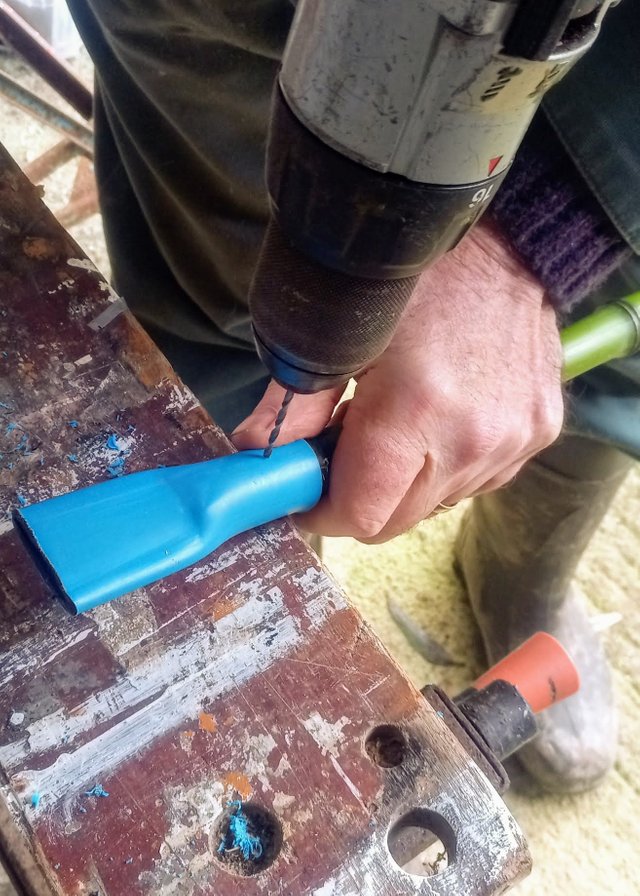
On occasion we used the heat gun to stretch the corners of the blue things (seriously what do you call them?!) and sandpapered down the edges of the bamboo. Otherwise things went on pretty smoothly. When cutting the bamboo we measured the poles to be 10cm shorter than the required length to fit the blue thing on top of the pole (captain obvious moment 🤓). Also, because we used fresh bamboo which would eventually shrink we secured the blue things with nails. Snipping off the pointy ends and hammered them flat. Surprising the amount of force the bamboo can withstand even at its weakest points.
 |  |
|---|

🛠️ The process summary:
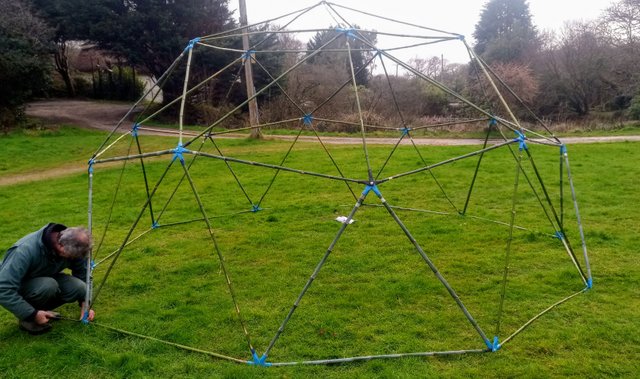
- To calculate the measurements of the dome we utilized domerama.com/
We chose to go with the 2v dome to keep things simple geo-dome/2v_tool
With a 2.5m radius giving ample space for two/three people to move once finished
It meant that we needed 35 long poles and 30 shorter poles to form the two triangles. - To connect the bamboo to the node we used two size HDPE plastic pipes, measuring 2.5cm and the other 2cm
The sweet spot for molding was for 10 minutes at 100 degrees C in a standard electric home oven
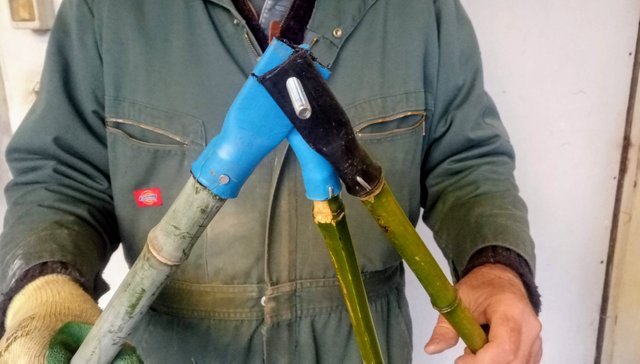
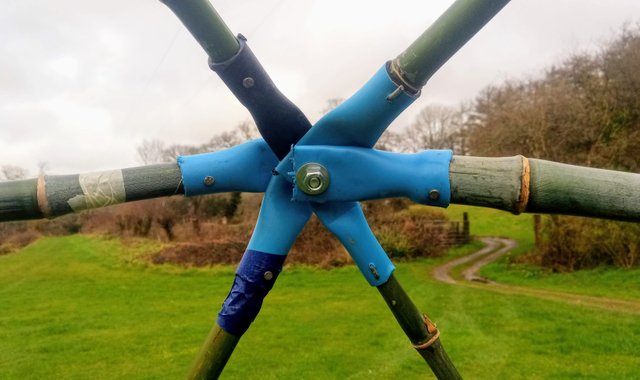
Using D-clamps to create the 5cm nodes as bottom images shows and threading a simple nut & bolt to secure them.
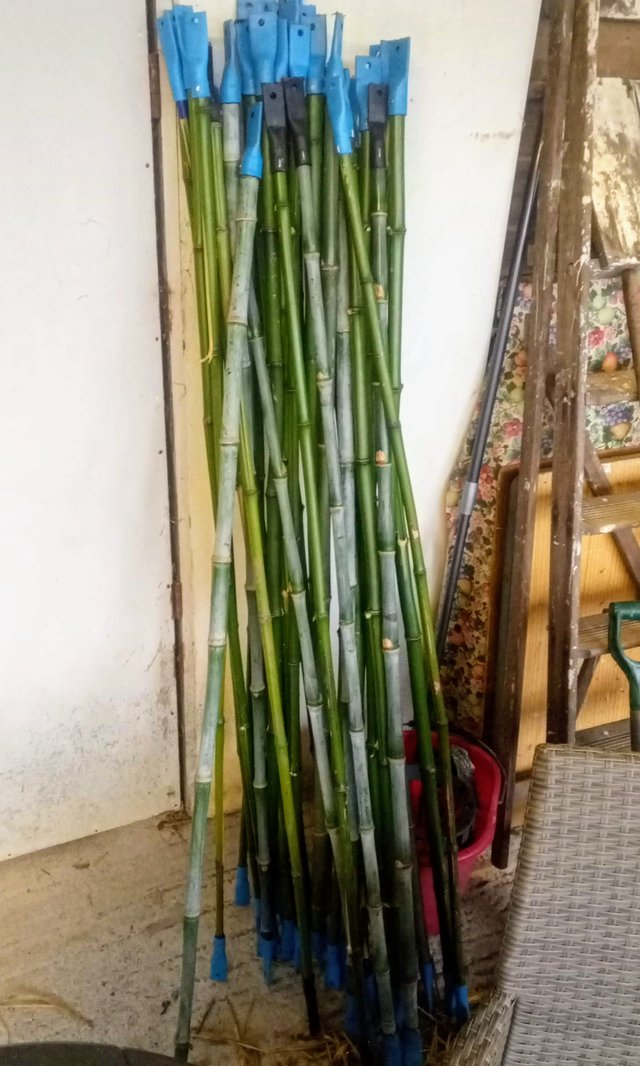
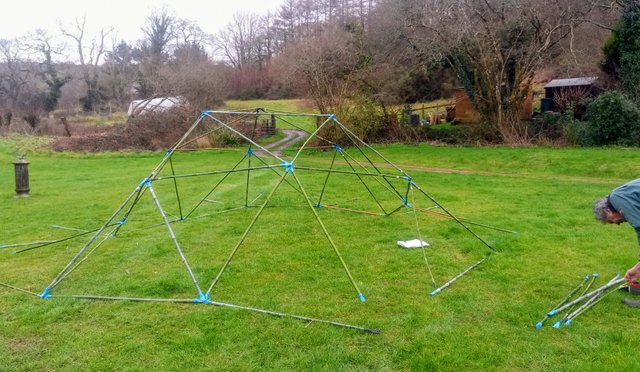
Nailing the plastic over the bamboo as bottom images shows cutting the ends of and hammering them flat - Before assembling the structure we tape-coded the small polls to easily distinguish them from the longer ones
Selecting the thinner poles for the top and thicker one for the bottom part of the dome
Laying them out alternating between small and big triangle and slowly moving from the top down
Towards the middle we tucked the structure closer in to get the triangles to meet (was a bit of "shit, we screwed up" moment) - Took us (between harvest + processing + sorting + experimenting + streamlining it) about 3 whole days.
✅ The result: feelings and thoughts
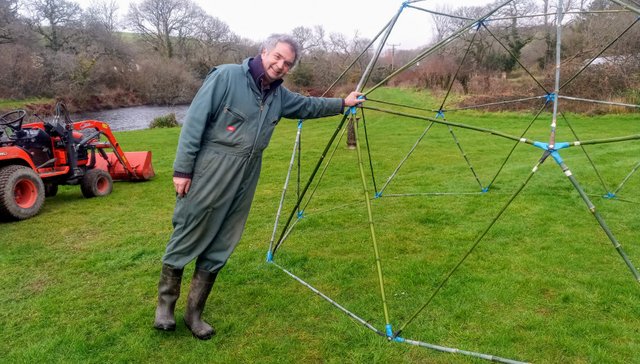
Must admit, after all the prep work from the past it assembled quickly and easily leaving us with this "well, what next?" feeling.
It was a cool journey, from sourcing raw materials to re-purposing plastic waste. For the time being I can play Capoeira as it's perfectly shape to accommodate those movements, practice Yoga when it's not soaking whet, or get cracking with the final step.

The power of triangles, diversifying wait distribution into one focused point.
It visually reminded me of what happens during a group meditation. Various people from different bodies tuning into to focus on one objective. Immensely powerful.
🤔 What next?
- Currently we are figuring out what material to use to cover the structure and how to make an easy entrance.
- Give me a shout if you'd like to build one yourself or if would like to chat about creative ideas for lock-down
Thanks for stopping by, happy to any comments 😄
If you you're a ✨Notion fan like me, you might enjoy seeing my inspired website that I made on it.