Upcycle Old Wine Bottles With Easy Glass Etching

Glass etching is an easy and fun hobby that doesn't (have to) cost an arm and a leg, and it's a great way to re-use old wine, champagne or beer bottles. You can etch most glass (not ceramic) with glass etching cream, but some types of Pyrex cannot be etched.
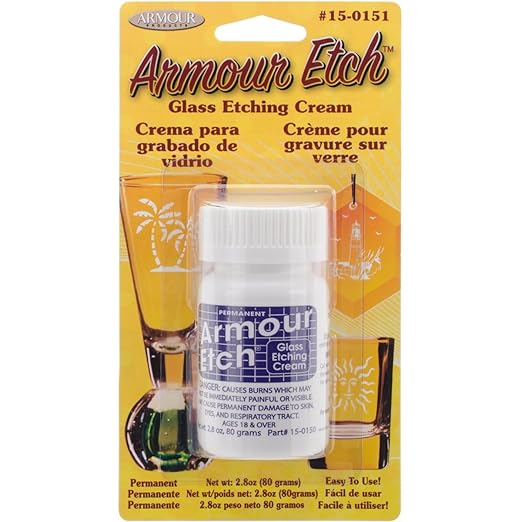
The process works by using a cream that eats away at the surface-level of the glass. The best glass etching cream I've found is Armour Etch (available at Amazon for ~$12). It comes in two sizes, but you'll be surprised how far a little will go, so start with the small one. Pick up a small, cheap paintbrush while you're at it.
Next, you'll want to buy or make some vinyl stencils. If you buy them, it's important to know that some are re-usable and some are not, so make sure you check. Armour makes a bunch of stencils, although they're a little pricier than I'd want them to be.
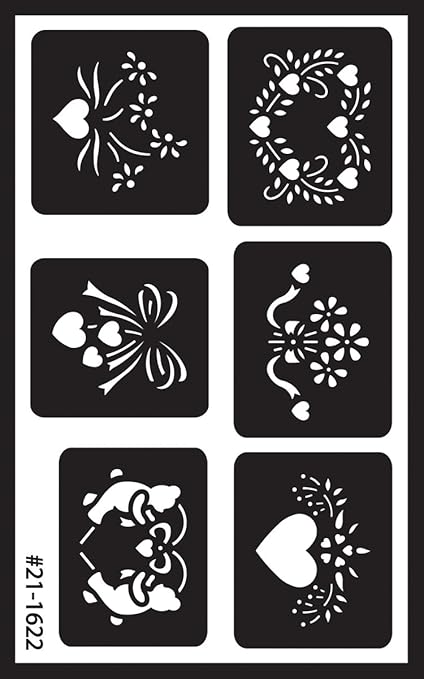
If you don't want to spend the money on commercial stencils (or if you want to make something that's entirely custom), regular contact paper or tape works very well as well. Just print out a design and trace it out using an Xacto knife.

(Image by LovelyCraftyHome)
Preparing the Glass
First off, put on some rubber gloves. Glass etching cream is caustic and you shouldn't let it contact your skin. Next, clean the bottle with rubbing alcohol to get any oils and gunk off.
If you have to remove paper labels from the bottle and are having a hard time, you can try soaking the label in water and use some liquid fabric softener and a razor to scrape it off.
Put a paper towel down on your work surface, so you can protect your countertops or tables from any dripped cream.
Once it's all clean, you're ready to start etching!
Etching
The etching itself is really easy - the trickier part is always putting the stencil on exactly where you want it, making sure it's straight, etc. If you need to re-seat the stencil, be careful not to stretch it out (like I did the first time) or you can distort the design.
Make sure the stencil is in form contact with the glass around all of the areas you're going to be applying the cream, or else you can end up with fuzzy lines or weird blobs.

Next, use the paintbrush to brush the etching cream over the stencil. You want it to be pretty thick, but not so thick that it drips down past the stencil. Check carefully that you've got cream in all the nooks and crannies.
Then wait 5 minutes. That's it. After 5 minutes are up, rinse the bottle with water and remove the stencil. Clean it with glass cleaner to make sure all the cream is completely removed.
(This was my very first try, so forgive the sloppiness.)

And that's it! That's all there is to it! (As you can see, I stretched the stencil a little too much. Oh well, lesson learned!)
You might also want to pick up some Rub N' Buff (on Amazon for about $8), which is a cream you can rub over the new etching which makes the contrast pop a little. It comes in lots of colors, but I usually like white or silver. (It can be a pain to get off your hands, if you don't have mineral spirits, but it really punches the design up.) The tube is small, but you don't need a lot of it.
This is the design after the Rub 'N' Buff. You can see how it really pops. (I hadn't finished cleaning it up, so it looks a little messy here, but you get the idea.)

If you decide you really love glass etching, you can even buy a vinyl printer that will let you print out your own stencils from designs on your computer.
Upcycled wine bottles make great gifts and look great around your own home. I'll be following this post up with one on glass cutting, so you can learn how to turn your old wine bottles into drinking glasses, candles, planters, etc.
I love this artistic side you're sharing! Your stars look cool, the stretched stencil gave them some extra character.
I am interesting in allll kinds of crafts. I have yet to try glass etching. I always thought it required heat or power tools. Thanks for showing me how easy it really is! ♥♥
Thanks! Heat isn't required for this kind of etching. It is usually required somewhere in the process for cutting bottles (like cutting the top part off of a wine bottle to make it into a glass) if you're not using fancy hardware - but I'll post a bit about cutting glass with a cheap glass cutter soon. I also have diamond drill bits that fit onto my black and decker Dremel-clone, which I can use for drilling holes in the bottom (for planters) or in the side (to run a cord through). I'll definitely try to take better pics for those though :D
Cool! I'll be on the lookout for your glass cutting and other power-tool projects too
Wow, that's pretty cool. I had never thought to do something like that. We have a bunch of bottles @corinnestokes uses for water kefir. They are all clear though, so I guess it wouldn't work well for that...
You can definitely use clear bottles! You just may need to punch it up with the Rub N Buff. I'm designing stencils for alllll the clear glass in my house. :D