Three Pairs of Earrings, Two Necklaces, and a Bracelet
Several components in these earrings and necklaces are silver-plated instead of just stainless steel or tinned copper. The bracelet is less elaborate, but more on that later.

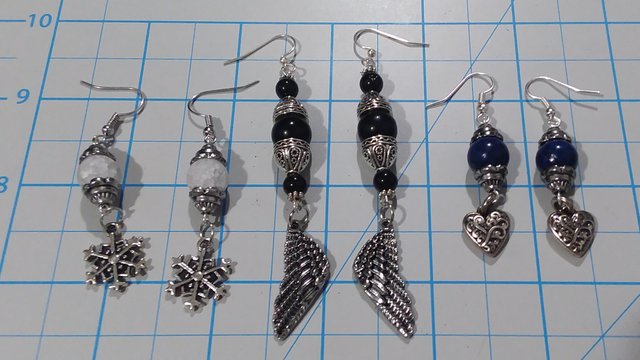
Left to right: snowflake charms and crackle quartz beads; wing charms, daisy spacers, and jasper beads; and "reconstituted lapis stone" beads with silver plated heart charms. The bead caps in each piece are all also silver plated.

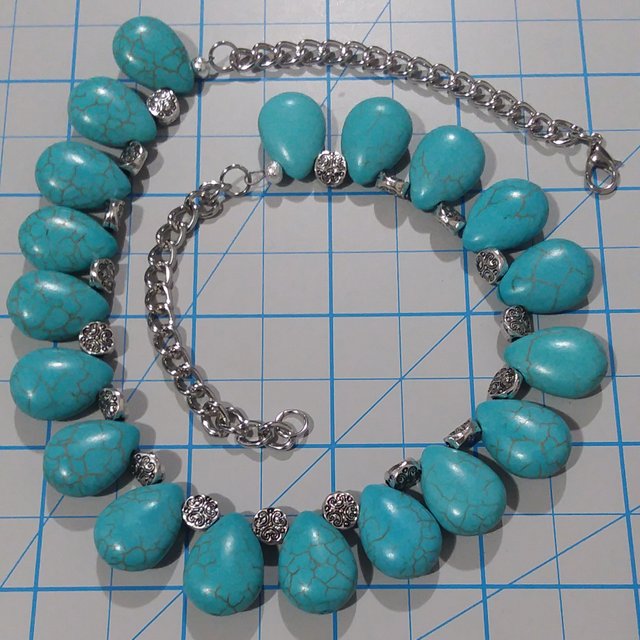
This first necklace uses teardrop-shaped faux turquoise beads and silver-plated spacers. They are strung on beading wire, and linked with short lengths of chain using jump rings.

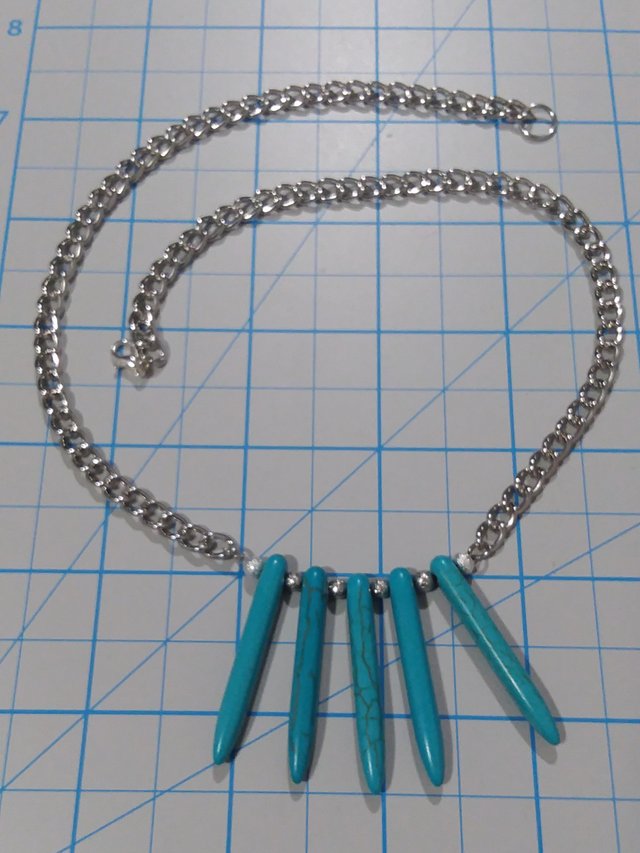
The second is a bit of an experiment. I used a similar technique as above, but with more chain and a very small segment of faux turquoise spikes. The spacers here are not silver, though, but they were chosen to resemble the bead caps that cover the crimp beads on the end.

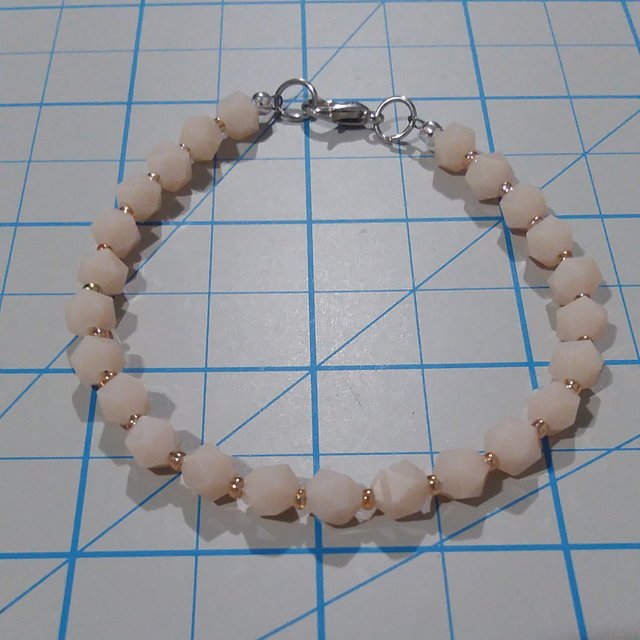
Lastly, this bracelet is a good example of a project you could try yourself if you want to experiment with the techniques I used for the necklaces above. I bought a string of beads and re-strung them as this bracelet.
Supplies
-string of beads
-beading wire
-crimp beads
-bead caps
-crimp bead pliers
-chain nose pliers
-clippers
-clasp
Instructions
Use a crimp bead to form a loop in one end of a length of beading wire. With crimp bead pliers, crush it and form it into a rough cylinder to hold the loop in place. Most pliers will have separate jaw sections designed to simplify these steps, and will include an instruction card if you are unsure how to do this, or search tutorials elsewhere online. That is how I learned to use these tools, and they do a better job than I could.
Cover the crimp bead with a bead cap using any smooth-jawed pliers you have. Work a bit at a time and form it into as seamless a sphere as you can. I do not know whether better tools are available for this task.
Then comes the tediois part: transferring beads from the thread or monofilament they are sold with onto proper beading wire. This is easier or harder depending on the sizes of the beads. This string had ppastic rondelle beads with tiny glass spacer beads that were a bit difficult to manipulate.
tip: use a square of felt to cover your work surface. It catches dropped beads.
After the beading reaches the length you desire, form a new crimp bead loop in the wire and trim any excess length. Cover with another bead cap. Leave enough slack for the necklace or bracelet to flex without leaving more exposed wire than you can avoid. Finally, use jump rings through the wire loops to connect directly to a clasp, or add a few links of chain to achieve a better fit if needed.
EDIT: I wrote a slightly more in-depth tutorial for this process a long while back, and I managed to dredge it up, so if this is too brief, it may be more enlightening.
At first glace I thought these were fishing lures. I guess they are for a fisher of man, lol.
Fisher of women, technically.
I should take up fly-tying or something.
I love them! Nice and simple and goes with anything. Great job
Posted using Partiko Android
Thank you for using the recommended tag/s. This post has been manually rewarded with BUILD tokens in the form of an upvote. You can buy, stake, and exchange our "BUILD" tokens for steem on steem engine or SteemLeo
Build-it is a central hub for DIY and How-To projects. It's an opportunity to find and share the latest in DIY, and How-To tutorials. The recommended tags required when creating a DIY article are #diy, #build-it. #how-to, or #doityourself. Please subscribe to our community here
Chat with us on our discord and telegram channels Discord, Telegram.
Thanks for sharing your creative and inspirational post!
This post got curated by our fellow curator @tibfox and you received a 100% upvote from our non-profit curation service!
Join the official DIYHub community on steem and show us more of your amazing work!